2020-08-24 Webinar Recording (NETLAB Virtual Machine Training Session)
286 views
Skip to first unread message

Mark Martin
Aug 25, 2020, 1:04:04 PM8/25/20
to mfg-educators-o...@googlegroups.com
NOTE: THE INSTRUCTIONS IN THIS WEBINAR HAVE BEEN SUPERSEDED. PLEASE REVIEW THE POSTING FOR THE 2020-09-25 WEBINAR.
If you're a K-12 or CC teacher, and need help getting students access to manufacturing / engineering software such as CAD (Fusion, Inventor, RevIt, AutoCAD) or others, read below.
The 8/24/20 Zoom webinar is now available at:
- This session was a training session on how to use the Netlab virtual machine.
- USER GUIDES for instructors and for students are BELOW
- Note: one requirement of using the Netlab virtual machine is that you can NOT have all your students on at once. This is because of capacity issues. We ask that you give your students a demo and then allow them to logon to the virtual machines at their own leisure. Thanks.
- Usernames. Instructors create user names for your students. These are global throughout the entire system which means if there's an "mmartin" in Livermore HS you can't have an mmartin in Santa Rosa HS. So here's a recommendation for student usernames you create - "[schoolname].[firstinitial][lastname]" ex. "lvhs.mmartin" or "livermore.mmartin"
- To make this easier for you I created a Google spreadsheet where you can take your students name and it will generate the rest of the information for the upload. Go to the link below and make a copy of it and you'll be able to edit it. Then just download the CSV file and use that.
https://docs.google.com/spreadsheets/d/1Eve6EQGV1ycef57AaARLMr6vr64XOzp-Rv0fELeN_Dk/edit?usp=sharing - If you have any questions, please contact Mark Martin at markm...@peralta.edu
INSTRUCTOR INFO
1) Go to: openlab2.bayict.cabrillo.edu
2) Login
If you don't have a logon fill out the form here. You'll receive an email once we create your username.
Username: Your first initial last name (all lowercase). Example “mmartin"
Password: changeme
(obviously you'll want to change that once you logon)
(note: if for some reason your username doesn't work, add a 1 at the end - eg “mmartin1”. This is because that somebody else with that same first initial and last name has already signed up. Unfortunately it doesn't separate user names by school so that might be the case.)
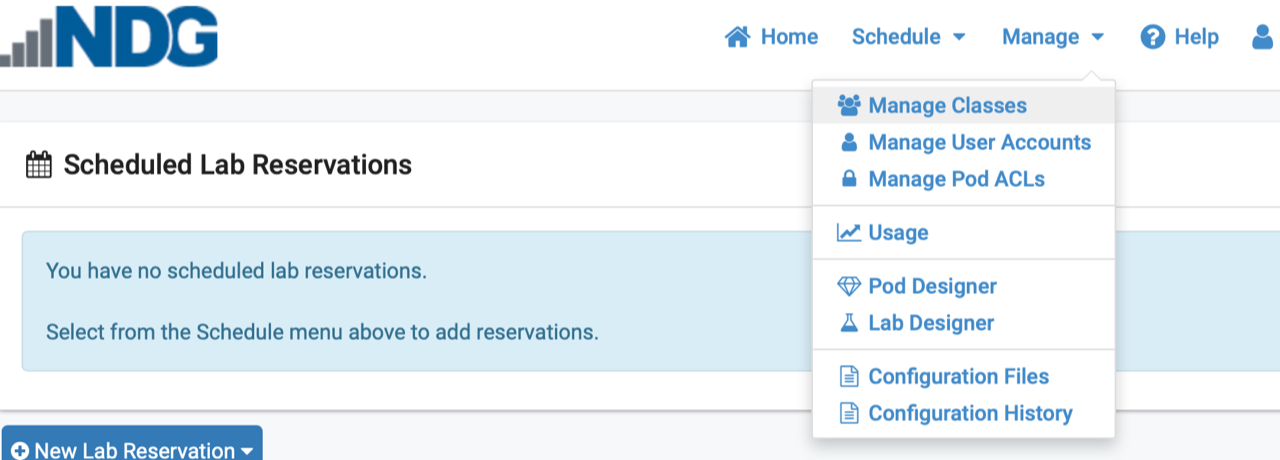
3) Create a class(es). Go to Manage / Manage classes in top menu
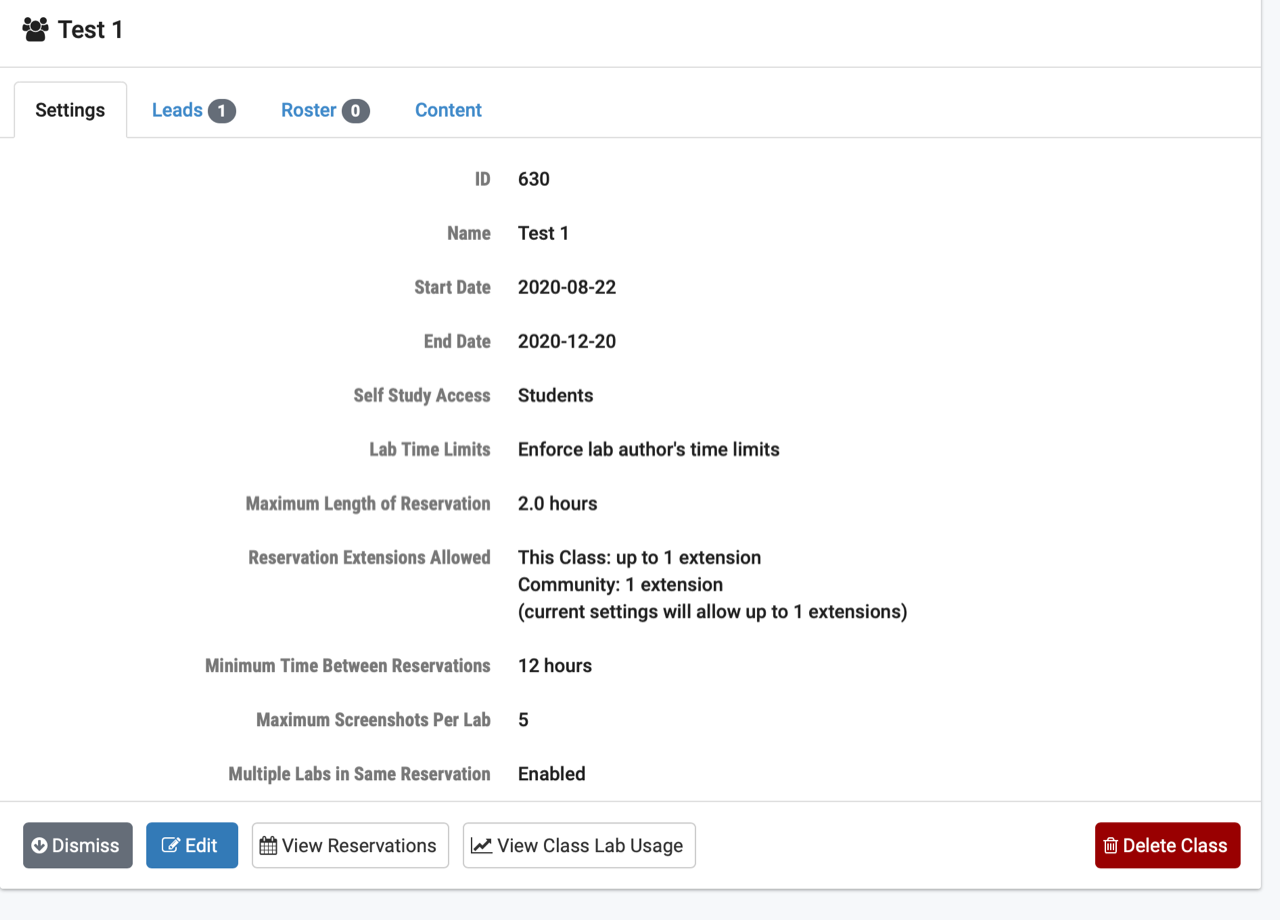
- (Name it whatever the name of your class is - “Intro to Engr”, “CAD”, etc. - )
- I would suggest use the settings below. We want to limit the students to no more than two hours so that we can let other students get on if there's capacity available at the end of their session they can ask for up to one extension. The minimum time between reservations keep students from signing up for lots of reservation slots. If we start to run out of capacity will have to rethink these settings.
- Then you’ll want to click on Content and add “Autodesk” to the class.
4) Play Around with the software
- Now that you've created a class you'll want to check out the software to see how well it works. If you have the same Chromebook your students will be using you might check it out on that to see how it performs.
- Login, and then choose "New Lab Reservation".
- If the software looks like it will work for your students you can now start add them to your class
5) Add Students - go to Manage / Manage user accounts
- Go to the bottom and hit import accounts. You'll be able to upload a CSV file of all your students information. Choose an initial password for all the students in upper right (I would suggest “changeme”. They will be prompted to change their password when they login.
- Usernames. Instructors create user names for your students. These are global throughout the entire system which means if there's an "mmartin" somewhere else in the system, you can't have an "mmartin" in your school. So here's a recommendation for student usernames you create - "[schoolname].[firstinitial][lastname]" ex. "lvhs.mmartin" or "livermore.mmartin"
- To make this easier for you I created a Google spreadsheet where you can take your students name and it will generate the rest of the information for the upload. Go to the link below and make a copy of it and you'll be able to edit it. Then just download the CSV file and use that.
https://docs.google.com/spreadsheets/d/1Eve6EQGV1ycef57AaARLMr6vr64XOzp-Rv0fELeN_Dk/edit?usp=sharing 6) SEND OUT the information to your students. The system will NOT send out usernames automatically so you'll need to email it to them. Here's what you can send to Students:
- Go to: openlab2.bayict.cabrillo.edu
- username (case sensitive): ???
- password: changeme
- Make sure you set your Time Zone to the correct time (Pacific) or else it will make it confusing to schedule.
7) Capacity
Also because of capacity issues we ask that you NOT get all your students onto the virtual machines at the same time. My suggestion is you record a demo of what you want to teach that day or maybe even for the whole week. Students can then get on whenever they want to watch the lecture and start working on the software whenever they want. You can use your regular class time to go over questions or to go into a little more detail. There's a reporting function so you can see what students have logged on, how many hours they've spent on it, and how many sessions they've been on, etc. So you can see who's not putting in the effort and might need a little motivation. This actually might work better for some students. They can go back and watch the demo again if they miss something and can play around with the software to try to figure it out before asking questions.
Reply all
Reply to author
Forward
0 new messages