Stitiching 2 images / 2 rows - Problem Rectlinear

ralf
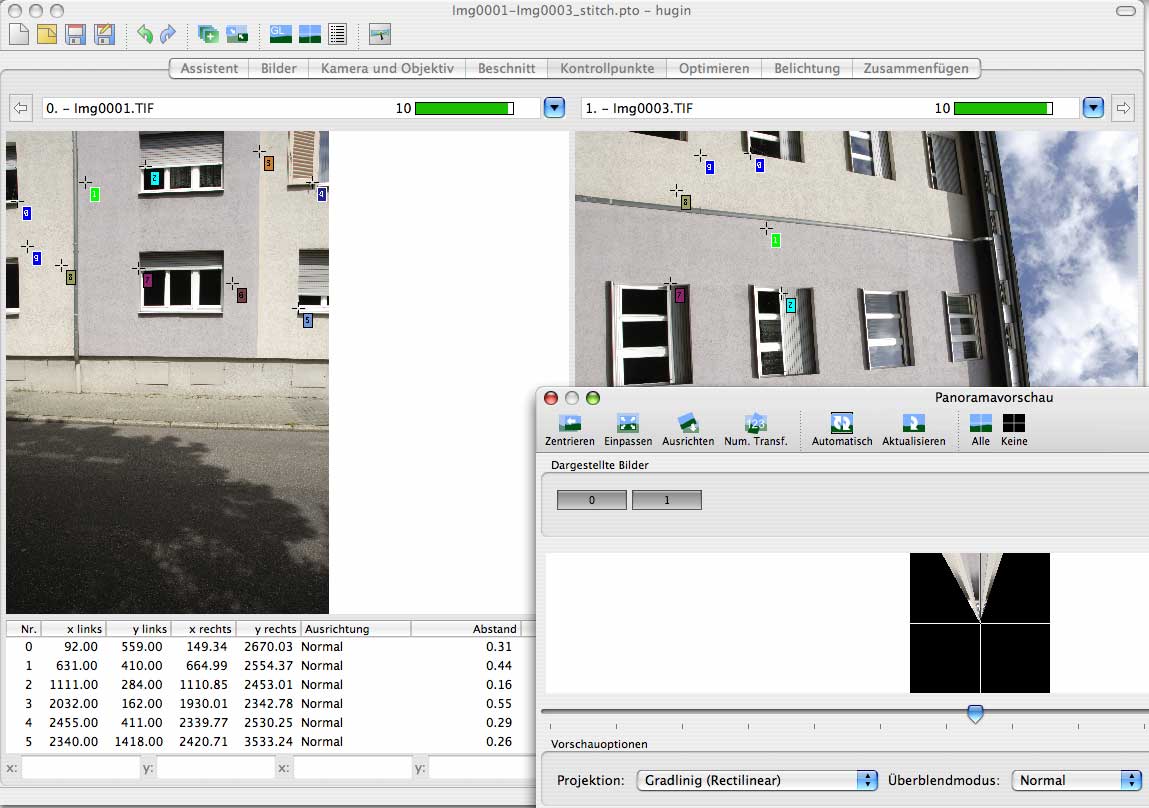
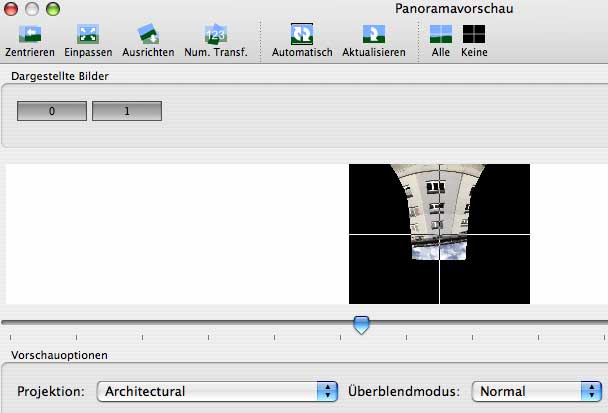
I stitched 2 images vertical means 2 rows, each row 1 image. Switching
in the previewwindow to rectlinear the window gets black with a
"triangle" which shows the colour of the images.
Stitching 4 images - 2 images of the first test and 2 more images -
means 2 rows, each row 2 images everything is fine. The preview window
- mode rectlinear - shows the stitched image.
Furthermore is there a limitation in the vertical view of the
rectlinear output?

Carl von Einem
> Hello,
> I stitched 2 images vertical means 2 rows, each row 1 image. Switching
> in the previewwindow to rectlinear the window gets black with a
> "triangle" which shows the colour of the images.
Use 'Center' and/or 'Fit' buttons to "zoom in" on your subject, see
http://wiki.panotools.org/Hugin_Preview_window
> Stitching 4 images - 2 images of the first test and 2 more images -
> means 2 rows, each row 2 images everything is fine. The preview window
> - mode rectlinear - shows the stitched image.
I'm not sure if I understand the problem, can you give more details
(lens data, screenshot)?
> Furthermore is there a limitation in the vertical view of the
> rectlinear output
Yes, of course, see
<http://wiki.panotools.org/Projection#Rectilinear_projection>
Carl
Ralf
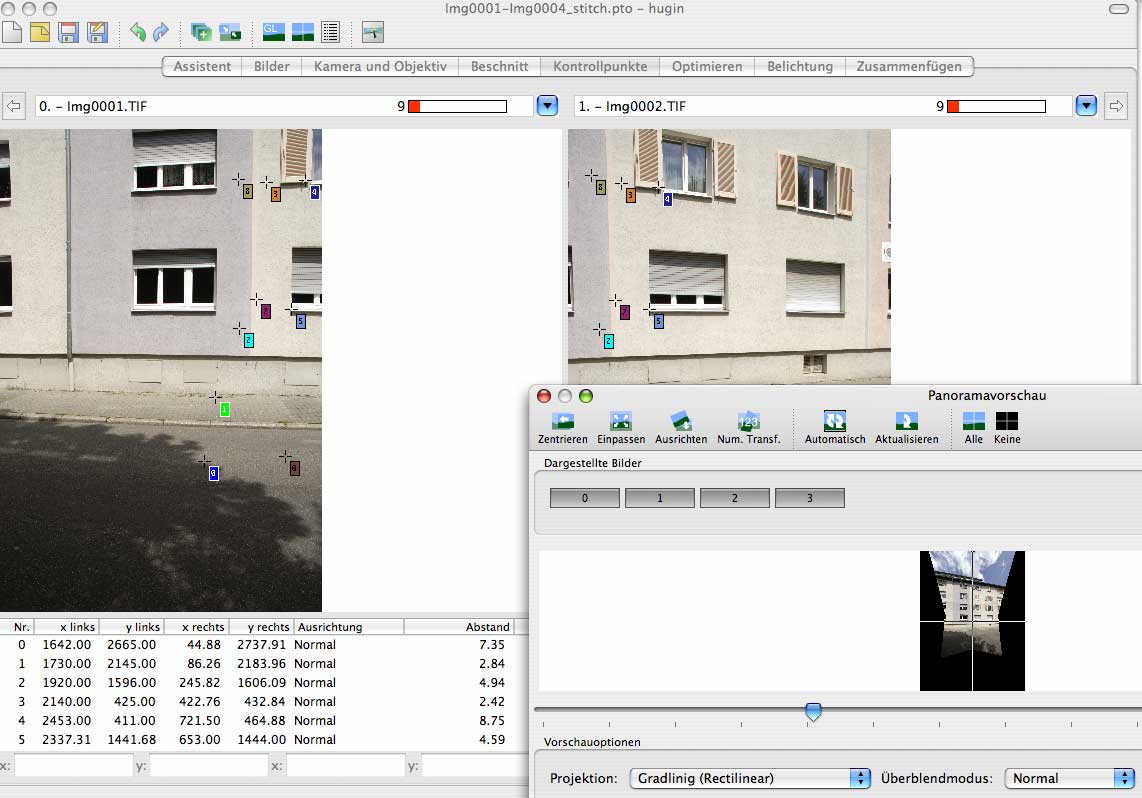
I used a Zoom 18 - 200 mm in this case with 18 mm and Hugin 0.8.0.-
rc5 / MacOS 10.4.11
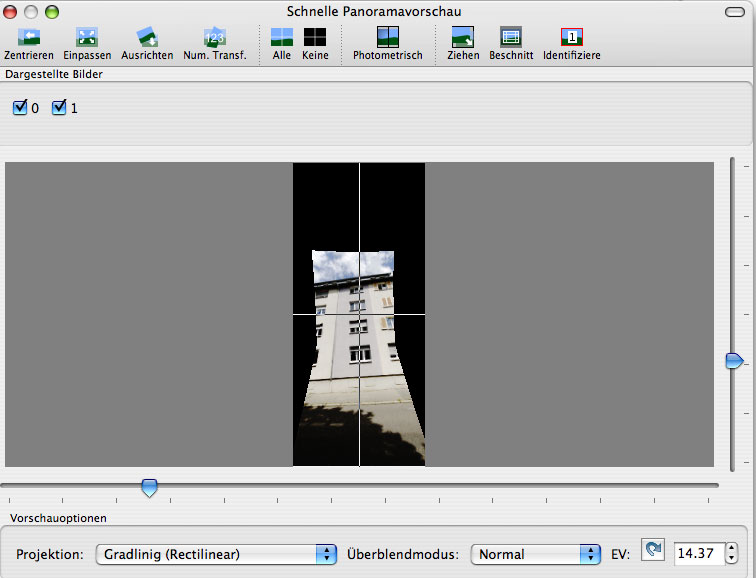
Screenshot with 2 images. Center, Fit, Automatically doesn't work
with 2 images. (Often it happens that the right image is rotated I
don't know why)

Tduell
On Aug 25, 1:02 am, Ralf <i...@planetdsl.de> wrote:
[snip]
> with 2 images. (Often it happens that the right image is rotated I
> don't know why)
Do you get the same poor preview result with the 2 images with both
the 'fast preview' window and the 'preview' window, and also using
when selecting other projections?
Cheers,
Terry

Bruno Postle
>
>Screenshot with 2 images. Center, Fit, Automatically doesn't work
>with 2 images.
Did you try the Straighten button in the Preview window?
The problem with the two image project is that the photos are
centred way above the middle of the frame, resulting in a huge
vertical angle of view to show everything.
--
Bruno
Ralf
I also tried straighten with no success.
> The problem with the two image project is that the photos are
> centred way above the middle of the frame, resulting in a huge
> vertical angle of view to show everything.
>
Why does it work with 4 images, it is the same vertical angle still 2
more images are added?
> Do you get the same poor preview result with the 2 images with both
> the 'fast preview' window and the 'preview' window, and also using
> when selecting other projections?
>
> Cheers,
> Terry
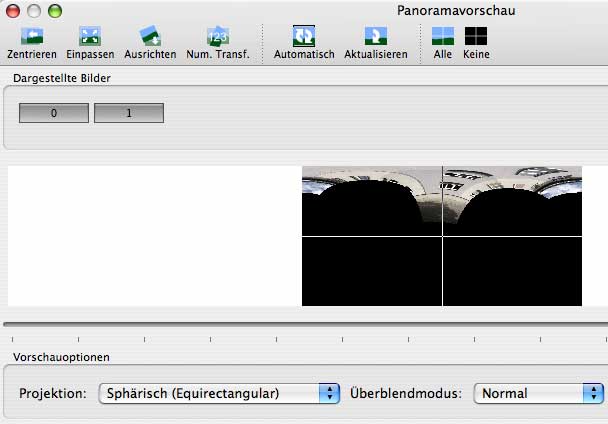
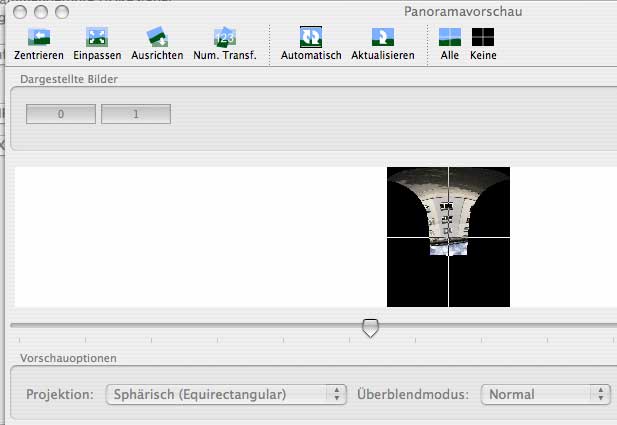
It is the same result with "fast preview". Enclosed are some
screenshots with other projections which are looking better but not
good.
Opening the preview-window:
Bruno Postle
>> The problem with the two image project is that the photos are
>> centred way above the middle of the frame, resulting in a huge
>> vertical angle of view to show everything.
>
>Why does it work with 4 images, it is the same vertical angle still 2
>more images are added?
It will work with two images, you just need to put the photos nearer
the middle of the output. The easiest way to do this is to drag the
photos to the middle in the Fast Preview window.
--
Bruno
Ralf
previewwindow gets back to "first" image when I try to straighten.
Would it possible to make the "rectlinear" option for 2 images easier
in an upcoming release?
Screenshot before straighten.
Carl von Einem
your viewpoint while shooting was too low and you want a straightened
perspective, right?
Your screenshot shows at least two places where you could (read: should)
apply vertical control points:
- the left row of window frames (upper right corner and bottom right corner)
- the grey part of the house front (the border on the right side)
After that optimizing pitch should bring you a better result.
Carl
Bruno Postle
>That works but I was not able to straighten the image. The fast
>previewwindow gets back to "first" image when I try to straighten.
>Would it possible to make the "rectlinear" option for 2 images easier
>in an upcoming release?
There is a problem with 'Straighten' where it only works well with
rows of images, for a single stack (and I guess your case of one
image above another) it should probably revert to simply centering
the photos in the canvas.
--
Bruno
Ralf
that's right I could do this.
But the photos were shot with a tripod. With or without straigthen -
should be enough - the image should be overall straigthen. For me it
seems that there's a problem with Hugin. Hopefully "they" can solve
the problem in an upcoming version.
Best wishes,
Ralf
Carl von Einem
Lack of vertical control points in your special case means that you
don't give hugin enough information. So please don't blame it on the
software. Stitching only two frames is kind of special if you want to
display an architectural scene.
Even the use of a tripod is no guarantee for an easy stitching process.
You might have introduced an error somewhere in your setup.
Carl

Oskar Sander
Cheers
O
--
/O
Bruno Postle
>How does straighten work? Any clever horizon detection stuff, or just
>trying to align the images geometrically?
It looks at the positions of images and rotates the scene to
minimise the variation of both roll and pitch. This works
suprisingly well for wide and 360° scenes, but clearly has problens
with some sets of images such as single stacks.
Tim's 2009 hugin summer of code project is very effective at
detecting straight-lines in photos, this could be repurposed for
finding vertical lines for straightening panoramas.
--
Bruno