Skip to first unread message

Vo Duy dot Com
<voduydotcom@gmail.com>Jun 8, 2022, 1:26:07 PM6/8/22
to [hoidap.voduy.com] Forum Support: Domain, Hosting, VPS, Server...

wget https://raw.githubusercontent.com/hestiacp/hestiacp/release/install/hst-install.sh
bash hst-install.sh
More documentation:
https://hestiacp.com
STEP 2: Install vDDoS Proxy Protection
vDDoS Proxy Protection is free software to provide a Reverse Proxy Server HTTP(S) protocols. It act as a Layer 7 Firewall Filter & Mitigate DOS, DDOS, SYN Floods, or HTTP Floods attack to protect your website.
wget https://files.voduy.com/vDDoS-Proxy-Protection/latest.sh ; chmod 700 latest.sh ; bash latest.sh
More documentation:
https://vddos.voduy.com
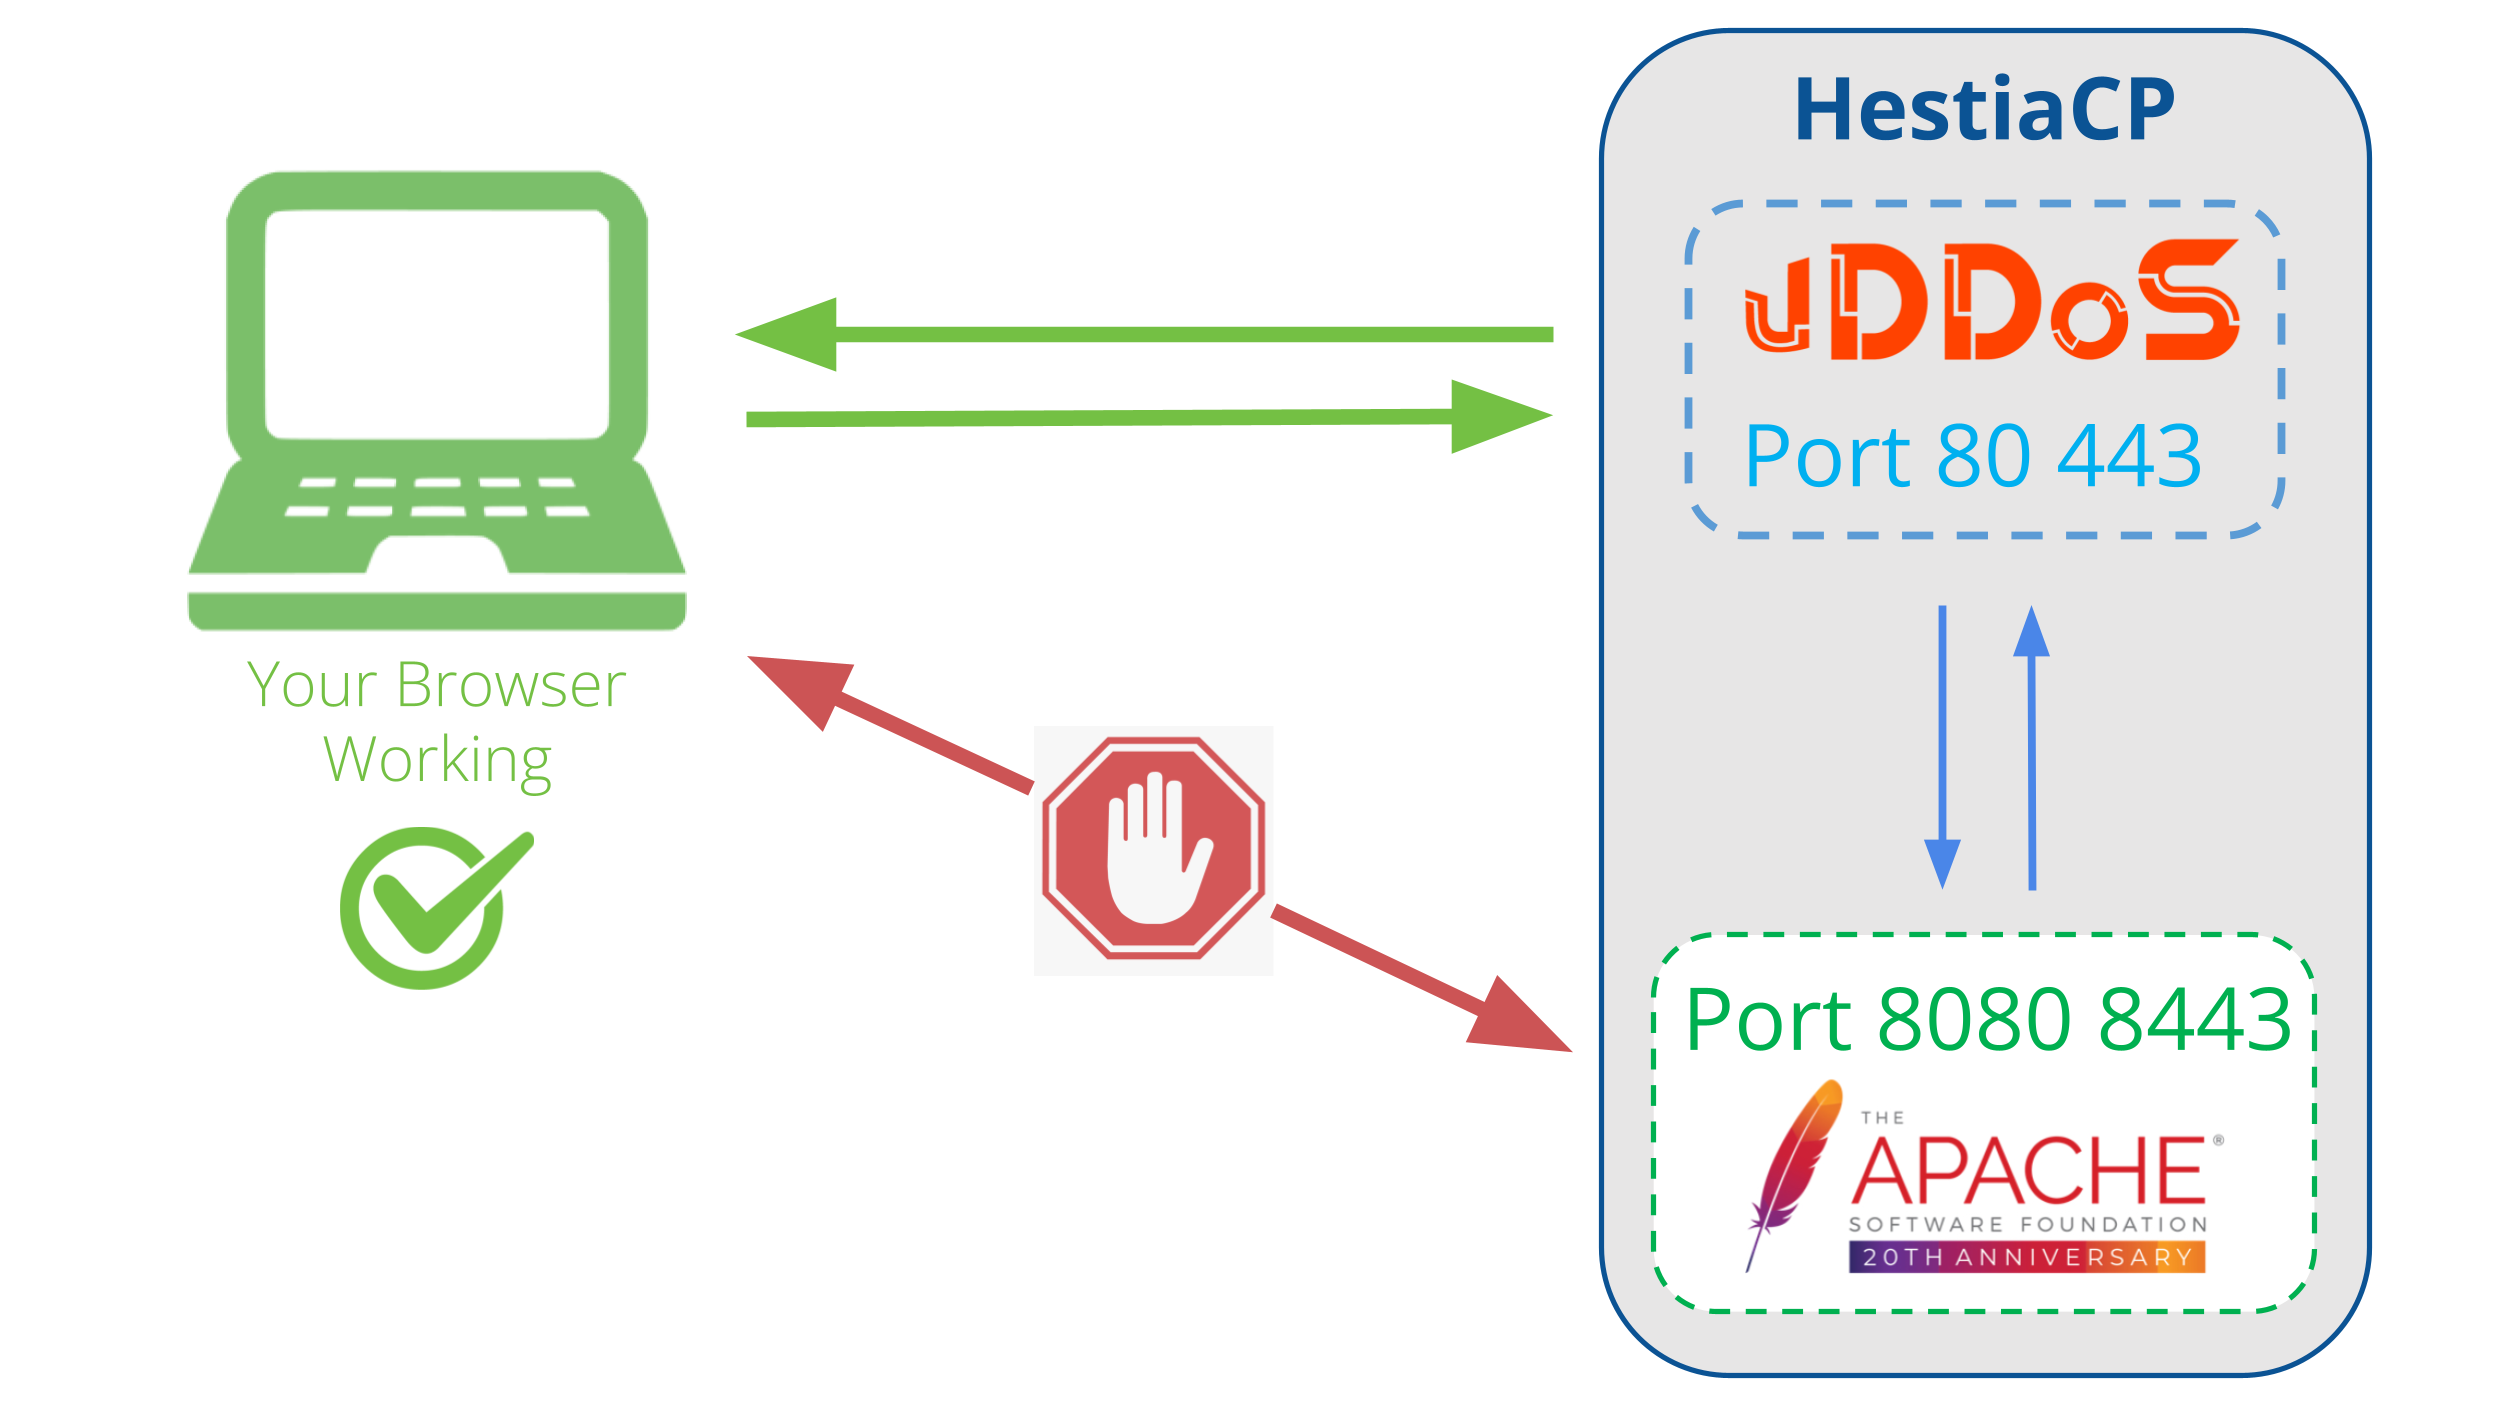
STEP 3: Change Apache Default Port
By default HestiaCP uses Apache or Nginx running on port 80, 443. Or Nginx proxy Apache too, we can reconfigure these Webservers to listen on another port so that vDDoS can proxy on them.
More documentation:
https://vestacp.com/docs/#how-to-remove-nginx-debian-ubuntu
vDDoS Proxy Protection is free software to provide a Reverse Proxy Server HTTP(S) protocols. It act as a Layer 7 Firewall Filter & Mitigate DOS, DDOS, SYN Floods, or HTTP Floods attack to protect your website.
wget https://files.voduy.com/vDDoS-Proxy-Protection/latest.sh ; chmod 700 latest.sh ; bash latest.sh
More documentation:
https://vddos.voduy.com
STEP 3: Change Apache Default Port
By default HestiaCP uses Apache or Nginx running on port 80, 443. Or Nginx proxy Apache too, we can reconfigure these Webservers to listen on another port so that vDDoS can proxy on them.
More documentation:
https://vestacp.com/docs/#how-to-remove-nginx-debian-ubuntu
Stop & Remove nginx:
service nginx stop
apt-get -y remove nginx
Change Hestia configuration:
apt-get -y remove nginx
Change Hestia configuration:
cp /usr/local/hestia/conf/hestia.conf /usr/local/hestia/conf/hestia.conf.vddos.bak
cd /usr/local/hestia/conf
sed -i "/PROXY_*/d" hestia.conf
For example, I want Apache listen on port 8080 and 8443:
nano /usr/local/hestia/conf/hestia.conf
...
WEB_PORT='8080'
WEB_RGROUPS='www-data'
WEB_SSL='mod_ssl'
WEB_SSL_PORT='8443'
WEB_SYSTEM='apache2'
Rebuild vhost configs:
for user in $(v-list-sys-users plain); do v-rebuild-web-domains $user; done
mv /etc/apache2/conf.d/phpmyadmin.inc /etc/apache2/conf.d/phpmyadmin.conf
Re-Check Apache port:
root@HestiaCP:~ # service apache2 restart
root@HestiaCP:~ # netstat -lntup|grep apache
tcp 0 0 1.2.3.4:8080 0.0.0.0:* LISTEN 722/apache2
tcp 0 0 127.0.0.1:8081 0.0.0.0:* LISTEN 722/apache2
tcp 0 0 1.2.3.4:8443 0.0.0.0:* LISTEN 722/apache2
STEP 4: Config vDDoS Proxy Protection
For example, the IP Addr of your server is 1.2.3.4:
nano /vddos/conf.d/website.conf
# Website Listen Backend Cache Security SSL-Prikey SSL-CRTkey
default http://0.0.0.0:80 http://1.2.3.4:8080 no no no no
default https://0.0.0.0:443 https://1.2.3.4:8443 no no /vddos/ssl/your-domain.com.pri /vddos/ssl/your-domain.com.crt
Restart vDDoS service after you have configured:
/usr/bin/vddos restart
STEP 5: Config vDDoS Auto Add
vDDoS Auto Add is a addon support for vDDoS Proxy Protection - Monitor Domains/Aliasdomains/Subdomains in Panel Hosting, Web Server, List Domain, Virtual Host... and automatically add them into the website.conf file.
nano /vddos/auto-add/setting.conf
# Default Setting for vddos-add command:
SSL auto
DNS_sleep 66
DNS_alias_mode no
Cache no
Security no
HTTP_Listen http://0.0.0.0:80
HTTPS_Listen https://0.0.0.0:443
HTTP_Backend http://1.2.3.4:8080
HTTPS_Backend https://1.2.3.4:8443
Set Crontab:
ln -s /usr/sbin/apache2ctl /usr/sbin/httpd
echo '*/15 * * * * root /usr/bin/vddos-autoadd webserver apache' >> /etc/crontab
STEP 6: Config vDDoS Auto Switch
vDDoS Auto Switch is a addon support for vDDoS Proxy Protection - Automatically identifies overloaded websites and changes their Security Mode.
nano /vddos/auto-switch/setting.conf
# This is the default configuration for "sensor-switch.sh" and "vddos-autoswitch.sh"
hostname="vDDoS Master" #(Name this server, it will show up in Email notifications)
vddos_master_slave_mode="no" #(Turn on "yes" if your system has slave servers, want to sync affter switch like master)
backend_url_check="no" #(Put the URL of the backend. Ex: https://1.1.1.1:8443/ (make sure Backend status response is "200"))
send_notifications="no" #(Turn on "yes" if you want receive notification)
smtp_server="smtps://smtp.gmail.com" #(SMTP Server)
smtp_username="x...@gmail.com" #(Your Mail)
smtp_password="xxxxxxxxxxxxx" #(Get your Apps password for Gmail from https://security.google.com/settings/security/apppasswords)
send_notifications_to="xx...@gmail.com" #(Your Email Address will receive notification)
maximum_allowable_delay_for_backend=2 #(Means: If Backend (status response "200") is slower than 2s, vDDoS will enable challenge mode)
maximum_allowable_delay_for_website=2 #(Means: If Website (status response "200") is slower than 2s, vDDoS will enable challenge mode)
default_switch_mode_not_attack="no" #(Default Mode vDDoS use when it's not under attacked)
default_switch_mode_under_attack="high" #(Default Mode vDDoS use when it's under attack)
default_waiting_time_to_release="60" #(For example 60 minutes, release time from challenge)
Crontab vDDoS Auto Switch:
echo '*/5 * * * * root /usr/bin/vddos-autoswitch checkalldomain high' >> /etc/crontab
echo '0 */3 * * * root /usr/bin/vddos-switch allsite no && /usr/bin/vddos reload' >> /etc/crontab
echo '* * * * * root /usr/bin/vddos-sensor' >> /etc/crontab
More documentation:
https://github.com/duy13/vDDoS-Auto-Switch
Reply all
Reply to author
Forward
0 new messages