The Hedgehog of Piepsk

Scott B
SCENARIO 4 (The Hedgehog of Piepsk)
....the hills were dark with the mist of the evening.
"Oberlieutennant, are you sure the reports were correct?" The young German soldier nervously peered thru his machine gun sights, anxiously watching the crossroads a couple hundred meters away.
"Yes." The veteran officer had seen this Russian style of advance before. It was a cautious and methodical movement to contact. VERY SLOW, ALMOST WITHOUT VISIBLE ACTIVITY, but deliberate nontheless. "Don't be so eager to face your Russian counterpart, especially in the darkness. We have advantages in the terrain and the distance in which he must cross. Just be steady, and await my command." He knew the scout reports were correct. The Russian infantry company which was seen moving toward the town he was tasked to defend out numbered his small platoon four to one. But he had the buildings...and the experience of many years on the eastern front. He knew if he downed the commissars early, the russian attack would stall; then melt away all together until another could be found to lead them.
He looked down at the two young German machine-gunners, nervously anticipating the communists and wondered. How long had they been waiting? MONTHS IT SEEMED. Yet he knew they were coming. ANY TIME NOW he thought. He raised his worn binoculars for another look.
...."easy lads, he nodded. Easy..."

Action on Hill 522
Germans: Kevin Welsh
Russians: Michael Radish
Monitor: Vincent Maresca
Variations: Use all Squad Leader rules
Reminder: Wheatfields are out of season and count as open hexes
German Comments
I will attempt to exchange space for time without sacrificing units. Analyzing the possible Russian avenues of advance and the weight of time, I believe the best entry locations are on Board 3 east of Hill 522 with subsequent deployment around the hill into the town. Once in the town, the game will be difficult for the Germans. To scatter the Russians on two or more boards takes energy away from their attack, and piecemeals their advance. With only three leaders controlling 32 squads, an early loss is hard to recover from and could leave stranded squads. They must enter behind the cover of Hill522, mass behind and to the south of it, and assault into the town. In this manner, they can almost get to the town even before being fired upon! The two forward positions at 3T3 and 3U8 will make efforts to stop or stall the Russian advance, supported directly by the MG’s in building 3M2, and indirectly by the mortar battery. While 3T3 is an extremely strong position, receiving a shift of +4 from 3 directions and covering the obvious avenue into the town, 3U8 may appear initially weak. 3U8 is important non-the-less, as I believe this will be the main avenue of the Russian advance once getting east of Hill 522. I will attempt to entrench them there, and cover their front with the before mentioned support Entrenched and in the woods will provide good protection. In the event that they cannot entrench on the first turn, they may have to fall back to a subsequent position as the woods alone will not be sufficient cover. The 8-0 in 3T6 will remain available behind the entrenchments with instructions to grab any boys that break under the initial Russian wave. Early success will be decided in being able to establish radio contact and placement of spotting rounds, entrenchment attempts, and good key-hole bursts from the 2nd level guns. Careless movement of the Russian leaders could decide this one early. Now it’s all up to the entry…
Russian Comments
My strategy is pretty basic...get as many units as possible into town as
quickly as possible without exposing myself to too much defensive fire while
moving in the open. My guess is that the bulk of the German defenders will be
relatively close to the town and in positions to both pick off my units with
longe-range MG fire and easily retreat into the town proper. Being red-green
color blind, I may have to run the list of stone buildings on Board 3 by you
just to make sure I don't miss any (the grey and brown look very similar to me).
I have sent out some "runner" squads on the roads to lead the way into town.
They serve several purposes: draw long-range fire and/or move close enough to
German units to start placing the thinly spread defenders on the board; get at
least a couple of units into position to provide some modicum of cover-fire for
the advancing forces.
So far, based on Kev's last email, I only know that the radio is not being
operated by his 8-0 leader. The Artillery Request placement is in LOS of way
too many hexes to start making of list of possible/not possible locations
(besides, I will find out where they are the hard way by the end of the 3rd
turn).
I have never played this scenario...should be interesting.
Neutral Comments
This scenario was listed as “well-balanced” by a Squad Leader page (http://www.advancephase.com/) with game play resulting in 32 German vs. 24 Russian wins or a German win 57% of the time.
Germans have the advantage of invisibility (HIP), leadership, and long-ranged MG fire.
The Germans primary objective is to kill the three Russian officers outright. The second objective is to break as many moving Russian squads [-2 modifier] with MG fire directed by a (-) leader before they enter the town’s protective buildings.
Russian manpower allows concentration of force and the ability to attack the few German defenders from many points. The Russian’s Achilles heal is there limited leadership and poor modifiers (only one –1). Without leaders, a broken Russian squad is worthless.
Michael’s opening movements limited the potential for long range German MG fire hitting multiple targets as few stacks and single hex movement was used. The MGs were with the leaders and runners where sent out to spot the Germans. However, The powerful psychological effect of a hidden German enemy has successfully lead to conservative Russian movement. Analysis of topography is important and tricky for new SL players. The Germans can not be emplaced 10 whole hex from the eastern edge (or east of row 2V) and must be in a building or forest hex to retain HIP. Board 2 has no 2nd or 3rd level hills with cover to provide the Germans with long range fire on the advancing Russians. This usually leads to at least one German officer, a squad, MG and possibly the radio in the second floor of building 2N1 and/or 2N2. Second, the 2nd level hill hexes of Hills 522 and 621 means the Germans can’t see SE of either hill providing blind spots for advancement into the town. Even (dangerously) aggressive German deployments outside the town in hexes such as 2M1, 2M2, 2M7, 4M2, 4M8, 4N5 are unable to see (bring fire down into) the 3FF10 to 3Y10 route which needed to be more aggressively exploited by Michael. MR’s leaders should be using their 6 movement points to get a few stacks advancing quickly. MR will lean the rule of thumb of never stacking a Zero modifier leader with troops in the open (or any terrain for some players – but the Russians can’t always enjoy this option with their limited number of leaders) from the dreaded “double-break” rule.
Michael has chosen to distribute his forces across the entire eastern edge setting up a flanking movement down the 2L1 road and possibly along board 4 but this all takes precious time. The Russian’s distribution over the eastern edge may make concentrated fire more difficult in the middle game and the decision to put the 9-1 in the center (vulnerable to MG fire if he advances) could make it difficult for the Russians to rally and advance. The units on Board 4 tend to take a pounding from the MGs in 3N1 so we shall see what happens. 10 or 11 turns sounds like a lot but it will go quickly moving units around the flanks (I think it is 5 turns to go around board 2?). The Russians need time to get close to the town, prepare their assault, and have enough forces left to take 2N1 – Time is the enemy!
The German (Kevin’s) setup resisted the urge to dissipate German forces across boards 2 and 4 but concentrating their firepower around the town. The Germans have sacrificed all-around defense in the town for a forward concentration of force. This seems an all or nothing approach. The loss of 2U8 would leave the town vulnerable but should hit the advancing Russians with x2 firepower cresting the hill, through the woods or eating MG fire in their flanks. The “bunker” in 2T3 tends to hold its own well into the game. The concentration of the 2 MMGs and the HMG in building 2N1 should provide deadly long-range fire. I’m a bit more conservative so it will be interesting to see if Kevin’s “strong points” can survive the Russian’s human waves and maintain the ability to withdraw to protect the town.
A number of questions arose during the game regarding rules and/or game play clarification. These comments have been included for future interest/review at the end of the replay in Appendix A.
See Appendix A: Question #1 about HIP units and entrenchment.
German Set Up
German Set-up:
(All units Hidden Initial Placement or HIP)
3N2(2F): 9-2, 467, HMG, RAD
3N1(2F): 8-1, 2x467, 2xMMG
3U8: 9-1, 3x467, 2xLMG
3T3: 9-1, 2x467, 2xLMG
3T7: 8-0
Russian Turn 1
MGs waiting…….
Rally Phase
German Radio contact: DR:6+1=7, contact made and Artillery Request placed in 3W6
Prep Fire Phase (Russian)
None
Movement Phase (Russian)
Board 2:
447: A6, B5, C5, D5, E6, F5, G5
447: A1, B1, C1
447: A2, B2, C2
447: A3, B2, C3
447: A4, B3
447: A5, B4, C4
447: A9, B8, C9
447: A10, B9, C10, D9
447: A8, B7, C8
8-0 (Burnski), 3x447, 2xLMG: A7, B7, C7
Board 3:
447: GG6, FF5, EE6, DD5, CC6, BB6, AA6, Z5
447: GG6, FF5, EE6, DD5, CC6, BB6, AA6, Z6
447: GG10, FF10, EE10, DD9
447: GG9, FF8, EE9
447: GG8, FF7, EE8
447: GG7, FF6, EE7
447: GG5, FF4, EE4
447: GG1, FF1, EE1
447: GG2, FF2, EE2
447: GG3, FF2, EE3
9-1, 447, MMG: GG4, FF3
Board 4:
447: A4, B4, C4
447: A5, B5, C5, D4, E4, F3, G4, H3
447: A8, B8, C8, D7
447: A6, B6, C6, D5
447: A10, B9, C9, D8
447: A3, B3, C3, D2
447: A1, B0, C1, D0
447: A2, B1, C2
8-0 (Cohenov), 447, LMG: A7, B7
Defensive Fire Phase (German)
3N1: 8-1, 2x467, MMG at 4H3 (8FP, -3): DR 5+4=9(-3)=6, 1MC
3N1: MMG at 4C4 (2FP, -2): DR5+4=9(-2)=7, NE
3N2: 9-2, HMG at 4D2 (6FP, -4): DR5+2=7(-4)=3, KIA
3N2: 467 at 4H3 (2FP, -2): DR2+2=4(-2)=2, KIA
4H3 447(1MC) DR=6, NE
See Question #2 for clarification of German MG fire
Advancing Fire Phase (Russian)
None
Rout Phase
None
Advance Phase (Russian)
4D8 447: 4E9 4D7 447: 4E7
4D5 447: 4E5 4B7 447, LMG: 4B6
4C4 447: 4D4 4C2 447: 4D1
4D0 447: 4E1 3EE1 447: 3DD0
3EE2 447: 3DD2 3EE3 447: 3DD3
3EE4 447: 3DD4 3EE7 447: 3DD6
3EE8 447: 3DD7 3EE9 447: 3DD8
3DD9 447: 3CC9 3Z5 447: 3Y6
3Z6 447: 3Y7 2D9 447: 2E9
2C9 447: 2D8 2C8 447: 2D8
2G5 447: 2G6 2C4 447: 2D4
2C3 447: 2D3 2C2 447: 2D2
2C1 447: 2D1 2B3 447: 2C4
2C7 2x447, 2xLMG: 2D6
2C7 447: 2D7 2C7 8-0: 2C8
Close Combat Phase
German artillery accuracy: DR5
Direction of Error: DR4
Extent of Error: DR1
Initial SR lands in 3W7, replace with red SR
End of Russian Turn 1 German Notes
I was very surprised to see the Russian regiment deployed across all 3 boards. My initial thoughts were that this was a mistake in that it disperses the Russian strength in numbers, forces squads to cover ground in the open, and it will take many turns for the furthest squads to enter the battle area. An advantage remains however that if enough flanking squads on boards 2 and 4 get into cover and can enter board 3, my defense is not prepared to repel them. I may have to fall them back if this begins to take shape.
No leaders presented worthwhile targets so I focused my fire on Cohenov’s group (board 4) and caught 2 squads moving in the open. –3 and –4 modifiers make any amount of FP deadly. If at all possible, I will continue to make many small FP attacks in lieu of a few large ones, as broken Russian squads are just as valuable as KIA’d ones. Also I do not want to risk both of Pitz’s MMG’s in a fire group attack in the event of a single “12”. Artillery was inaccurate but the spotting round landed nearby and in LOS anyway, so I will keep it. I think I will leave it somewhere on Hill 522, as its presence along gives second thoughts about an advance in that area.
Goals for German Turn 1: a) maintain radio contact, b) entrench Kelso and his boys in 3U8, c) suppress Russian squads with some good long range fire from bldg 3M2, d) keep Stites hidden as long as possible to add the mystery of yet hidden German squads to the Russian planning process.
German Turn 1
Rally Phase
Wetzelberge attempts to maintain German Radio contact: DR 3+1=4, contact maintained
Spotting Round Correction: Adjust red SR from 3W7 to 3W4
Prep Fire Phase (German)
Entrenchment attempt in 3U8:
9-1, 467 (needs a ‘6’), DR 1+1=2(!)-1=1, success. Place 9-1 (Kelso) and 467 below entrenchment counter in 3U8.
See Question #3 about entrenchment and who looses HIP/Remains HIP in hex
3N1: 8-1, 467, MMG at 4E1 (2FP, -1): DR 2+2 (-1)=3, 1MC
3N1: 467, MMG at 3DD3 (2FP): DR 3+2=5, MC
3N2: 9-2, 467, HMG at 3DD2 (6FP, -2): DR 6+5 (-2)=9, NE
4E1 447(1MC) DR=5, NE
3DD3 447(MC) DR=5, NE
Movement Phase (German)
None
Defensive Fire (Russian)
None
Advancing Fire (German)
None
Advance Phase (German)
None
Close Combat
None
End of Turn 1 Russian Notes
Turn 1 went fairly well for the Russians. Only 2 squads were KIAed, and none
were broken due in large part to very fortunate morale check rolls. One of the
KIAed squads was a "runner" squad, fulfilling its objective to draw German fire
and thereby have some of the German defenders reveal their position(s).
However, I think the Germans in the two-story building would have revealed
themselves even without the "runner" squad moving within normal range of the
defenders' MMGs. I should have assumed that Kev would have placed at least
some of his heavier MGs on the second level of that building. They will
continue to control most of the paths into town, and limit the routes my
remaining squads can take without moving in the open. I will have to assume
that some of the still-hidden German defenders have taken up positions to
enabling them to fire at these "limited" routes and plan future movement
accordingly.
At the conclusion of Turn 1, one-half of the German defenders have revealed
their positions, leaving 2 leaders, 4 squads, 4 LMGs and the radio hidden. I
had hoped that more of the German defenders would have revealed themselves at
this point. Unfortunately, German off-board artillery is now a huge factor to
consider since the spotting round stayed within LOS of the radio operator. The
only other information I have is that the radio is being operated by one of the
hidden leaders, and that, given the locations of the spotting rounds during
Turn 1, there are too many possible locations for the radio to bother keeping
track of them all at this point in the game. I need to find out where that
radio is as soon as possible in order to know what, if any, routes will be safe
from artillery fire.
Accordingly, I will still have to hesitate before moving any of my leaders in
the open, which means they will probably have to stay far behind the advancing
squads. On the other hand, I may use the leaders to draw German long-range
fire, which should allow more of my squads to make it to cover closer to town.
However, I do not know if it is worth the risk since I will need all 3 leaders
when/if my remaining squads make it into town. The next turn will see all of
the Russian squads again moving forward as quickly as possible, since after
Turn 2 most of my squads will have made it to cover and be in a position to
advance toward the town under cover and without moving in the open in LOS of
the German MGs.
End of Turn 1 German Notes
Things are going as well as can be expected. A Russian advance into the woods south of Hill 522 may cause some problems, as I have noticed that neither Wetzelberge nor Pitz can adjust fire into the center of that woodline, just its flanks. I should be able to position my SR at a decent location in 3V9 if needed. It will be up to Kelso and his boys to hold that flank. Entrenched, they should be a tough nut to crack. I was hoping to get a few more Russians during my Prep Fire, but it seems that Kelso took all the motivation with his shovels. Someone get Wetzelberge some coffee.
End of Turn 1 Neutral Notes
Russians cautiously advance while German fire kills two squads, but no broken Russia squads to show for it. The revealed German squad and leader in 3U8 should draw Russian squads into the German stack and cause some damage. It may get messy if the Russian advance piecemeal onto 3U8. It will be interesting to see the Russian squads can advance along the town’s flanks and force the Germans to abandon their prepared forward positions before Kev is ready. The MGs in the building need to be breaking more squads to keep them out of the town. The Russian leaders are on the defensive and it may become harder later in the get to get them to the broken squads without the MGs zeroing in on them.
RUSSIAN TURN 2

Russian recon checks out the approaches…..
Rally Phase
German Radio Contact: DR 6+3=9, contact maintained
Spotting Round Correction: None.
Prep Fire Phase (Russian)
None
Movement Phase (Russian)
4E9 447: 4F9, 4G10, 4H10
4E7 447: 4F6, 4G6, 4H6
4E5 447: 4F4, 4F3
4B6 447, LMG: 4B5, 4C5, 4D4, 4E5
4D4 447: 4E5, 4F4
4E1 447: 4F1, 4G1
4D1 447: 4E2, 4F2, 4G2
3DD0 447: 4E1, 3BB0, 3AA1
3DD2 447: 3CC2, 3BB2, 3AA2
3DD3 447: 3CC4, 3BB3
3DD4 447: 3CC5, 3BB5
3DD6 447: 3CC6, 3BB6, 3AA6, 3Z6, 3Z7, 3Z8, 3Y9
3CC9 447: 3BB9, 3AA10, 3Z9, 3Y10
3DD7 447: 3CC7, 3BB7, 3AA7
3DD8 447: 3CC9, 3BB8
3FF3 447, MMG: 3FF4, 3EE5, 3DD5
3Y6 447: 3X6, 3X5, 3X4
3Y7 447: 3Y8, 3X8
2E9 447: 2F9, 2G10, 2H9
2G6 447: 2H6, 2I7
2D8 447: 2E8, 2F8, 2G8
2D8 447: 2E9
2D7 447: 2E7, 2F6, 2G7
2D6 447, LMG: 2E6, 2F5, 2G5, 2H5
2D6 447, LMG: 2D7, 2D8
2C8 8-0: 2D7
2C4 447: 2D4
2D4 447: 2E4, 2F3
2D3 447: 2E3, 2F2
2D2 447: 2E2, 2F1, 2G2, 2H1, 2I2, 2J2, 2K2
2D1 447: 2E1, 2F0, 2G1
Defensive Fire Phase (German)
3N1: 8-1, 467, MMG at 4E1 (2FP, -3) DR: 6+4=10 (-3)= 7, NE
3N1: 467, MMG at 4F2 (2FP, -2) DR: 5+4=9 (-2)=7, NE
3N2: 9-2, 467, HMG at 3AA2 (6FP, -4) DR: 2+1=3 (-4)=-1, KIA
Advancing Fire Phase (Russian)
2K2: 447 at 2M2 (2FP); DR=9, NE
2I7: 447 at 2K9 (2FP); DR=9, NE
3X8: 447 at 3V8 (2FP); DR=5, MC (No units present)
3X4: 447 at 3W2 (2FP); DR=4, MC1 (No units present)
4H6: 447 at 4K7 (2FP); DR=4, MC1 (No units present)
Rout Phase
Russian: None
German: None
Advance Phase (Russian)
4H10 447: 4I10 4H6 447: 4I6
4F3 447: 4G3 4E5 447, LMG: 4F4
4F4 447: 4F3 4G1 447: 4H0
4G2 447: 4H1 4B7 8-0: 4B6
3AA1 447: 3Z1 3BB3 447: 3AA3
3BB5 447: 3AA6 3Y9 447: 3X9
3Y10 447: 3X10 3AA7 447: 3Z6
3BB8 447: 3AA8 3DD5 447, MMG: 3CC6
3X4 447: 3X3 3X8 447: 3X7
3FF3 9-1: 3FF4 2H9 447: 2I9
2I7 447: 2J6 2G8 447: 2H8
2E9 447: 2F8 2G7 447: 2H7
2H5 447, LMG: 2I6 2D8 447, LMG: 2E9
2D7 8-0: 2D6 2D4 447: 2E4
2F3 447: 2G3 2F2 447: 2G2
2K2 447: 2L1 2G1 447: 2H1
Close Combat Phase
None
German Turn 2
Rally Phase
Russian: None
German: Maintain Radio Contact DR: 6+5=11 (-2)=9, contact lost; remove SR
Prep Fire Phase (German)
3N1: 8-1, MMG, 467 at 4H0 (6FP) DR: 4+3=7, MC
3N2: 9-2, HMG (fired by 467) at 3AA3 (6FP, -1) DR: 6+2=8, (-1)=7, MC
FG-3N1: 467, 3N2: 467 at 4H1 (4FP, +1) DR: 6+2=8, (+1)=9, NE
Russian morale roles
4H0 447(MC) DR=4, NE
3AA3 447(MC) DR=6, NE
Movement Phase (German)
None
Defensive Fire (Russian)
4I10: 447 at 4K8 (2FP); DR=7, NE
4I6: 447 at 4K8 (2FP); DR=6, NE
4F4: 447 at 4K2 (1FP, +1); DR=7(+1)=8, NE
4F3: 447 at 4K4 (1FP); DR=9, NE
4G3: 447 at 4K3 (2FP); DR=9, NE
3X3: 447 at 3V2 (2FP); DR=9, NE
3X10: 447 at 2L9 (2FP, +1); DR=5(+1)=6, NE
2I9: 447 at 2K9 (2FP); DR=6, NE
2J6: 447 at 2K8 (2FP); DR=7, NE
2L1: 447 at 2M3 (2FP, +1); DR=4(+1)=5, MC (no units present)
Advancing Fire (German)
None
Rout Phase
Russian: None
German: None
Advance Phase (German)
None
Close Combat
None
German comments
The Russian advance continues across the width of all three boards, this
is a good thing at least for now. I'll hand it to Mike, he won't let me get a
shot at more than one Russian squad at a time. I wonder if the still HIP
Stites and his squads are influencing Mikes movement any? I would think that
it is, observing the way his squads are cautiously picking their way across
the maps, especially Board 2! Every turn he spends poking around Hill 621 is
a turn less he is fighting for Piepsk. It looks as though he is going to
funnel most of his Board 2 and 3 forces through the woods south of Hill 522.
Kelso could see as many as 16 squads in the next turn or two. I will have to
shift the mortars south to discourage a buildup there.
Boy, my fires have been awful. A complete Defensive Fire and Prep Fire
and all I can claim is one squad and two MC's. Wetzelberge and Pitz will have
to do better than that, even with the dispersed Russian forces. This was also
a lousy turn for Wetzelberge to loose radio contact. I will attempt to
establish it south of Kelso's position and add its value to the south
defense. Back to the Russian advance...
Russian comments
It turns out that only one of the hexes I had considered "cleared" was still a
possible location for German HIP units (3W6). If the loss of HIP/concealment
status was not my mistake, I suppose Kev will help me find out what it is the
hard way. I have made slight revisions to my End of Turn 2 comments/notes
based on this change.
Turn 2 also went fairly well for the Russians, with only 1 additional squad
KIAed and none broken (due again to very fortunate morale check rolls after
being subjected to well-directed German MG fire). Most of the Russian squads
have now made it to positions that will allow them to advance toward town
without exposing themselves to the German MGs in the second floor of the
largest stone building in the town. However, I may have to expose some units
to fire next turn in order to keep fire away from my leaders as they slowly
advance to cover.
Unfortunately, no other German units revealed themselves during Turn 2,
although I would guess that most of the remaining HIP units are in the town
itself. Some may have taken up positions to stall my advance toward town
along "alternate" routes, but I think these positions will be limited to Board
2 and close to town. Some German units are probably positioned to control the
road around Hill 621. If I do send a few squads along that road, I expect to
run into them in the next couple of turns. The only down side to doing this is
that I do not have a leader to spare to send along with them, which means that
any broken squad will essentially be out of play for the duration.
With another stroke of luck, German off-board artillery is temporarily not a
consideration with the failure to maintain radio contact. That will give my
advancing units a brief reprieve, although I expect artillery to still play an
important role before the end of the scenario.
Russian units have been firing into, and trying to end movement adjacent to,
hexes that may hold HIP German units. Determining which hexes have
been "cleared" along the advance into town will be very important for the
Russian units advancing more slowly than the rest, especially for leaders that
will still have to move in the open to catch up to their squads. So far, it
has been established that there are no German units in: 2K1, 2K2, 2K3, 2K6,
2K7, 2K10, 2L0, 2L1, 2L2, 2M1, 2M2, 2M3, 3W2, 3W3, 3W4, 3W5, 3W7, 3W8, 3W9,
3W10, AND 4K7.
The German entrenchment in 3U8 needs some attention. It is directly in the
path of a large number of squads advancing toward the town, however, it is a
very strong position. Within the entrenchment, the German squad will be tough
to break by direct infantry fire. I cannot form a large fire group without
placing more than 1 squad into each hex (and that is something I have been
trying to avoid in order to reduce the effects of any German fire), and I can
only charge it by a total of 3 routes. I may have to go around it entirely,
but I am not sure if I have time to re-route a quarter of my units.
Neutral comments
Mike does not understand or did not read the German HIP and initial deployment restrictions. The Germans were not allowed set up within 10-whole hexes of the east edge while HIP units can only be positioned within “buildings or woods.” Mike’s blind shots into clear hexes and hexes east of 3V can not contain German units. This is dramatically effecting his advance as he thinks every hex may contain a German unit. All said, Mike is converging his forces well into the forest gap between Hills 522/621. He is very conservative with his Russian squads with his sprinters stopped on hill 522 – why not send one over the hill and spot some Germans? The spread out Russian advance has the advantage of minimizing a kill on a stack while the three abreast squads allows firegroups. Luckily for Mike German MG and artillery are lack-luster. The German 3U8 stack is still waiting for some victims….
Russian Turn 3

Russian advance begins
Rally Phase
Russian: None
German: Establish Radio Contact DR: 2+1=3, Contact Established.
Place Artillery Request in 2L7
Prep Fire Phase (Russian)
3X3: 447 at 3U2 (2FP, +1); DR=5(+1)=6, NE
Entrenchment attempt in 3X7: DR=11, NE
Movement Phase (Russian)
4I10 447: 4J9, 4K9, 4L8
4I6 447: 4I5, 4J4
4G3 447: 4G2, 4H1, 4I1
4F4 447, LMG: 4F3, 4G3, 4G2
4F3 447: 4G3, 4H2
4H0 447: 3Y1, 4J0
4H1 447: 4H0, 3Y1
3AA3 447: 2AA4, 2AA5, 2Z5, 2Y5
3AA6 447: 3Z5, 3Y5, 3X5
3X9 447: 3W9
3X10 447: 3W10, 3V10
3Z6 447: 3Z7, 3Z8, 3Y9, 3X9
3AA8 447: 3AA9, 3Z9, 3Y10
3CC6 447, MMG: 3BB6, 3AA6, 3Z6, 3Y7
2I9 447: 2J9, 2J10
2J6 447: 2K6
2H8 447: 2I9, 2J9
2F8 447: 2G9, 2H9
2H7 447: 2H8, 2I9 (not enough MP!)
2I6 447, LMG: 2J6
2E9 447, LMG: 2F9, 2G10, 2H10
2D6 8-0: 2E6, 2F5, 2G6, 2H6
2E4 447: 2E3, 2E2, 2F1, 2G1
2G3 447: 2G4, 2H4, 2H5, 2I6
2G2 447: 2H2, 2I3
2L1 447: 2M2, 2N1, 2O2, 2P1, 2Q1, 2R1, 2S2, 2T2
2H1 447: 2I2, 2J2, 2K2, 2L1, 2M1
Defensive Fire Phase (German)
3N1: 8-1, 467, MMG at 4H2 (6FP); DR: 5+5=10, NE
3N1: 467, MMG at 4J4 (6FP, +1); DR: 5+1=6, (+1)=7, MC
3N2: 9-2, HMG (fired by 467) at 2J9 (6FP, -1); DR: 5+2=7, (-1)=6, 1MC (on both 2J9 and 2J10 squads)
Note: the 2J9 target hex was an illegal move with unit pushed back into 2I9
3N2: 467 at 4H2 (2FP, +1); DR: 6+3=9, (+1)=10, NE
3U8: 9-1, 3x467 [HIP revealed !], 2xLMG at 3V10 (16FP); DR: 3+1=4, KIA
NOTE ON 3U8: 9-1 and 1x467 are below the entrenchment, 2x467 and 2xLMG are above entrenchement
See Question #4 regarding leadership modifier from below entrenchment
4J4 447(MC) DR=4, NE
2J9 447(1MC) DR=8, BROKE (DM)
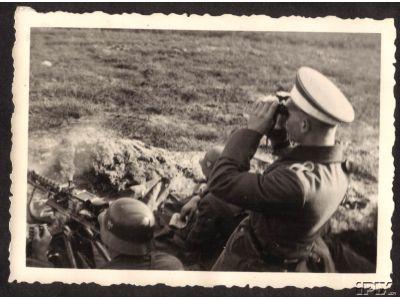
Photo of Sgt. Kelso and boys.
Advancing Fire Phase (Russian)
4L8: 447 at 4N5 (1FP, +1); DR=7(+1)=8, NE
4J4: 447 at 4M2 (1FP, +1); DR=8(+1)=9, NE
4J0: 447 at 4L0 (1FP, +1); DR=9(+1)=10, NE
3W9: 447 at 3T10 (1FP, +1); DR=12(+1)=13, NE
2J6: 447 at 2K8 (1FP); DR=10, NE
2I3: 447 at 2K4 (1FP); DR=11, NE
2M1: 447 at 2N2 (1FP); DR=3, 1MC (if any units are present)
2T2: 447 at 2W4 (1FP, +1); DR=7(+1)=8, NE
Rout Phase
Russian:
2J9 447 (BR, DM): 2I9
German: ?
Advance Phase (Russian)
4L8 447: 4M8 4J4 447: 4J3
4B6 8-0: 4C6 4I1 447: 4J0
4G2 447, LMG: 4G1 4H2 447: 4H1
4J0 447: 4K1 3FF4 9-1: 3EE5
3Z1 447: 3Y1 3Y1 447: 3X1
3X3 447: --- 3Y5 447: 3Y4
3X5 447: 3X4 3W9 447: ---
3X9 447: 3W10 3Y10 447: 3X10
3Y7 447, MMG: 3Y6 3X7 447: ---
2K6 447: 2J6 2H8 447: 2I8
2H9 447: 2I10 2I9 447: 2J9
2J6 447, LMG: 2I7 2H10 447, LMG: 3Y10
2H6 8-0: 2H7 2G1 447: 2H1
2I6 447: 2H6 2I3 447: 2J3
2T2 447: 2T3 2M1 447: 2N1
Close Combat Phase
German Artillery Accuracy: DR 5
Direction of Error: DR 2
Extent of Error: DR 5; Blue SR lands in 2Q5, out of LOS
Remove Blue SR, Place Artillery Request in 2O9
German Turn 3
Rally Phase
Russian:
2I9 447 (BR, DM): no longer DM
German Radio Contact: Maintain Contact DR: 3+1=4, Contact Maintained
Prep Fire Phase (German)
3N1: 8-1, 467, MMG at 4J3 (6FP, -1) DR: 5+1=6, (-1)=5, 1MC
3N1: 467, MMG at 3Y4 (6FP) DR: 2+2=4, 2MC
3T3: 9-1, 2x467, 2xLMG at 3X1 (12FP) DR: 3+1=4, 3MC [! Revealed]
3N2: 9-2, HMG (fired by 467), at 2J9 (6FP, -1) DR: 4+1=5, (-1)=4, 2MC
3N2: 467 at 4H1 (2FP, +1) DR: 4+4=8, (+1)=9, NE
4J3 447(1MC) DR=8, BROKE (DM)
3Y4 447(2MC) DR=9, BROKE (DM)
3X1 447(3MC) DR=8, BROKE (DM)
2J9 447(2MC) DR=8, BROKE (DM)
Movement Phase (German)
None
Defensive Fire (Russian)
3X3: 447 at 3T3 (4FP, +4); DR=7(+4)=11, NE (Blocked by Bldg in 3V3)
2J6: 447 at 3U8 (2FP, +1/+3); DR=7(+1/+3)=8/10, NE
2I7: 447 at 3U8 (2FP, +1/+3); DR=8(+1/+3)=9/11, NE
Advancing Fire (German)
3U8: 9-1, 2x467, LMG at 2I7 (6FP); DR 6+2=8, NE
3U8: 467, LMG at 2J6 (4FP, +1); DR 4+3=7(+1)=8, NE
Rout Phase
Russian:
4J3 447 (BR, DM): 4J4
3X1 447 (BR, DM): 3X0
3Y4 447 (BR, DM): 3Y5, 3Y6
2J9 447 (BR, DM): 2I9
German: None
Advance Phase (German)
3U8: Advance 2x467, 2xLMG under entrenchment
Close Combat
Flip “Artillery Request” marker to blue SR
Artillery Accuracy DR: 2, blue SR is accurate and lands in 2O9
Replace blue SR with red SR
END OF GAME TURN 3
German comments
It has become clear that the Russian avenues of advance are focused on both the east road entrance into Piepsk and the woods south of Hill 522. As the Russian squads begin to assemble here, it will be imperative that I take advantage of any key-hole shots that exist, and wear down his forces down before the assault. Even though his forces began the game dispersed, they are now beginning to cluster for the first of as many assaults as he can muster to enter the city. In hindsight, my long-range fire only netted 3 squads. He still outnumbers me 4 to 1, and a coordinated attack on his part could make things rough. Fire this turn was much better, drawing large MC’s on a number of squads and giving Wetzleberge his second KIA. On the second half of the turn, I brought Stites out of hiding to begin his stubborn defense of the eastern road entrance. He played his hiding game well and bought the defense some time. I may have been missing it all along, but I just realized that Kelso may have LOS along the northern slopes of Hill 621! I wonder how many fire opportunities were missed? Oh well, their initial fire was inaccurate, but I will certainly have him watch those slopes much closer from now on. The mortars have finally arrived in a good location to the south, I will adjust them beginning next turn (if Wetzelberge maintains contact) to bring some smoke on Mike’s boys in the woods.
Russian Comments
Russian units were not so fortunate in Turn 3. Yet another squad was KIAed, and 5 squads (all but one of the targets of German fire) failed their morale checks and broke after being subjected primarily to more withering long-range German MG fire. One of these unfortunate squads is essentially KIA since it is in a position too far away, and too exposed, for a leader to reach in order to attempt a rally. The good thing is that most of the Russian squads are now in position to begin the assault on the German defenders, beginning with the entrenched units in hex 3U8, and my leaders are now in position to catch up with the advancing squads without exposing themselves to fire while moving in the open. I had intended to begin an assault on 3U8 next turn, however, 3 squads that were going to be part of the assault broke under enemy fire and I may have to wait another turn (I am rapidly running out of turns!). The time constraints on this scenario will no doubt prove to be very important, but waiting another turn (or even 2) will allow Russian units to take up positions for a massive assault on the outer town buildings. The Germans will either maintain their positions, and risk coming under heavy Russian fire, or they will retreat further into town. I hope they retreat! If they do, the Russian squads will be able to advance further into town and to hold positions with better cover than just woods and wooden buildings, and maybe even gain control of a couple of the stone buildings. If they do not retreat, I can only hope that my fire is quickly effective and that I can manage to engage some Germans in close combat…if not, the assault will stall because I do not have enough leaders to rally squads fast enough to maintain it.
The best thing about Turn 3 was that the remaining HIP German squads revealed themselves when they fired at the Russian squad closest to town. The only Germans still HIP are the 8-0 leader and the radio. The fact that all the Germans capable of firing at Russian units have revealed themselves is very important. Russian units may now move “freely” and without the need for extra caution for fear of being caught moving in the open by a hidden German defender. The only thing to really worry about now is German artillery fire. This also means that most of the road around Hill 621 is open, and I will move the 4 Russian squads taking that route toward town as fast as possible. These squads should be able to make it to town in 3 turns, but with no leader accompanying them I have to be very careful about exposing them to any German fire. Hopefully, they will prove to be a distraction to the Germans at that time by moving into positions that might be seen as a danger to the two-story stone building.
It is no longer necessary to try to “clear” hexes that may hold HIP German defenders. The only remaining HIP units are the 8-0 leader and the radio, and I would guess that they are in a first-level hex of the large stone building. Based on the hexes where German spotting rounds landed, there are only a few possible locations for the 8-0 and the radio: 4U3, 4X10, 4CC6, 3J2, 3J4 (maybe—LOS to 3W7 is questionable), 3M5, 3N1, 3N1(2), 3N2, 3N2(2) and 3P2.
The additional German units in hex 3U8 were a huge surprise...I never expected that (and another KIA squad was the result). It will be a tough nut to crack, but the possibility to take out 3 German squads makes it worth it. I will be able to form a 9-squad fire group (assuming they all survive German fire), while at the same time threatening 3T3 with a possible assault. Hopefully, the feint against 3T3 and the squads taking the road around Hill 621 will both draw some of the German fire away from the squads attacking 3U8.
Neutral Comments
Good use of cover by the Russians to get into the forest gap between Hills 621-522 and the woodline north of town. The Russians could have made better use of scout squads entering the town to locate the German positions and not milling about behind Hill 522. Germans made good use of their artillery to force the Russians off Hill 621 and slow down their assault. The German MGs finally came alive and put some needed pressure on the Russians. I think Kevin revealed the 3U8 stack one turn too early for; 1) the psychological factor of unknown Germans slowing down the Russian advance; 2) there would have been more targets in the same area thus inflicting greater casualties. I guess Kev was being nice to Michael ☺. The last German cat is out of the bag (all but the 8-0 anyway) so it will be intersting to see how Michael reacts.
Russian Turn 4
Rally Phase
Russian:
2I9 447 (BR, DM): no longer DM
2I9 447 (BR): ---
4J4 447 (BR, DM): no longer DM
3X0 447 (BR, DM): no longer DM
3Y6 447 (BR, DM): no longer DM
German Radio Contact: DR: 6+2=8; radio contact maintained
Adjust red SR to hex 3V10
Prep Fire Phase (Russian)
Entrenchment attempt in 3X7: DR=11, NE
Entrenchment attempt in 3W9: DR=3, success. Place 447 below entrenchment.
Entrenchment attempt in 4M8: DR=7, NE
Movement Phase (Russian)
4C6 8-0: 4D5, 4E5, 4F4
4G1 447, LMG: 4H0, 3Y1
4H1 447: 4I1, 4J0
4J0 447: 3W1, 3V1
4K1 447: 4L0, 3U1
3Y1 447: 3X0, 3W1
3EE5 9-1: 3DD5, 3CC6, 3BB6, 3AA6, 3Z6, 3Y6
3X3 447: 3X4, 3X5
3X4 447: 3X5, 3X6
3W10 447: 3V10, 2L9
3Y10 447, LMG: 3X9, 3W9
3Y6 447, MMG: 3X6, 3X7
3X10 447: 2K10, 2L9
2I10 447: 2J10, 3W10
2I8 447: 2J7, 2K8, 2L8
2H7 8-0: 2H8, 2I9
2H6 447: 2H7, 2H8
2I7 447, LMG: 2H7, 2H8
2J6 447: 2I7, 2H7
2H1 447: 2I2, 2J2, 2K2, 2L1, 2M2, 2N1, 2O2, 2P1
2J3 447: 2J2, 2K2, 2L1, 2M2, 2N1, 2O2, 2P1
2N1 447: 2O2, 2P1, 2Q1, 2R1, 2S2, 2T2, 2U3, 2V3
2T3 447: 2T4, 2T5, 2U6
Defensive Fire Phase (German)
3N1(2): 8-1, 2x467, 2xMMG at 3W1 (12FP); DR 5+3=8, 1MC (both squads)
3N2(2): 9-2, HMG (fired by 467) at 2L9 (6FP, -1); DR 6+5=11(-1)=10, NE
3N2(2): 467 at 4J4 (2FP, +1); DR 2+1=3(+1)=4, 1MC
3U8: 9-1, 3x467, 2xLMG at 2K8 (16FP, -3); DR: 2+2=4(-3)=1, KIA
Russian Morale Checks:
3W1 447 (1MC) DR=9, BROKE (DM)
3W1(3V1) 447 (1MC) DR=6, NE
4J4 447 (BR) (1MC) DR=7(+1), KIA
Advancing Fire Phase (Russian)
Fire Group: 3U1 (447), 3V1 (447) at 3N1(2) (2FP, +3); DR=7(+3)=10, NE
Rout Phase
Russian:
3W1 447 (BR, DM): 3X0
German: None
Advance Phase (Russian)
4F4 8-0: 4F3 4M8 447: 4N7
2U6 447: 2U7 2V3 447: 2V4
2P1 2x447: 2Q1 3X0 447: 4K1
3Y1 447, LMG: 3X1 3V1 447: 3U2
3U1 447: 3T1 3X5 447: 3W5
3X6 447: 3W6 3X7 447: 3W7
3X7 447, MMG: 3W8 3Y6 9-1: ---
3W9 447, LMG: 3V8 3W9 447(E): 3V9
3W10 447: 3V10 2L9 447: 2M9
2L9 447: 2M10 2I9 8-0: ---
2H8 447: 2I8 2H8 447, LMG: 2I9
2H7 447: 2I7
Close Combat Phase
None
German Turn 4
Rally Phase
German Radio Contact: DR 6+5=11, radio contact broken; Remove red SR
Russian:
3X0 447 (BR, DM): no longer DM
3X0 447 (BR): ---
3Y6 447 (BR): DR=2(-1)=1, rally
2I9 447 (BR): DR=5, rally
2I9 447 (BR): DR=10, NE
Prep Fire Phase (German)
3U8: 9-1, 2x467, 2xLMG at 3W8 (12FP); DR 6+1=7, 1MC
penetration into 3V8 (8FP); DR=7, 1MC
3U8: 467 at 3V8 (8FP); DR 4+2=6, 1MC
3T3: 9-1, 467, LMG at 3W7 (6FP, -1); DR 2+2=4(-1)=3, KIA
3T3: 467, LMG at 3U2 (6FP, +1); DR 5+4=9(+1)=10, NE
3N2(2): 9-2, HMG (fired by 467) at 3V9 (6FP, -2); DR 5+2=7(-2)=5, 1MC
3N2(2): 467 at 3U2 (2FP); DR 5+4=9, NE
3N1(2): 8-1, 467, MMG at 3W6 (6FP, -1); DR 5+3=8(-1)=7, MC
3N1(2): 467, MMG at 3W5 (6FP); DR 2+1=3, KIA
Russian Morale Checks:
3W8 447 (1MC) DR=9, BROKE (DM)
3V8 447 (1MC) DR=5, NE
3V8 447 (1MC) DR=7, BROKE (DM)
3V9 447 (1MC) DR=5, NE
3W6 447 (MC) DR=3, NE
Movement Phase (German)
None
Defensive Fire (Russian)
Fire Group: 3T1 (447), 3U2 (447) at 3T3 (8FP, +4); DR=6(+4)=10, NE
3X1: 447, LMG at 3T3 (6FP, +4); DR=8(+4)=12, NE
3W6: 447 at 3T3 (4FP, +2); DR=7(+2)=9, NE
Fire Group: 2I7 (447), 2I8 (447) at 3U8 (4FP, +3); DR=6(+3)=9, NE
Fire Group: 3V9 (447), 3V10 (447), 2M10 (447), 2M9 (447) at 3U8 (16FP, +3);
DR=4(+3)=7, 2MC
German Morale Checks:
3U8 9-1 (2MC) DR 6+2=8, BROKE (DM)
467-A (2MC) DR 2+1=3, NE 467-A (MC) DR 2+2=4, NE
467-B (2MC) DR 5+1=6, BROKE (DM) 467-B (MC) DR 6+5=11, KIA
467-C (2MC) DR 4+1=5, NE 467-C (MC) DR 5+2=7, NE
Advancing Fire (German)
None
Rout Phase
German:
3U8 9-1 (BR, DM): 3T7
Russian:
3W8 447 (BR, DM): drops MMG, 3X8
3V8 447 (BR, DM): drops LMG, 3W9 (entrenched)
Advance Phase (German)
3U8 467: 3T7
3N1(2) 2x467, 2xMMG 3N2(2)
3N2(2) 467, HMG 3N1(2)
Close Combat
None
END OF GAME TURN 4
German Comments
Russian Comments
The assault on the German units defending the town began in earnest in Turn 4. Although 2 more squads were KIAed, and 3 squads broke, many of the Russian squads were in position to attack the entrenched units in hex 3U8 and the units in 3T3. Also, 2 of the 3 Russian leaders caught up to the advancing squads and began rallying the troops. The last leader, if he survives German defensive fire next turn, will also have caught up to his units and be in a position to rally other broken squads on the right flank. I have a feeling that Kev will try to prevent the last leader from reaching the troops on the right flank by concentrating his fire on the leader as he moves into LOS of the two-story stone building. A fire group consisting of the second-story German units and directed at the leader on the right flank could easily result in a KIA. Due to this possibility and the fact that the leader is much more important than even several squads (at this point in time), I have moved several units into LOS of the units on the second floor of the large stone building, including some that are moving in the open. Hopefully, this will draw at least some of the German MG fire away from the leader approaching the right flank.
I decided not to wait another turn before beginning the attack…and I was very fortunate in the attack results. The Germans maintained their positions, but were rather unlucky with their fire against the attacking Russian squads and with the loss of radio contact (preventing a fire mission directed against my attacking squads). Additionally, the attacking Russian squads passed enough morale checks to maintain a 4-squad fire group (out of the initial 9-squad fire group that had advanced on the German position). I managed to crack the German defensive position in hex 3U8, breaking the leader and KIAing one of the squads. At this point, the attack seems to be going very well for the Russians. My squads are on the verge of gaining a defensible foothold in the town (in addition to the rather weak position on the right flank), which will give many of my other units a safe approach into the center of town. Even so, the time constraints are becoming increasingly important. I still don’t know if the Russians have enough time (and enough squads) to gain control of all the small stone buildings and successfully attack the large stone building, which will undoubtedly be the fall-back position for all defending German units.
The German 8-0 leader and the radio remain hidden, but the location of spotting rounds during Turn 4 eliminated all possible locations except for the second floor of the large stone building. I expect the 8-0 leader to reveal himself (and the radio) by moving out of danger as my squads get closer to his location and in position to direct significant levels of infantry fire against the second floor of the large stone building.
The squads moving around Hill 621 continue to advance on the town from the left flank and at least some of them should be make it to town in 2 to 3 turns. Any surviving unbroken squads will be in a position to harass the German units in the large stone building at the same time that my other squads begin their final assault on the stone buildings in the town. They will prove to be very valuable even if they only manage to attract some German MG fire and cut off possible routes of retreat for the Germans not in the large stone building.
Neutral Comments
The Russians were off with a bang! I think the Russians should have waited a turn to amass their forces and combine for a simultaneous attack from the south (road 2O10 forces), the north (3U1 woods/buildings), and the east with the forces from the 2I row to overwhelm the German MG stacks with multiple targets thus dilute their concentrated killing power. Time is against the Russians and their charge was a bold move but costly?
Russian Turn 5
Rally Phase
Russian:
3X0 447 (BR): ---
3X0 447 (BR): ---
2I9 447 (BR): DR=6, rally
3W9 447 (BR, DM): no longer DM
3X8 447 (BR, DM): no longer DM
German:
3T7 9-1 (BK, DM): DR: 5+1=6, NE; no longer DM
German Radio Contact: DR: 4+1=5; radio contact established
Place Artillery Request in 2O9
Prep Fire Phase (Russian)
Fire Group: 3T1 (447), 3U2 (447) at 3T3 (8FP, +4); DR=2(+4)=6, 1MC
3V10: 447 at 3T7 (4FP, +1); DR=11(+1)=12, NE (place DM marker)
2M9: 447 at 3U8 (4FP, +3); DR=3(+3)=6, MC
German Morale Checks:
3T3 9-1 (1MC) DR 5+3=8, NE
3T3 467 (1MC) DR 2+1=3, NE
3T3 467 (1MC) DR 5+5=10, BROKE (DM)
3U8 467 (MC) DR 3+1=4, NE
Movement Phase (Russian)
4N7 447: 4N6, 4N5, 4N4
4K1 447: 4L0, 3U1
4F3 8-0: 4G3, 4G2, 4H1, 4I1
3X1 447, LMG: 3W1, 3V1
3W6 447: 3X5, 3X4, 3W4
3Y6 9-1: 3Y7, 3Y8, 3X8
3Y6 447: 3Y5, 3X4
3V9 447: 3V8 (picks up LMG)
2M10 447: 2N10, 3T9
2I9 8-0, 2x447, LMG: 2I10, 3Y10, 3Y9, 3X8
2I9 447: 2J9, 2K10
2I8 447: 2I9
2I7 447: 2J7, 2K8, 2L8
2U7 447: 2U8, 2T8
2V4 447: 2V5, 2V6, 2V7
2Q1 447: 2R1, 2S2, 2T2, 2U3, 2V3, 2V4, 2V5
2Q1 447: 2R1, 2S2, 2T2, 2T3
Defensive Fire Phase (German)
3T7: 467 at 3T9 (4FP, +1); DR 5+3=8(+1)=9, NE
3U8: 467, 2xLMG at 3V8 (16FP, -2); DR 5+3=8(-2)=6, 2MC
3N1(2): 467 at 4N4 (2FP, -2); DR 6+2=8(-2)=6, NE
3N1(2): 8-1, HMG (fired by 467) at 3T9 (6FP); DR 6+1=7, MC
3T3: 9-1, 467, 2xLMG at 3U2 (8FP); DR 3+2=5, 2MC
3N2(2): 9-2, 467, MMG at 3T9 (6FP, -1); DR 5+2=7(-1)=6, 1MC
3N2(2): 467, MMG at 3V10 (6FP, +1); DR 4+3=7(+1)=8, NE
Russian Morale Checks:
3V8 447 (2MC) DR=5, NE
3T9 447 (MC) DR=7, NE
3U2 447 (2MC) DR=5, NE
3T9 447 (1MC) DR=6, NE
Advancing Fire Phase (Russian)
Fire Group: 3U1 (447), 3V1 (447) at 3N1(2) (2FP, +3); DR=7(+3)=10, NE
3W4: 447 at 3T3 (2FP, +2); DR=5(+2)=7, NE
3V8: 447, LMG at 3U8 (6FP, +3); DR=8(+3)=11, NE
3T9: 447 at 3T7 (2FP, +1); DR=2(+1)=3, 1MC
2L8: 447 at 3T7 (1FP, +1); DR=6(+1)=7, NE
German Morale Checks:
3T7 8-0 (was HIP, is now revealed) (1MC) DR 4+2=6, NE
3T7 9-1 (BK, DM) (1MC) DR 4+3=7, NE
3T7 467 (1MC) DR 4+3=7, BROKE (DM)
Rout Phase
Russian: None
German:
3T7 9-1 (BK, DM): 3S8
3T7 467 (BK, DM): 3S8
3U8 467 (voluntary BK): drops 2x LMG, 3T7
Advance Phase (Russian)
4N4 447: 4N3
4I1 8-0: 3X0
3T1 447: 3T2
3U2 447: 3U3
3U1 447: 3T1
3V1 447: 3U2
3V1 LMG: ---
3W4 447: 3V3
3X4 447: 3W4
3T9 447: 3S9
3V8 447: 3U8 (E), captures 2xLMG
3V8 LMG: ---
3X8 8-0: ---
3X8 9-1, 447, LMG: 3W9 (E)
3X8 447: 3W8
3V10 447: 3U10
2K10 447: 3V10
2M9 447: 2L9
2L8 447: 2M9
2I9 447: 2I10
2T8 447: 2T9
2V7 447: 2U8
2V5 447: 2V6
2T3 447: 2T4
Close Combat Phase
Russian:
3V8 (E) 447: destroys one captured LMG
German: ?
German Turn 5
Rally Phase
German:
?
German Radio Contact: ?
Russian:
3X0 447 (BR): DR=7, rally
3X0 447 (BR): DR=5, rally
3X8 447 (BR): DR=7, rally
3W9 447 (BR): DR=4(-1)=3, rally
Told you my dice seem to be loaded…I will have to use these dice for SFB too!
Rally Phase
Russian:
German:
Prep Fire Phase (German)
Movement Phase (German)
Defensive Fire (Russian)
Advancing Fire (German)
Rout Phase
Russian: ?
German: ?
Advance Phase (German)
Close Combat
END OF GAME TURN 5
Russian Turn 6
Rally Phase
Russian:
German:
Prep Fire Phase (Russian)
Movement Phase (Russian)
Defensive Fire Phase (German)
Advancing Fire Phase (Russian)
Rout Phase
Advance Phase (Russian)
Close Combat Phase
German Turn 6
Rally Phase
Russian:
German:
Prep Fire Phase (German)
Movement Phase (German)
Defensive Fire (Russian)
Advancing Fire (German)
Rout Phase
Russian: ?
German: ?
Advance Phase (German)
Close Combat
END OF GAME TURN 6
Russian Turn 7
Rally Phase
Russian:
German:
Prep Fire Phase (Russian)
Movement Phase (Russian)
Defensive Fire Phase (German)
Advancing Fire Phase (Russian)
Rout Phase
Advance Phase (Russian)
Close Combat Phase
German Turn 7
Rally Phase
Russian:
German:
Prep Fire Phase (German)
Movement Phase (German)
Defensive Fire (Russian)
Advancing Fire (German)
Rout Phase
Russian: ?
German: ?
Advance Phase (German)
Close Combat
END OF GAME TURN 7
Russian Turn 8
Rally Phase
Russian:
German:
Prep Fire Phase (Russian)
Movement Phase (Russian)
Defensive Fire Phase (German)
Advancing Fire Phase (Russian)
Rout Phase
Advance Phase (Russian)
Close Combat Phase
German Turn 8
Rally Phase
Russian:
German:
Prep Fire Phase (German)
Movement Phase (German)
Defensive Fire (Russian)
Advancing Fire (German)
Rout Phase
Russian: ?
German: ?
Advance Phase (German)
Close Combat
END OF GAME TURN 8
Russian Turn 9
Rally Phase
Russian:
German:
Prep Fire Phase (Russian)
Movement Phase (Russian)
Defensive Fire Phase (German)
Advancing Fire Phase (Russian)
Rout Phase
Advance Phase (Russian)
Close Combat Phase
German Turn 9
Rally Phase
Russian:
German:
Prep Fire Phase (German)
Movement Phase (German)
Defensive Fire (Russian)
Advancing Fire (German)
Rout Phase
Russian: ?
German: ?
Advance Phase (German)
Close Combat
END OF GAME TURN 9
Russian Turn 10
Rally Phase
Russian:
German:
Prep Fire Phase (Russian)
Movement Phase (Russian)
Defensive Fire Phase (German)
Advancing Fire Phase (Russian)
Rout Phase
Advance Phase (Russian)
Close Combat Phase
German Turn 10
Rally Phase
Russian:
German:
Prep Fire Phase (German)
Movement Phase (German)
Defensive Fire (Russian)
Advancing Fire (German)
Rout Phase
Russian: ?
German: ?
Advance Phase (German)
Close Combat
END OF GAME TURN 10
APPENDIX A
QUESTION #1
Mike,
I have completed my HIP for all 8 German squads for scenario 4; I am
ready for your entry. Do some research for me and see if you can answer the
following: HIP units must start in either buildings or woods. It is my intent
to begin at least a few in some woods, and have the intention of attempting
to entrench them on my turn. If these units remain out of LOS, would the
entrench attempt cause them to loose their HIP? I found nothing under
concealment or HIP that says they would. Without revealing the location of
the entrenchment (providing success), I would reveal the rolls and you would
at least know if I was successful or not, and how many you might expect to
find on the board. Let me know what you think.
Kev,
Sorry for the long delay in getting Scenario 4 going! In preparation for
finalizing my initial deployment I re-read the (new) rules for this scenario.
Rule 42.2 makes no reference to LOS restrictions on losing HIP for any of the
reasons (including attempting to entrench), and it does not seem to be
addressed in any of the Q&A. One of the Q&A does refer to the fact that
entrenchments and wire may begin the game HIP, but that is as far as it goes.
I hate to do this at such a late date, but based on the above I have to reverse
my earlier position with regard to HIP units being able to attempt entrenchment
without losing their HIP status. It seems that any action by an HIP unit makes
them lose their HIP status regardless of LOS to/from enemy units on the board.
Let me know what you think (since you may want to modify your initial HIP
placement).
Mike,
Nowhere in the rules that I am aware of does it say that the act of
attempting to entrench will compromise HIP, to include the Q+A and Rule
Conventions. For the sake of getting to scenario started however, I will
temporarily compromise. I will e-mail Pete and Bill and get their opinion. I
would note that we can only interpret the rules as we read them and cannot
make suppositions. The units in question are not in your line of sight
anytime during turn 1, regardless of your move. Even if they were in your
line of sight, the rules still fail to mention entrenching would violate HIP,
although I think I would be more likely to consider it.
Regardless of the outcome, I am still prepared for your entry.
Kevin and Michael,
RE: HIP entrenchment rules. HIP is an extension of the concealment rules
(rule 42). My 4th edition SL rules state any concealed or HIP unit which is
adjacent to an enemy unit, moves, fires, makes smoke or **attempts to
entrench** (Rules 25.4, 42.2) losses its concealment or HIP status. The
rules state the act of entrenching (all that digging going on), regardless
of enemy LOS, removes the HIP/concealment status. This is my take on it
unless you are playing with more current rules (?).
QUESTION #2
Kev,
First of all, be safe next week! Hope to catch you before you leave.
I had a few questions/comments about the Defensive Fire orders you sent (yes, I
plotted them already):
1. Am I correct in assuming that all of the units firing are in the second
level of the hexes in question?
2. Who is firing the second MMG from 3N1(2) at 4C4?
3. The 9-2 leader in 3N2(2) can only fire the HMG at half strength (3FP per
Rule 17.3), therefore it results in a 1MC instead of a KIA.
4. Is there more defensive fire on the way (awaiting the results from
this "batch"), or is the ball back in my court for Advancing Fire (not) and
Advance movement?
> Mike,
>
> I think I can answer your questions for you if Kevin has not already
> responded.
>
> 1) Yes they are on the second floor (place 2nd floor counter below).
>
> 2) This is not a second MMG but the MG penetration from the attack on hex
> 4H3 (see penetration rules - note Kevin had to use the same die role without
> the leader's modifier [leaders can only add their modifier to one attack
> hex] from the 4H3 attack).
>
> 3) Rule 17.1 states a squad can fire one MMG/HMG or two LMGs and still
> retain its own firepower. This rule allows a squad to fire his MG at one
> hex and his firepower at a completely different hex (a squad with 2 LMGs
> could fire at up to three separate hexes!). So the squad in 3N2 fired the
> HMG at 4D2 and used his own firepower (minus the leadership modifier similar
> to question above) at hex 4H3 - with Kev's lucky "boxcars" killing the 4H3
> squad (remove squad).
>
> 4) Kevin is done with DF. I take it you are not making any advancing fire.
> There is no Route Phase so its your Advance Phase. I have some more info
> from Kevin to play before the turn ends.
>
>You may want to re-read the blocking terrain rules to
> "see" were Kev's (known) MGs can.
>
> Vin
Thanks for the info/clarification!
With regard to #2, I did not know you could have MG penetration when firing
from an elevated position at a lower position (just doesn't make sense to me).
About #3, so he applied the leadership modifier to the HMG fire but the squad
fired it...I get it. And the squad KIAed my other squad with his B.S. lucky
roll! Both KIA squads removed.
Mike,
1)Yes, those units sighted are on the second level of the building
2)Each squad from 3N2 is firing a MMG. The first (along with his inherent and the second's inherent for 8FP) with the leader direction at 4H3, the second (firing just the second MMG for 2FP) as a different fire group at 4C4.
3)The 9-2 is directing the squad's firing of the HMG at 4D2, but the squad itself is firing its inherent firepower at 4H3.
By the way, my B.S. die rolls were not all that good; two 9's, a 7, and a 4. But any die rolls are good when you have -2, -3, and -4 die roll modifiers.
I may have access online depending on where we stay, I will try to answer any other questions either of you may have.
Kev
Thanks for the clarification!
It won't matter for my advance, but Vinny's email indicated that the second MMG
target hex was the result of penetrating fire and not fire by a second MMG (I
did not know you could have penetrating MG fire when firing at a lower level
target hex from an elevated position). Let me know if there is a second MMG in
3N1(2) or not.
You're right your "B.S." die rolls were not that good, however, I would have
preferred mostly 7s (with a couple of 12s thrown in to get your MGs out of
play).
Vin,
I do have the same thought as MIke in that I did not believe that
penetrating fire can come from an elevated hex to a lower one. Regardless of
this, my fire was legitimate. We do need a clarification on penetration from
a higher level though.
Kev
You both were correct (looks like the moderator has to re-read the rules as well!).
I wasn't sure if you fired one or two MGs so 1) I wasn't sure what you did and thought maybe (incorrectly) you tried an [illegal] penetration shot 2) I didn't want to give away you had a second MGin the hex if you didn't fire it!
I knew Mike would have a question with this and I figured it would be worked
out once you returned. I just didn't want to give away your MG. No harm
done.
QUESTION #3
Entrenchment attempt in 3U8:
9-1, 467 (needs a ‘6’), DR 1+1=2(!), success. Place entrenchment in 3U8
Question: 1) Without the need for further entrenchment attempts, can the two additional squads in 3U8 remain HIP?
2) Can HIP support weapons remain hidden if: a) the squads remain HIP; b) the squads do not remain HIP? Remember, they were not moved or fired. It could be of tactical importance for them to remain HIP until fired or moved.
If the additional squads and support weapons cannot remain HIP, then add the following line after “Place entrenchment in 3U8” above: Units now seen in 3U8: 9-1, 3x467, 2xLMG, all entrenced.
Kev,
Rule 54.2 states once a squad successfully entrenches, "an entrenchment
counter is placed over all units in the squad hex." I interpret this rule
to mean the remaining HIP units in the hex (squads, leader, and support
weapons) go below the entrenchment counter and retain their HIP. These
units did not move or fire to lose HIP status while rule 54.2 states "all
units in the squad hex" can be moved below the entrenchment counter. I
would also clarify the 9-1 leader, although he directed the entrenchment
attempt, did not actually move or fire to void his HIP status (although Mike
would see the -1 in the attempt and know there was a leader in the squad's
hex). Only the entrenching squad lost its HIP. If it required additional
squads to achieve entrenchment, those entrenching squads would have lost
their HIP but the support weapons and leader would still retain their HIP
status. I consider the support weapons their own units for HIP and would
not lose their HIP status until they were moved or fired.
In a nutshell - only the squad was revealed and all the other units remain
HIPed. Let me know which units you are placing above and/or below the
entrenchment counter. From this point on, HIP units and support weapons
"outside" the entrenchment will lose their HIP status if they move below the
entrenchment counter later in the game turn (rule 54.4 states moving below
the entrenchment counter requires one point of movement - thus it is
"movement").
I will forward your turn info once I receive your hex 3U8 clarification.
Vinny,
For now, I will reveal only the leader and successful squad entrenching.
All others will remain HIP in the hex above the entrenchment. You can edit my
turn accordingly and send Mike a copy. Thanks.
Kev
QUESTION #4
Based on the Kev's lethal fire group in hex 3U8, I decided to research whether
or not the units both above and below an entrenchment (and forming a fire
group) could receive a leadership modifier (which resulted in my squad being
KIAed). I reviewed the rules, as well as the Q&A/Errata that I have, and
(unfortunately) found nothing to the contrary, so the basic rules concerning
leadership modifiers and same-hex fire groups seem to apply (and yet another
Russian squad is toast before engaging the enemy).