H8DUtility 3

Les Bird

Joseph Travis
--
You received this message because you are subscribed to the Google Groups "SEBHC" group.
To unsubscribe from this group and stop receiving emails from it, send an email to sebhc+un...@googlegroups.com.
To view this discussion on the web visit https://groups.google.com/d/msgid/sebhc/de3aba8d-bd28-4cf3-9ac3-87ecc805c346n%40googlegroups.com.
Les Bird
Joseph Travis
To view this discussion on the web visit https://groups.google.com/d/msgid/sebhc/79d75c2c-785e-4bf3-a827-d44fc51c89can%40googlegroups.com.

Glenn Roberts
I have been unable to get this to work, but more disturbingly I can no longer get the previous version to work. This was all working fine at VCF East. I’ve even tried different H8 setups and two different PC configurations. This may have something to do with the H89LDR file differences (recall our discussion of getting this to work with the new “XH” feature in the Rev. 4 board ROM)….
Attempting to retrace my steps until I get a solid baseline that works…
I swear every time I try to do *anything* that involves floppy disks it ends up taking hours or days!... but I’m determined to get this working again, then I’ll try the new version!...
--
Les Bird
glenn.f...@gmail.com
First of all. Everything works great on my original 8080 system. It has the original h-8-4 board for serial I/O. I am so far only testing the H17 portion. Once I get that working I’ll move on to the ’37.
I can’t get it to work on Rusty or Big Blue. Rusty has 2.6 Z80 CPU and “Les Bird” H-8-4 w/ 16550 UARTs. Big Blue has Z80 rev4 cpu with the 16C550 daughterboard. Both have the new H37/H17 “piggback” boards. The H17 disk works fine on both systems and passes TEST17 with flying colors.
Using the 8080 setup I keyed in the manual bootstrap program and was then able to save a bootable client. Also writing disks went fine.
When I boot from the saved client disk on Rusty and run H8DUtility3 on the PC I get “CLIENT IS READY”. So far so good…
When I try to send an image I get the messages:
DRIVE SY0 SELECTED ON CLIENT
DISK VOLUME SET TO 0
But nothing happens.
Using the front panel on the H8 I see that the code is simply sitting in a loop waiting for Data Ready:
043.362 333 345 IN 345 ; Line status register
043.364 037 RAR ; rotate through carry
043.365 322 362 043 JNC 043.362 ; loop…
It never gets data.
Also I am not able to do the “SEND LDR” thing, presumably for a similar reason. I had to save the loader using my old 8080 configuration.
I would wonder if there’s something about the 16550 UART that causes this discrepancy, except I did have a working version of this on Big Blue at VCF east… something I now cannot seem to reproduce ☹
For now I’m stumped…
- Glenn
To view this discussion on the web visit https://groups.google.com/d/msgid/sebhc/af16bf82-9c31-4f4a-9013-802b1e469af0n%40googlegroups.com.
Joseph Travis
To view this discussion on the web visit https://groups.google.com/d/msgid/sebhc/009801d7d05a%246242d4a0%2426c87de0%24%40gmail.com.
Glenn Roberts
On Nov 2, 2021, at 11:33 PM, Joseph Travis <jtravi...@gmail.com> wrote:
To view this discussion on the web visit https://groups.google.com/d/msgid/sebhc/CAGQDgBA5DQGRy-Jvg2Pbiny3xo2OUFvcRgS%2BNCrpNAx3uZr_Jg%40mail.gmail.com.
Les Bird
Joseph Travis
To view this discussion on the web visit https://groups.google.com/d/msgid/sebhc/94B5964F-AAF3-4804-9A80-156FA68D18A7%40gmail.com.
glenn.f...@gmail.com
I’ll attempt to be more thorough in my notes. Here’s where I’m at:
Two systems: Rusty and let’s call it “Trusty” (or maybe “Dusty”? – he’s been in the closet for a while!). Trusty is my very original H8 that I built in 1981. 8080 CPU, 3x 16K SRAM; H17 controller board; H-8-4 with 8250 UARTs; single 100K Siemens disk drive. Trusty still works great!
Rusty contains the Z80 Rev 2.6 board; “piggyback” H17/37/67 I/O board combo built last spring; “Les Bird” H-8-4 clone board with 16550 UARTs. It also has CPU speed control board and real time clock board. All tests are at 2Mhz CPU speed.
I tried the following on Trusty (spoiler alert: everything below works fine):
- Key in the original mini client software via the front panel
- Set PC to 043.000 and hit “go”
- Run H8DUtility3 on the PC
- Select DISK IMAGER option
- Select CLIENT STATUS. No response (expected)
- Select SEND LDR. Disk activity on H17. Message asks if I want to SAVE or CANCEL. Hit SAVE
- Disk activity as loader is save to H17
- Select CLIENT STATUS again. Receive “CLIENT IS READY”
- Quit H8DUtility3
- Boot Trusty from just created disk
- Run H8DUtility3 again.
- Select DISK IMAGER and then CLIENT STATUS. Receive “CLIENT IS READY”
- Select SEND IMAGE
- Select an H8D image that has Les’ H8DIMGR2 on it…
- Hit “DONE”. Disk image writing process begins on H8 (NOTE to Les: should you warn the user? Older version issued a warning to allow user to swap out disk).
- Imaging process proceeds as expected and completes after writing tracks 0..39
- Quit H8DUtilit3
- Boot Trusty from just-created disk
- Run H8DIMGR2
- On the PC run H8DUtility3 again
- Select DISK IMAGER; CLIENT STATUS; response is “CLIENT IS READY”
- Am able to send disk image just as before
- Everything works fine!
Now for Rusty:
- Key in the original mini client software via the front panel
- Set PC to 043.000 and hit “go”
- Run H8DUtility3 on the PC
- Select DISK IMAGER option
- Select CLIENT STATUS. No response (expected)
- Select SEND LDR. Disk activity on H17. Message asks if I want to SAVE or CANCEL. Hit SAVE
- Disk activity as loader is save to H17
- Disk LED stays solid; drove motor stays on; PC display shows execution at around 034.001 and looping (somewhere in H17 ROM code) H8D Utility says “LOADER SAVED TO DISK” but clearly something did not complete properly on the H8 side…
- Select CLIENT STATUS again. No Response.
- Abort; quit H8DUtility 3 and reset H8…
- Boot Rusty from Z67IDE+ (HDOS) (can’t boot from floppy because the image was damaged by previous step). Run H8DIMGR2. LED display goes blank (expected); console says “CLIENT READY” (question: is it OK to run this when SY0: is actually the Z67IDE+ or do I have to boot from the floppy? Previously I tried booting from the floppy and had the same results as shown below)
- Run H8DUtility 3; select DISK IMAGER; CLIENT STATUS; response is “CLIENT IS READY”
- Select SEND IMAGE and select the same disk image as before (the one with H8DIMGR2 on it).
- Select “DONE” and see message on the H8 console: “USING DRIVE SY0” and “SETTING DISK TYPE 0 – 1S40T”
- On the H8Utilty3 message window I see “DRIVE SY0 SELECTED ON CLIENT” “DISK TYPE 0 SET ON CLIENT” “DISK VOLUME SET TO 0” - so far so good…
- Then nothing happens no activity on either end. Cant’ tell what’s happening on Rusty because the program has turned off the LEDs.
- Trying another approach: booted Rusty using the client software disk previously created with the “SAVE” operation on Trusty
- Run H8DUtility3. Client status says “CLIENT IS READY”
- Attempt to send disk image. Get message “DRIVE SY0 SELECTED ON CLIENT” AND “DISK VOLUM SET TO 0”.. then no activity
- Pc display on H8 indicates looping activity at 043.362 (waiting for serial data as described in my previous email.)
- Glenn
- Boot Rfrom just created disk
- Run H8DUtility3 again.
- Select DISK IMAGER and then CLIENT STATUS. Receive “CLIENT IS READY”
- Select SEND IMAGE
- Select an H8D image that has Les’ H8DIMGR2 on it…
- Hit “DONE”. Disk image writing process begins on H8 (NOTE to Les: should you warn the user? Older version issued a warning to allow user to swap out disk).
- Imaging process proceeds as expected and completes after writing tracks 0..39
- Quit H8DUtilit3
- Boot Trusty from just-created disk
- Run H8DIMGR2
- On the PC run H8DUtility3 again
- Select DISK IMAGER; CLIENT STATUS; response is “CLIENT IS READY”
- Am able to send disk image just as before
- Everything works fine!
To view this discussion on the web visit https://groups.google.com/d/msgid/sebhc/33d90faa-83ea-49ab-83c4-9c024d2328b3n%40googlegroups.com.
Les Bird

Douglas Miller
That's a good point... If the ROM "2mS" interrupt handler is taking too much time, could that cause overrun? Seems like this program must disable normal front-panel updates, and otherwise minimize the interrupt handler work. H17 code requires that the 2mS tick be counting, but there might also be a "user handler".
To view this discussion on the web visit https://groups.google.com/d/msgid/sebhc/6a9bae23-e947-49fa-9182-b1f5feebb9den%40googlegroups.com.
Glenn Roberts
On Nov 3, 2021, at 12:35 PM, Douglas Miller <durga...@gmail.com> wrote:
To view this discussion on the web visit https://groups.google.com/d/msgid/sebhc/9685f716-c2ed-8016-e565-8bcdf14a1143%40gmail.com.
Glenn Roberts
It was déjà vu (all over again 😊 ).
8 years ago I was struggling with a problem when using the H8D utility on my (then) Z80 machine (this was with the HA8-6 standard Heath Z80 CPU at 2Mhz). Looking at the code I saw that the I/O was not interrupt-driven, it simply did task-time reading from the serial port and storing into RAM. Should an interrupt take any significant time during that transfer characters would be dropped. The conversation is here:
https://groups.google.com/g/sebhc/c/EDdw031FNMI/m/3DHce3SpQXwJ
scroll down to my conversation at the bottom dated “Aug 10, 2013, 7:05:43 AM” which gives a complete description.
I noted that the BC register was used to keep track of the incoming characters and used the front panel to monitor BC. If all works correctly it decrements all the way down to zero and then writes out the data to disk. What I observed was that it decremented down to a small number and just stopped. Bytes had been lost due to interrupt service issues!.
My solution at the time was to rewrite the software to disable the front panel update. that was enough to get things to work. I saved that client on a bootable disk and have always used that disk. I believe this is what I used at VCF East and it worked fine.
So the question was: could this be what’s happening now?
So I set up a system with all “standard” Heath gear (except for the RAM where I used norberto’s more modern 64K card). I used a standard H17 and H8-4 serial card and standard 8080 CPU (XCON8 ROM). I set the front panel to monitor the BC register and started the client program. I ran H8DUtility3 on the PC and sure enough everything worked fine. As expected the BC counter would count down to zero and then a disk write would happen (one track) and then the cycle would repeat.
Then I changed out the 8080 CPU for the Z80 (again, standard Heath HA8-6 CPU with PAM37 ROM). Again, I set the front panel to monitor the BC register and booted the client software from disk and ran H8DUtility3 on the PC. It showed “client ready” but when I initiated a transfer the BC counter counted down but stopped at 011Q. somewhere during the transfer 9 bytes had been dropped! The program will wait forever for those 9 bytes….
So you might ask, why not use that version of the client I used at VCF East? - the disk will no longer boot. I should be able to recreate it but will have to dig through 8 years of cobwebs in my brain to remember how 😊
So Douglas was on the right track. Characters are being dropped due to interrupt processing and the very simple mechanism being used to transfer data. Apparently on any Z80-based CPU (at least those with the PAM37 ROM) the interrupt service routines can sometimes take long enough to cause a character to be missed.
Les: what configuration are you using to test this? perhaps I can reproduce? Or are you using an emulator?
To view this discussion on the web visit https://groups.google.com/d/msgid/sebhc/6a9bae23-e947-49fa-9182-b1f5feebb9den%40googlegroups.com.
Les Bird
Glenn Roberts
Interesting… tx.
But see the note I just sent for more info 😊…
To view this discussion on the web visit https://groups.google.com/d/msgid/sebhc/a8565324-4d96-4c6e-ac14-a9f4c8eda064n%40googlegroups.com.
Les Bird
Les Bird
Glenn Roberts
Well I guess I’m back to stumped. We have very similar configurations – my Rev 2.6 CPU board should be functionally equivalent to yours. I note that with jumpers It’s possible to run your board at 1 Mhz (if you have the ECS-300CX chip) – you sure you’re running it at 2Mhz and not 1? At 1Mhz I believe everything would work.
So far I’m unable to reproduce your results.
I will note that in some sense it’s “cheating” to run H8DIMGR2 because part of the purpose of this configuration is to bootstrap a system from nothing. That means entering the small program from the front panel and downloading either the H8DIMGR disk or the extended client boot disk. Are you able to do that? that “bootstrap” program is where I’ve definitely seen dropped characters with the Z80 processors (at 2Mhz).
I actually have the ECS-300CX chip on my board so theoretically could run the CPU at 1Mhz – except I can’t figure out how to set the jumpers (and the documentation isn’t very clear). Can you explain the “A+A”, “A+B” etc notations on the board? how would I set the jumpers on the CPU board for 1Mhz? … or for 2, 4 , or 8?
To view this discussion on the web visit https://groups.google.com/d/msgid/sebhc/58746076-8590-493b-9ec5-251f2630b858n%40googlegroups.com.
Les Bird
Glenn Roberts
Thanks les.
So I’m still stumped. I’ll step back but perhaps others can try it out. I may try the H37 capability, which is really the nice new add.
If it’s just me then that’s my problem but I’m concerned that others will run into problems like I did…
If I get an epiphany perhaps I’ll revisit the H17 part.
To view this discussion on the web visit https://groups.google.com/d/msgid/sebhc/41eb8f7e-ee7b-4279-98ad-831bb94585d6n%40googlegroups.com.
Les Bird
glenn.f...@gmail.com
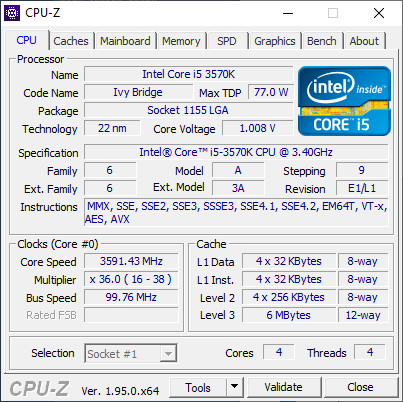
So I am not able to reproduce this result. When I run H8DIMGR2 I get “CLIENT READY” and also on the H8Utility3 side I get “CLIENT IS READY” but the transfer does not complete. it starts since I see the messages “USING DRIVE SY0” and “SETTING DISK TYPE 0 – 1S40T” on the H8 console, but there is never any disk activity. I am using a Windows 10 PC with a USB serial port adapter. System spec’s:
Using RTM/0 on the H8 keypad I interrupted the (hung) code to see that the BC register (counts down incoming bytes) is set to 000 010 (should be 0) indicating 8 dropped bytes during transmission… the code will wait forever for those remaining 8 bytes ! 😊 I also repeated this but this time hit RTM/0 and then GO just after H8DIMGR2 starts. This has the effect of re-enabling the front panel display so I can monitor the BC pair in real time. With FP refresh running more characters were lost (as expected due to the interrupt load of servicing the panel refresh): the final value on BC when it hung was 000 013…
All I can think of to suggest is try running the H8DUtility3 software on a Windows box to see if you get the same results.
Incidentally I was able to restore my old boot disk with the client software. This allows me to once again use H8DUtility rev 2.2. this version does not work with H8DUtility3. But at least I can create disk images again! This is the version I demo’ed at VCF.
To restore it I had to drag out a 10+ year old Dell laptop running MS DOS. That’s where I made the changes which included mod’s to Dwight’s original (FORTH) code to get the download to work (one time use)! Fortunately I documented all this back in ’13!
To view this discussion on the web visit https://groups.google.com/d/msgid/sebhc/25347ee7-c1eb-42fc-acb8-c120df634ecdn%40googlegroups.com.
Les Bird
Les Bird
Glenn Roberts
On Nov 4, 2021, at 8:59 PM, Les Bird <lesb...@gmail.com> wrote:
Glenn,
To view this discussion on the web visit https://groups.google.com/d/msgid/sebhc/13ec88ba-be23-4340-aaeb-223c4dd023bdn%40googlegroups.com.
Glenn Roberts
On Nov 4, 2021, at 8:59 PM, Les Bird <lesb...@gmail.com> wrote:
Glenn,
To view this discussion on the web visit https://groups.google.com/d/msgid/sebhc/13ec88ba-be23-4340-aaeb-223c4dd023bdn%40googlegroups.com.
Glenn Roberts
Les Bird
glenn.f...@gmail.com
So here’s what I’ve found so far. For the purposes of this explanation I will refer to the 42-byte bootstrap program (that you enter from the front panel as the “mini server” and then when the additional code is downloaded and appended (H89LDR3.BIN) as the “full server” (Note while it’s tempting to call these programs clients the client is actually on the PC end – the server running on the H8 provides the response to the various 1-byte commands from the PC client, e.g.: W, R, S, V, C, I and T).
Configuration (Rusty):
Z80 (Rev. 2.6) – XCON8/PAM37+ running at 2Mhz
“Les Bird” H-8-4 w/ National Semiconductor NS16550AN UARTs
“piggy back” I/O boards (17/37/67)
Procedure:
- Issue “fake boot” to load disk vectors
- Key in the mini server boostrap code https://sebhc.github.io/sebhc/software/Utilities/H8DUtility/BOOTSTRP.TXT
- Via front panel set PC=043.000 and set front panel to monitor DE register
- Hit key 4 (GO) to execute mini server
- DE register shows 046.132 as expected. DE will be decremented as the data for the full server are received (line from mini server source):
043.034 021 132 046 00036 LXI D,DBEND-1 Depends on size (to be determined)
- Run H8DUtility3 client on PC
- Select “Disk Image” select “Send LDR” to send the H89LDR3.BIN, which will be appended to the mini-server to create the full server.
- Read warning message and click “DONE”. Data is transferred (DE register decreases) and receive messages SENDING H89LDR3.BIN and H89LDR.BIN SENT SUCCESSFULLY on the client console. Receive popup to CANCEL or SAVE.
- Note that the DE register did *not* fully complete decrementing. Given the design of these two pieces of code the DE register must completely decrement down to 043.050 so that the PCHL instruction is overwritten (the PCHL acts as an effective JMP LDR1 since the HL register contains the address of LDR1. The H89LDR3.BIN must overwrite the PCHL instruction in order to transfer control to the full server):
043.037 333 345 00037 LDR1 IN LSTAT
043.041 037 00038 RAR
043.042 322 037 043 00039 JNC LDR1 Wait for char
043.045 333 340 00040 IN RX
043.047 022 00041 STAX D
043.050 033 00042 DCX D
043.051 351 00043 PCHL
- The DE register shows 043.052 indicating that two bytes have been lost in the transfer process. Both client and server are effectively stuck at this point.
- Using RTM/0 key combination on the H8 front panel I examine the contents of memory, comparing to the listing (attached) and find the two locations where bytes were dropped.
- Repeat all of above and this time DE shows 043.054 (4 bytes dropped). I examine the contents of memory and again find all of the locations where bytes were dropped (different each time).
- One possibility is that an interrupt service routine is taking a lot of time (would have to be about 1ms to cause a byte to be skipped) ?? but I don’t understand why Les doesn’t see this on his machine. I have repeated this problem on multiple Z80 configurations. In one of my sessions I replaced the 16550 with an 8250 and the results did not change.
As I’ve said in a previous email, back in 2013 I encountered this “dropped character” problem on my Heath Z80 box with Heath H-8-4 board. My solution at that time was to modify both the mini server and full server code to blank the LED refresh during data transfer. Using that code, and HDUtility 2.2 I can still transfer files successfully on this configuration.
Idea: boot the modified server code and see if it works with HUtility3:
- Boot server image containing modified server (that blanks LEDs during transfer).
- Run H8DUtility3 client on PC
- Select DISK IMAGER
- Select CLIENT STATUS. Receive “CLIENT IS READY”
- Select image to transfer (H8DIMGR2.H8D)
- get popup to BEGIN or CANCEL
- insert blank disk in H17 and select BEGIN
- it works! LED display is blanked during transfer. Disk cycles on and off. Disk writing completes normally.
ok so having come this far, let’s boot the H8DIMGR disk, run it and see if it works!:
- boot from just-created floppy
- run H8DIMGR2.ABS
- see “CLIENT IS READY” (IMO should say server is ready 😊 )
- FP LEDs are blanked
- Run H8DUtility3 on PC, select Disk Imager, client status… get “client is ready” response.
- Select “send image”
- Again select H8DIMGR2.H8D
- Get popup CANCEL or BEGIN on PC client
- Insert fresh disk in H17
- Select BEGIN
- See message on H8: USING DRIVE SY0 SETTING DISK TYPE 0 – 1S40T
- Then nothing…!
- Using RTM/0 on H8 examine BC register. Contents are 013Q
- Repeating above several times get same results except BC contents vary. Usually 011Q, 012Q or 013Q, which suggests 9 to 11 bytes are being dropped during the transmission of a track image.
Summary: I can use H8Dutility3 to create disk copies but only with my modified server which blanks the LEDs. Unable to get it to work with H8DIMGR2 from Les’ site…
I haven’t tried it recently because it’s a pain to set up but I believe all of this worked fine on Trusty (my original 8080 system). I did this last week and that’s my recollection of how things went.
Happy to re-post information about the mod’s I made to the server code back in 2013 if useful.
Can’t understand why this works for Les. Would love for someone else with a Z80-based setup to try so we could determine if there’s something about my system that’s “one off” (though I can’t imagine what that would be…)
To view this discussion on the web visit https://groups.google.com/d/msgid/sebhc/1468c72c-53af-46be-b666-8a825ac5303fn%40googlegroups.com.

dwight
Sent: Thursday, November 11, 2021 12:37 PM
To: se...@googlegroups.com <se...@googlegroups.com>
Subject: RE: [sebhc] H8DUtility 3
Les Bird
Glenn Roberts
Ok thanks. well just to bring it full circle, you asked us all to test and that was my goal and I’m basically reporting results for you to decide on. But even if the things you mention are the culprit(s) I presume you’d want a robust enough solution to handle little variations like that in your user base. If it would help you with testing I can try from a macbook (it’s a pretty old one, 2013 vintage I think).
I’m using a Sabrent USB-9290. It’s definitely a few years old (Windows 7/Windows Vista compliant!). I should probably buy a new one anyway; if I do I’ll report the results.
I guess we really need more than one data point (me) to know if these are more generalized problems 😊
Attached are the mod’s I made 8 years ago, if they’re of use. Both to the mini server and the full server… (search for GFR in comments). Happy to proved .ASM if useful.
To view this discussion on the web visit https://groups.google.com/d/msgid/sebhc/336ba7ce-eed0-4ee8-aab6-c38bc326635an%40googlegroups.com.
Les Bird
glenn.f...@gmail.com
Thanks Les. The one thing in common with all of my attempts has been the older Sabrent USB-to-Serial converter. I have ordered the newer one (same one you’re using) to see if that helps. I don’t have any Win64 or Mac boxes that have built in serial so I’ll have to use the converter. Will let you know if that resolves the problem…
I may be out of pocket for a few days (have to go help my son with something in upstate NY) so probably won’t check back in on this ‘til later sometime next week.
To try the H37 portion where can I find some disk images to test?
To view this discussion on the web visit https://groups.google.com/d/msgid/sebhc/f73c9311-f38f-4c9b-beeb-37beeaeeb6aan%40googlegroups.com.
Les Bird
Les Bird
Glenn Roberts
Eureka. So I’m not going crazy. I have the rev 2.6 board so I presume those reworks were incorporated directly into the board by then. I’ve never had to do any mods. I also have PAM37+ which is a slightly altered PAM37 image. I can’t remember why that was done but Norberto or others (Terry G?) might be able to remind us. I agree with you that there’s something in PAM37 that’s just occasionally taking a little too long in an interrupt service routine.
Let me know if you need any of the old .ASM programs I’ve mentioned (though the mods I did were minor and you may have a different approach)… I’ll be out of pocket for a few days as far as accessing my H8 systems, but will continue to monitor/respond to email…
To view this discussion on the web visit https://groups.google.com/d/msgid/sebhc/bd7192a8-0d86-4dcd-930b-0c0917ae4822n%40googlegroups.com.
glenn.f...@gmail.com
Les: I just tried running H8DUtility3 before I remembered to plug in the Sabrent USB/Serial converter. i.e. the computer has no COM: devices, but the software didn’t complain. H8Utility2 would complain if I did this.
To view this discussion on the web visit https://groups.google.com/d/msgid/sebhc/738ff822-4aba-4a1e-831a-b8cb4d773f5dn%40googlegroups.com.
glenn.f...@gmail.com
I had success at making an H37 image! I downloaded the HDOS2 boot image and was able to use HUtility3 and H37IMGR to create an image. Initially I forgot that I had booted the system at 10Mhz (HDOS3 with AUTOEXEC.BAT) but once I stepped the speed down all worked well.
The intro message says that DK0 is supposed to be a 40Trk drive. But I have a single 3.5” drive attached, which I usually use as DS/DD/80T. is there a way to configure things so that DK0: can write 80T disks? Also I couldn’t exit H37IMGR. Had to reboot.
Anyway, very nice. I haven’t tried sending images (from the H8 to the PC) yet.
To view this discussion on the web visit https://groups.google.com/d/msgid/sebhc/738ff822-4aba-4a1e-831a-b8cb4d773f5dn%40googlegroups.com.
Les Bird
Glenn Roberts
Does 38.4KB require 16550 uart?
To view this discussion on the web visit https://groups.google.com/d/msgid/sebhc/fa95c6b1-9e02-48f4-8db4-2272fe83a369n%40googlegroups.com.
Les Bird
Glenn Roberts
On Nov 13, 2021, at 9:26 PM, Les Bird <lesb...@gmail.com> wrote:
Yes you need to reboot when you're done with the imager. I think the same applies to H8DIMGR2 as well.
To view this discussion on the web visit https://groups.google.com/d/msgid/sebhc/ae770b56-96ca-4ff4-b41a-4f6bf6b0d4ddn%40googlegroups.com.
Les Bird

Steven Hirsch
> All I use for soft sector drives are 3.5”. Much more reliable.
floppy media I have are 8" diskettes, followed by 5.25". I've lost track of
the amount of data corruption seen on 3.5" drives.

Dave McGuire
occasional unreadable 8" disk, but most of them are fine. 5.25" are
about 50/50, maybe a bit better, and 3.5" are almost all garbage.
I attribute this to the rapid consumerization of floppy disk media.
Disk manufacturing was cheapened so rapidly that the useful lifetime of
new media is basically gone well within the useful lifetime of media
from two generations prior. Most of us saw that happen but it seems
many of us forgot. :)
-Dave
--
Dave McGuire, AK4HZ
New Kensington, PA
Glenn Roberts
Sent from my iPad
> On Nov 14, 2021, at 9:12 AM, Steven Hirsch <snhi...@gmail.com> wrote:
> On 11/13/21 9:28 PM, Glenn Roberts wrote:
>
>> All I use for soft sector drives are 3.5”. Much more reliable.
>
> Interesting - my experiences are exactly the opposite. The most reliable floppy media I have are 8" diskettes, followed by 5.25". I've lost track of the amount of data corruption seen on 3.5" drives.
>
> You received this message because you are subscribed to the Google Groups "SEBHC" group.
> To unsubscribe from this group and stop receiving emails from it, send an email to sebhc+un...@googlegroups.com.

Kenneth L. Owen tx836519
The Hard vs. Soft sectoring is an attribute of the disk media. Any 5 ¼ “ disk drive will work with either. (Just different means of determining the start of sector – physical difference of the disks using the same hardware. Comparing 3.5” to 5.25” drives is a time difference - hardware from two different eras of technology.
- ken
Sent from Mail for Windows
From: Glenn Roberts
Sent: Sunday, November 14, 2021 9:45 AM
To: se...@googlegroups.com
Subject: Re: [sebhc] H8DUtility 3
Well I guess I’m comparing 3.5” soft sectored to 5.25” hard sectored, so that’s a bit of apples to oranges. For some reason I never did much with 5.25” soft sectored drives on the H8, perhaps because I never had an H37 interface back in the day? I have had lots of failures on H17 style 5.25” hard sectored disks/drives. Don’t think I can recall personally encountering any failures in the 3.5” world. Lucky I guess? Perhaps my final caveat is that I generally make little use of floppy’s at all, and do most transfers and backup using USB flash drives… my main use of disk drives is to read, capture, and preserve old software.
To view this discussion on the web visit https://groups.google.com/d/msgid/sebhc/B36066E5-83A4-4BEC-B212-32CF89F89BB7%40gmail.com.

Mark Garlanger
--
You received this message because you are subscribed to the Google Groups "SEBHC" group.
To unsubscribe from this group and stop receiving emails from it, send an email to sebhc+un...@googlegroups.com.
To view this discussion on the web visit https://groups.google.com/d/msgid/sebhc/eaaf0f96-6a09-e563-0f50-30e85bb81f3d%40neurotica.com.
Les Bird
glenn.f...@gmail.com
- I was able to create the 100K H8D bootable disk containing H37IMGR and H8DIMGR3 using my old version of the server and version 2.2 of H8Dutility.
- System is Big Blue (Z80 rev 4 board; piggyback H17/H37/H67 I/O).
- Booted from H17 floppy created in step 1
- Ran H8DIMGR3 and receive “CLIENT READY” prompt on H8 console
- On PC downloaded and ran H8DUtility3 from wiki link
- Clicked on Disk Imager
- Verified baud set to 9600
- Clicked on Client Status. ION light goes out on H8; nothing happens.
Repeated steps on Rusty (Z80 Rev 2.6) and had similar but not identical results:
- The ION light did not go out.
- Console window on PC says “CLIENT IS NOT READY” then nothing happens.
The H37 imager worked fine and I was able to transfer an image and boot from it. Just the H17 one not working for me.
From: se...@googlegroups.com <se...@googlegroups.com> On Behalf Of Les Bird
Sent: Sunday, November 14, 2021 5:46 PM
To: SEBHC <se...@googlegroups.com>
Subject: Re: [sebhc] H8DUtility 3
Glenn,
To view this discussion on the web visit https://groups.google.com/d/msgid/sebhc/42d6a53b-2bbf-4257-8d9f-eb7c7bd82e62n%40googlegroups.com.
Les Bird
Les Bird

Jeff Mowery
To view this discussion on the web visit https://groups.google.com/d/msgid/sebhc/395723d6-ba0f-41b2-bb1f-50f3993cae36n%40googlegroups.com.
Les Bird
Jeff Mowery
To view this discussion on the web visit https://groups.google.com/d/msgid/sebhc/888a2956-45b5-4a09-93df-1c1f88e8640en%40googlegroups.com.
glenn.f...@gmail.com
Les: finally got a few minutes to try this out. I built H8DIMGR4.ABS from the source (no errors) and transferred to the same boot floppy that I had with H8DIMGR3 on it. I boot from the floppy and run H8DIMGR4. This is on Rusty (single 100K Siemens drive – single sided).
The message on the H8 console says:
CONFIGURE SYSTEM AS FOLLOWS:
SY0: 40 TRACK DOUBLE SIDED
SY1: 80 TRACK DOUBLE SIDED
But this is a single sided (100K) drive. Is there code in there that’s trying to determine if I have a double sided drive? How do I tell it I don’t?
I ran H8DUtility3 and attempted to send the image “EMPTY1S40T”. all seemed fine but after the message DISK IMAGE “EMPTY1S40D.H8D” sent in 0:40 the H17 drive made a lot of noise like it was trying to step to an unknown track? I reset the system. It seems troubling that the code doesn’t know that this is a single-sided drive.
That’s as much testing as I’ve been able to do so far…
To view this discussion on the web visit https://groups.google.com/d/msgid/sebhc/395723d6-ba0f-41b2-bb1f-50f3993cae36n%40googlegroups.com.