
Robo
Robo

How to Upload Sparki Code
This guide will show how to upload code to Sparki. Uploading new code erases old code, and replaces it with the new code.
![]() Following this example will erase the program that interacts with the remote. You can restore Sparki’s original program by uploading Examples > Restore_Default
Following this example will erase the program that interacts with the remote. You can restore Sparki’s original program by uploading Examples > Restore_Default
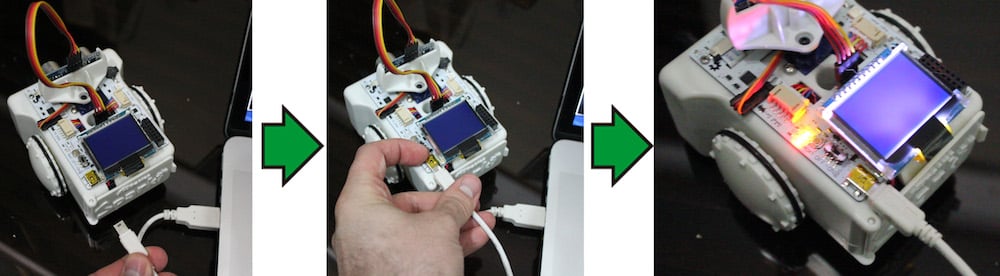
With the SparkiDuino software installed, plug in your Sparki’s USB cable into your computer’s USB port and Sparki. You cannot program Sparki with the bluetooth module.
![]() If using Windows, it may take some time for the drivers to install automatically while Sparki is plugged in. Please be patient.
If using Windows, it may take some time for the drivers to install automatically while Sparki is plugged in. Please be patient.
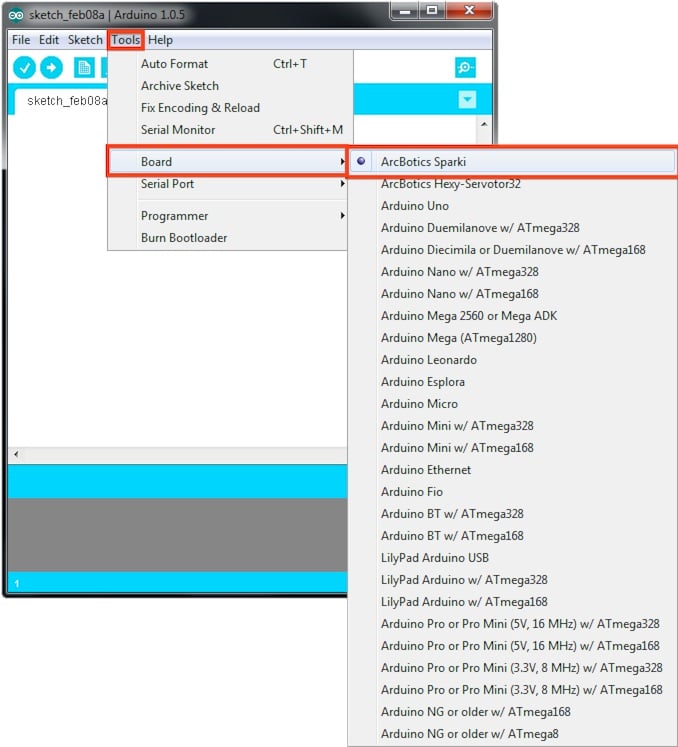
Select the ArcBotics Sparki board by selecting it from Tools | Board.
Select the serial device of the Arduino board from the Tools | Serial Port menu.
![]() If you’re not sure which port is Sparki, try looking at the ports before plugging in Sparki, and after plugging in Sparki. The new one should be Sparki.
If you’re not sure which port is Sparki, try looking at the ports before plugging in Sparki, and after plugging in Sparki. The new one should be Sparki.
![]() On Windows, this should be something like
On Windows, this should be something like COM3, COM4, or COM5. If you see COM1 and COM2, they are unlikely to be Sparki.
![]() On the Mac, this should be something like
On the Mac, this should be something like/dev/tty.usbmodem1411 for a USB board.

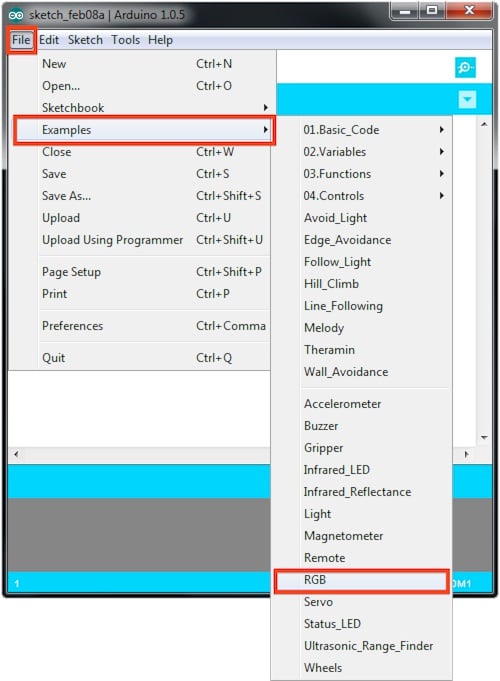
To have some code to upload, we will use one of the examples – the RGB – from the Sparki examples. All example code and code you write upload the same way.
Here we are selecting the RGB example. When this RGB code is selected and uploaded, the RGB LED on Sparki will rotate between Red, Green and Blue.
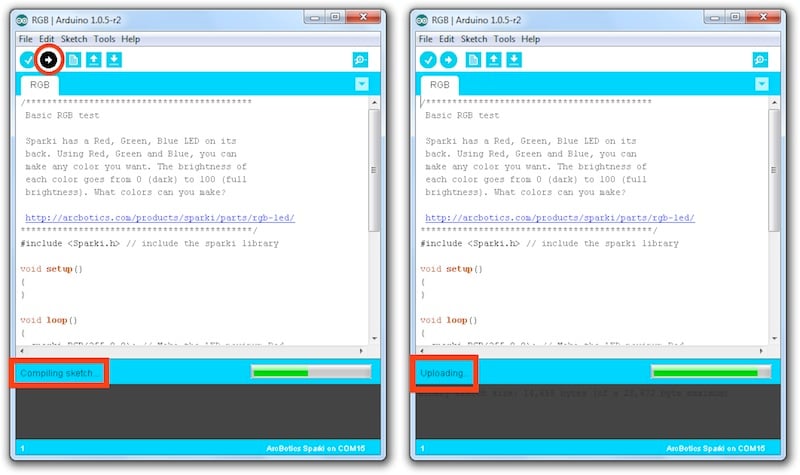
With this code selected, it should show up in the code box now. You can press the second button from the left (the left-pointing arrow). The code will first compile, then upload:
While the code is being uploaded, Sparki’s status light first pulses red while in programming mode, then blinks rapidly while the program is being sent. It then goes solid red, off, then runs the program:
https://www.youtube.com/watch?v=jsZBltz4Jgw
And show it is done uploading:
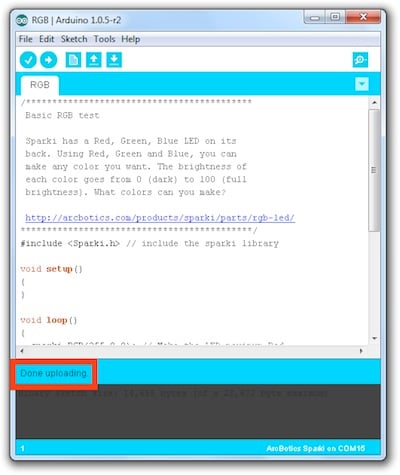
Now your Sparki will blink Red, Green then Blue!