Stripped CLEM dropout braze-on

357 views
Skip to first unread message

Joe Bernard

unread,
Feb 8, 2016, 8:16:43 AM2/8/16
to RBW Owners Bunch
Whelp, I installed my Pletscher rack last night, and the right rear bolt went in, but got loose before bottoming out. I was able to keep everything connected by backing it out a smidge, but I don't trust that bolt to stay there on bumpy rides. What do I do now?

Jeffrey Marco

unread,
Feb 8, 2016, 8:23:04 AM2/8/16
to RBW Owners Bunch
re tap with the next size up?

mikel...@juno.com

unread,
Feb 8, 2016, 8:30:33 AM2/8/16
to rbw-owne...@googlegroups.com
or use a nut/washer on the inside end
____________________________________________________________
Protect what matters
Knowing your flood risk and being prepared can help keep your family safe ...
http://thirdpartyoffers.juno.com/TGL3131/56b89853467b18524a78st03duc

Deacon Patrick

unread,
Feb 8, 2016, 9:07:11 AM2/8/16
to RBW Owners Bunch
M5 bolts are required. The rack comes with M4?

With abandon,
Patrick

Steve Palincsar

unread,
Feb 8, 2016, 9:22:58 AM2/8/16
to rbw-owne...@googlegroups.com


On 02/08/2016 08:16 AM, Joe Bernard wrote:
> Whelp, I installed my Pletscher rack last night, and the right rear bolt went in, but got loose before bottoming out.

Cross-threaded?


Bryan Pizzillo

unread,
Feb 8, 2016, 10:34:16 AM2/8/16
to RBW Owners Bunch
Did you use an M6 screw?  I had the same issue attempting to mount a different rack to my Clem as the screws were M5s.  The M5s some what held, but it was really just paint holding them in.


On Monday, February 8, 2016 at 8:16:43 AM UTC-5, Joe Bernard wrote:

Ron Mc

unread,
Feb 8, 2016, 10:59:46 AM2/8/16
to RBW Owners Bunch
this - use longer M5 with nylock on the other side, or a star lock washer with a half (thickness) nut

Bill Lindsay

unread,
Feb 8, 2016, 12:33:58 PM2/8/16
to RBW Owners Bunch
Joe

I don't own a Clem but I have seen the Clem tear dropouts. One eyelet is threaded M5 and the other is M6. Hopefully you just spun an M5 bolt into the M6 eyelet and you actually have no problem.

Bill Lindsay
ElCerrito, Ca

Joe Bernard

unread,
Feb 8, 2016, 3:11:40 PM2/8/16
to RBW Owners Bunch
One is an M6? Well, this explains things..neither bolt feels like they're in there tight enough. I've never seen this on a dropout before.

masmojo

unread,
Feb 8, 2016, 3:14:46 PM2/8/16
to RBW Owners Bunch
Just to add to this somewhat, the paint on these frames is liberally applied, and it seems to pool in the threaded eyelets for the racks & whatnot. I ended up getting taps and chasing the theads on the detailer hanger, and all the other threaded bits!
Prior to doing this the screws would not thread in straight & I was afraid I would strip or crossthread them the way things were going.
After chasing all the threads everything went smoothly!

Mark Reimer

unread,
Feb 8, 2016, 3:30:49 PM2/8/16
to RBW Owners Bunch
My Atlantis has a totally stripped front rack eyelet as well. No problem. I just use a longer bolt and put a flat washer and nylon lock nut on the back side. In fact, I'm pretty sure it's a stronger connection than the stock setup! 

Bill Lindsay

unread,
Feb 8, 2016, 4:21:03 PM2/8/16
to RBW Owners Bunch
I don't think I have seen an M6 on a dropout before either.  I think it's a cute idea, and allows you to use a stronger bolt for some applications if you want to do that, but it is bound to cause some confusion.  It wouldn't be Rivendell if you weren't a little bit bewildered every once in a while, right?  Run a tap through to clean the paint out.  You'll use that M5x0.8 over and over.  The M6x1.0 is also really useful.  Those two taps plus a handle for both will cost under $20 total at your Ace Hardware.  Clean the paint out with the tap, and you should be good to go.  

Tony DeFilippo

unread,
Feb 8, 2016, 4:43:48 PM2/8/16
to RBW Owners Bunch
Same issue with my wife's clementine... Liberal paint was an understatement. My first bolt sheared off in the braze on, then I sheared off a drill bit trying to drill it out... You can imagine what the audio was like in my garage.

I contacted Riv and their advice was to chase all the threads (of course) and they noted the m6 threaded braze on as well (which wasnt in play for me).

So I got a die kit, chased all the threads and installed using the next available braze on. Frustrating, I blame myself. I've prepped two frames pre powder coating before with much cleaner threads than the Clementine and I was in a rush to finish the build. Should have slowed down.

Joe Bernard

unread,
Feb 8, 2016, 5:23:29 PM2/8/16
to RBW Owners Bunch
Ugh, I give up kids. I switched to the lower M5 eyelet, which had the rack to far away for the upper struts to reach seatstay eyelets. So I found a couple M6 bolts and tried the original location. This caused the flat steel lower mounting plate to interfere with the Breezer-style dropout, also preventing the rack from reaching the seatstay eyelets. The lower-cost rack intended for the lower-cost Riv does not fit the bike. Oy!

Bill Lindsay

unread,
Feb 8, 2016, 5:53:56 PM2/8/16
to RBW Owners Bunch
How about the ones about one or maybe two inches up from the dropouts?  The lowest ones brazed on to the seat stays.  Those are M5, and should give you no interference problems with the flat plate of the clem rack, and should allow the struts to reach easily.   

Joe Bernard

unread,
Feb 8, 2016, 6:17:15 PM2/8/16
to RBW Owners Bunch
I test-fitted that idea and ended up with the opposite problem: the rack was too high and close. I just found a couple of frame clamps which drop in between those two positions, so we'll see how it goes. It seems silly to need clamps on a frame with braze-ons all over the place, but I have the rack and parts here, so what the heck. I shoulda bought a Nitto...

Bill Lindsay

unread,
Feb 8, 2016, 6:25:50 PM2/8/16
to RBW Owners Bunch
Yikes.  Call Mark and let him tell you the best way to do it.  I'd file an edge off the flat part of the Pletscher rack before resorting to clamps.  In fact, I'd never use clamps to mount the lower legs of a rear rack.  That's what takes ALL the load.  Clamps up top to stabilize is OK, but not down low.  

Bryan Pizzillo

unread,
Feb 8, 2016, 6:39:37 PM2/8/16
to RBW Owners Bunch
Try mounting it on the braze ons higher up on the seat stays.  Those are actually M6 as well.  That is where I mounted a Nitto Mt Campee, albeit I had to mount it to the inside, but it was no biggie.  I also found when attempting to use M5 bolts and jury rigging on the dropouts that the hardware would have interfered with the chain/cassette.  Anyway, everything is good on the higher ups.  

Joe Bernard

unread,
Feb 8, 2016, 7:08:32 PM2/8/16
to RBW Owners Bunch
Ok, I'm working on the other M6 mounts right now. It's looking good.

Mark in Beacon

unread,
Feb 8, 2016, 7:24:00 PM2/8/16
to RBW Owners Bunch

I feel your pain. I spent the better part of a day dealing with front and rear rackage on my Clementine, some details of which can be found in my mega post, My Darling Clementine: A Saga.


There are three sets of braze-ons that can technically be used to install the bottom portion of a rack; two on the dropout and one a bit higher on the seatstay. The one on the seat stay and the upper of the two on the dropout both take M6 bolts, while the lowest braze-on takes an M5. This is because its most likely use would be for fender stays. I assume the seatstay was added to accommodate racks that are not long enough to reach the upper braze-ons--in this position, a rack designed for a 26" bike might work well on the 650B and 700c Clems.

One reason I dislike the Breezer-style dropouts is due to this possibility of interference. Also, the way the two dropout braze-ons stack right on top of one another can be problematic, because the fender stay is close enough to interfere with many rack legs, including my Moose Rack. A less problematic design in this regard is seen here on my Kuwahara:


Note that the upper, more forward braze-on, for the rack, is unthreaded, to take a thicker, stronger bolt and nut.

I had to drill out the aft hole on my Moose Rack to accommodate an M6.

Joe Bernard

unread,
Feb 8, 2016, 7:31:20 PM2/8/16
to RBW Owners Bunch
The deed is done now, but that little adventure kinda sucked. I've mounted lots of racks, and never had these problems before. I'm glad it's solved now, but I'm not thrilled to have marked up the rear dropouts on my brand new bike. Time to find BRG touch-up paint...

Thanks for all your help, kids,
Joe "M6??" Bernard
Vallejo, CA.

Mark in Beacon

unread,
Feb 8, 2016, 7:34:48 PM2/8/16
to RBW Owners Bunch

By "not long enough," I mean not long enough to span distance created by the long chainstays; those lower seatstay braze-ons are quite a bit forward of the drop-out braze-ons.

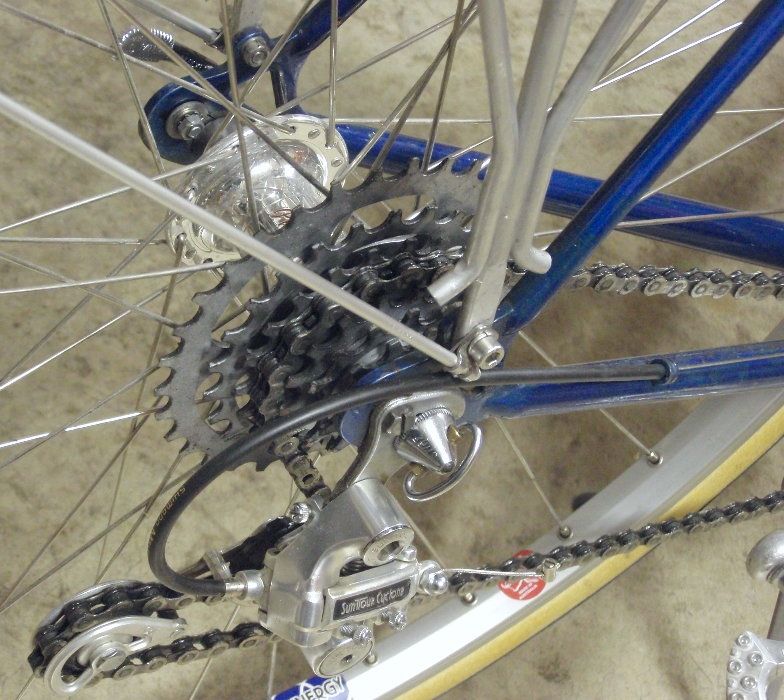
And here you can sort of see what I mean about the interference when the two braze-ons are stacked (though a better shot would show the fact that the fender stay protrudes forward into the plane that some rack legs would likely want to occupy)


:

iamkeith

unread,
Feb 8, 2016, 10:59:04 PM2/8/16
to RBW Owners Bunch
Sounds like you've got this figured out, Joe, but here are a couple of notes from my own experience mounting the Clem/Pletscher rack to my Clem frame, in case it helps others, or in case you want to experiment further:

1.  I've so far opted for the biggest tires I can fit, on my 59/700c frame - 2.4" Maxis Ardents in this case.  As such, the rear rack struts weren't nearly wide enough to clear the tire.  An easy fix was to cut the rivets off, and re-mount the struts to the outside of the lugs on the bottom of the rack, using one of the many extra bolts that are included.  To do this, I also had to cut off the tabs that held the mini-pump pegs.   About 5 minutes work with a dremel tool, but I think it actually looks better.  See picture below.

2.  I too attached to the extra M6 brazeons located higher up on the seat stays.  Because of the overall height of the 29er tire, I was also forced to use the stamped metal tabs to get enough vertical clearance.  I mounted them to the inside of the brazeons, even with the relocated, wider rear struts .   However.... I don't know for sure, but I'm willing to bet that a 52 or 45cm frame (or even a 59cm with a smaller tire) could use this rack without the metal tabs!  I personally think those  are the only mickey mouse detail on an otherwise stout and much-nicer-than-I-ever-expected rack.  Basically, just bolt the struts directly to the brazeon.   The shifted geometry would mean that forward strut wouldn't be quite vertical, but I can't see why that would matter.  And the platform would shift slightly forward when set to level, but the Clem has plenty of room to spare.  (Hope that makes sense...)

Joe Bernard

unread,
Feb 9, 2016, 12:26:53 AM2/9/16
to RBW Owners Bunch
It makes sense, but I already used the metal plate on the inside of the braze-ons. I tried to visualize attaching both struts directly without the plate, but it looked like too much unnecessary gymnastics. It's all good now, I just wish I could have seen instructions for this model when I started. Going by the Cheviot video at rivbike.com didn't work, plus I didn't realize the bike had different sized mounts. Hopefully this thread will solve these issues for future CLEM owners.

masmojo

unread,
Feb 10, 2016, 12:07:33 PM2/10/16
to RBW Owners Bunch
For what it's worth, I have assembled almost every bike I own (which is a fair number) & in my late teens I worked in a bike shop, so I probably built a hundred or so bike during my stint there, but my Clementine was by far the most difficult I ever had to deal with. A myriad of small little nit-picky, annoying problems; aside from the tread issues mentioned above, I had a bottom bracket that just did not like the theading on the Clementine BB!? The 135mm spacing and log chainstays make mounting a rear rack somewhat challenging, some eyelets seem oddly spaced, the wheel skewer hits on the derailleur when removing the rear wheel,and a half dozen smaller little things that I don't remember now.
On the plus side, when I got to building the second one, it went much smoother! ;-)

Joe Bernard

unread,
Feb 10, 2016, 1:09:34 PM2/10/16
to RBW Owners Bunch
Oh yeah, dropping the rear wheel out involves removing the nut on the skewer because it gets stuck between the derailer and Breezer-style dropout. The Clem/Clementine look and ride great, but they're definitely a challenge to fiddle with until you know your way around them. I'm learning fast!

David Banzer

unread,
Feb 10, 2016, 1:35:08 PM2/10/16
to RBW Owners Bunch
As I've been locking up my Clem around town, I added a security-type skewer to the rear wheel as the quick release was kind of a pain. Works better than a quick release IMO with the dropout.
David
Chicago
Reply all
Reply to author
Forward
0 new messages