Nitto M18 or Mark's Rack Light Mount Epiphany

1,708 views
Skip to first unread message

Ron Mc

unread,
Jan 22, 2013, 8:44:49 AM1/22/13
to rbw-owne...@googlegroups.com
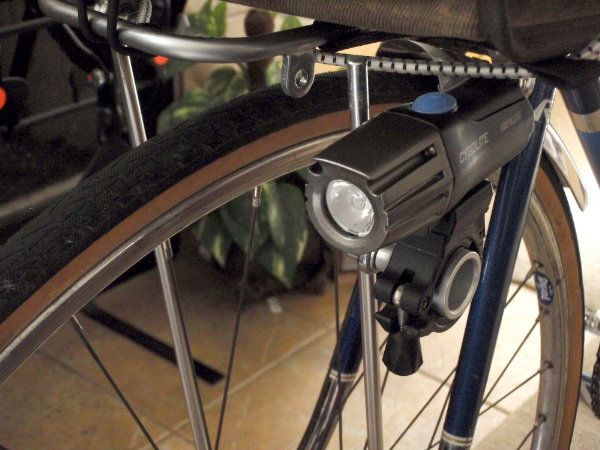
Came up with a great solution for mounting a Cygolite on the strut of my Nitto M-18 front rack .  It will also work for a Mark's Rack.  
Note this this won't work on an M-12 or VO front rack with brazed/welded struts - it will only work on the racks that use separate rod struts and the Nitto 20184 Rack Nut and Bolt to attach the rod to the rack.  
Note that the M18 rack doesn't have M5 lugs, so there is no simple way to attach a light to the rack.  
While the Mark's rack does have M5 lugs, and you can attach a light mount directly to those, they're at the rear of the rack, and attaching on the strut lets you mount a light 6 inches forward.  

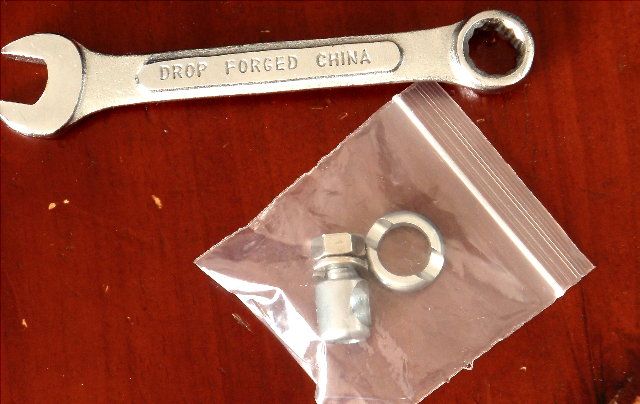
You need the spare Nitto 20184 assembly. http://www.rivbike.com/product-p/rh1-20184.htm Slide the Nitto rack nut and bolt down the strut, face it out and you have an M6 mounting base for any of your strap-type light brackets. I'm sure others have been this far without the epiphany, because here you can use the Nitto nut and attach a bracket for your Edelux, et.al. lights. But I wanted a handlebar mount Cygolite on the strut. So I bought a Paul Gino light mount, re-drilled and tapped the M5 guide hole to the M6 thread, and used the tapped Gino mount in place of the nut.
Also needs a lock washer, and I went with an M6 bellville spring washer.

I used a fluteless (cold-forming) M6 tap on the Gino guide hole,because this forced me to open the hole from 5mm to 7/32", which took away the anodizing and gave me fresh metal. 
It should also produce harder threads than a chip-cutting tap.  
The tap was sold by McMaster as a hand-tap, and it worked great by hand (with lube - I did it right the first time)
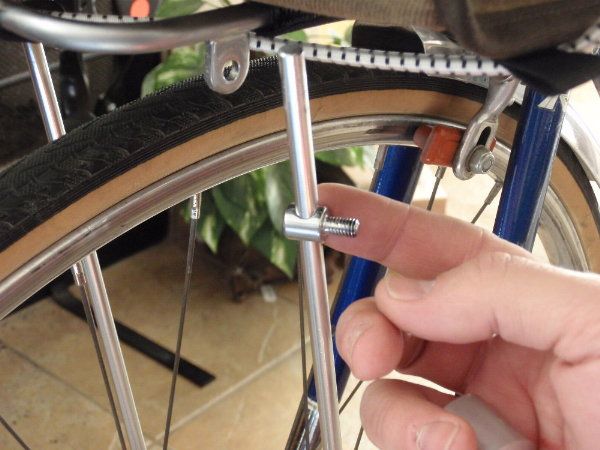
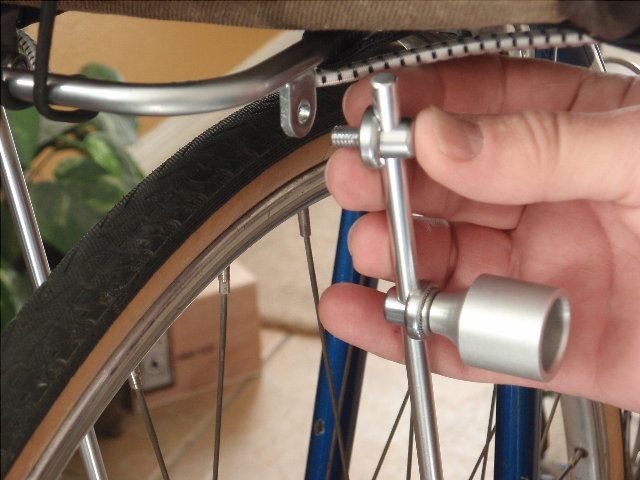
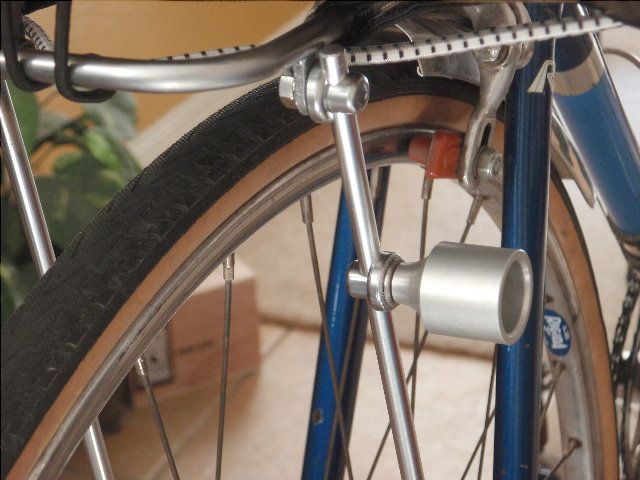
Here's the Nitto strut joint I took apart.  (This joint has to come apart anyway, to gain access to the strut)

 the rod bolt loose on the strut

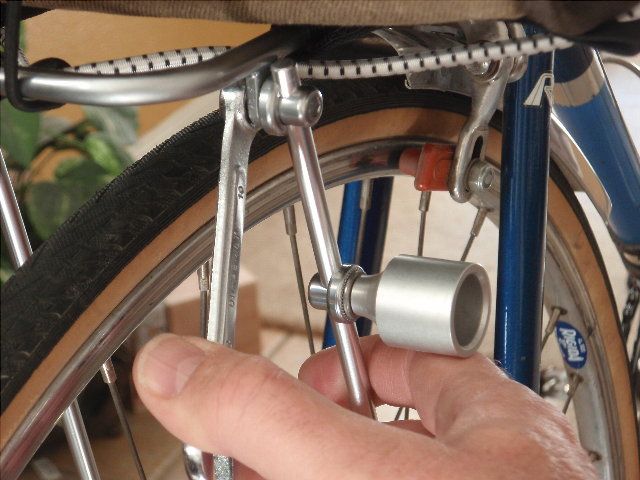
 Nitto clamp washer in place

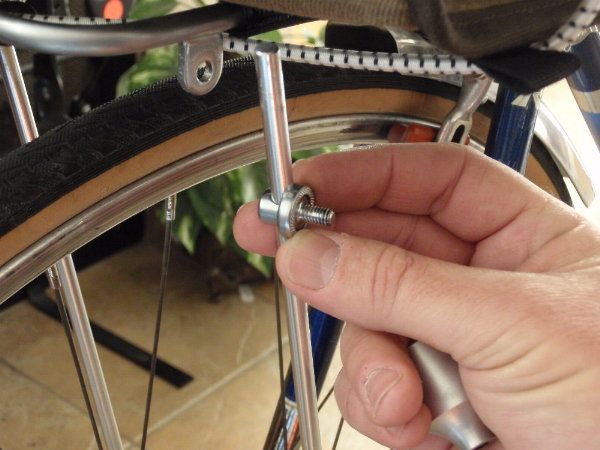
 M6 bellville spring washer in place - the crown side goes toward the Gino

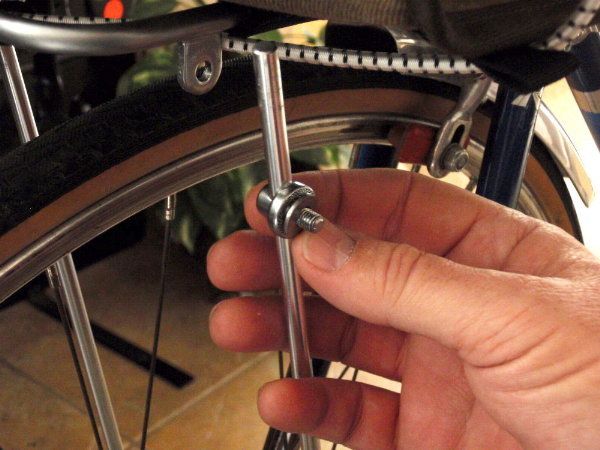
(here is where you could attach the Herse or VO strap bracket for other style light mounts)

and my tapped Gino mount completes the assembly

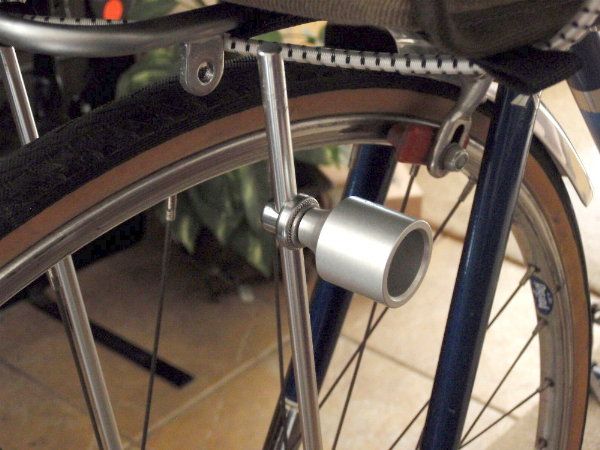
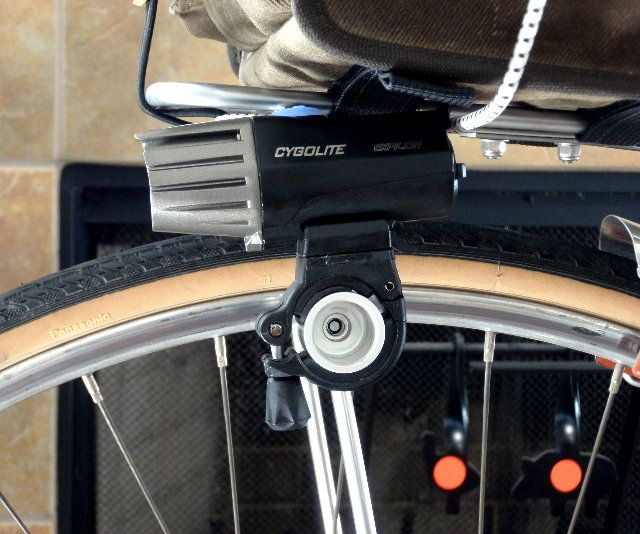
 hanging the light for vertical clearance fit

After you have the position and alignment right, you should tighten the Gino with a pair of channel lock pliers (and maybe a chamois)  to get some compression of the bellville spring washer - this makes for a shock- and vibration-proof joint.  

and an elegant solution

I'm waiting on my replacement Nitto fitting to reassemble the top of the strut to the rack, but it will arrive today in a rivbike order.  

It doesn't show in my photos, but the light beam is a good inch and change above the tire and I have plenty of vertical clearance to reach the light button under a wide rando bag. 
On my M18 rack, I have the long struts attached to my front dropout M5 lugs, but this should also work fine with shorter struts attached to fork clamps or lugs.


Ron Mc

unread,
Jan 22, 2013, 8:47:47 AM1/22/13
to rbw-owne...@googlegroups.com
something strange happened to the rivbike link
Nitto Rack Hardware - Rack Nut & Bolt - 20184, each

William

unread,
Jan 22, 2013, 12:47:03 PM1/22/13
to rbw-owne...@googlegroups.com
Very nicely done.  I always fear self-loosening with assemblies of that type, but that's the kind of thing a split washer should help with.  APPROVE

Cyclofiend Jim

unread,
Jan 22, 2013, 1:24:50 PM1/22/13
to rbw-owne...@googlegroups.com
Nice hack!

Thanks for sharing the setup with everyone!

- Jim

Philip Williamson

unread,
Jan 22, 2013, 2:32:58 PM1/22/13
to rbw-owne...@googlegroups.com
Heroic. I love it. I need to learn about taps and dies, I think.

Philip

Ron Mc

unread,
Jan 22, 2013, 3:07:45 PM1/22/13
to rbw-owne...@googlegroups.com
Thanks.  
If I had used a cutting thread tap, the pilot hole should be 5 mm for the M6 thread.  The guide hole on the part is At Least open enough to clear a 5mm screw, so it could be a bigger hole, meaning less metal than needed to cut the M6 thread. 
This is  the reason I chose the cold forming tap.  I knew I would have to drill a slightly bigger hole to open the pilot hole, and would get the strongest possible threads out of the process.  
With the cold forming tap, none of the remaining metal is cut away - it's all forged into the thread shape, and all under compressive stress, which increases the fatigue strength.  

Ron Mc

unread,
Jan 22, 2013, 3:16:46 PM1/22/13
to rbw-owne...@googlegroups.com
Phillip, one of the best resources on the net is also the catalog - McMaster-Carr
when you start searching tools and materials, their site is set up exceptionally well to inform you as well as sell to you.  You should be able to click to most of the technical information you will need and, if not, google will get you into good supporting references.  

But back to McMaster - their service is exceptional.  I've been buying small tools and materials for my shop work from them for a dozen years, and their service is first-rate - they treat a $15 order as being just as important as an industrial order.  

William

unread,
Jan 22, 2013, 3:21:50 PM1/22/13
to rbw-owne...@googlegroups.com
McMaster-Carr is hardwired in my brain to thread cutting tools.  So much so, that I remember it with a Beastie Boys lyric:

"Mc-MASTER!  Cut!  Cut!  Cut-FASTER!"

Not lying.  The B-Boys original said mix master, of course.    

Ron Mc

unread,
Jan 22, 2013, 4:58:52 PM1/22/13
to rbw-owne...@googlegroups.com
Wlliam, here is why you can't use a split washer.  

The hole in the Nitto clamp washer is too large, and the split washer would not engage - hence the need for a bellview spring lock washer.  I finished mine today, and I could really feel the spring compressing - I'm not a bit worried - it will be there for me.  

And here's the rest of today.  

Assembling the rod bolt and clamp washer to the top of the strut.  

Tightening the flat washer and aircraft nut on the other side of the rack lug

All done.  

Let there be light

William

unread,
Jan 22, 2013, 5:21:41 PM1/22/13
to rbw-owne...@googlegroups.com
Great work.  You've clearly thought it through.  

René Sterental

unread,
Jan 22, 2013, 6:11:08 PM1/22/13
to rbw-owne...@googlegroups.com
Perfect Timing!!!
 
I was just evaluating how to mount my dynamo Edelux on the Betty and you've just shown me a fantastic solution! Ordering the extra parts right now!
 
René


--
You received this message because you are subscribed to the Google Groups "RBW Owners Bunch" group.
To view this discussion on the web visit https://groups.google.com/d/msg/rbw-owners-bunch/-/UkFSnFZa_OYJ.

To post to this group, send email to rbw-owne...@googlegroups.com.
To unsubscribe from this group, send email to rbw-owners-bun...@googlegroups.com.
For more options, visit this group at http://groups.google.com/group/rbw-owners-bunch?hl=en.

René Sterental

unread,
Jan 22, 2013, 6:13:28 PM1/22/13
to rbw-owne...@googlegroups.com
The rack nut & bolt is out of stock... let's see if I can cannibalize one from another rack temporarily...

Ron Mc

unread,
Jan 22, 2013, 6:38:36 PM1/22/13
to rbw-owne...@googlegroups.com
Try Bens cycle

Ron Mc

unread,
Jan 22, 2013, 6:57:10 PM1/22/13
to rbw-owne...@googlegroups.com
in stock at Ben's
I think discount srch15 will get you a 15% discount. 

On Tuesday, January 22, 2013 5:38:36 PM UTC-6, Ron Mc wrote:
Try Bens cycle

René Sterental

unread,
Jan 22, 2013, 8:00:26 PM1/22/13
to rbw-owne...@googlegroups.com
Thanks!
--
You received this message because you are subscribed to the Google Groups "RBW Owners Bunch" group.
To view this discussion on the web visit https://groups.google.com/d/msg/rbw-owners-bunch/-/uemnoyr9f8AJ.

To post to this group, send email to rbw-owne...@googlegroups.com.
To unsubscribe from this group, send email to rbw-owners-bun...@googlegroups.com.
For more options, visit this group at http://groups.google.com/group/rbw-owners-bunch?hl=en.


--
Sent from Gmail Mobile

Ron Mc

unread,
Jan 22, 2013, 9:49:15 PM1/22/13
to rbw-owne...@googlegroups.com
went for a short ride in the dark this evening.  The new light position is fantastic.  I had it hanging under the handlebar, and now it's 14 inches lower.  I get much better distance and much, much better texture of the road.  The peripheral lighting is at least as good, and it doesn't shine into cars.  Had 5 or 6 deer bolt (rode by 100 bedded down) and no problems at all.  This has to be the best place to mount a light.  

Ron Mc

unread,
Jan 24, 2013, 10:41:26 AM1/24/13
to rbw-owne...@googlegroups.com
btw Rene, 
I bought 25 bellville washers, and don't need that many around - if you need a couple, LMK, and I can mail them.  

Ron Mc

unread,
Jan 25, 2013, 8:03:36 AM1/25/13
to rbw-owne...@googlegroups.com
One last ps - since I have the tools and experience, if anyone needs a Gino tapped for M6, look me up.  I'll return it ready to go along with a washer  

Tom Harrop

unread,
Jan 25, 2013, 8:29:20 AM1/25/13
to rbw-owne...@googlegroups.com
This is a great idea and I can vouch that it works well. I also used a Nitto assembly to attach the light to the gf's Homer's Mark's rack (three apostrophes in a row!). I used a bit of SS stock instead of a Gino's Mount but the outcome is similar.

I didn't think to use a washer because I'm a hack, but it's been over a year now and I just checked it—it's still rock solid.

No great photos but you can just make it out here.

Montclair BobbyB

unread,
Jan 25, 2013, 10:49:59 AM1/25/13
to rbw-owne...@googlegroups.com
NICE MOD!!!
Reply all
Reply to author
Forward
0 new messages