Problems Drilling Holes
257 views
Skip to first unread message

Matheu Broom
Jul 25, 2019, 12:30:51 AM7/25/19
to Pocket NC
Hi Everyone,
I am new to CNC machining and I am looking for some help. I am a technician at The University of Auckland, New Zealand. I am using the Pocket NC to make small parts for students.
The first part I am making is very simple. Circular (25mm) aluminium stock with a few 3mm diameter holes drilled 10mm deep. I am using standard drill bits.
I am using Fusion 360 to make a chip clearing drill toolpath with a 0.25 pecking depth. I have tried a large range of speeds (500 - 6000) and feeds (50mm/min - 200mm/min).
No matter what I try the tool jams into the work and won't drill to the full depth. (Even jamming in the first few mm).
I substituted the drill for a 2mm 2 flute end mill to pocket the hole, however, this ends up making an elliptical hole.
Any help with where to start on this would be great. Drilling holes between 2mm - 4mm diameter will be a MAJOR part of many designs in the future and I want to find a good way of doing this.
What have other people found useful? Different type of drill? Different paths? Different feeds and speeds?
Thanks Everyone :)
Matheu
P.S End milling the face of the aluminium with 3mm 2 flute worked LOVELY :)

LeeRoy Jenkins
Jul 25, 2019, 10:53:05 AM7/25/19
to Pocket NC
Which machine are you using? if you are using the V2-50 there is not a whole lot of torque in the lower half of the rpm range. Also is this 3mm drill bit 3mm for the entire length? My first thought is it maybe slipping inside the spindle because of the difference between 3mm and .125" shank which is .007".

Graham Stabler
Jul 25, 2019, 10:56:43 AM7/25/19
to Pocket NC
>My first thought is it maybe slipping inside the spindle because of the difference between 3mm and .125" shank which is .007".
There is a 3mm collet available for the V2.5.
LeeRoy Jenkins
Jul 25, 2019, 11:02:37 AM7/25/19
to Pocket NC
If that's the case (american with a .125" collet my bad) then I would definitely say its the low rpm. I would try drilling 30,000+ rpm range.

Q Rothing
Jul 25, 2019, 1:37:19 PM7/25/19
to Pocket NC
Hi Matheu,
Using standard twist drills doesn't usually work super well with our machine due to the torque that is required to turn them. My suggestion would be to use an endmill and bore the holes, which usually works quite well for users so I would be interested to hear more about how those bored holes turned into eliptiical holes.
Feel free to email me directly at qrot...@pocketnc.com
Q Rothing
Pocket NC Applications Engineer
Matheu Broom
Jul 25, 2019, 6:38:35 PM7/25/19
to Pocket NC
Thanks for the tips. I am using the original V2 which I assume is the same as the V2-10. Would the V2-50 be better for this type of work? If so is it possible to upgrade in the future?
We are trying to stick to metric tools. I was using a 3mm drill in a 3mm collet. I could try again with higher rpm to get higher torque.
The elliptical hole was produced when using a 2mm 2 flute and a 2d pocket tool path. I tried again today with a bore tool path at the same settings as my facing operation (8500rpm 200mm/min) while flushing. I saw pretty good chip evacuation and got a much better hole. I think the issue is evacuating chips from the deep hole. Has anyone had much experience using single flute endmills for better chip evacuation of deep holes.
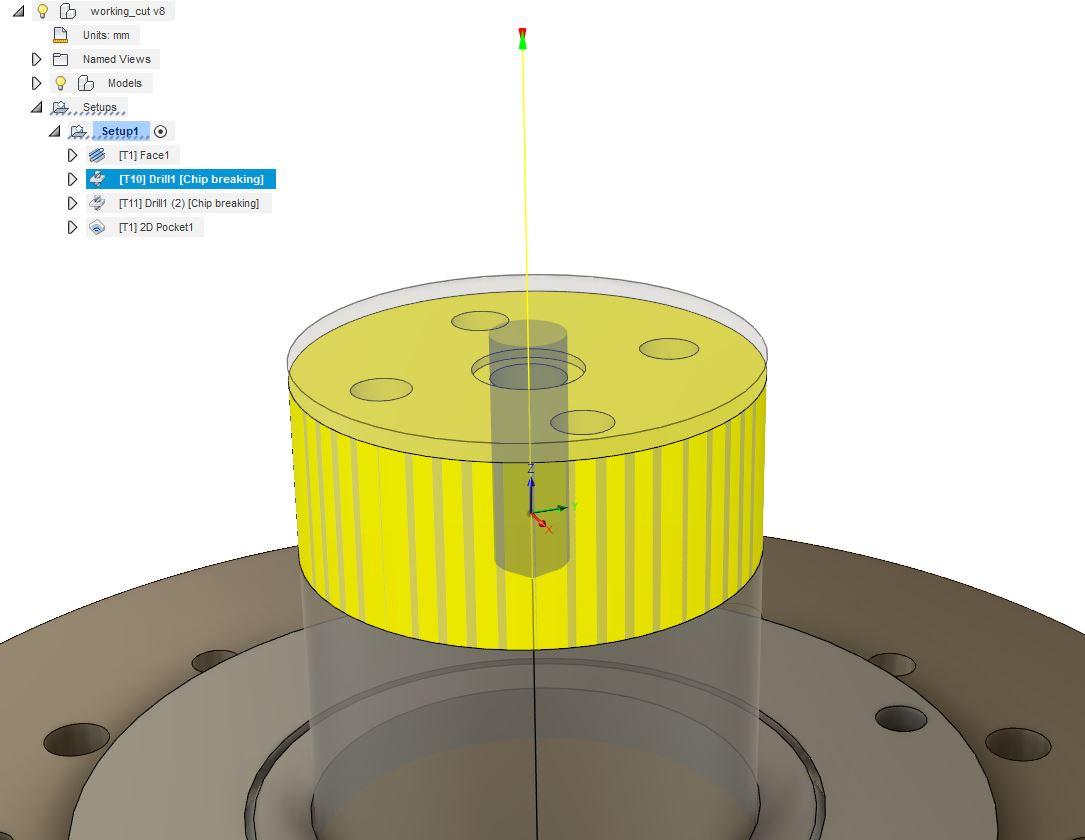
My other issue is the bore depth. Ive set the heights in fusion 360 to the hole bottom (plus 0.5mm to drill through). However, the path generated doesn’t go to the full depth. What might be causing this?
Thanks everyone for the help!
Once I learn more I’m happy to start contributing more to the community :)
We are trying to stick to metric tools. I was using a 3mm drill in a 3mm collet. I could try again with higher rpm to get higher torque.
The elliptical hole was produced when using a 2mm 2 flute and a 2d pocket tool path. I tried again today with a bore tool path at the same settings as my facing operation (8500rpm 200mm/min) while flushing. I saw pretty good chip evacuation and got a much better hole. I think the issue is evacuating chips from the deep hole. Has anyone had much experience using single flute endmills for better chip evacuation of deep holes.
My other issue is the bore depth. Ive set the heights in fusion 360 to the hole bottom (plus 0.5mm to drill through). However, the path generated doesn’t go to the full depth. What might be causing this?
Thanks everyone for the help!
Once I learn more I’m happy to start contributing more to the community :)

Micael Törnblom
Jul 26, 2019, 1:10:14 AM7/26/19
to Pocket NC
Matheu, I have 3 tips for you.
(1) I believe that you can try making your holes in several steps. I begin with a smaller diameter drill, about 1 or 1.5 mm. I also use less feed, about 20 mm/min. I notice it is much easier to make a hole with a small diameter tool, then work my way up with 2mm, 2,5 mm then 3mm.
(2) Sometimes, I also jog it manually. I first run the program so the machine is positioned correctly over the hole. Then stop the machine, and jog manually in Z direction. Then I can hear when the drill struggles and I can then reverser slightly before continue again. So my own manual pecking if you would like to call it that.
(3) Finally, to bore through a hole you should use -0.5 from the hole bottom. Just want to make sure you have tried that.
Good luck!
Graham Stabler
Jul 26, 2019, 2:22:32 AM7/26/19
to Pocket NC
Note that you can get metric tools with a 1/8th shank, PCB drills are excellent and generally not too expensive and come with a 1/8th shank. As you have ER collets there won't be a problem holding them. A 3.5mm collet will hold both 3mm and 1/8th although it is more work to tighten up to hold a 3mm tool than when using a 3mm collet (which has a 2.5mm-3mm range).
Chip evacuation is why I suggested the deep hole drilling full retract cycle for your drilling, it carries the swarf out of the hole which reduces the load. Using multiple drills is also a good idea as mentioned.
When you say plus 0.5mm I hope you are entering -0.5mm into the box. The displayed planes represent where the tool path should end. The extra depth required will depend on the drill.
If you do use an end mill, pocket with 0.1mm "stock to leave" say and then do a boring tool path with multiple depths to clean it up. An air duster is an easy way to help clear the chips.
Graham
Matheu Broom
Jul 28, 2019, 10:32:47 PM7/28/19
to Pocket NC
Hi Everyone,
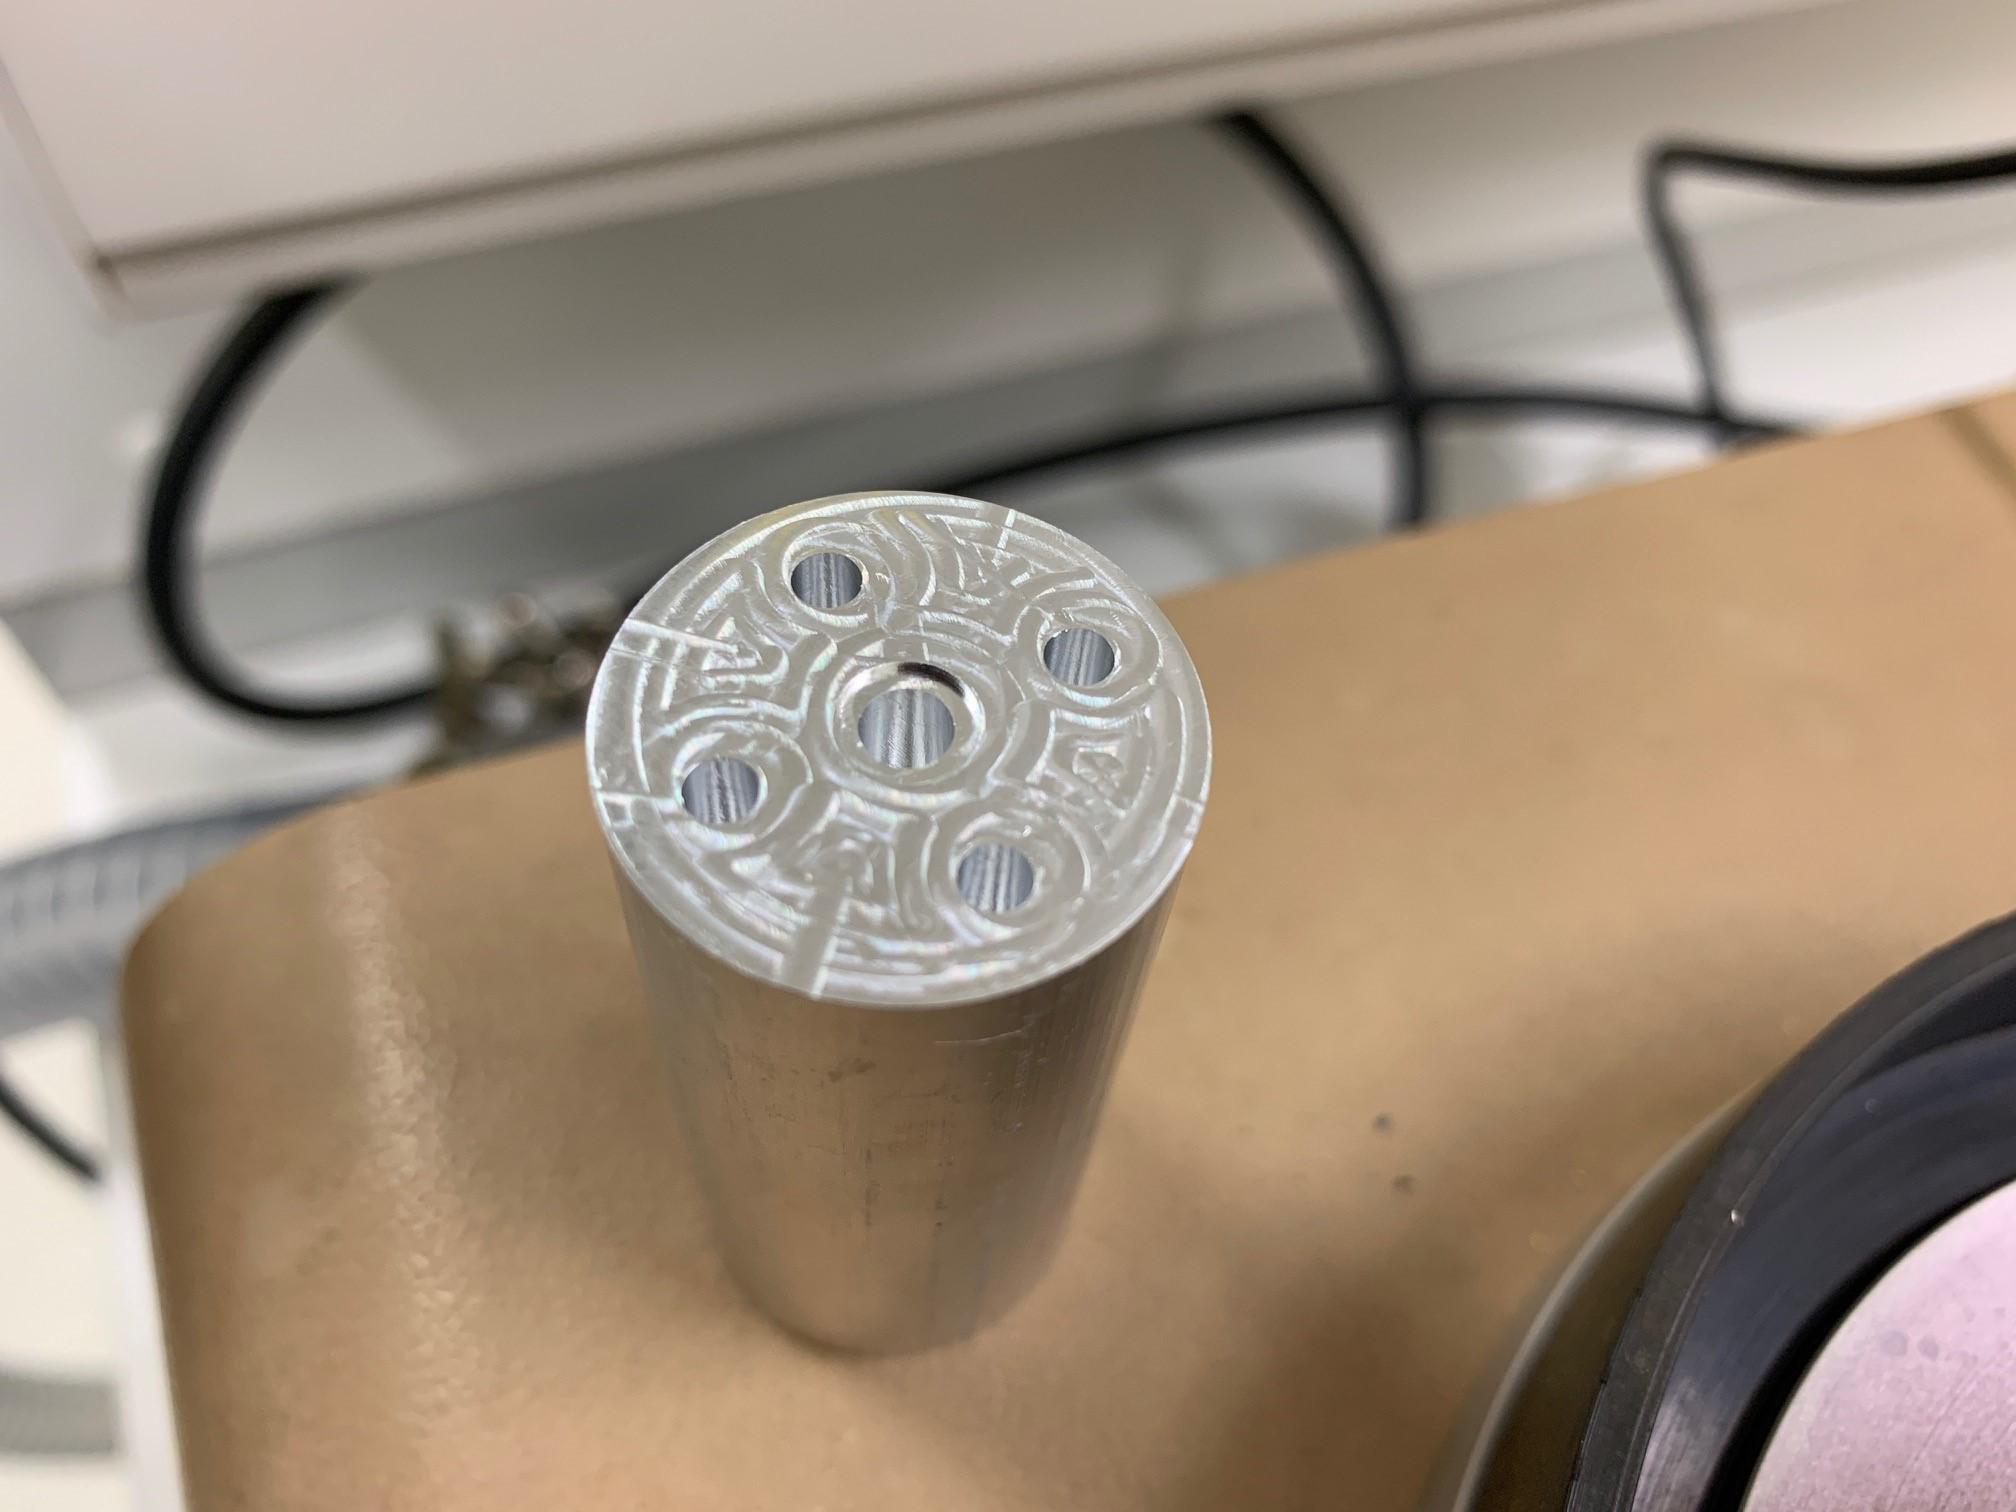
Thank you SO MUCH for the help. Here is an image of the first prototype part, just needs cutting on the lathe.
I ended up using a 2D bore instead of a 2D pocket which gave me much better results in terms of the shape of the hole. I also flushed the hole as it was drilling to make sure all of the chips were evacuated which helped a lot. I also added multiple passes to slowly increase the size of the hole to again allow chip removal.
Turns out that the holes are the right depth (I used -0.5mm) but for some reason, the animation in the simulation of Fusion didn't show it going through (maybe my old pc).
I will try using small drills in the future as an alternative method but this seems to work ok for now (also allows tuning of the hole size using the same tool).
Thanks, everyone :) Expect more projects and images soon.
Reply all
Reply to author
Forward
0 new messages