Compact Teensy SDR with RA8875 4.3" display and RS-HFIQ

Mike Lewis
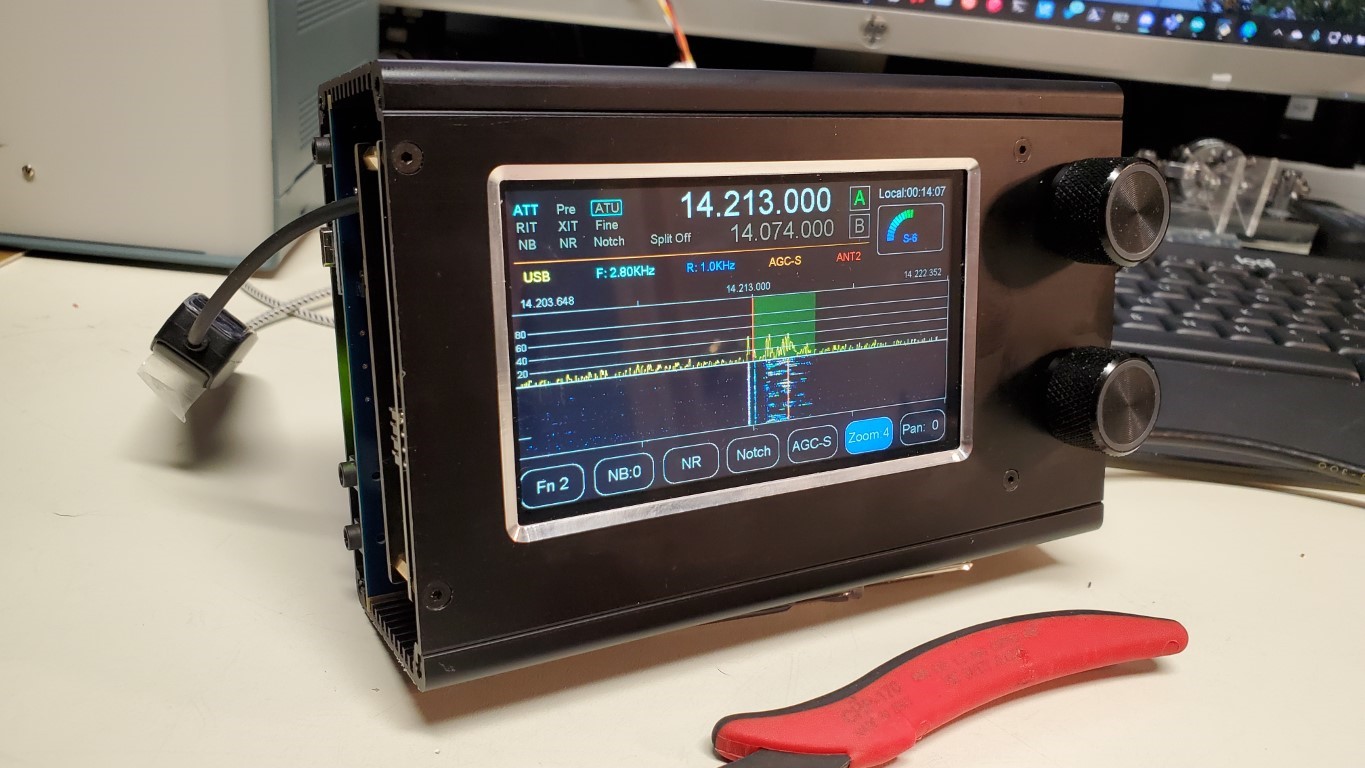
FYI. Pretty cool little handheld solution came to life today on my workbench. I envision using these as IF rigs, maybe even one per station. This is a 5W 80-10M QRP SDR transceiver. I have some software testing and dev to do on the TX side modulation code but the RX side works great with dual VFO for split and A/B swaps.
Bob, W7PUA has been instrumental in helping convert the Teensy audio library to 32bit floating point and adding features like noise blanker, noise reduction, multiple IQ FFT sizes, and more, all of which are incorporated in my builds. Basic Cat serial port control is now working with WSJT-X and other programs via OmniRig V1. In Panadapter mode I use the Elecraft K3 protocol and accurately display the frequency with offset and sideband awareness.
The Teensy motherboard was developed in our project group for such uses, below is a V2 PCB. I also support a 7” touchscreen version.
- Mike K7MDL
From: Mike Lewis
Sent: Friday, April 29, 2022 19:14
To: keit...@groups.io
Subject: Re: [keithsdr] Compact packaging started on Teensy SR with RA8875 4.3" display
I have the compact 4.3” running in the Hammond 53mm deep box with John’s V2 motherboard for lower profile and a slightly modified RS-HFIQ board in it. Seems to be working great.

I used a LC78_05-3.0 DC-DC 3 terminal regulator replacement mounted on the motherboard and I am not seeing any noise issues so far, even on 28Mhz with a EFHW wire antenna attached and poor conditions on HF.
The 2x 10K resistors are on the motherboard now on the back side. Here is a partially assembled V2 board. I am using only i2c encoders on this rig so I am leaving off some of the jacks. The DC DC converter installs in the existing holes on the right side along with some Tantalum caps. I do not have a battery holder yet. Be sure to use the V2 board #define or some things like encoders won’t work since the pins number are changed between board revisions.

I bent the bottom side RS-HFIQ heat sink fins out at a 45 (see below) to make clearance for a RPi heat sink I stuck onto the Teensy. They line up above each other which is good, helps keep the Teensy away for the RF front end, lots of ground plane around the PA section. I have the back of the RS-HFIQ facing the Teensy thinking it might help as a RF shield. The mother board is a 4 layer board and will also help shield noise from the display.

Shown above is the minimum interconnect to get things running. 12V, Line in and Line out and the USB Host wires. I am using i2c encoders. Not shown are the wire jumpers for mic/PTT and speaker/headphone, the audio amp, and the planned internal speaker.
12V from the motherboard comes from a header on the RS-HFIQ (A6/A7 header) which has switched 14V and Gnd.
Some right angle connectors would make for even more room. I trimmed the extra long RS-HFIQ audio 2x3 header pins then bent them over a bit for more wire clearance. I filed down the top front ridge of the DC coaxial power jack to clear the case. A few pin headers on the RS-HFIQ I swapped to the bottom side of the board (Line IN, Line Out, A6/A7 for 14V), and the BNC.
I use a vacuum desoldering gun for the pin headers which makes flipping the header around easy. My largest desoldering tip was not large enough for the BNC legs and it took a lot of heat and some gentle prying one side at a time to work it out of the board holes. I like the ruggedness of this jack so flipped it to the bottom side (for case clearance). There is a capacitor on the bottom side feeding the center pin. Do not push the BNC all the way to the board or the BNC body will short the tiny capacitor.
With the Nano in the socket, I trimmed off the 1-2mm of exposed pin tops to prevent shorting the case.

Some end views of the RF + CPU + RA8875 4.3” display stack. The case is a Hammond 1455N1601BK. Has metal end panels with plastic bezels you can opt to leave off. This is the same box as the RS-HFIQ except it is 53mm deep vs 31mm.


I am reusing the RS-HFIQ Line In and Line Out jacks for Speaker and Mic/PTT since each jack has a 2x3 header with shorting blocks that when removed, isolate the jacks and allows me to run alternate signals out them. I have yet to make jumpers for the Mic/PTT and headphone/ext speaker jack so theyare not seen installed in these pictures.
I am about to fit in a small 5V 1W audio amp. I will need to find a very compact speaker that might fit on the end panel.
A USB panel mount connector for the Teensy will mount on an end panel along with the reused RS-HFIQ power switch. The old RS-HFIQ end panels will be used as drill guides. For that USB extension cable I will cut the plastic off a micro USB plug end so I can bend the wires closer to the plug body to clear the case. The audio card is rotated 90deg on the V2 board to the headphone jack is no problem now. Mic, line in and line out are broke out on pin headers on the motherboard for easy connection to the RS-HFIQ.
Keeping the USB Host cable inside the box involves putting a JST connector in the motherboard USB holes and tacking fine wires onto the Nano’s CH340G USB chip pins 5 and 6 to tap the D+ and D- USB data lines. Easier then soldering to the microUSB connector area. Purple wires are on Pins 5 & 6 of the CH340G chip on the Nano. These are the easiest way I found to access the USB data lines for internal wiring. I will likely remove the Nano micro USB connector so I do not have to drill an end panel hole for it. Like the power switch wires, I passed the wires through a mounting hole.

I have USB serial CAT control working and now running WSJT-X on my PC using the headphone audio out and the USB. A 2nd USB serial port is dedicated to CAT control via OmniRig V1 and the RS-HFIQ.ini rig file.
There is an external si5351a clock header on the RS-HFIQ. I think there is room to slip in W7GLF’s tiny 10Mhz si5351c board (designed for 22Mhz TCXO replacement for Yaesu FT-817/857/897 radios) and get an auto-switching 10Mhz external reference. The RS-HFIQ is using 25Mhz. I have made no changes to the RS_HFIQ Nano software.
Here the new Teensy Compact SDR (minus end panels) joins the family of SDRs accumulating here. Besides the K3, the other SDRs are PiHPSDR controllers built in the last half year. One is in the largest Hammond box in the 1455 series. Not seen is a new 7” Teensy SDR build in a much larger Chaval case.

Mike, K7MDL

Tree
--
~The Voice of the Pacific NorthWest VHF Society~
You are subscribed to the Google Groups "PNWVHFS" group.
To post to this group, send email to PNW...@googlegroups.com
To read message history, visit http://groups.google.com/group/PNWVHFS
---
You received this message because you are subscribed to the Google Groups "PNWVHFS" group.
To unsubscribe from this group and stop receiving emails from it, send an email to pnwvhfs+u...@googlegroups.com.
To view this discussion on the web visit https://groups.google.com/d/msgid/pnwvhfs/DM4PR07MB93580921C47E691644EBEB37F6FF9%40DM4PR07MB9358.namprd07.prod.outlook.com.