how do I connect to my PiDP11 on LAN in Xterm( or whatever) if it doesn't show up in Network Scan with SSH able

Robert Weissburg

Johnny Billquist
Second - no PDP-11 OS have ssh at the moment, so you will not be able to
connect using that no matter what.
However, with 2.11BSD as well as RSX, you can get telnet working, but it
does require that you configure things on the PDP-11 OS side. But I'm
also a bit wondering if you've actually understood that the PDP-11 will
have a separate IP address to your RPi, and depending on OS, you might
need to configure the address manually. If things just pop up when you
put in the cable, I suspect it's actually your RPi you're seeing, and
not your PiDP-11...
Johnny
> You received this message because you are subscribed to the Google
> Groups "[PiDP-11]" group.
> To unsubscribe from this group and stop receiving emails from it, send
> an email to pidp-11+u...@googlegroups.com
> <mailto:pidp-11+u...@googlegroups.com>.
> To view this discussion visit https://groups.google.com/d/msgid/
> pidp-11/743cec70-f647-44e4-883f-a93148c9881en%40googlegroups.com
> <https://groups.google.com/d/msgid/pidp-11/743cec70-f647-44e4-883f-
> a93148c9881en%40googlegroups.com?utm_medium=email&utm_source=footer>.
Robert Weissburg
Johnny Billquist
then there isn't really anything to connect to.
Here is a suggestion - check out http://mim.softjar.se/pidp.htm, install
RSX, and follow the suggestions on that page, and use the cable on your
RPi, and you should eventually get to the point where you can connect to
the PDP-11 using telnet.
I don't have any as straight forward instructions for 2.11BSD, but if
you know your way around Unix, it shouldn't be too hard to work out
things on that side, but remember that 2.11BSD do not talk DHCP, so then
you need to configure addresses manually.
Johnny
> > pidp-11/743cec70-f647-44e4-883f-a93148c9881en%40googlegroups.com
> <http://40googlegroups.com>
> > <https://groups.google.com/d/msgid/pidp-11/743cec70-
> f647-44e4-883f- <https://groups.google.com/d/msgid/pidp-11/743cec70-
> f647-44e4-883f->
> > a93148c9881en%40googlegroups.com?
> utm_medium=email&utm_source=footer <http://40googlegroups.com?
> utm_medium=email&utm_source=footer>>.
> --
> You received this message because you are subscribed to the Google
> Groups "[PiDP-11]" group.
> To unsubscribe from this group and stop receiving emails from it, send
> an email to pidp-11+u...@googlegroups.com
> <mailto:pidp-11+u...@googlegroups.com>.
> To view this discussion visit https://groups.google.com/d/msgid/pidp-11/
> groups.google.com/d/msgid/pidp-11/
> dc7c446a-2caf-423f-9383-9d756087611dn%40googlegroups.com?
> utm_medium=email&utm_source=footer>.
Robert Weissburg

terri-...@glaver.org
I am doing the Wireless Operation setup on page 17 of the PiDP11 User Manual, step-by-step. This says to do exactly what I described.This is to allow working with the Pi wirelessly for all operations, so you don't need to be wired to it, so you can put it on the shelf and work from a comfortable location.
I have discovered online that SSH is not enabled by default on the Pi, which explains the issue. Enabling that is simple, if I can get "on" the pi.However, I don't appear to be able to enable that without putting a screen, keyboard and mouse back on the Pi, as it doesn't show up as a connected USB device when I attach it to be laptop now, even with Bonjour. I suspect this is because the Blinkenlights program is running on the PiDP11 by autostart, so it's not in pi mode and not "seeing" the laptop. I don't know a way to get it into the "pi" mode without being able to issue the CTRL-E, exit by keyboard. Even if I did connect it to the USB devices, like it was when I set up the PiDP11 it seems the Blinkenlights program would autostart anyway and I'd have the same problem.
If you don't have anything on the Pi's SD card that you care about (or have a spare SD card), download the latest version of the Raspberry Pi Imager. Run that on a system with an SD card slot and select "Raspberry Pi OS (Legacy) Full" 64-bit. The Imager will offer you the ability to enable SSH. Do that, give it your WiFi SSID and password, and put it in the Raspberry Pi and boot it. You should then be able to SSH into the Pi.
Optional (but strongly recommended) switch your desktop to X11 from Wayland:
sudo raspi-config
sudo raspi-config
Now, download the PiDP-11 software. I recommend my development fork (because I can support it) from:
You should now have a working PiDP-11 with blinkenlights. You can either SSH in or use a VNC client if you enabled VNC, to get the whole desktop,
Once you get to that point, post a reply with which operating system(s) you are interested in and people here can tell you how to set up TCP/IP (for the ones that speak TCP). You may find it easier (particularly on wireless) to simply connect the emulated multiplexor to a TCP port in the SIMH boot.ini file.
Robert Weissburg
Robert Weissburg
The pidp11 software runs fine without the PiDP-11 board plugged in. Set up & test your Raspberry Pi before you start soldering. Any Pi from the Pi Zero up can be used. But a Pi 2, 3, 4 or 5 is recommended. Read the manual (link, open in MS Word or OpenOffice) for more important details. There are three software install options; I recommend #1. Options #2 and 3 are left here in case - for whatever reason - you encounter setup problems.
Option #1: latest version.Download the latest Raspberry Pi OS to your liking (64 bit is preferred), make sure to create the username 'pi', and bring the Raspberry Pi up to the point where you have an internet connection. Then:
cd /opt
sudo git clone https://github.com/obsolescence/pidp11
/opt/pidp11/install/install.sh
Follow the instructions of the install script. Note: this install option #1 does not work for headless install at the moment. Small Wayland-induced bug. Install with a HDMI display and USB keyboard. After installing, headless operation works just fine. For more information, please read the PiDP-11 Github page.
Fallback Option #2: download the Raspberry Pi ready-to-boot SD cardFallback Option #3: install the previous version of the PiDP-11 software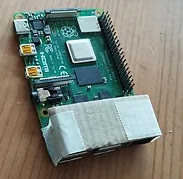
The Pi sits close to the PiDP-11 circuit board. Avoid any risk of short circuits: protect the metal USB connectors on the Pi with a strip cut from plastic or thin cardboard
terri-...@glaver.org
Thanks for you response. I set my card up by the instructions that are on the Obsolescence Guaranteed website, as instructed in my kit.
Thus:
https://github.com/Terri-Kennedy/pidp11.git is the development repository and will eventually merge back into the main obsolescence repo once I'm done with my fixes + improvements.
If your knobs rotate backwards or your LEDs lock up, you'll want to try my repo instead.