P 31-2 Windlass installation (my version)

Last Resort
I’m starting a new post pertaining to all the Windlass install that was discussed in my other posting found here: ventilation slots in V-Berth (google.com)
This way it will be easier for future interested 31-2 owners to find should they wish to install a windlass.
To sum up from the previous post, the windlass was installed and hatch door put back on and it was time to do the wiring.
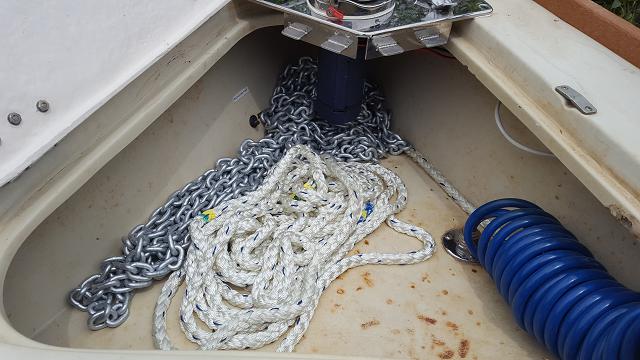
I used 4awg welding wire. I had estimated 40/45’ and bought 50’B and 50’R, but was way off ☹ it only took about 30’ for each line, with my Red needing a foot or so more to reach the breaker, and another couple of feet back to my positive bus. Running the wire wasn’t too bad (using flexible welding wire helped greatly). I started in the middle and I had to only drill out 4 holes for each wire from the water tank/small storage. 2 holes thru the wet locker in and 2 out to the bottom drawer. There was already a spacing in the bottom drawer at the front upper bow side to reach up to the next drawer and then 2 holes there to run to the holding tank wall and the last 2 holes. Once at the bow bilge, there was already a nice sized hole cut from the floor into the bilge at both ends, so easy peasy 😊 Connected to contractor and done up there. Now for what I thought would be the easier part (no V-berth to tear apart), I managed to get the 2 wires through the existing holes for the water tanks to under the sink, but what a bitch of a job when you’re by yourself, and there’s an extra 20’ on each line ☹ From there I took the wires back to the hull and through the storage area under the oven and through the next storage area and out to the cockpit locker behind the water heater (there was enough room in all the existing holes). Then a 90 degree turn around the water heater and down through the big spacing use for LOTS of my other wires and through into the battery compartment under the aft cabin bed. I managed to find one existing hole in for the red, but had to drill another one out for the black. Hooked up to the breaker, red bus and black bus, and all set. I had purchased “cheap” remotes found on the net for operating the windlass, but in the end no luck and had to install the guarded switch that came with my unit in the anchor locker area instead. I really don’t want to install foot pads and wanted the remote system, so I may have to break down and pay Lewmar the big bucks for their remote system ☹ I preloaded the rode and chain by hand and set it all up as shown in picture.
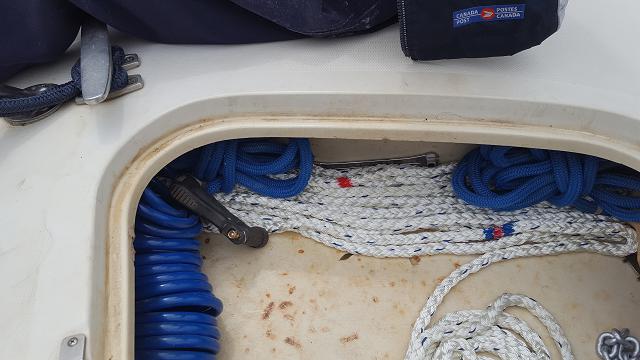
My first anchoring was a bit of a learning curve, both learning how to use a windlass 😉, and the operation itself. I decided to let the windlass let out my 70’ and it was a bit slow. The chain kept getting caught in the windlass due to kinks in the chain from the hand loading, and the same with the rode, but not nearly as bad. We discussed in the previous post about milking it all by hand, and that’s necessary for sure, but the issue with a vertical windlass is the opening is on the other side of the windlass motor, so it’s not quite handy as it would be with a horizontal windlass. But then a horizontal windlass had NO chance of dropping the chain and rode into the bow bilge. But if that’s not going to happen now, milking it all is your choice, then a horizontal windlass may be the way to go. I’m sure my SS plate could be easily adapted for a different windlass cut-out. I went with the v700 due to its smaller size and being nicely streamlined. Pulling the anchor up this morning went better, but still need more practice at the milking, plus being on my own makes it somewhat harder with no one to control the boat at the same time. I know once the admiral gets here things will simplify. My 2nd drop today I decided to try the freefall (after learning how) and it went a big better, but still some issues with kinks in the chain. But my milking got better and so did the dropping. I’m sure though I need to find a way to at least drop my 80’ of working chain and rode into the bow bilge, but that will be a project for next spring making up a piece that I can mount and seal in that small area around the pump out hose and anchor locker drain. Except for the pump out line, I can rearrange the other hoses and wires to clear the area to make more room and no obstructions. When or if I get the windlass to run smoothly without milking, then I might consider moving the switch back to the cockpit, but that’s another project for another spring 😊
Another thought though came to me last night as the mosquitoes were trying to get to me…if there’s a hole into the cabin, they’ll find it (I’ve plugged most of them). Once a hole is cut through the locker into the bow bilge, they’ll have a way in through the hole now that there’s no seal between the anchor hatch and SS plate, so whatever I do come up with to install/build in there, it will have to be sealed tight!!!! (Which make my 1st point about v-berth slats a moot point now doesn’t it?). I guess there might be a way also to seal that gap created by cutting the hatch and the SS plate.
Last Resort
Last Resort
Last Resort
Last Resort
Bottom line! you CAN put a working windlass on a P31-2 and it works GREAT to take away all the muscle work of doing the anchoring yourself, if that's what you're after :)