Why no door envelope testing when passive certification is bypassed? Part 2 (homeowner post)

cavendum.e...@gmail.com
- Before signing any build contracts go directly to the door and window manufacturer's representative (you DO know who that is, right?) and begin a relationship. Your door and window package is way too expensive, and too important, to leave this to others.
- Have the rep walk you through the quality control process required to properly install and verify the performance of their products in your particular house. In my case, I naively assumed all of this was somehow "automatically" put in place for me by the builder. It was not.
- Confirm with the rep that both the builder, and any installers the builder intends to use, have the experience and skills to carry out their parts of the quality control process. If the rep can't lock that down for you, or doesn't have experience with each of the actors involved, consider it a red flag. You may have to force a change in the roster, coach.
- Make sure you find out when specialist skills provided by the manufacturer are required, and just how that interaction is managed. And find out how quickly that specialist skill can be available at your job site. You're going to need it. I certainly did.
- Get the manufacturer's Warranty in your hand and have them mark out which parts apply to your specific build, and which do not. I naively assumed that the Warranty would have to be at least as good as that for high quality windows used in non-passive construction. My mistake.
- If there are parts of the Warranty that leave holes in your coverage (perhaps your build site is within a mile of Puget Sound?) this is the time to either (a) have the manufacturer modify the Warranty for your build in writing, or (b) accept the Warranty as is and the risks that go along with it, or (c) talk to other manufacturers.
- Get a copy of the Sales Contract form to go along with the Warranty. Your agreement with manufacturer consists of both, and they interact. I never received either document until I was having on going problems getting my installation fixed, and that was a year after my build started. And then only after I demanded them. That is way too late, homeowner!

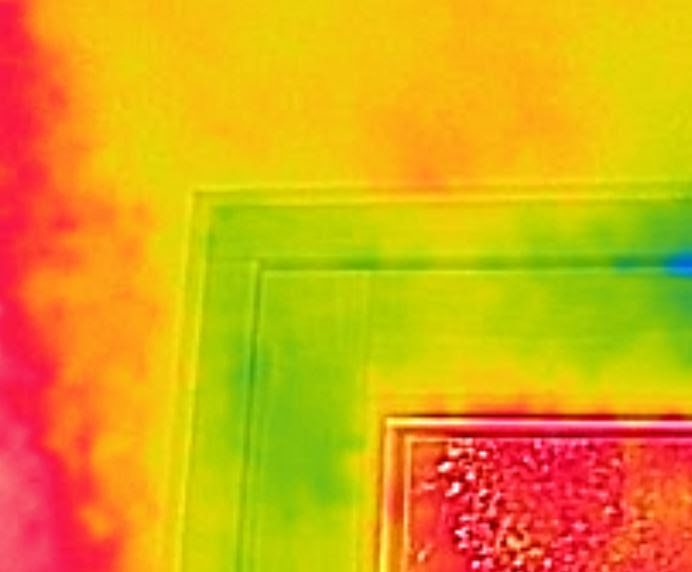
Entry door "after" thermal image (below). The vertical leak was fixed by the Zola tech door adjustment. The leak at the lower right was blocked with sealant applied by the Zola tech.
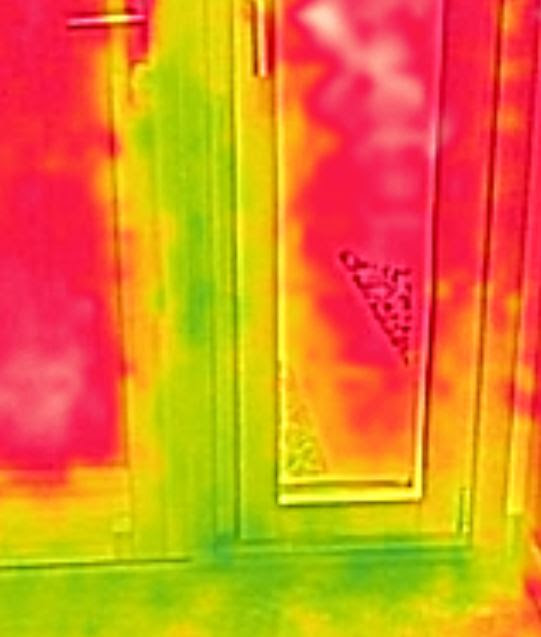
Side door "before" thermal image (below). The vertical purple area is an air leak from the central door hinge down to the floor; the door is out of adjustment. The dark blue areas at the bottom left and right of the door are air leaks were caused by damage done to the door sill, and door seals, by the builder and subcontractors using the door without protecting the sill.
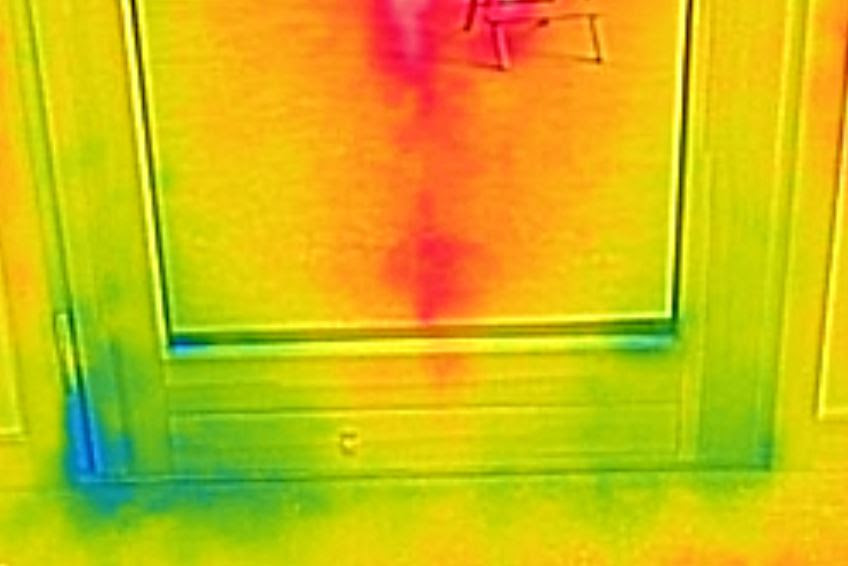
Side door "after" thermal image (below). The vertical leak was fixed (almost completely) by the Zola tech door adjustment. The leaks along the bottom were stopped with new seals applied to the door sill and the door itself. Because of the damage done to the sill, and the bottom of the door, those parts could only be partially repaired without replacing the entire sill assembly.
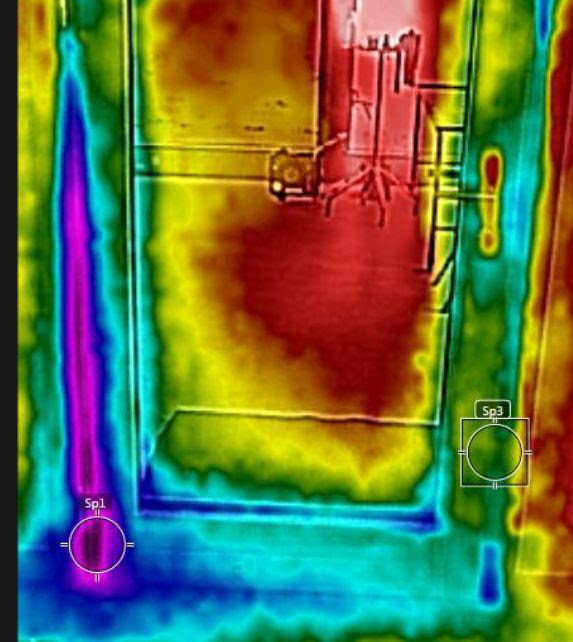
Slider door "before" thermal image (below). The horizontal purple and blue area is an air leak caused by parts missing from the door installation. The area of the hole in the seal was about the size of a golf ball... you could feel air blowing in from the outside. The installer didn't verify that the door seals were properly installed (or missing entirely in this case).

Slider door "after" thermal image (below). The same area with seal installed. After I proved the leak to the builder, the manufacturer forwarded a replacement seal.