[Oxen Software Studio] WindowBuilder Pro brief sample – Part 2 of 3

Lautaro
There is no specific Swing project option, so we should just create a standard Java project:

After creating the project we are going to create a JFrame class:

On the next screen, enter names for class and package (I'm going to put ar.com.oxen.test.swing - the main purpose of this blog is to make publicity for Oxen :P). When finished, you should have a class like this one:
package ar.com.oxen.test.swing;

import java.awt.BorderLayout;

public class MyFrame extends JFrame {

 private JPanel contentPane;

 /**
  * Launch the application.
  */
 public static void main(String[] args) {
  EventQueue.invokeLater(new Runnable() {
   public void run() {
    try {
     MyFrame frame = new MyFrame();
     frame.setVisible(true);
    } catch (Exception e) {
     e.printStackTrace();
    }
   }
  });
 }

 /**
  * Create the frame.
  */
 public MyFrame() {
  setDefaultCloseOperation(JFrame.EXIT_ON_CLOSE);
  setBounds(100, 100, 450, 300);
  contentPane = new JPanel();
  contentPane.setBorder(new EmptyBorder(5, 5, 5, 5));
  contentPane.setLayout(new BorderLayout(0, 0));
  setContentPane(contentPane);
 }

}
It's worth noting that the wizard created a main method, so we can just run the frame as a ordinary Java application.
In order to edit the frame, we must open the file and select the design tab:

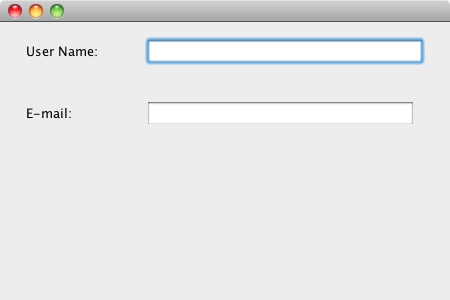
By default, the frame has a BorderLayout. You can use any layout of your preference, depending the needs of your application UI (just drag the layout over the panel). I'm going to use an absolute layout just for this example. After adding A couple of JLabels and JTextFields, we have a nice registration screen:
In order to make the code more readable, be sure of putting a meaningful name in each JTextField variable name (properties view on design editor):

Now, I'm going to show you a pretty cool feature: bindings. With bindings, you can link values between object properties without writing specific code, which eases the implementation of MVC and MVP patterns. With this Swing plugin, a 3rd party library (org.jdesktop.beansbinding) is used. The editor allows a graphical and intuitive definition of such bindings. The SWT plugin has binding support also, but I'm going to test ti on the next post.
Let's begin by adding a JCheckBox for enabling e-mail notifications (in our imaginary example).

Now, on the bindings tab, we are going to add a new binding, selecting the enabled property of the e-mail text field on Target (left) and selected property of checkbox on Model (right).

There is an option for selecting beans or widgets. For this binding, both sides must be widgets:

Add the binding by clicking on any of the + buttons:

Select READ on UpdateStrategy. This means that when the model is changed, the value is copied into the target. A READ_ONCE strategy makes a copy only one time (when the panel is shown) and a READ_WRITE strategy makes a bidirectional binding.
When you add the binding, you can specify a data converter and a data validator, but I'm not going to cover them on this post.
Now, when you run the example, the e-mail text field is enabled/disabled according to checkbox selection. If you don't believe me, just try it :)
Now, we are going to add a model bean. Let's suppose we have a Person bean which holds the name and the e-mail:
package ar.com.oxen.test.swing;

public class Person {
 private String name;
 private String email = "johann.s...@mastropiero.org.ar";

 public String getName() {
  return name;
 }

 public void setName(String name) {
  this.name = name;
 }

 public String getEmail() {
  return email;
 }

 public void setEmail(String email) {
  this.email = email;
 }
}
I intentionally put a default value on the e-mail just to show the bidirectionally of the binding. Now, we must add a Person property on the JFrame:

After that, we must add two READ_WRITE bindings from name and email to their respective field text properties (remember selecting "Bean" on Model panel):

This should wire all the properties. Just to test it, we are going to add a button that shows person data on a dialog. In order to achieve this, an action event handler must be added:

the code for the event handler could be as follows:
btnShowPerson.addActionListener(new ActionListener() {
    public void actionPerformed(ActionEvent e) {
        JOptionPane.showMessageDialog(null, "Name: " + person.getName()
                + " and e-mail:" + person.getEmail(), "Person data",
                JOptionPane.PLAIN_MESSAGE, null);
    }
});
This should be enough for running the example.
This is all for this post. I hope you enjoyed this mini-tutorial. On the next post (and last one of this serie) I'll play for a while with SWT/JFace editor.
Related posts:
--
Posted By Lautaro to Oxen Software Studio at 10/01/2010 07:46:00 PM

Sebastián Echarte
--
Saludos
Seba Echarte
Pablo Abrudsky
>
> Muy interesante, che estoy haciendo el Proyecto final para la facu. con GWT y seleccione como mejor opcion smart GWT, como parte de lo que pasaste encontré esto que me parece interesante para aplicar a mi proyecto.
> Ya hice las pruebas necesarias cree el proyecto, ahora me toca la parte de hacer una arquitectura para la presentación (Vista), ahi me perdi un poco debido a que voy a creear muchas clases ABM etc etc.
> ¿Que Arquitectura para la vista seria ideal para estos tipos de `proyectos?
>
> http://code.google.com/intl/fr/webtoolkit/articles/mvp-architecture.html
>
Hace un tiempo estuve mirando este framework, parecía muy bueno, y por
lo que veo sigue activo.
http://code.google.com/p/gwt-presenter/
Espero que te sirva,
Saludos,
Pablo.
>
> 2010/10/5 Lautaro <lbra...@yahoo.com>
>>
>> Last week we started testing WindowBuilder Pro and created a simple GWT example project. This time I'm going to show you how to create a Swing project.
>>
>> There is no specific Swing project option, so we should just create a standard Java project:
>>
>>
>> After creating the project we are going to create a JFrame class:
>>
>>
>> By default, the frame has a BorderLayout. You can use any layout of your preference, depending the needs of your application UI (just drag the layout over the panel). I'm going to use an absolute layout just for this example. After adding A couple of JLabels and JTextFields, we have a nice registration screen:
>>
>>
>> In order to make the code more readable, be sure of putting a meaningful name in each JTextField variable name (properties view on design editor):
>>
>>
>> Now, I'm going to show you a pretty cool feature: bindings. With bindings, you can link values between object properties without writing specific code, which eases the implementation of MVC and MVP patterns. With this Swing plugin, a 3rd party library (org.jdesktop.beansbinding) is used. The editor allows a graphical and intuitive definition of such bindings. The SWT plugin has binding support also, but I'm going to test ti on the next post.
>>
>> Let's begin by adding a JCheckBox for enabling e-mail notifications (in our imaginary example).
>>
>>
>> Now, on the bindings tab, we are going to add a new binding, selecting the enabled property of the e-mail text field on Target (left) and selected property of checkbox on Model (right).
>>
>>
>> There is an option for selecting beans or widgets. For this binding, both sides must be widgets:
>>
>>
>> Add the binding by clicking on any of the + buttons:
>>
>>
>> Select READ on UpdateStrategy. This means that when the model is changed, the value is copied into the target. A READ_ONCE strategy makes a copy only one time (when the panel is shown) and a READ_WRITE strategy makes a bidirectional binding.
>>
>> When you add the binding, you can specify a data converter and a data validator, but I'm not going to cover them on this post.
>>
>> Now, when you run the example, the e-mail text field is enabled/disabled according to checkbox selection. If you don't believe me, just try it :)
>>
>> Now, we are going to add a model bean. Let's suppose we have a Person bean which holds the name and the e-mail:
>>
>> package ar.com.oxen.test.swing;
>>
>> public class Person {
>> private String name;
>> private String email = "johann.s...@mastropiero.org.ar";
>>
>> public String getName() {
>> return name;
>> }
>>
>> public void setName(String name) {
>> this.name = name;
>> }
>>
>> public String getEmail() {
>> return email;
>> }
>>
>> public void setEmail(String email) {
>> this.email = email;
>> }
>> }
>>
>> I intentionally put a default value on the e-mail just to show the bidirectionally of the binding. Now, we must add a Person property on the JFrame:
>>
>>
>>
>> After that, we must add two READ_WRITE bindings from name and email to their respective field text properties (remember selecting "Bean" on Model panel):
>>
>>
>> This should wire all the properties. Just to test it, we are going to add a button that shows person data on a dialog. In order to achieve this, an action event handler must be added:
>>
>>
>>
Lautaro Brasseur
http://code.google.com/intl/es-ES/webtoolkit/articles/mvp-architecture.html
que por ahi aplica más a GWT. Si querés ver más conceptualmente la cosa, fijate en los artículos de Martin Fowler:
http://martinfowler.com/eaaDev/ModelViewPresenter.html
y, finalmente (como no podía ser de otra forma, al mismo nivel que Google o Fowler, jaja), nuestra prueba de concepto:
http://blog.oxenstudio.com.ar/2010/09/generic-mvp-with-properties-and-binding.html
Saludos
Lautaro
De: Sebastián Echarte <sech...@gmail.com>
Para: oxen-softw...@googlegroups.com
Enviado: martes, 5 de octubre, 2010 17:04:33
Asunto: Re: [Oxen Software Studio] WindowBuilder Pro brief sample – Part 2 of 3