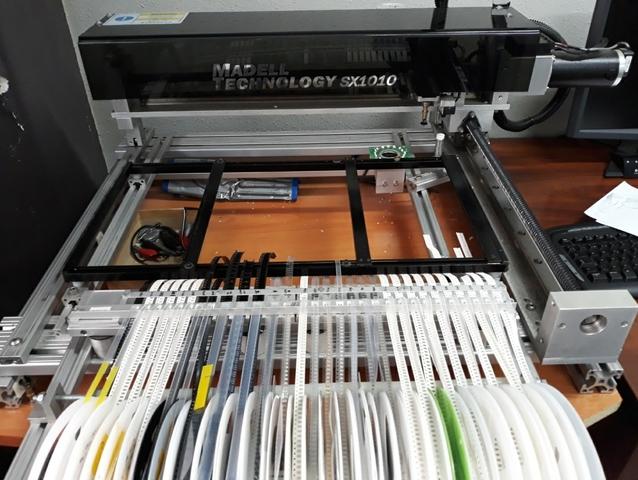
Madell SX1010 Open PNP Retrofit

948 views
Skip to first unread message

Xavier Lenne

unread,
Nov 6, 2019, 1:37:23 PM11/6/19
to OpenPnP
Hello Guys,

I'm Xavier from Switzerland. I follow this group for a couple of month and this is my first topic. 3 months ago, I gave the chance to buy a madell SX1010 like this one :

madell_sx1010.jpg


As it's my first PNP and I didn't wanted to spend too much time on building a machine from scratch, I though I could live with there solution. But after spending weeks on this machine to make it work and talk with there after sale saying that I need a maintenance contract (for professionnal I can understand to work that way, but for personnal use it's out of budget), I give up and decided to make a retrofit. After all, the mechanic is here, and even if it's not perfect, I think it's a good entry point.

So, my goal is to change the command electronic for a smoothieboard, and, if possible, make it work with the rest (after a total rewiring of course). I know I'll have to change the camera as madell use a proprietary solution for visual detection, I hope we'll discuss about it later. I'm not so far for the moment as it's a project I do during the week-end, but I already ordered the smoothieboard which come in few days. To give you a small overview of the machine :
- X, Y motion is done by lead screw attached to a servomotor (HuaNing Technology, Inc HN23-127-60) with an encoder (CUI AMT102-V) drived by a Geckodrive G320 DC Servodrive.

- Z motion is made by a linear stepper motor (Haydon switch instrument 43m4z), controlled by a Geckodrive G203V

- Head rotation seems to be made by a stepper motor (didn't see the reference yet) controlled by a stepper driver (US Digital MD2S-P).

We'll see the rest later. Before the smoothieboard come and as a first step, I'm wondering how to controll X,Y axis. I made a drawing of what I understand, but I'm little unsure about some things (for example, I have to wire a +5VDC to the gecko, but no terminal for the ground ???). So, could you give me your opinion about my wiring (attached) ?

Thanks by advance.

Best regards,

Xavier.


G320_Smoothieboard.png

Mike Menci

unread,
Nov 6, 2019, 2:55:15 PM11/6/19
to OpenPnP
HI, 
Be aware that smoothie configuration will need to change for use of servos (basic is steppers!)
Mike 

Jason von Nieda

unread,
Nov 6, 2019, 3:02:08 PM11/6/19
to ope...@googlegroups.com
Hi Xavier, and welcome!

Overall your wiring looks fine, but one thing to think about:

No 5v ground is needed on the Gecko drive because the STEP and DIR signals are being used in an open collector fashion. If you look at the diagram, you see that 5v goes through an opto-coupler LED to STEP and DIR, so when these signals are grounded they will be active. I am not sure if this will work okay with Smoothie, since the signals will be 5v. I don't remember offhand if Smoothie is 5v tolerant on the STEP and DIR signals. Best to check.

Jason


--
You received this message because you are subscribed to the Google Groups "OpenPnP" group.
To unsubscribe from this group and stop receiving emails from it, send an email to openpnp+u...@googlegroups.com.
To view this discussion on the web visit https://groups.google.com/d/msgid/openpnp/4a10021e-397a-4f83-8a77-51d33cab96a8%40googlegroups.com.

Xavier Lenne

unread,
Nov 7, 2019, 4:29:20 AM11/7/19
to OpenPnP
Hello Mike and Jason. Thank you for the welcome and your first inputs.

Thanks for the clarification Jason, I found on the smoothieboard documentation all the informations (I think) :

"Please note, if your external driver requires 5V, that Smoothieboard only provides 3.3v on it's output pins.

Two solutions to this : either use a level shifter or use the Smoothieboard's pins as Open-Drain ( ie linking to ground instead of linking to 3.3v, when closed ), and wire accordingly."

Screenshot 2019-11-07 at 10.04.39.png

I don't have enable port on the gecko, so I'll test to keep this wiring (in the documentation they take the 5V on endstop, in my case, I just had an external 5V PSU but maybe I can take it somwhere else on the smoothie like on UART Pins). I'll have to set the smoothieboard to work as open drain with this config (extracted from the doc) :

n this case, you will also need to change those pins to be open-drain. To change a pin from being normal to being open-drain, you add a O LowerCase “o” to the pin's number. For example :

alpha_step_pin    2.0      # Pin for alpha stepper step signal

becomes

alpha_step_pin   2.0o     # Pin for alpha stepper step signal

I'll test that as soon as I receive my Smoothieboard.

Other subject. I have to change cameras (top and bottom). Documentation suggest an ELP Model USB100W03M, 720p. It seems to work well but start to date (1080p seems to not be a luxury now). On what I found, there's a lot of different reference used, but not a "2019 camera choice which work out of the box with openPnp". Some people have trouble to make working higher res camera because all of them are on the same usb concentrator. In my case, I have a desktop computer and it's not a problem to had PCIE USB card.
2 models seems to be popular (but didn't find if they work out of the box with OpenPNP or if we need to tweek it a little) :

Any feedback on these models (or suggestions on others) ?

Best regards,

Xavier.
To unsubscribe from this group and stop receiving emails from it, send an email to ope...@googlegroups.com.

Marek T.

unread,
Nov 7, 2019, 5:40:02 AM11/7/19
to OpenPnP
Hi Xavier

Is Gecko not equipped with optoisolated dir/step inputs as many servo drivers are (including my shity one)? If it is not, u can still add some led optocoupler to get 100% sureness. I have them used for every valves control outputs of Smoothie, as they are driven from 24V grounded separately on my machine.
You don't need Enable output in case of servo driver.

Xavier Lenne

unread,
Nov 7, 2019, 8:39:07 AM11/7/19
to OpenPnP
Hello Marek,

After the message of Jason I checked the documentation of the geckodrive : https://www.geckodrive.com/amfile/file/download/file_id/15/product_id/35/ they say : 

"The STEP and DIRECTION signal drivers must be TTL compatible and have edge transition times of 100 ns or faster. The +5VDC is the opto-isolator common anode line and must be returned to the pulse source +5VDC supply." 

So it's well opto-isolated, I think I'll burn the driver with a bad connection ;-)

Xavier Lenne

unread,
Nov 7, 2019, 9:47:24 AM11/7/19
to OpenPnP
I updated my schematics, but I'll test it this week-end (I published it if it could help someone). I removed the 5V PSU (as I ordered a 5 XC-R with voltage regulator for 24V to 5V) and take the 5V on the UART pins of the Smoothieboard.

Depending on time, I'll try to make a draft of the whole schematics planned.

As there's very little documentation on those machines, don't hesitate to ask questions about it.

Best regards,

Xavier.
G320_Smoothieboard_2.jpg

Marek T.

unread,
Nov 7, 2019, 10:24:04 AM11/7/19
to OpenPnP
I don't like a solution that this Gecko does not have power grand separated from the logic ground. Understand it's not your choice but you have what you got...
Howevet, it seems be safe to connect dir/step of Gecko to the Smoothie open drain configured outputs. But for any case I'd add there a yet some serial resistors at least (to don't throw 5v through diodes onto the Smoothie) and check with the scope how the signals look like.
Probably Arthur will tell you here something more detailed when have some free time, I'm sure he's following us from time to time.

Ed Simmons

unread,
Nov 7, 2019, 10:27:45 AM11/7/19
to ope...@googlegroups.com
But there's opto-isolated inputs on the drive... The ground doesn't connect to the controller inputs and the (probably) differing potentials of the each area's local grounding don't matter.

Smoothie outputs are supposed to be 5v tolerant in an open drain configuration, from memory.

--
You received this message because you are subscribed to the Google Groups "OpenPnP" group.
To unsubscribe from this group and stop receiving emails from it, send an email to openpnp+u...@googlegroups.com.
To view this discussion on the web visit https://groups.google.com/d/msgid/openpnp/d67fcb22-cc61-494b-ab9a-5b6996fe8145%40googlegroups.com.

Marek Twarowski

unread,
Nov 7, 2019, 10:55:29 AM11/7/19
to ope...@googlegroups.com
So you think this 5V powers only opto couplers on the Gecko inputs. Maybe it is, but resistors can only increase the safety of Smoothie outputs...

But I still don't like it :-). Not it this case, but for some high current motors I'd prefer have separated grounds and separated powers for whole internal logic and analog cirquit part. No matter.

You received this message because you are subscribed to a topic in the Google Groups "OpenPnP" group.
To unsubscribe from this topic, visit https://groups.google.com/d/topic/openpnp/poYaRaCtqOA/unsubscribe.
To unsubscribe from this group and all its topics, send an email to openpnp+u...@googlegroups.com.
To view this discussion on the web visit https://groups.google.com/d/msgid/openpnp/CAKeJYZN%3DnuvJOYewQU%2B-ANuGsm6dudp1YsONFo1hrDANABqWpg%40mail.gmail.com.

Ed Simmons

unread,
Nov 7, 2019, 11:04:30 AM11/7/19
to ope...@googlegroups.com
Yes the 5v supply should be only used for the optocouplers inside the gecko drive. It probably derives its own internal logic supply from the main power supply. 

The image of the gecko drive is probably correct about the internals of the inputs... That's what I'd expect to find on the PCB if I were able to look inside it.
Screenshot from 2019-11-07 16-02-40.png

Xavier Lenne

unread,
Nov 7, 2019, 1:07:37 PM11/7/19
to OpenPnP
I advanced on the schematics, you'll find attached the first draft of it(in jpeg and PDF), let me know if something seems to be totally (or partially) wrong.

For the moment, I just have a question about the A Axis endstop (for define a 0 degree on nozzle rotation). I couldn't find the answer on the smoothieboard documentation nor on OpenPnp one. I wire the A Axis Endstop so the Z Max Endstop, but is it possible to configure it to be usable ? If yes, does anybody have a link to an explanation ?

Best regards,

Xavier.
Madell SX1010 Retrofit OpenPNP.pdf
Madell SX1010 Retrofit OpenPNP.jpg

Marek T.

unread,
Nov 7, 2019, 2:27:27 PM11/7/19
to OpenPnP
Schematic is rather ok except the endstop which I unfortunatelly can't answer reasonably - but rather you cannot use z-max the way you made without some firmware tweaking.

I don't use any endstop for Z (my Z are pneumatic not motorized) and use this Smoothie sensor for A axis (nozzle rotation). Usually people here have exactly opposite configuration - endstop for Z and A without it. So I think that not many here use it as you wish to do.

ma...@makr.zone

unread,
Nov 8, 2019, 3:17:00 AM11/8/19
to OpenPnP
> but rather you cannot use z-max the way you made without some firmware tweaking.

Marek, why not?

endstop.maxz.homing_direction                home_to_max      # direction it moves to the endstop

_Mark

Marek Twarowski

unread,
Nov 8, 2019, 3:42:04 AM11/8/19
to ope...@googlegroups.com
It was only "rather" :-), good to know for some future :-).

--
You received this message because you are subscribed to a topic in the Google Groups "OpenPnP" group.
To unsubscribe from this topic, visit https://groups.google.com/d/topic/openpnp/poYaRaCtqOA/unsubscribe.
To unsubscribe from this group and all its topics, send an email to openpnp+u...@googlegroups.com.

Xavier Lenne

unread,
Nov 8, 2019, 4:06:09 AM11/8/19
to OpenPnP
Hi and thanks for your answers. I read the 6 axis but for endstop it was not clear. To summurize and see if I well understood. I have to decalre that I have a A axis, and assign a min endstop by let this commented to remove Zmax endstop :

# uncomment for homing to max and comment the min above
#endstop.maxz.enable                          true             # enable an endstop
#endstop.maxz.pin                             1.29             # pin
#endstop.maxz.homing_direction                home_to_max      # direction it moves to the endstop
#endstop.maxz.homing_position                 200              # the cartesian coordinate this is set to when it homes
#endstop.maxz.axis                            Z                # the axis designator
#endstop.maxz.max_travel                      100              # the maximum travel in mm before it times out
#endstop.maxz.fast_rate                       10               # fast homing rate in mm/sec
#endstop.maxz.slow_rate                       2                # slow homing rate in mm/sec
#endstop.maxz.retract                         5                # bounce off endstop in mm

and uncomment this to have a Amin endstop on pin 1.29 :

# OPTIONAL uncomment for homing the A axis to min
#endstop.mina.enable                          true             # enable an endstop
#endstop.mina.pin                             1.29             # pin
#endstop.mina.homing_direction                home_to_min      # direction it moves to the endstop
#endstop.mina.homing_position                 200              # the cartesian coordinate this is set to when it homes
#endstop.mina.axis                            A                # the axis designator
#endstop.mina.max_travel                      100              # the maximum travel in mm before it times out
#endstop.mina.fast_rate                       10               # fast homing rate in mm/sec
#endstop.mina.slow_rate                       2                # slow homing rate in mm/sec
#endstop.mina.retract                         5                # bounce off endstop in mm

I'm I correct ?

Mike Menci

unread,
Nov 8, 2019, 6:38:24 AM11/8/19
to OpenPnP
Xsavier
Do you have this feeders - http://web.csulb.edu/~hill/ee400d/Technical%20Training%20Series/24%20MCN%202012%20Instruction%20Manual.pdf
Page 10 - can you sketch them ?
Mike

Xavier Lenne

unread,
Nov 8, 2019, 6:42:46 AM11/8/19
to OpenPnP
Hello Mike, unfortunately I just have the "Plumb fish" (shity) feeders, but I agree that they seems pretty nice (if they where not so expensives, I bought it to understand how they are).

Feeders will be the next step once the OpenPNP retrofit will be made.

Xavier.

Xavier Lenne

unread,
Nov 8, 2019, 6:48:18 AM11/8/19
to OpenPnP
I foud this video : https://www.youtube.com/watch?v=Qy8GhuE11mk that give some clues about how it's working. Apparetly, they just move the protective tape that make advance the whole thing. 


Le vendredi 8 novembre 2019 12:38:24 UTC+1, Mike Menci a écrit :

ma...@makr.zone

unread,
Nov 8, 2019, 8:11:16 AM11/8/19
to OpenPnP

It seems to me you are mixing Z and A.


First note that you can have both endstops enabled for some axes, it' not mutually exclusive.


For OpenPNP Often X and Y have both endstops enabled and they also act as limit switches, i.e. the machine stops immediately if they're hit. A safety measure.


# optional enable limit switches, actions will stop if any enabled limit switch is triggered
#endstop.minx.limit_enable                   false            # set to true to enable the limit on this endstop
#endstop.miny.limit_enable                   false            # set to true to enable the limit on this endstop
#endstop.minz.limit_enable                   false            # set to true to enable the limit on this endstop

Of course, then you should only uncomment one of the

homing_direction
entries i.e. for the one endstop (min xor max) that you are using.


For the Z axis you have only one endstop either in the middle (dual head) or at the top i.e. at the Z max.

For the Rotation axis (for which you probable use the A axis) you usually have no endstop, as it does not matter what rotation the nozzle has in the beginning. Only the difference in rotation between the pick and the place is important. Nozzle tip calibration will compensate any angle specific runout.

_Mark

Mike Menci

unread,
Nov 8, 2019, 8:23:56 AM11/8/19
to OpenPnP
@ Mark
I have for X and Y software limits enabled - My X & Y auto stops -never hits Max Limit and if I want to Jog over the limits it will stop - display warning:
Soft Limits-Window.png

Mike Menci

unread,
Nov 8, 2019, 8:26:27 AM11/8/19
to OpenPnP
@ Xsavier - Just follow Mark - once you have your axis running you can later enable this soft limits in Open PnP..
Mike

Mike Menci

unread,
Nov 8, 2019, 8:35:40 AM11/8/19
to OpenPnP
Xavier - if you look at that video there is no feeder advancing SMT parts - the COVER TAPE foil is used to pull the SMD tape forward !!
This is how I see it - so its a complete feeder.
I have Yaskawa Servos ready but for the moment Im happy with steppers - http://blog.bouni.de/2015/driving-a-yaskawa-sigma-ii-ac-servo-with-a-smoothieboard.html
Mike

ma...@makr.zone

unread,
Nov 8, 2019, 8:38:25 AM11/8/19
to ope...@googlegroups.com

The soft limits are very useful but when your machine is not where it thinks it is (unhomed or after a stepper stalling incident), then it won't help. I found it very easy to stall the machine when I set up the nozzle tip changer.

Also when you are outside OpenPNP experimenting with Pronterface or inside OpenPNPP using the G-Code console, the soft-limits are not enforced of course.

At least while setting up the machine, the physical limit switches are very useful and hat to terminate a few "crashes" in my case. Also I assume the retrofit machine has them and the assumption that limits are live and armed have gone into the design.

I  can imagine you might burn a servo when it is kept powered against an obstacle.

;-)

_Mark

--
You received this message because you are subscribed to the Google Groups "OpenPnP" group.
To unsubscribe from this group and stop receiving emails from it, send an email to openpnp+u...@googlegroups.com.
To view this discussion on the web visit https://groups.google.com/d/msgid/openpnp/702753d2-2682-4f4b-bed1-2084fef6f612%40googlegroups.com.

Mike Menci

unread,
Nov 8, 2019, 8:48:19 AM11/8/19
to OpenPnP
Correct - and the servos should not be connected with transmition drives (dismounteed couplings) for the first tests. With Yaskawa there are quite some settings to do in order to make servos run properly before you can connect and run the machine axis one by one...
Mike 
To unsubscribe from this group and stop receiving emails from it, send an email to ope...@googlegroups.com.

Jason von Nieda

unread,
Nov 8, 2019, 10:12:33 AM11/8/19
to ope...@googlegroups.com
Any decent servo drive should have a limit to the number of pulses it will lose before it alarms and removes power. My LeadShines use a settable parameter - if the expected position and actual position differ by that amount at any point the power is cut. Got for protecting people, as well as machines :)

Jason


Mike Menci

unread,
Nov 8, 2019, 11:09:42 AM11/8/19
to OpenPnP
I was wrong - they do have a mechanicaly operated sprocket as well - so it does not pull only the cover tape:
Mike

Mike Menci

unread,
Nov 8, 2019, 11:14:58 AM11/8/19
to OpenPnP
Actualy - both way work - an older model here without sprockets: https://www.directindustry.com/prod/madell-technology/product-66775-624780.html

Xavier Lenne

unread,
Nov 8, 2019, 11:19:41 AM11/8/19
to OpenPnP
Indeed, but if I'm right, it's the sx-3 feeder. The feeders that I found very sexy is the alex one : https://groups.google.com/forum/#!topic/openpnp/B90C2JUtN30%5B1-25%5D we could think about a metal bended version like the one of smd-taxi (which is the inspiration of alex) : https://www.youtube.com/watch?v=7AS698UH4T0 
Coupled with the "tape remover" alex developed it could be nice.

Xavier.

Mike Menci

unread,
Nov 9, 2019, 12:55:43 PM11/9/19
to OpenPnP
You should not have the problem with servos to push down with Z - this here looks very efficient and parts in tape are covered until pick up :
Just the spooling of cxover tabe would need to be added to feeder (or hanging weight on cover tape isa an temp. option)... 
What you think ?
Mike

Mike M.

unread,
Nov 11, 2019, 3:54:03 AM11/11/19
to OpenPnP
Xavier - any news - were you able to get some axis running ?
Mike

Xavier Lenne

unread,
Nov 11, 2019, 4:26:40 AM11/11/19
to OpenPnP
Hello Mike, not yet (busy week-end). I received my smoothieboard and for now I'm redrawing the existing setup in case I need to move back. I'll make it clean and I'll publish it here if it could help someone one day.

Xavier Lenne

unread,
Nov 11, 2019, 4:31:38 AM11/11/19
to OpenPnP
Hi again, I like it, the only thing that it concern me a little is the ability to handle thicker components (I have a lot). Your idea to had a spool to it for covering tape is very sexy, we could use the movement of the tape to synchronise the rotation of it. I still like the SMD Taxi feeders as it could be make with sheet metal (cheap and solid), if we add a spool for covering tape on it I think we could have a pretty could setup. If can make a grouped order we'll be able to keep prices low. We just need to go to the drawing table ;-)

Xavier.

Mike M.

unread,
Nov 11, 2019, 7:20:01 AM11/11/19
to OpenPnP
But this feeders do take a lot of space (8mm to 16mm = 21mm /feeder ) .... There should be a klutch in spool and this makes it a bit more complicated ....
You have one nozzle on Mandell or two? >How is the Z made on your machine? can you send some photos?
Mike

Mike M.

unread,
Nov 11, 2019, 7:22:32 AM11/11/19
to OpenPnP

Mike M.

unread,
Nov 28, 2019, 3:34:27 PM11/28/19
to OpenPnP
Xavier - I hope all is turning the right direction ? How is the progress?
Mike

len...@gmail.com

unread,
Mar 31, 2021, 9:27:59 AM3/31/21
to OpenPnP
Hello, I didn't post for a long time, I had to put in hold this project but I'm on it again. I finally managed to use most of the hardware (actually all motors turns well with the differents stepper drivers). I have to test limits switch, wiring valves (for vaccum, I still don't know if I need pressure). I pass some times for figure out how to wiring everything, especially with geckodrive.
It's still a work in progress, but here is my wiring scheme :
Madell Sx1010 Retrofit.png
I just have a question on the vacuum sequence. I bought a gast vaccuum pump that will be managed by an SSR relay. If I understand it well, the sequence will be :
1) Vaccuum Pump ON
2) Solenoid ON to have the nozzle having vaccum
3) Take the part
4) Put part in is location
5) Vaccuum Pump OFF
6) Solenoid OFF to come back in positive pressure and release the part.

I'm correct or I miss something (actually the alternative is to use 2 solenoids and make the vaccuum on the circuit until I take the part, then close a first solenoid to keep a negative pressure inside the circuit, turn off the pump, moving to the part location, and activate the second solenoid to put the circuit in positive pressure and be able to release the part).

Thanks for your help and sorry fot he (too) long update on this project.

Xavier.

Niclas Hedhman

unread,
Mar 31, 2021, 9:51:59 AM3/31/21
to ope...@googlegroups.com

I am separating the vacuum generation from the pick-n-place action, by adding a vacuum vessel. The pump is ON/OFF by simple mechanical pressure gauge (not sure what they are called in English, same as a thermostat but for pressure instead of temperature), and the solenoid ON/OFF operates in the PnP sequence, always having vacuum available. My primary reason is to reduce noise, a) over dimensioned pump runs shorter period of times, b) can move the pump to another room.

HTH
Niclas


--
You received this message because you are subscribed to the Google Groups "OpenPnP" group.
To unsubscribe from this group and stop receiving emails from it, send an email to openpnp+u...@googlegroups.com.
To view this discussion on the web visit https://groups.google.com/d/msgid/openpnp/560de794-96d1-46fd-a04c-25bb13861754n%40googlegroups.com.

len...@gmail.com

unread,
Mar 31, 2021, 10:00:28 AM3/31/21
to OpenPnP
Hi Niclas and thanks for your advices, with that, when did you put positive pressure on the circuit ? Your solenoid is plugged with nozzle on the common, NC on vaccuum tank and NO on ambient air ?

BR.

Xavier.

ma...@makr.zone

unread,
Mar 31, 2021, 10:09:04 AM3/31/21
to ope...@googlegroups.com

Same as Niclas, I'm using a vacuum reservoir or whatever it is properly called in English ;-)

So the pump stays on as long as the machine is enabled and it will top up the "vacuum" from time to time. 

Adding a sensor to the reservoir pressure, Smoothie can control the level using hysteresis ("bang-bang") control. Description and configuration here:

https://makr.zone/vacuum-sensor/192/

_Mark

Niclas Hedhman

unread,
Mar 31, 2021, 11:14:35 AM3/31/21
to ope...@googlegroups.com

I haven't built it yet. But the plan involves the option (not decided yet, could be needed to drive up speed) of a slight over-pressure on NO.

len...@gmail.com

unread,
Apr 1, 2021, 8:48:37 AM4/1/21
to OpenPnP
Hello guys and thanks for your advice, I'm gonna do that. 

@Mark, as you're also in Switzerland, do you have a recommandation to source pneumatic components ?

Xavier.

ma...@makr.zone

unread,
Apr 1, 2021, 9:02:13 AM4/1/21
to ope...@googlegroups.com

:-)

Bought mine from Conrad. But that's not really a recommendation, i.e. I did not compare much.

_Mark

Mehrdad Majzoobi

unread,
Aug 17, 2021, 1:04:10 AM8/17/21
to OpenPnP
Hi everyone,

I have been following this thread with much enthusiasm as I have recently purchased a similar PnP machine (SMT MAX QM1100) which looks almost identical to Xavier's machine from Madell (see some pictures below). 

The machine works fine though the vision is a bit wanky as it uses old software and draft feeders often get out of sync. Top-looking vision is also unreliable and spits out a lot of components. Setting up vision is also a pain in the ass as it requires adding pictures for every 45-degree rotation. Long story short, the machine has a solid mechanical build but comes with crappy software with no prospect of update.

I have been tempted to take the steps mentioned here but I would like to still keep the original function of the machine intact. Since the machine uses a serial port (RS232) to send commands to the motion controller, I was thinking that instead of doing a hardware conversion (except cameras since current cameras and vision systems are CCD, non-USB, and are hooked up to a proprietary vision card in the PC) I would reverse engineer the UART/Serial commands and setup a Gcodedriver accordingly. 

Has anyone does something like this before? any suggestions on how to proceed? Do you think this is a sound approach or I am better off swapping the controller board with Smoothieboard?

The upside of this approach is that I can keep the machine running while I work on reverse-engineering the serial commands and if this approach works, I can do a soft switch to OpenPnP.

Thanks for your guidance,
Mehrdad
s-l1600.jpg
PXL_20210809_231016074.jpg

len...@gmail.com

unread,
Mar 29, 2022, 6:06:14 AM3/29/22
to OpenPnP
Hello guys,

After a long waiting time, I finally go back to work to make this machine working. I finally wired everything and everything seems to work. Just a problem with homing coordinates. All endstop on this machines are wired on MAX. When I do homing (I use $H instead of G28 as I used a CNC firmware on smoothie (the one of mark)), my machine should give me a X420, Y460, Z36 and C0. The problem is that I have those values when I launch openpnp and machine power on the first time. After that, I alway have good values on X and Y when I do homing, but Z goes to 0 instead of 36. I tried to use other GCode command (M114.1, M114.2...etc.), but lot of time I still have 0 and I can't move nor C Axis.
I'm on it for 2 days, but I'm totally struggle with that... Does anyone have on how I can fix that?

Thank you in advance.

Best regards,

Xavier.

mark maker

unread,
Mar 29, 2022, 7:43:46 AM3/29/22
to ope...@googlegroups.com

Hi Xavier

> I use $H instead of G28 as I used a CNC firmware on smoothie (the one of mark)

If by "the one of mark" you mean this one:

https://makr.zone/smoothieware-new-firmware-for-pnp/500/

then it is not a CNC=1 build, but a plain build. So you should use the normal commands.

In any case you should not need to do this by hand, just use Issues & Solutions:

https://github.com/openpnp/openpnp/wiki/Issues-and-Solutions

Some commands (like the HOME_COMMAND) you should delete (empty) in the GcodeDriver G-code tab, so they get freshly proposed by Issues & Solutions.

Press Find Issues & Solutions after each change to the machine setup, or after accepting and being happy with solutions.

_Mark

len...@gmail.com

unread,
Mar 29, 2022, 7:45:32 AM3/29/22
to OpenPnP
And for the ones interested, the updated drawings, the only things missing on it is the LED Rings.

Best regards,

Xavier.

Madell_Retrofit.png

len...@gmail.com

unread,
Mar 29, 2022, 7:59:52 AM3/29/22
to OpenPnP
Hi Mark and thanks for your answer (and all the knowledge you share). Unfortunately I already done that, I even did a totally new stepup of openpnp and follow Issue and Solutions recommandations but same results... What is strange is the fact that when I home, if I read firmware information on Driver panel, smoothieboard give the good coordinates, but openpnp seems to ignore it on the Z axis...

Regarding the firmware that's exactly the one pointed. My mistake, I though it was a customised version of a CNC one. But it work very well.

mark maker

unread,
Mar 29, 2022, 8:12:08 AM3/29/22
to ope...@googlegroups.com

can you post the machine.xml?

len...@gmail.com

unread,
Mar 29, 2022, 8:26:59 AM3/29/22
to OpenPnP
For sure! Here it is (I also added my config.txt of the smoothie).

Thank you for your help!

config.txt
machine.xml

mark maker

unread,
Mar 29, 2022, 12:27:42 PM3/29/22
to ope...@googlegroups.com
Look at the direction of the Z axis here...

https://github.com/openpnp/openpnp/wiki/Machine-Axes#the-openpnp-coordinate-system

... and then read this:

https://github.com/openpnp/openpnp/wiki/Machine-Axes#a-word-about-z-coordinates

If you can follow that, set the following in your config.txt (and you should know why): 

endstop.maxz.homing_position                 0

All good? 😁

_Mark

len...@gmail.com

unread,
Mar 30, 2022, 7:27:23 AM3/30/22
to OpenPnP
Hello Mark and thanks for your help, I switch to a homing of 0, when it works it's ok, but I still have some weired issue where I can't move Z nor C. The Z commute to a value of -17,1 (which is the height of the PCB used to primary fiducial location), I tried to understand where this value come from, but no real clue... I'm continue to dig but it's little anoying...

Best regards,

Xavier.

mark maker

unread,
Mar 30, 2022, 7:40:12 AM3/30/22
to ope...@googlegroups.com

> but I still have some weired issue where I can't move Z nor C

This is likely the selected tool in Machine Controls:

Be aware of this and select the right tool before trying to move/jog it.

If you have a camera selected, then it will only move Virtual Z or C axes, i.e the machine is still, but the internal coordinates are moved, which does make sense, once you understand the use cases:

https://github.com/openpnp/openpnp/wiki/Machine-Axes#referencevirtualaxis

https://github.com/openpnp/openpnp/wiki/3D-Units-per-Pixel

Also be aware that if you have "Auto tool select" enabled on the Machine, the tool will be selected automatically when you execute certain actions (press buttons etc.), that are clearly associated with the tool. So if you press one of the "Position Camera to Location" buttons for instance, it will also select the camera as tool.

> The Z commute to a value of -17,1 (which is the height of the PCB used to primary fiducial location), I tried to understand where this value come from, but no real clue... I'm continue to dig but it's little anoying...

Sorry, I don't understand the question.

_Mark

len...@gmail.com

unread,
Mar 30, 2022, 8:23:30 AM3/30/22
to OpenPnP
I'm so stupid... Thank's a lot, my problem come from that... Thank you a lot mark! Next step step setting the drag feeders and test a first production run!

Eli Bridge

unread,
Sep 10, 2024, 12:06:48 PM9/10/24
to OpenPnP
I am really excited to find this conversation. I have a Madell SX1010 that is on its last legs. I got it in 2009. It interfaces with a 25-year-old PC via a serial port and an obsolete video card. The vision system never worked very well (lots of scrolling and distortion) and the z-motor freezes up periodically. BUT, the X-Y system works well, and I hate to throw out all the hardware as well as my custom-built feeders. So I was thinking about a smoothieboard retrofit like the one described here except that I would replace the head with a dual head system like most of the recent open PNP designs have. I was uncertain about whether it was feasible, but the diagrams in Xavier's posts make it seem quite possible. The dual head system would (I presume) let me use a vacuum pump instead of the large and noisy air compressor that currently (and inefficiently) generates negative air pressure. 

Any advice or warnings before I descend into this rabbit hole. I have no experience with smoothieboards or OpenPNP, but the documentation makes sense to me so far. Is there a recommended dual-head kit that I should purchase. I see this on RoboDigg: https://www.robotdigg.com/product/674/Dual-PnP-Head-NEMA8-or-NEMA11-for-OpenPnP

And there are some similar kits on AliExpress.

@Xavier: Thanks for documenting your project here. Are there any updates since 2022?

bing luo

unread,
Sep 14, 2024, 4:56:34 AM9/14/24
to OpenPnP
The   mounter  head with  seesaw structure   is cannot achieve automatic replacement of the nozzle, as its upward traction force depends on the spring, which usually has a small pulling force.  Nowadays,  mounter heads  with   belt    are commonly used.   
However, due to temu taking away a large share of AliExpress, we are no longer selling these accessories on AliExpress.   We have exactly what you need on our website.  Compatible motherboards that can run smoothie  firmware are currently   maybe  only available for sale by us.   www.microsmt.com.cn.
Reply all
Reply to author
Forward
0 new messages