Fixing a jam without bending the metal
336 views
Skip to first unread message

Atrix
Dec 11, 2015, 5:34:43 PM12/11/15
to MOD-t
Cheers to Andrew for being the first pioneer into taking a mod-t that I have seen.
Following this will void any warranty
I have done the same and taken the head apart without bending the top plate. I will try and explain each image showing each stage I took:
Step 1: so the first image (take_apart_01), start with the printer head at the top as shown (used the load filament function to move it up quicker), remove the 4 screws on top.
Step 2: Now using a mirror to see, remove the 8 screws as shown in take_apart_02, Don't try and remove it, as it attached to what I assume is an earth wire, it will be lose and hanging down like take_apart_03. Unconnect the hot end first then unscrew it (when its cool).
Step 3: Now using the thumb screw at the back of the printer head (shown in take_apart_04), move it down to the bottom. This will give you enough space to remove the parts from inside the printer head. Move the black wire behind the closest pillar as you move the printer head down it be possible to move it through the gap in the top plate so you can move the top plate above the wire to the top of the pillars. It will hold it self up.
Step 4: As all the screws have been removed from under the printer head (step 2), the big fan in the middle should be free to move up, but is attached to a wire (take a note of where it is tucked away for when you put it back together). The connecter has only one way to be put back together (shown in take_apart_06, marked with a red arrow and the number 1). Be careful of the clear plastic disc marked in take_apart_05 by the green arrow.
Step 5: Removing the filament feeder should be moved up and remove the connecter marked with the red arrow with no number (image take_apart_06). Again be careful of the clear plastic disc indicated by the green arrow. This connecter will fit only one way.
Step 6: The fiddle bit, You should use a tray or something to capture anything that may and will more than likely will drop. Take note of the spring location as shown with green arrows in take_apart_09a (take_apart_09b, just showing a different angle). This spring holds the baring that pushes the filament to the feeder wheel. There are two parts that guide the filament, these must align to the two halves of the filament feeder, again take note (these parts are shown in Andrew's post). Unscrew the 3 screws in tern a little bit at a time as shown in take_apart_07. (image take_apart_08 is just showing where my filament is jammed). I wish I took some more images of this step, but my hands were full :D). Remove the old filament and give it a clean, I just used my finger and blowing the dust off. Making sure all the parts are aligned with both halves put the filament feeder back together, at this point the spring doesn't need to be in place but needs to be on the correct side of your feeder. Once you have screwed each screw in-turn, place the spring back to its correct location.
Step 7: Mine had filament stuck as shown in take_apart_10, I just unscrewed the bolt shown and the plate can be removed. I just used a safety pin to push it through (results shown take_apart_11).
Step 8: putting it all back together. I reconnected the filament feeder first and place it back into position, and then reconnected the big fan making sure to put the connecting cable is tucked back away into its initial position. Again being careful not to damage the clear plastic discs. When both the feeder and fan are back in place I screwed in the top plate, this makes sure everything is in the correct place including the black wire (you cant move the black wire to its original side of the pillar until the printer head is back at the top).
Step 9: Move the printer head back to the top, screw in the plate under the printer head. I started with the inner 4 screws first as that seats the filament feeder. Move the black cable to its original side of the pillar. only re-connect the hot end leaving it hanging or attach it with printers tape (safer option).
Step 10: Power up the printer and use the load filament function so you can see if the filament is going through the printer head. I used a small 4inch piece of filament with the one end cut at an angle (take_apart_12) and waited until it all came through. If this worked screw the hot end back in (once cooled) and reconnect your main filament.
Hopefully that should fix your issue.

ajf
Dec 11, 2015, 6:03:11 PM12/11/15
to MOD-t
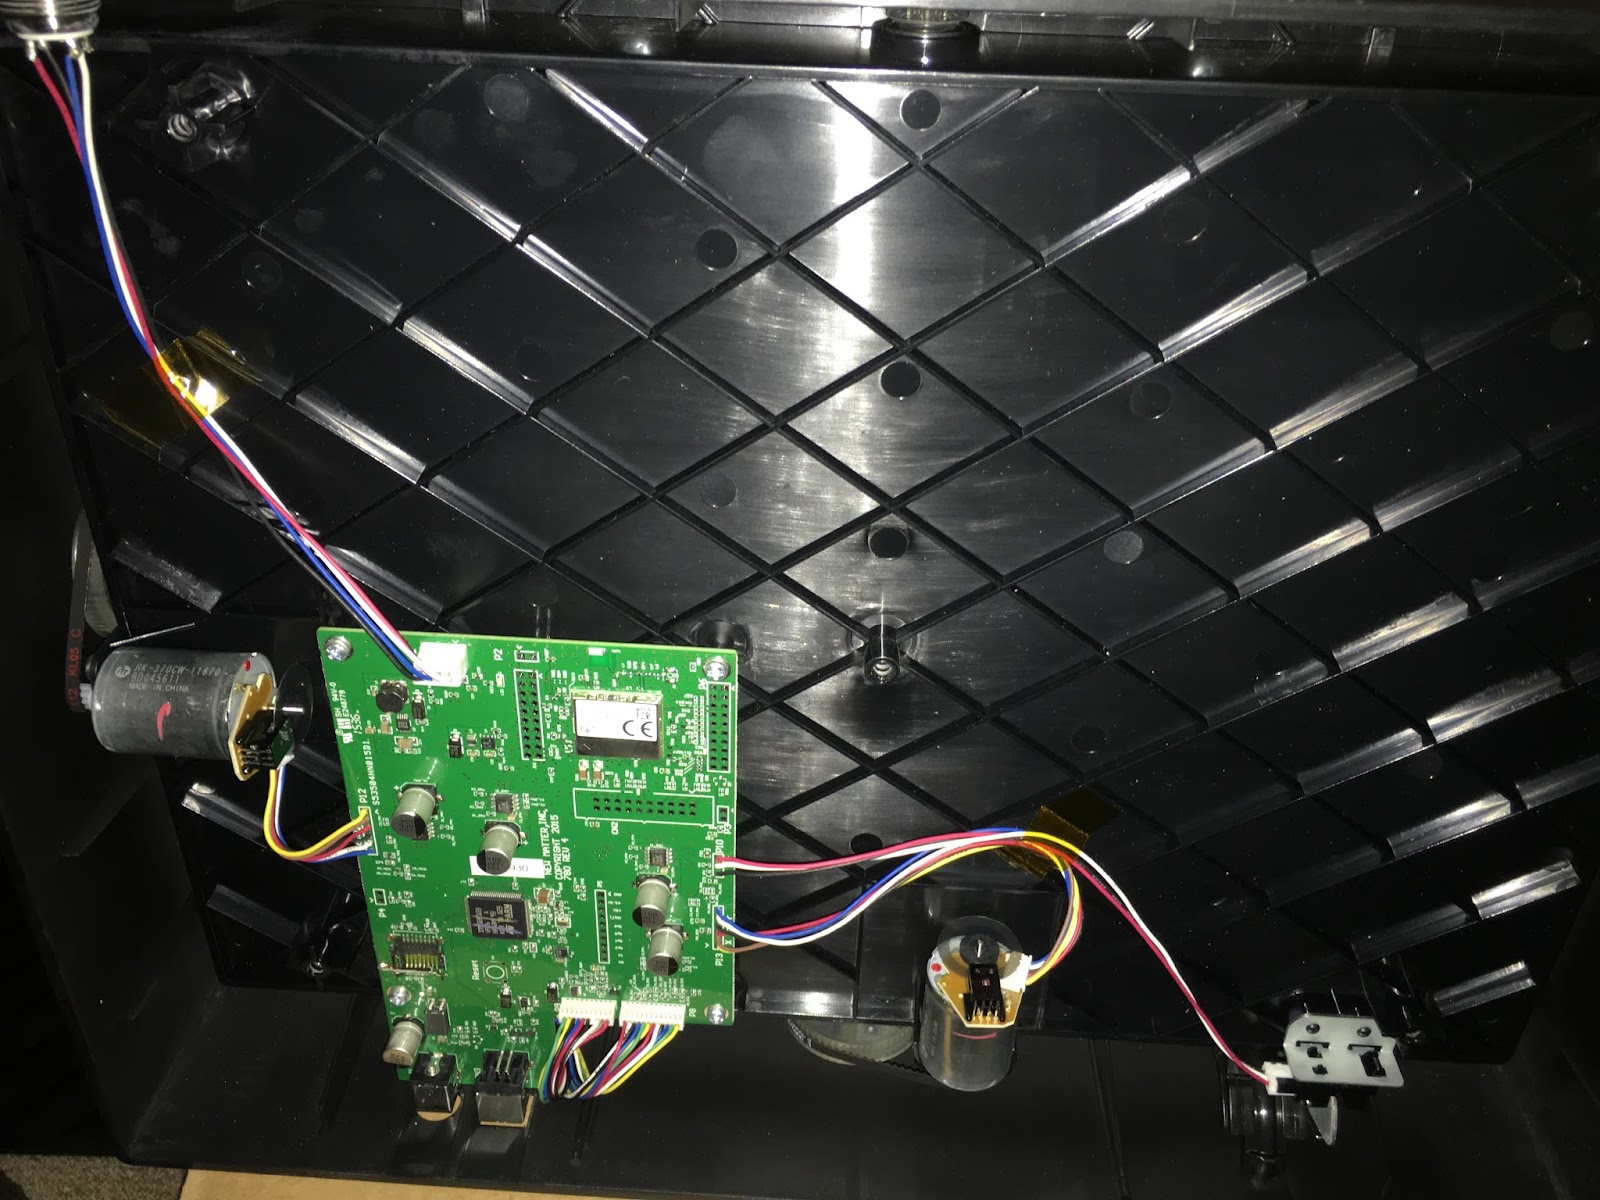
Thanks for posting this... I was going to do a teardown of the head, but now I don't have to. Maybe I'll do a complete teardown of the whole machine at some point, I went inside the first day, but there really isn't all that much to see in the bottom, just the controller board, motors and the filament sensor:

Andy Hudson-Smith
Dec 14, 2015, 4:43:52 AM12/14/15
to MOD-t
Well done ! - I am kicking myself for not moving the head down (i.e. allowing enough space to open it up without bending the top.... :)
Its not something i want to do often though...
Andy
Atrix
Dec 14, 2015, 12:11:45 PM12/14/15
to MOD-t
that's cool, only through what you have done did I try my method.

Daniel Cube
Jan 23, 2016, 1:10:14 PM1/23/16
to MOD-t
you know you can just unscrew and take out the whole central driveshaft and the whole head pops off of the top, right
Reply all
Reply to author
Forward
0 new messages