"Show my Location" app
54 views
Skip to first unread message

Itai Landau
Apr 21, 2019, 9:31:30 AM4/21/19
to mitappinv...@googlegroups.com
Hello all,
I would like to share with you my first app created as part of an online course I'm taking at my work place.
The task was to develop a Map Location App that sends a text message to your chosen contact with your current location.
We also needed to share our app to the App Inventor community.
So let's start :)
There are 3 main part for my app:
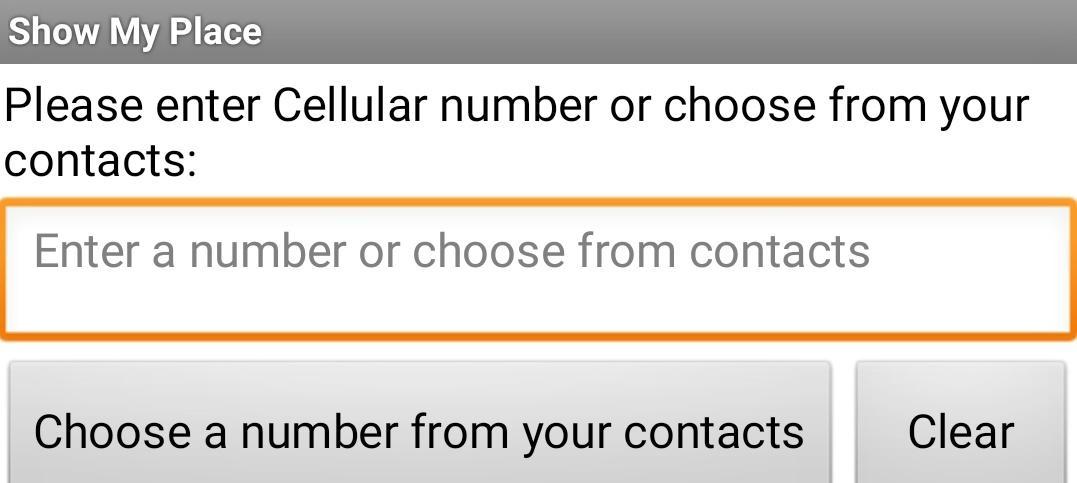
- The phone number -
- So I gave the user 2 options in this part:
- Enter manually the number - as it sounds, user just need to type in the number of his chosen contact
- Or Choose from your contact list - I used the "Social option of "PhoneNumerPicker", which when pressed, shows you the contact list on your device, from which you can choose
- I also added a "Clear" button in case user want the option to send several times, without the need to manually delete the number/contact he chose.
- And the code behind all of that:
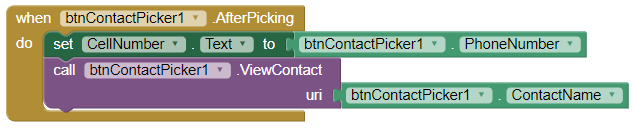
- Choose from contact
- Clear button

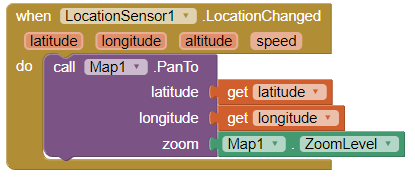
- The Map -
- I used the "Maps" -> "Map" option as to show my map. Very basic I think, nothing special here
- I choose to show the location of the user on the map and a compass.
- In order to be able to get the location on the map, I had to add the "Sensors" -> "LocationSensor" option.
- This one enables the map to actual show the user and to refresh the map according to the refresh time interval of your choice.
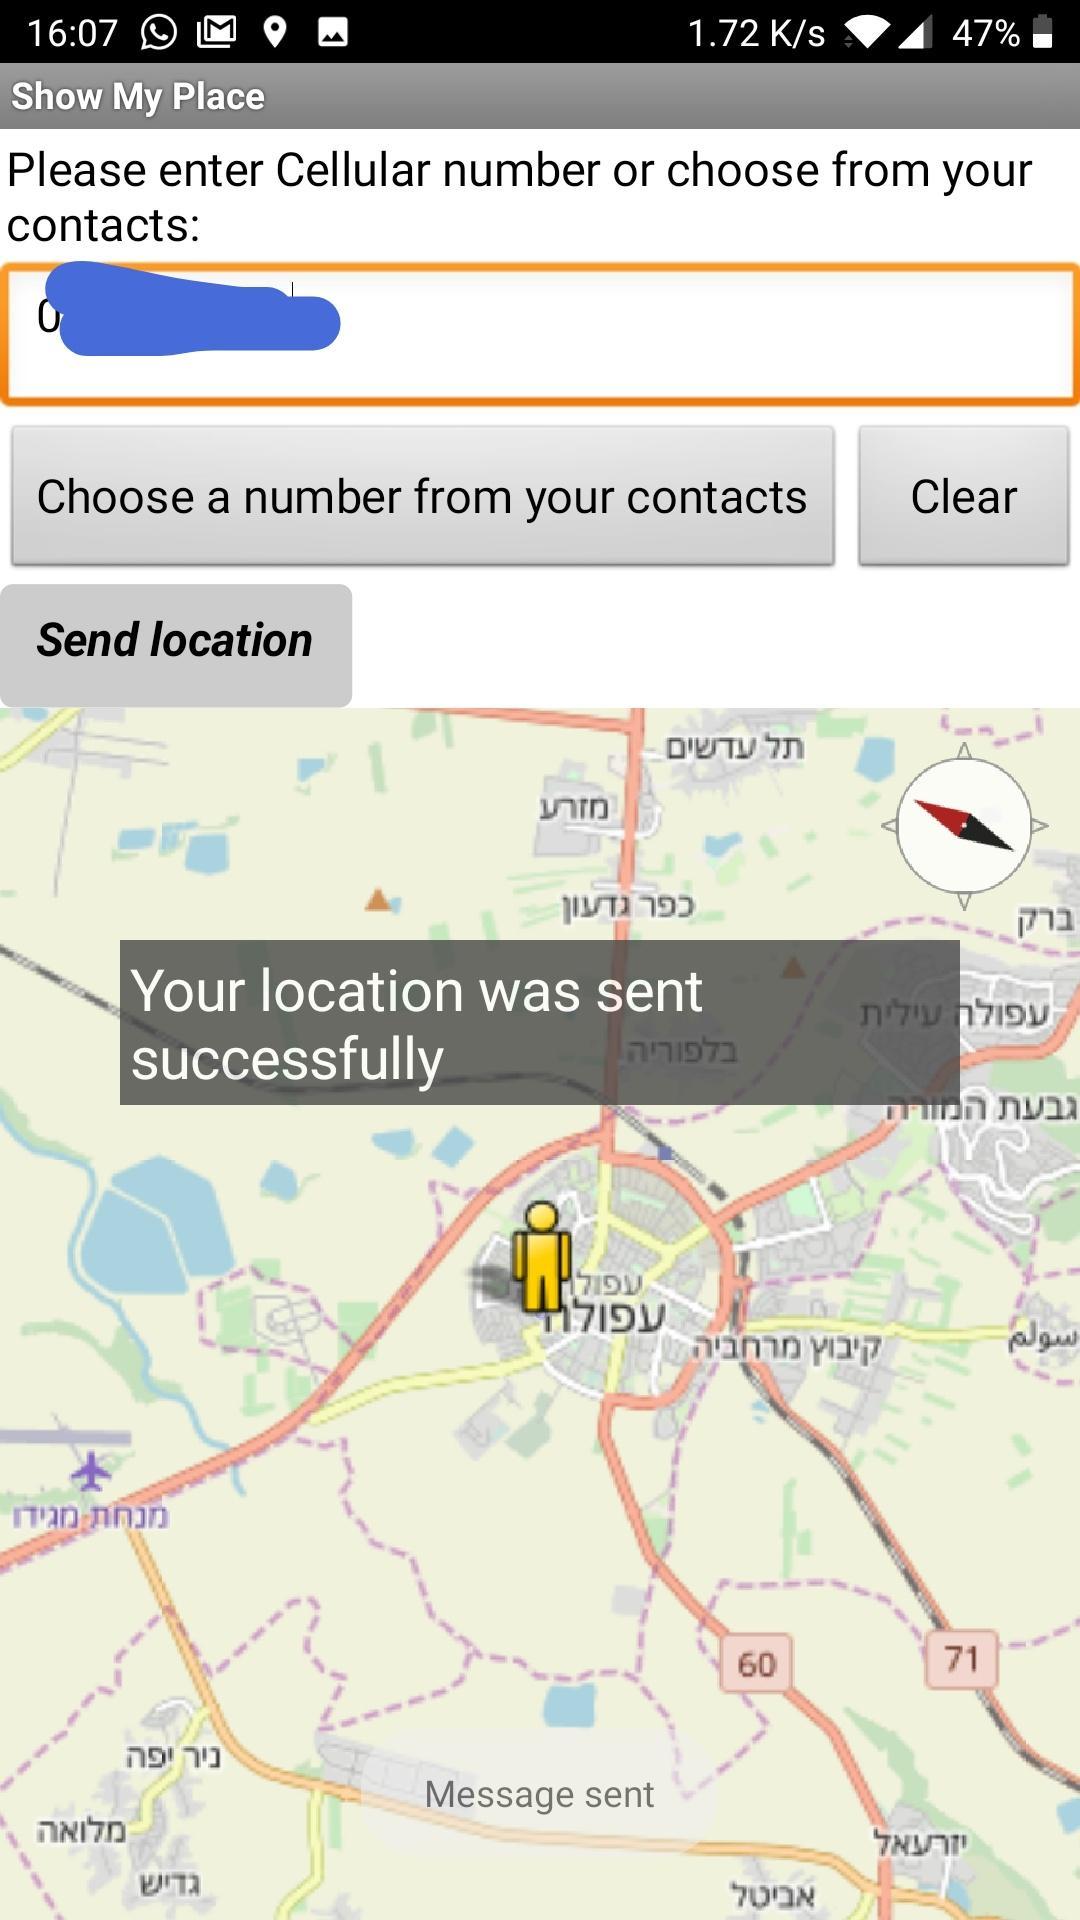
- This is how the map looks in the app:
.jpg?part=0.4&view=1)
- And this is the code to "Initialize location"
- The "Send" button -
- It use is very simple:
- At first, I choose the "send Message" option, which turned out to be very annoying. As each time I pressed the button, I was transfer to my default texting app, where there I needed to press again the "Send" button of the app, in order for my message to send out.
- So after some digging, I found out there is a better option (at least for me) which is "sendMessageDirect". This option enables you to send the text message directly from your app. Only difference, is that it needs a special permission to read/write messages. I saw no issue in my case, as I built a very simple app. Of course, this should be a concern when you are building an app which you want others to use.
- If there is a number in the designated place - send the message and show a success message on screen
- If there is no number - show an error message on screen and don't send anything

- And the code behind it:

That's it.
I hoped you enjoyed my post, and that it was helpful for you :)

TimAI2
Apr 21, 2019, 1:28:50 PM4/21/19
to MIT App Inventor Forum
Thank you and well done :)
Reply all
Reply to author
Forward
0 new messages