Skip to first unread message

Samira kh
Feb 24, 2019, 3:01:11 AM2/24/19
to mitappinv...@googlegroups.com
Bonjour;
Je veux savoir comment on peut changer le marqueur de la carte
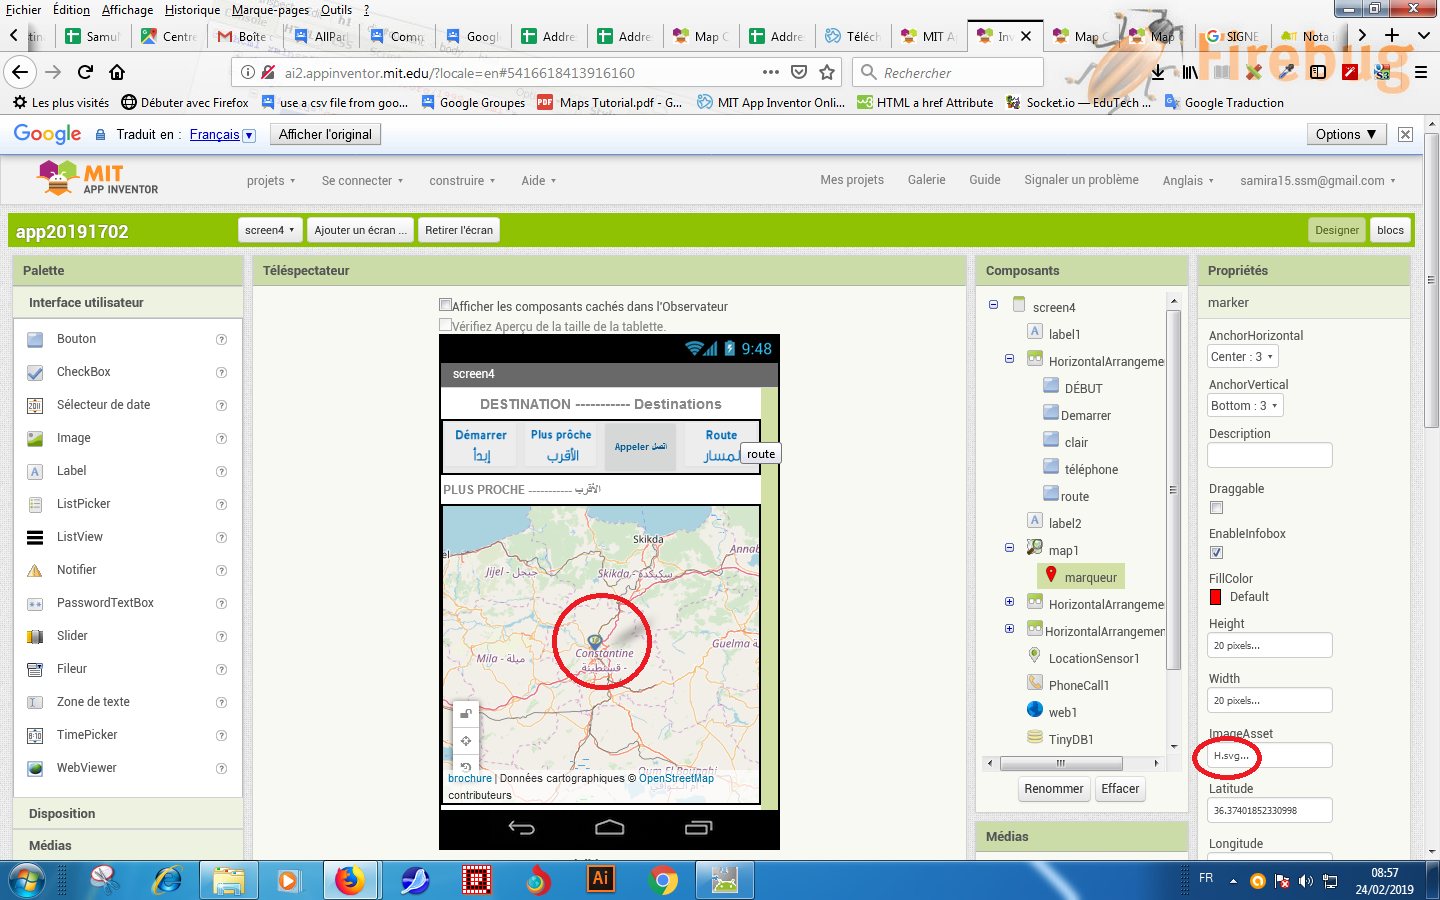
j'ai mis dans ImageIsset une image H.svg
mais lorsque je teste l'application sur Android le marqueur ne change pas il reste le même

Ghica
Feb 24, 2019, 8:34:32 AM2/24/19
to MIT App Inventor Forum
You should post your relevant blocks. From just a picture we cannot see why something is not moving.
Could you also explain what you expect to happen?
Cheers, Ghica.
Ghica
Feb 24, 2019, 3:21:06 PM2/24/19
to MIT App Inventor Forum
Samira,
You sent me a private reply, that I do not react to.
If you want help, you need to post the blocks of your app, or the .aia
Cheers, Ghica.
Samira kh
Feb 25, 2019, 2:32:27 AM2/25/19
to MIT App Inventor Forum
Bonjour je veux que le marqueur être comme ce marqueur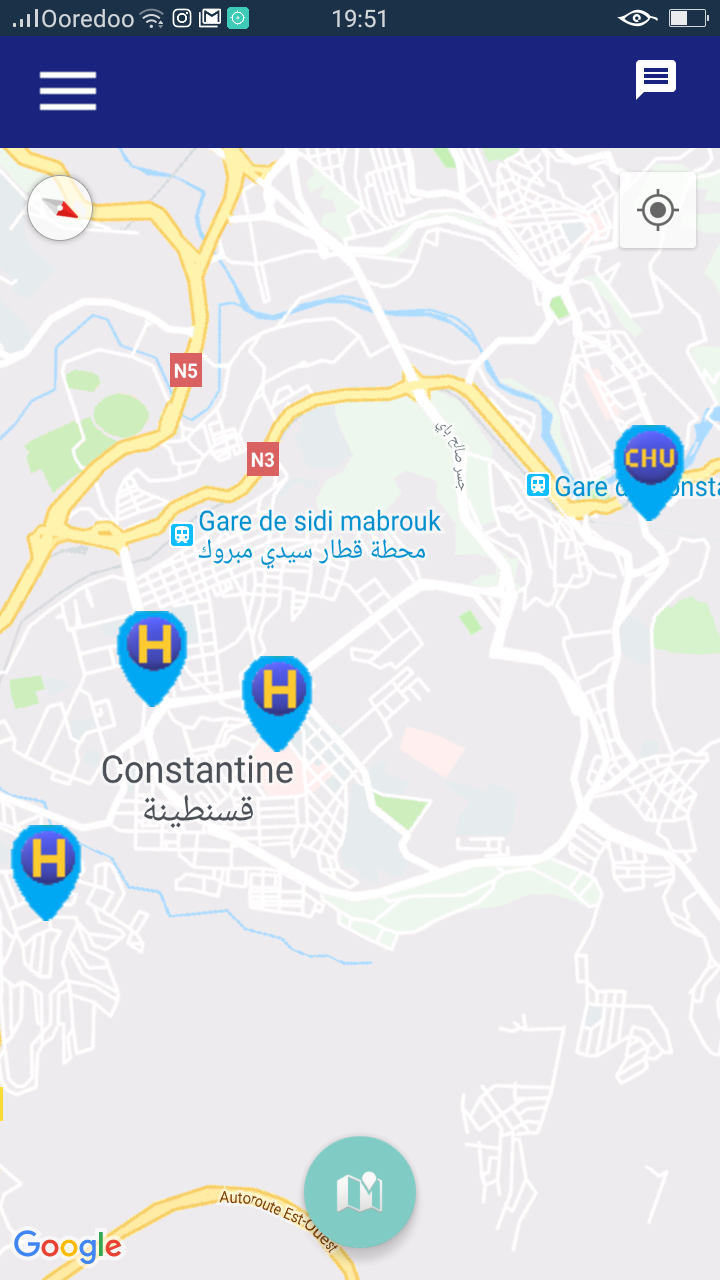
Ghica
Feb 25, 2019, 5:53:32 AM2/25/19
to MIT App Inventor Forum
Samira,
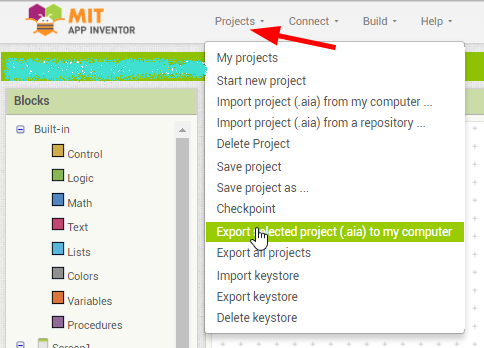
Connect to the Companion, go to the blocks page, click with your right mouse button on an empty spot and choose download blocks as image. Post (upload) that image here.
- and/or -
Export your .aia and attach your .aia to your post.
Cheers, Ghica.
Ghica
Feb 25, 2019, 8:13:43 AM2/25/19
to MIT App Inventor Forum
I think I finally understand what your problem is. You are trying to change the marker to some other picture, but it does not seem to work (I tried too).
I am assigning this to someone who might know.
Cheers, Ghica
Samira kh
Feb 25, 2019, 8:17:03 AM2/25/19
to MIT App Inventor Forum
oui exactement
merci Ghica

SteveJG
Feb 25, 2019, 9:26:49 AM2/25/19
to mitappinv...@googlegroups.com
Sorry Samira. I do not know what you are trying unsuccessfully to do either. To get help, post your aia and or your Blocks image and as Ghica recommended and provide a longer, more detailed explanation of what you want to do. Short explanations are NOT helpful.
The MIT Map and Marker components are very complex. A developer must do a lot of experimenting with the components to use them effectively. There is no detailed tutorial.
You asked "How do you change the Map marker?" How you 'change' the appearance of a Marker depends on the type of Marker. App Inventor 2 uses both design time Markers and run time Markers. The coding required with design time markers does not work for 'changing' run time marker images; the techniques are different.
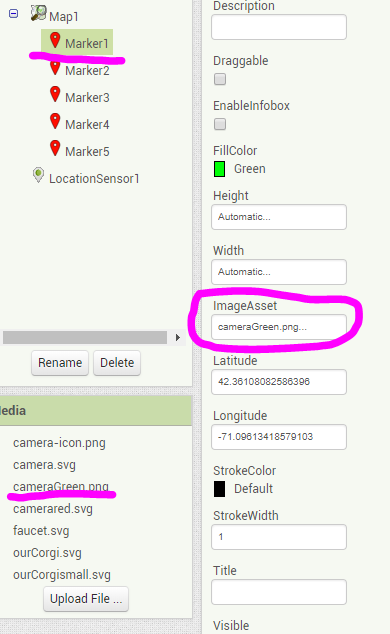
Static Design Time Markers (Marker1, Marker2,Marker3 etc.) using a custom svg Marker or png Marker:
Either set the Marker ImageAsset in the Marker1, Marker2 etc. properties using an svg file (or png) stored in Media
or
![]()
using the set Marker1.ImageAsset to Block to point to an image in the Media . Assigning the custom Marker image with Blocks is the preferred method to set a custom Marker image.
Run Time Markers (the ones created using the call Map1.CreateMarker) created from a csv or a List
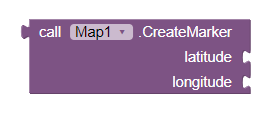
The images for the run time Markers can only be 'changed' using the Any component Any Marker Blocks .

To change only one of your Markers, one way would be to make a list of the 'created' runtime components and pair that list with a List of links to appropriate images stored in Media. Use the List to determine which image goes with which run time Marker. Then use the set Marker.ImageAsset of component to perhaps //greenCamera.png You cannot predetermine the run time component list or name ; the component names are created at run time and will change each time the app is started.
The image associated with each Marker can be part of the data string that that 'contains' information about the created Marker. How do you do that? Using the
National Parks Map tutorial, it might work something like this:
Change the data strings used to provide information about individual markers from: Shenandoah N.P.,1111111111,35.7647,-82.2653\nYosemite N.P.,1111111111,37.8651,-119.5383\nSequoia N.P.,1111111111,36.4864,-110.5885
to something like:
Shenandoah N.P.,1111111111,35.7647,-82.2653,//greenCamera.png\nYosemite N.P.,1111111111,37.8651,-119.5383,//redCamera.svg\nSequoia N.P.,1111111111,36.4864,-10.5885,//blackCamera.svg
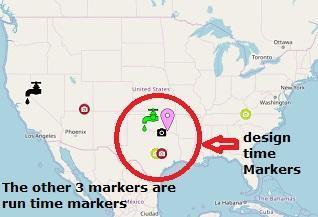
Where the link to associated images greenCamera.png, redCamera.png etc. are image files stored in Media. If the images are not stored in Media, you need to provide the appropriate path to the image. In the case of images stored in Media, the path is //theimage.png or in your case //H.svg . These three run time Markers are shown in the image below:
Is that what you are trying to do?
For example, if a csv file in the National Parks Map tutorial is modified to contain the image file name, the National Parks Map app can be modified to use different Marker icons for each run time Marker. Add the appropriate blocks to the setRuntimeMarkers Procedure in the National Park Map Tutorial as shown in the following image:
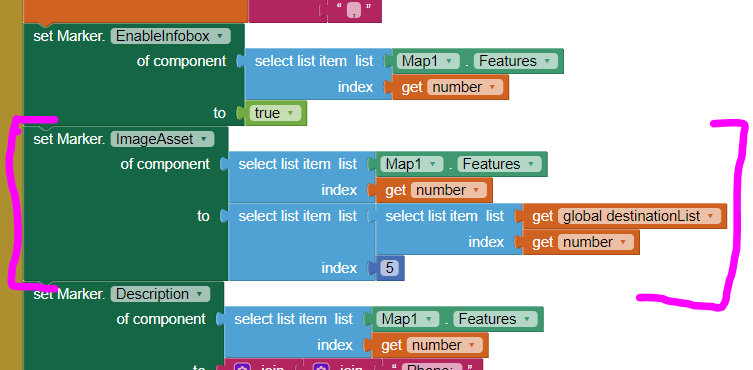
The blocks highlighted in fuchsia are the 'new' blocks required to set the Marker icons. Notice the index to recall the image is 5. Five because there are now five elements instead of the original 4 shown in the tutorial and the image link is the fifth element. Other minor changes might be required if you modified the tutorial.
Things to be aware of:
1) SVG markers scale automatically (supposedly), png or jpeg markers do not. It does not make sense to create large images for Markers and scale them down to the 'right size. A 32x32 pixel image makes very good sense. Experiment with the svg or png original image dimensions to find what works best with your app.
2) You can make programming a bit easier if you do not to mix run time and design time markers. If you mix run time and design time markers, see Bug #3
3) Add one Design Time Marker to your Designer and then set that marker's Visibility property to false to use run time Markers . If you do not, you will not have access to the Any component Marker Blocks, To use Run Time Markers, you must have at least one Design Time marker. Set it's Visibility set to hide it.
Bugs..these are probable bugs with the Map components you may have to deal with
1) It is possible to change the color of some svg markers using code. Some svg markers can not change color using code because of the way the images are made (there are different types of svg). A probable bug allows images displayed in the Designer to color change a Marker image on the Designer screen but the color is not effected in Companion and does not change color when viewed in the Companion or a compiled app. Developers can simulate image color changes by using several copies of an identical image but in different colors and switching among them by code.
2) When design time Markers are used together with run time Markers on the same Map and the design time Title and Visibility are set using the Marker properties, random Titles will overwrite the Titles typed in the Designer for the design time markers. Make sure you EnableInfoBox for each Marker if using design time markers. Use the Any component set Marker.EnableInfoBox and set it to true for all Markers (use a loop to set all the Markers). Otherwise, the bubble will not display. The cure to avoid problems when design time Title and Visibility when also using them along with runtime Marker images is to set the run time Properties using Blocks. Avoid setting these Properties in the Designer.
3) If both design and run time Markers are used together on the same Map and the Design Time parameters are set on the Designer, only the run time markers will appear on the Map. The cure is to use Blocks to concatenate the FeatureCollection lists (the one for the Design Time Markers and one for the Design Time Markers) using an "append to list" Block as the final call to set FeatureCollection prior to displaying the Markers.
4) The Any component Marker.FillColor block can change the color of some svg images. It cannot change the color of png/jpeg files in the Companion or on the finished app.
Does this information help?
Regards,
Steve
Samira kh
Feb 26, 2019, 5:33:52 AM2/26/19
to MIT App Inventor Forum
Bonjour Mr Steve
j'ai un problème sur la carte MIT

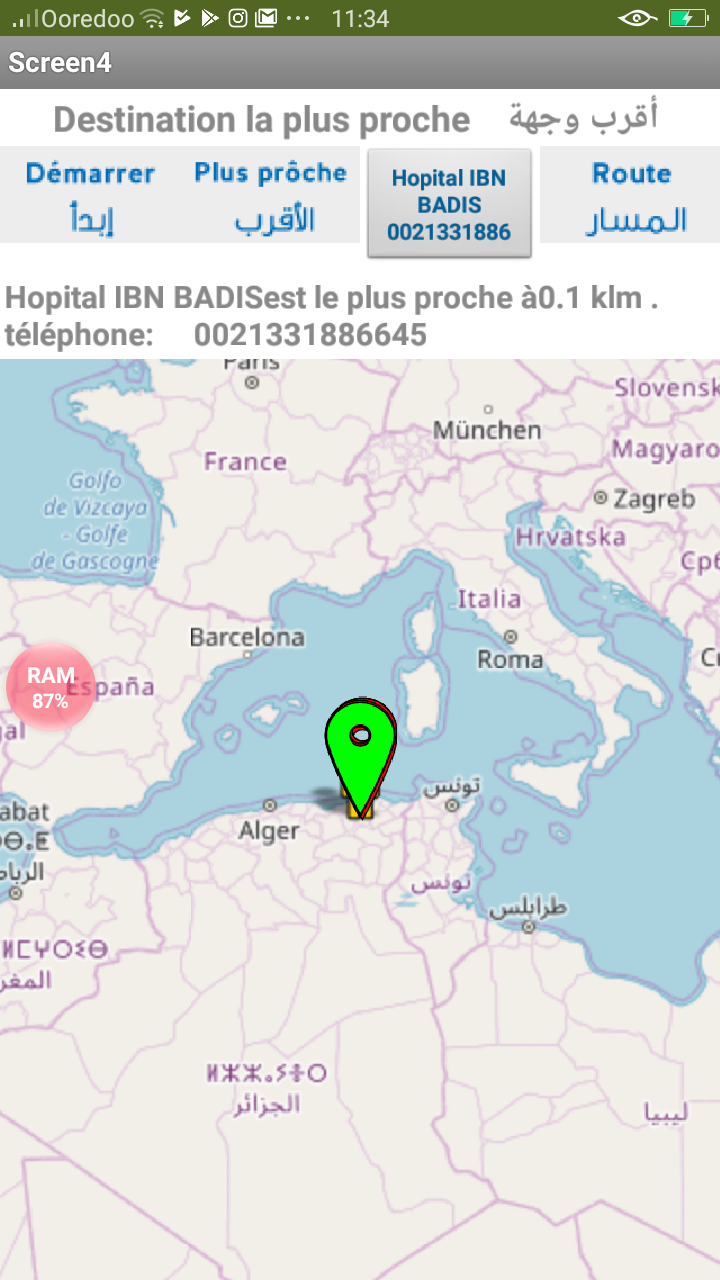
lorsque je met la carte sur app inventor comme celle la
mais lorsque je clique sur démarrer elle me donne la carte général et moi je veux comme je la met
comment faire pour rester comme la première carte
SteveJG
Feb 26, 2019, 8:36:28 AM2/26/19
to MIT App Inventor Forum
You want to know how to change the zoom level Samira. Please read the documentation Map and Marker . There are several simple ways to force the Map display to zoom in or out.
You can:
Enable the
- ShowZoom
- Shows or hides the Android native zoom buttons to allow the user to zoom the Map in or out. This can be used in place of the two-finger pinch-to-zoom gesture. and change the zoom manually
- by setting it to true.
- You can set that using Blocks or the Designer
- You can also set the
- ZoomLevel
- Gets or sets the zoom level for the Map. Valid values range from 1-20. Not all tile layers will support each zoom level at every location. For example, detailed aerial photography is likely not available for tiles in the middle of the ocean or at the poles. Highest zoom levels will likely occur in major city centers due to the amount of detailed data available.
- Experiment... try a zoom of perhaps 16 or 17 to zoom in and you may realize the map display you want.
Regards,
Steve
Reply all
Reply to author
Forward
0 new messages