Easiest way to retain dynamic range?
57 views
Skip to first unread message

Tommy Hughes
Aug 10, 2022, 3:06:48 PM8/10/22
to hugin and other free panoramic software
Hi, I'm stitching some pano from a DJI Mavic 3 which have great dynamic range, but the output does not. What is the cheapest way to retain the full dynamic range? Is this to do with the raw processing? Or do I need create multiple tiffs with different settings and run some exposure fusion? I have thousands of files to process so I'm looking for the fastest option.
Cheers!

johnfi...@gmail.com
Aug 10, 2022, 4:42:40 PM8/10/22
to hugin and other free panoramic software
Can you clarify some points. (I'm partially asking in case this helps someone else give you a better answer, but also because I also want to do some dynamic range things better in hugin than I currently know how to, so I think your clearer question might draw out a better answer for me).
Your starting point has "great dynamic range". Does that mean the starting point has enough extra bits (beyond the basic 8 per channel) to directly represent that dynamic range? Does it mean the multiple images have many different exposures (multiple per stack and/or each appropriate to the brightness of its own content)? Or both extra bits and varying exposure?
Your "output does not". What output? From doing what to the input images? And is that 8 bit or 16 bit output?
How do you hope to represent high dynamic range in the final result?
Do you want to stay in 16 bit (so depend on that to have enough range and depend on the viewing tool to convert that range usefully to display range when displaying)?
Do you want to do mask adjustments to brightness after stitching (I want to and don't yet know how to put that whole work flow together) so the final image is "dishonest" in showing the brighter parts of dark areas as brighter than the darker parts of bright areas, even though the real world scene had those dark parts of bright areas brighter than bright parts of dark areas?
Do you want to find a good non linear mapping from 16 bit to 8 bit (probably after stitching) to provide a more "honest" image: So brighter pixels in the true scene are consistently brighter in the result than less bright pixels from the scene? In other words global scaling to make the original dynamic range more visible in the result without being supported by the display hardware.
Do you want to mainly defeat hugin's automatic exposure correction. So far as I understand, hugin generally tries to change all the images to what they would have been if they had all been taken at the same exposure. I almost never want that and don't have a good understanding of what is involved in preventing it. The boundaries become harder to deal with if that feature is disabled. Blending an overlap where the two images have different exposures of the same content and you haven't permitted an exposure correction, can cause a very ugly blend operation. But the original exposures are often different for good reason and "correcting" that is uglier than dealing with the more difficult blend. Not correcting it and successfully blending gives roughly the same kind of "dishonest" image (that I want but don't know whether you do) as the mask based final adjustment would, but unlike those doesn't even depend on 16 bits being enough to allow undoing the harm of automatic exposure correction.
Tommy Hughes
Aug 10, 2022, 6:40:04 PM8/10/22
to hugin and other free panoramic software
Thank you for the detailed response! I did, indeed, rush this question, as I was looking at an 8/10 sunset developing outside.
Now that I've thought about it for a minute I think I can probably get most of what I want (recovering highlights, anyway) with a different raw profile with the exposure stepped down. Or it's just hugin overexposing, but I'm doing this in script, so I don't know if they are doing the same thing.
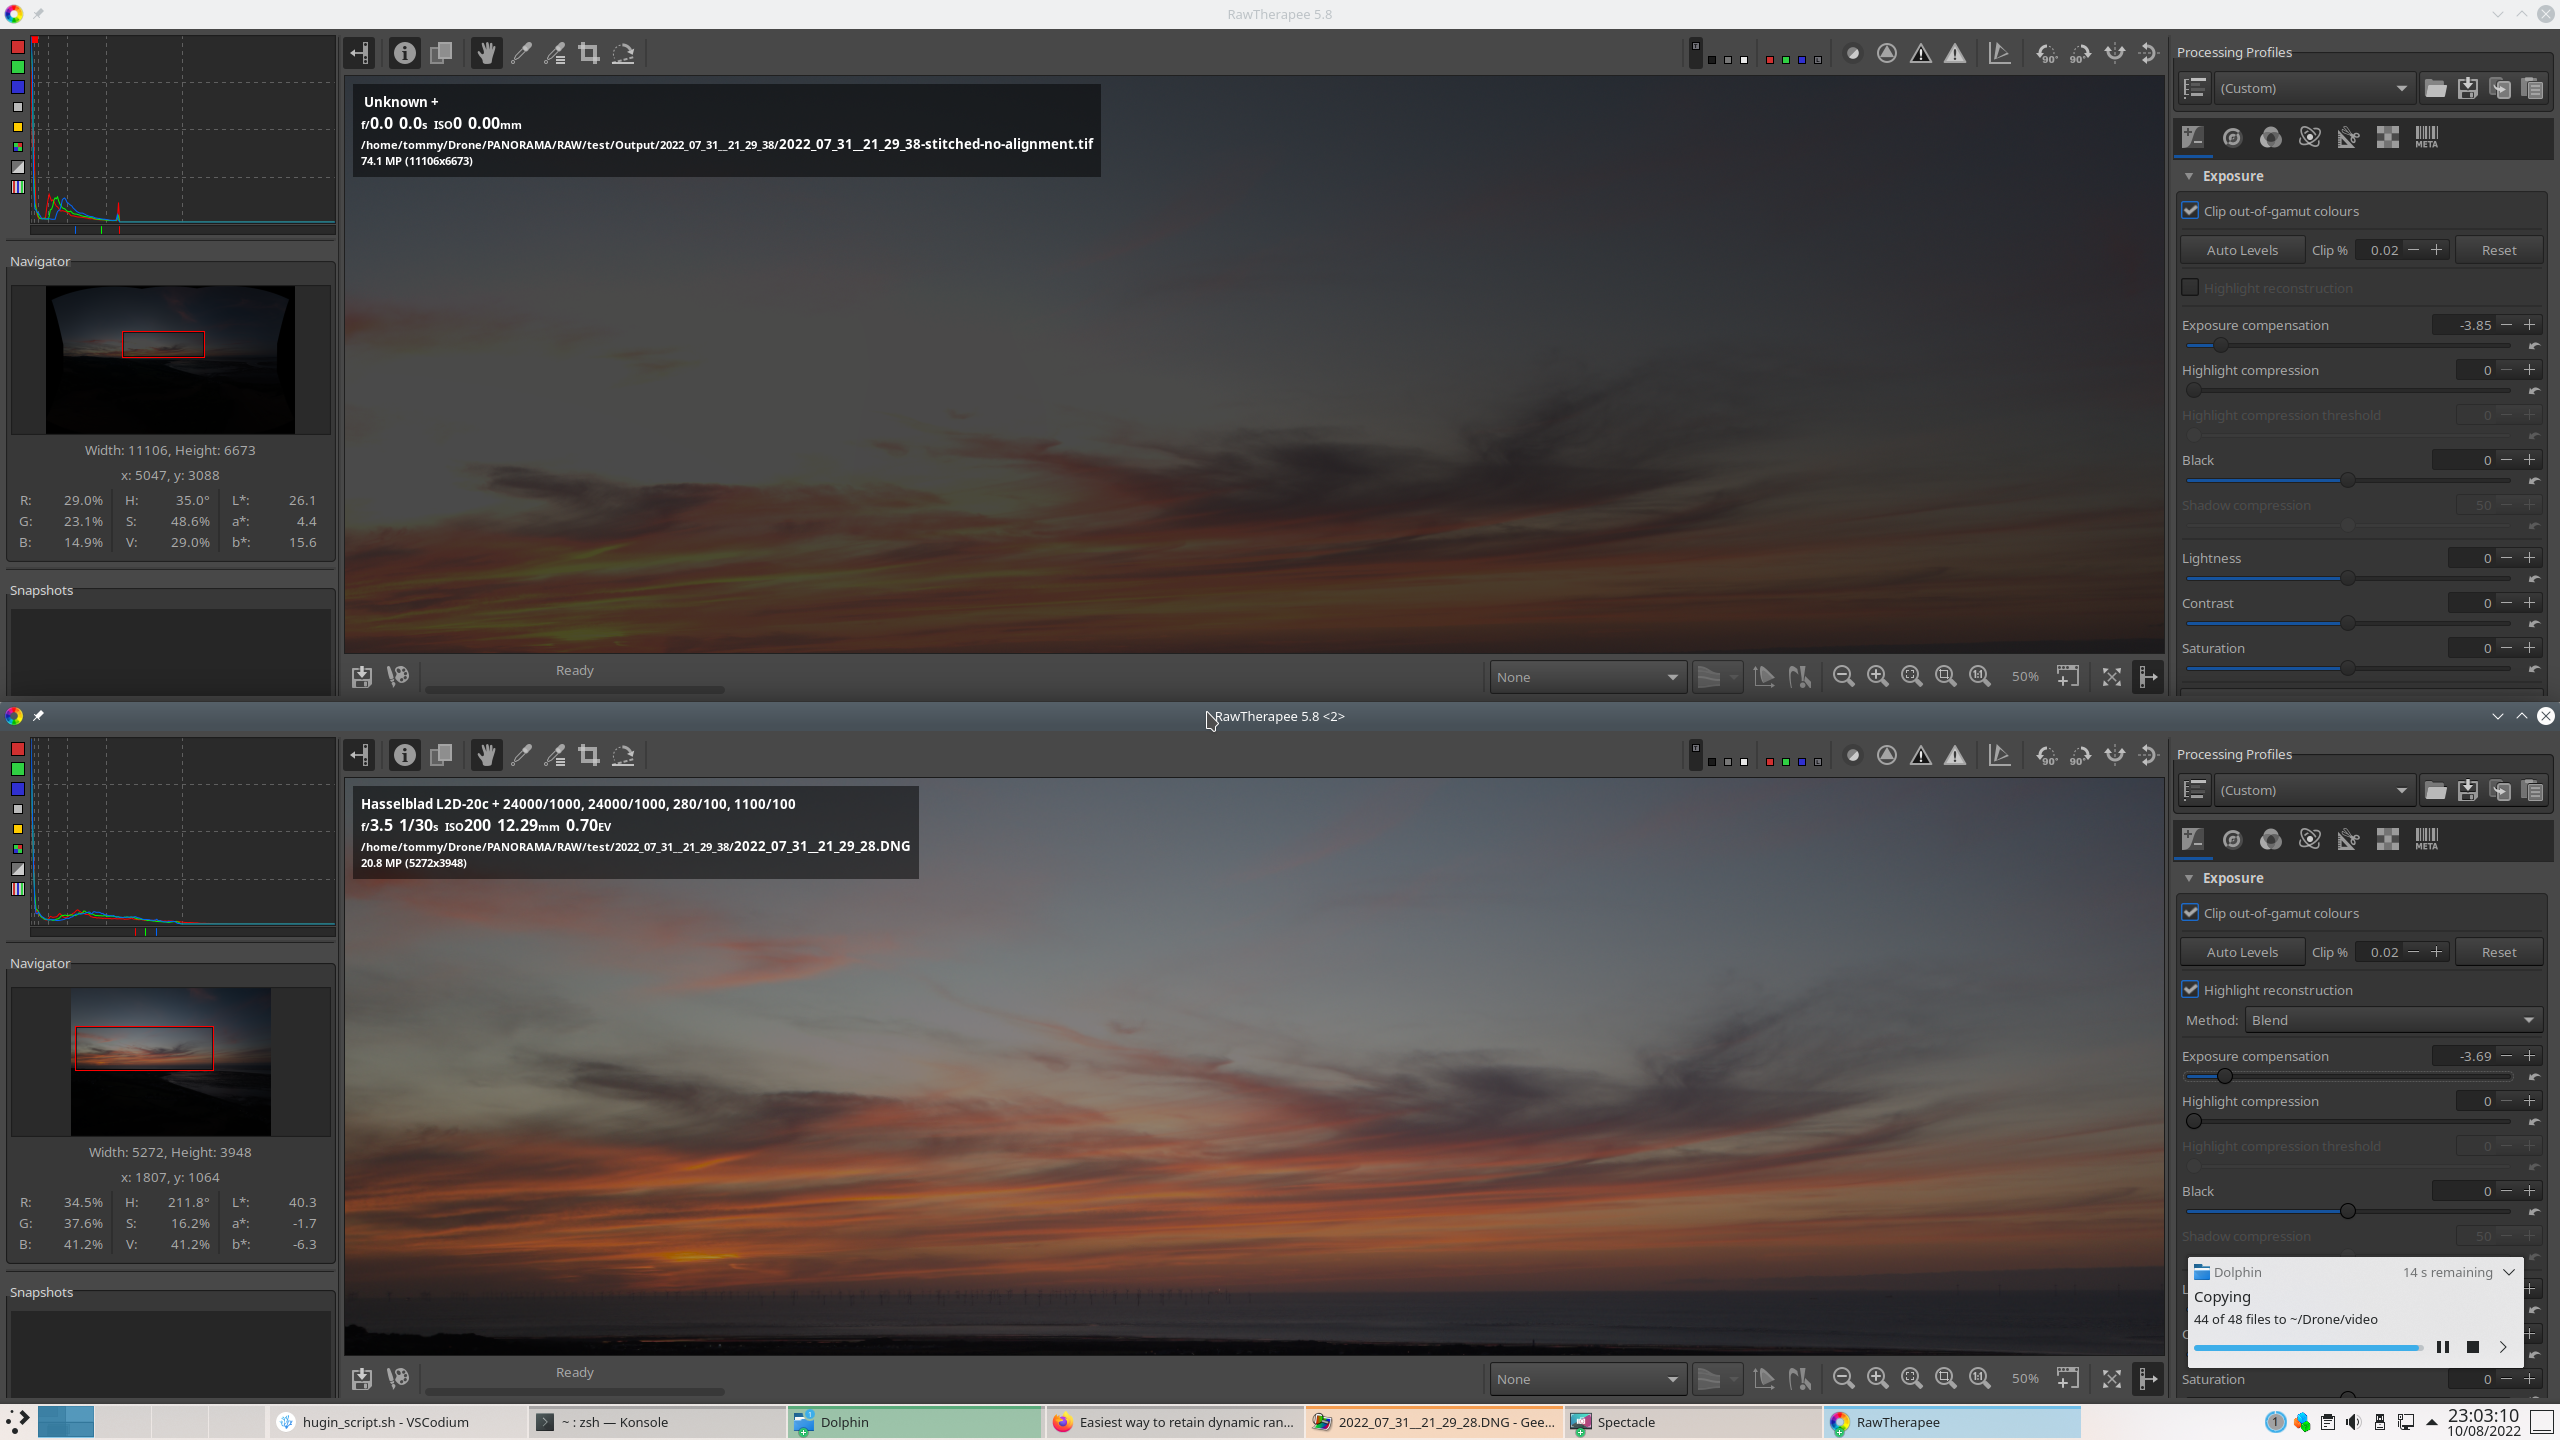
The raws are 12-bits and I turn them into 16 tifs with a neutral rawtherapee profile. Here is a screenshot of the raw dng file, and tiff pano output side-by-side. With the exposure turned way down, the pano tiff is unable to recover the highlights that are visible in the dng. I automatically delete the intermediary tiffs, but after I post this I will change that, and check those out.
I know that I could edit the raws, first, and balance the highlights and shadows manually, but everything that I read says to keep the raw processing to a minimum, to retain the most information in the image, and do that type of editing in post.
Here are the relevant commands I'm using, now.
pto_gen -o $name *.tif
autooptimiser -p -m -s -l -o $name $name
pano_modify --center --straighten --canvas=AUTO -o $name $name
nona -m TIFF_m -o $1 --gpu ../$name
enblend -o /tmp/ramdisk/$1/$1-stitched.tif /tmp/ramdisk/$1/nona/*.tif
What do you think?
Tommy Hughes
Aug 10, 2022, 7:14:38 PM8/10/22
to hugin and other free panoramic software
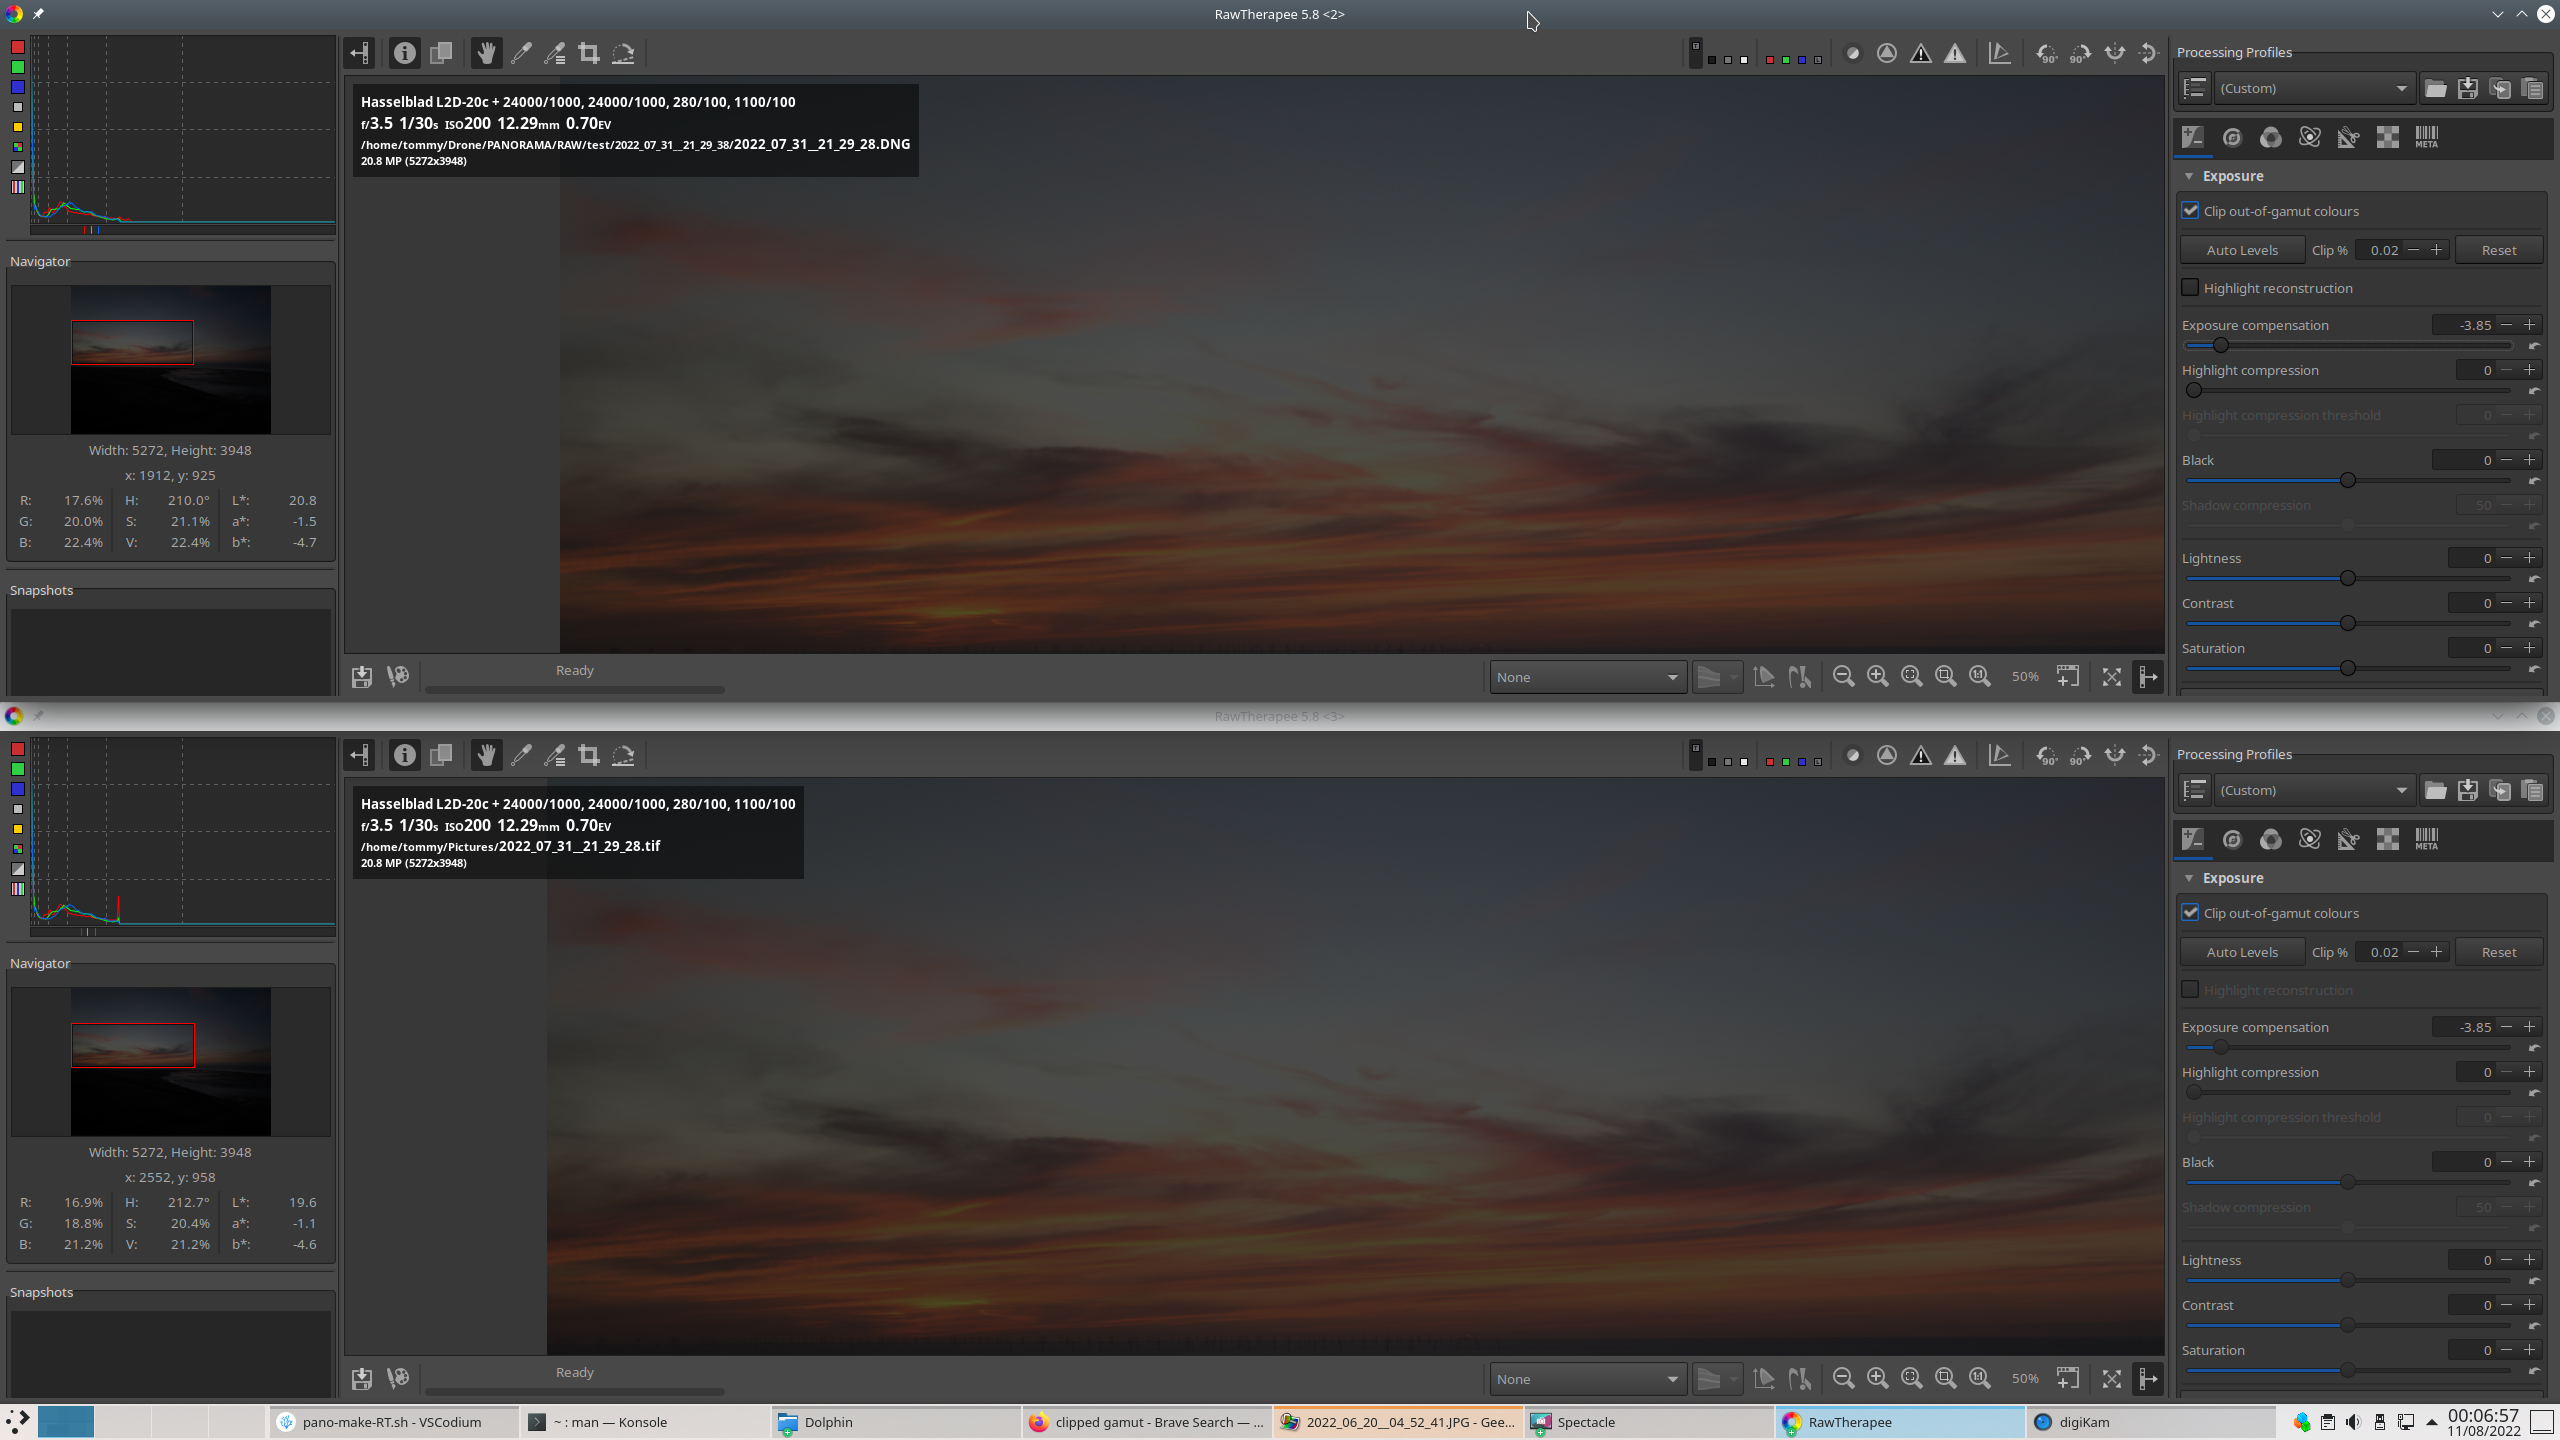
And here is the tiff from rawtherapee. It looks the same as the tiff, so at least I ruled that out. It must be in my hugin/panotools pipeline. I guess, with a photo like this much variance between the shadows and highlights, I'm going to have to use something like exposure stacking, or fusing. But which to use in a script?
johnfi...@gmail.com
Aug 12, 2022, 7:43:11 AM8/12/22
to hugin and other free panoramic software
Your last two posts seem to be about one image. I assume you have more than one to combine via hugin.
So when I asked about the different exposures across the multiple original images, I think that was important. I don't see any answer.
I'm still guessing that hugin is adjusting the exposures to eliminate that differences in original exposure across the images, and that is where the highlights are lost, meaning 4 bits added (to the original 12) are not enough to bridge the exposure differences.
You seem to have already figured out that a different conversion from raw to tiff would result in protecting those highlights from subsequent destruction.
I know far less about Rawtherapee than you know. So my terminology is likely wrong. But logically, a less linear mapping in the original conversion from 12 bits to 16 bits would provide the extra room to protect the highlights from the subsequent adjustment (that normalizes exposure between photos).
Tommy Hughes
Aug 12, 2022, 11:21:00 AM8/12/22
to hugin and other free panoramic software
Sorry, I wasn't clear. The top top image is a finished panorama from stitching multiple photos and zoomed in on the blown-out region. The bottom is the original raw, showing that there is a lot of detail in the highlights. These are sunset panoramas, and I am experimenting with different ways of capturing and processing them. In this case I have fixed the parameters in manual mode, so there is a big difference in brightness between the files facing the sun and those facing away.
I was just reading the manual for Enfuse, and it mentions this under "Common Misconceptions":
A single image cannot be the source of an exposure series?
Raw-files in particular lend themselves to be converted multiple times
and the results being fused together. The technique is simpler, faster,
and usually even looks better than digital blending(2)) (as opposed to
using a graduated neutral density filter) or blending exposures(3)) in an
image manipulation program. Moreover, perfect alignment comes free
of charge!
I guess this is the way to go, so I am working on that now. I have multiple raw profiles done and everything scripted up, but enfuse doesn't want to work for me, yet. It is just producing an empty, or 8byte pano file.
You asked about mask adjustments to brightness. I don't like the look of most hdr and tone mapped images, but I have used enfuse on a series of exposure bracketed, single images (not panos). The results where much more natural and pleasing than typical HDR photos. But I've never created my own masks, I just used enfuse on mostly default settings.
Reply all
Reply to author
Forward
0 new messages