Fused exposures are too light!

Robert Krawitz
the results (particularly the sky) are much too pale. This is with
basically the 2010.3 release (maybe a few commits before, but nothing
in the hg log jumps out at me).
This seems to be happening at the very start; nona is producing very
pale sky (in particular) for all the exposures. The high exposure is
basically white, the middle exposure is very pale, and the low
exposure is merely pale (the original images are fine).
I've experimented with changing the exposure on the nona command line;
I'm able to get darker skies that way. But if I change the EV in
hugin, it gets propagated through to the pto file passed to nona, with
the result that nothing changes.
I must be missing something obvious here, but for the life of me I
can't figure out what it is...
--
Robert Krawitz <r...@alum.mit.edu>
Tall Clubs International -- http://www.tall.org/ or 1-888-IM-TALL-2
Member of the League for Programming Freedom -- http://ProgFree.org
Project lead for Gutenprint -- http://gimp-print.sourceforge.net
"Linux doesn't dictate how I work, I dictate how Linux works."
--Eric Crampton

Yuval Levy
> I'm trying to build panoramas with multiple exposures (-2, 0, +2), but
> the results (particularly the sky) are much too pale. This is with
> basically the 2010.3 release (maybe a few commits before, but nothing
> in the hg log jumps out at me).
>
> This seems to be happening at the very start; nona is producing very
> pale sky (in particular) for all the exposures.
how does the sky look if you manually fuse three input images? don't bother
about alignment for now...
enfuse -o output.jpg image[1-3].jpg
> I must be missing something obvious here, but for the life of me I
> can't figure out what it is...
I'm still trying to understand your project. maybe posting some pictures
would help?
you mention parallax as a problem because of different vantage points and not
using a monopod. how far away is the subject? parallax is unimportant in the
distance.
also, you were mentioning an HDR pano. but then you are using exposure
fusion. That's not HDR.
Based on the incomplete information I have, I would suggest to align and
enfuse each image stack and then stitch them into a panorama:
align_image_stack -a pre1 image[1-3].jpg
enfuse -o input1.jpg pre1*
align_image_stack -a pre2 image[4-6].jpg
enfuse -o input2.jpg pre2*
...
since you're already on the command line, generate CPs as well, e.g. with
panomatic:
panomatic -o project.pto input*
then start Hugin, load project.pto, optimize and stitch.
HTH
Yuv
Robert Krawitz
>
> On October 22, 2010 10:54:31 pm Robert Krawitz wrote:
>> I'm trying to build panoramas with multiple exposures (-2, 0, +2), but
>> the results (particularly the sky) are much too pale. This is with
>> basically the 2010.3 release (maybe a few commits before, but nothing
>> in the hg log jumps out at me).
>>
>> This seems to be happening at the very start; nona is producing very
>> pale sky (in particular) for all the exposures.
>
> how does the sky look if you manually fuse three input images? don't bother
> about alignment for now...
>
> enfuse -o output.jpg image[1-3].jpg
That looks fine.
>> I must be missing something obvious here, but for the life of me I
>> can't figure out what it is...
>
> I'm still trying to understand your project. maybe posting some
> pictures would help?
>
> you mention parallax as a problem because of different vantage
> points and not using a monopod. how far away is the subject?
> parallax is unimportant in the distance.
These are two separate projects.
> also, you were mentioning an HDR pano. but then you are using exposure
> fusion. That's not HDR.
Sorry, my goof in wording.
(But I'm having a different problem with *actual* HDR -- the tools I
have that can handle high bit depth, cinepaint and display, show 16
bit images as noise with a few spots of recognizable image, and some
areas of moire.)
> Based on the incomplete information I have, I would suggest to align and
> enfuse each image stack and then stitch them into a panorama:
>
> align_image_stack -a pre1 image[1-3].jpg
> enfuse -o input1.jpg pre1*
> align_image_stack -a pre2 image[4-6].jpg
> enfuse -o input2.jpg pre2*
> ...
>
> since you're already on the command line, generate CPs as well, e.g. with
> panomatic:
>
> panomatic -o project.pto input*
>
> then start Hugin, load project.pto, optimize and stitch.
I will give that a try.

Lukáš Jirkovský
> I'm trying to build panoramas with multiple exposures (-2, 0, +2), but
> the results (particularly the sky) are much too pale. This is with
> basically the 2010.3 release (maybe a few commits before, but nothing
> in the hg log jumps out at me).
>
> This seems to be happening at the very start; nona is producing very
> pale sky (in particular) for all the exposures. The high exposure is
> basically white, the middle exposure is very pale, and the low
> exposure is merely pale (the original images are fine).
>
> I've experimented with changing the exposure on the nona command line;
> I'm able to get darker skies that way. But if I change the EV in
> hugin, it gets propagated through to the pto file passed to nona, with
> the result that nothing changes.
>
> I must be missing something obvious here, but for the life of me I
> can't figure out what it is...
>
> --
> Robert Krawitz <r...@alum.mit.edu>
>
Sometimes wrong camera response does such things. You could try to set
all EMoR settings in photometric tab to ones (I think) and see what
happens.
Lukas

kfj
On 23 Okt., 04:54, Robert Krawitz <r...@alum.mit.edu> wrote:
> I'm trying to build panoramas with multiple exposures (-2, 0, +2), but
> the results (particularly the sky) are much too pale. This is with
> basically the 2010.3 release (maybe a few commits before, but nothing
> in the hg log jumps out at me).
cause could be. did you use the photometric optimization? If so, all
the images will be photometrically transformed to be photometrically
as similar as possible prior to blending. This is what you do if you
make a normal panorama, but if you have a bracketed series, it just
makes the images all look very similar to the middle exposure, which
is the contrary of what you want - in fact it's counterproductive,
you'd be better off just using the meddle exposure by itself!
If you want to make a panorama with exposure-fused bracketed series,
you mustn't run the photometric optimization previously. If you are
using the assistant, it will probably do that for you without you
asking for it, so don't. To find out if that has happened, the
simplest way would be to once simply reset all photometric
optimizations (camera and lens tab, reset button, then in the mask
that comes up, check only the last four, which have to do with
photometry - best to re-read the EXIF data as well, since the
resetting doesn't seem to get rid of the EV correction once it's
happened) - and stitch the panorama as 'exposure fused panorama from
stacks'. If the sky's all right now, that was your problem. I think
I've had the same, and it took me quite some time figuring it out, but
that was what it was.
with regards
KFJ
Robert Krawitz
This wound up being a big headache; the aligned image stacks didn't
contain any EXIF data to let anything figure out the HFOV.
Anyway, why is nona modifying the exposure? If I select output of "No
exposure correction, low dynamic range", it's supposed to "output
remapped images with unmodified exposure". However, it's very
apparent that nona *is* adjusting the exposure, particularly in the
sky (and to a lesser extent in the ground).

Bruno Postle
>
>This wound up being a big headache; the aligned image stacks didn't
>contain any EXIF data to let anything figure out the HFOV.
>
>Anyway, why is nona modifying the exposure? If I select output of "No
>exposure correction, low dynamic range", it's supposed to "output
>remapped images with unmodified exposure". However, it's very
>apparent that nona *is* adjusting the exposure, particularly in the
>sky (and to a lesser extent in the ground).
Hugin resets EV exposure for all the photos when it is doing
exposure fusion, but it still does whatever vignetting and white
balance correction is defined - To do this it also uses the camera
response parameters.
If any of these are 'wrong' then you will get a degraded result.
In this situation you can often just reset all photometric
parameters and get an acceptable final result.
--
Bruno
Robert Krawitz
I think I tried that; it didn't work well enough (it did help). If I
reset them completely, the tonality is better but it's still washed
out.
I'm now trying just editing the makefile to change the exposures to
suit.
Yuval Levy
> These are two separate projects.
I start to understand. And I have the impression that you're the kind of user
that will be better off with more control over the process rather than with a
black box whose output is obviously not satisfying you.
As suggested in my previous post, start by merging the stacks.
align_image_stack is good for both your scenarios and more:
1. fused image
align_image_stack -a pre1 exposure[1-3].jpg
enfuse -o image1.jpg pre1*
2. merged HDR image
align_image_stack -o image1.hdr exposure[1-3].jpg
3. diagnostic info (a pto file)
align_image_stack -p image1.pto exposure[1-3].jpg
On October 23, 2010 03:36:45 pm Robert Krawitz wrote:
> This wound up being a big headache; the aligned image stacks didn't
> contain any EXIF data to let anything figure out the HFOV.
use exiftool to copy the relevant EXIF tag from one input exposure to its
target image.
I recommend LuminanceHDR or Krita to open/edit/view the HDR files, and pfstools
to manipulate them from the command line.
At this point, judge if the merge makes sense and fix it before proceeding. If
the alignment is not completely satisfying, open the pto file ("diagnostic"
variant above) in Hugin and try to improve from there. Good luck (as in: it
is most likely that the input exposures are too far apart to be ever properly
aligned).
Next you want to stitch a panorama out of the individual frames. Hugin can
open the HDR files directly, but the CP generators are not. To generate CPs,
tonemap the HDR. Bruno posted to this list a single command line to do it - I
think it was with ImageMagick's mogrify command and it used a simple
logarithmic tonemapping curve, but I can't recall the details at the moment.
Generate the CPs with the usual tools, e.g. with panomatic
panomatic -o project.pto image*.tif
then replace in the generated project.pto all .tif extensions with the .hdr
extesions of the original hdr file.
now start the Hugin GUI, load project.pto, optimize and stitch.
> I will give that a try.
I don't know how proficient and how patient you are, but if these are your first
projects you have taken a rather difficult approach / a steep learning curve.
I'd recommend mastering the individual steps of exposure fusion; exposure
merge into HDR; and stitching of a single exposure panorama; before going all
the way to the complex and perfect result you are trying to achieve. You can
use a subset of your current input images. Once you master the tools your
experience will be more rewarding.
Yuv
Robert Krawitz
>
> I start to understand. And I have the impression that you're the
> kind of user that will be better off with more control over the
> process rather than with a black box whose output is obviously not
> satisfying you.
Yep, when I know what's going on underneath so that if I know that if
I do X then Y will happen.
> As suggested in my previous post, start by merging the stacks.
> align_image_stack is good for both your scenarios and more:
>
> 1. fused image
> align_image_stack -a pre1 exposure[1-3].jpg
> enfuse -o image1.jpg pre1*
...and at some point in there fine tune the stack -- I shot it
hand-held and even with 8 fps there's some motion.
> 2. merged HDR image
> align_image_stack -o image1.hdr exposure[1-3].jpg
>
> 3. diagnostic info (a pto file)
> align_image_stack -p image1.pto exposure[1-3].jpg
OK.
> On October 23, 2010 03:36:45 pm Robert Krawitz wrote:
>> This wound up being a big headache; the aligned image stacks didn't
>> contain any EXIF data to let anything figure out the HFOV.
>
> use exiftool to copy the relevant EXIF tag from one input exposure to its
> target image.
>
> I recommend LuminanceHDR or Krita to open/edit/view the HDR files,
> and pfstools to manipulate them from the command line.
I'm getting garbage from HDR files (even 8-bit HDR files). It looks
largely like noise, with some areas that vaguely look like they make
sense.
> At this point, judge if the merge makes sense and fix it before
> proceeding. If the alignment is not completely satisfying, open the
> pto file ("diagnostic" variant above) in Hugin and try to improve
> from there. Good luck (as in: it is most likely that the input
> exposures are too far apart to be ever properly aligned).
I was afraid of that, but that wasn't the case. Some spots don't line
up, but as long as I ignore those few spots, I'm doing OK.
>> I will give that a try.
>
> I don't know how proficient and how patient you are, but if these
> are your first projects you have taken a rather difficult approach /
> a steep learning curve. I'd recommend mastering the individual
> steps of exposure fusion; exposure merge into HDR; and stitching of
> a single exposure panorama; before going all the way to the complex
> and perfect result you are trying to achieve. You can use a subset
> of your current input images. Once you master the tools your
> experience will be more rewarding.
I've done a few panoramas before, but never fusing or HDR. I got a
bit more ambitious on this vacation :-)
I'm willing to accept incremental improvements over time, but I'm
trying to understand what's going on here.
Yuval Levy
> > 1. fused image
> > align_image_stack -a pre1 exposure[1-3].jpg
> > enfuse -o image1.jpg pre1*
>
> ...and at some point in there fine tune the stack -- I shot it
> hand-held and even with 8 fps there's some motion.
no need to further fine tune the stack. align_image_stack takes care of your
motion. If there is motion in the scene, you will need deghosting. There is
some deghosting built into hugin_hdrmerge.
> I'm getting garbage from HDR files (even 8-bit HDR files). It looks
> largely like noise, with some areas that vaguely look like they make
> sense.
OK, let's try to solve this one first. What camera did you use? did you shoot
RAW or JPG?
If you don't have it yet on your machine (BTW, what system are you on?)
install LuminanceHDR. If you're on Ubuntu, do:
sudo apt-get install libqt4-dev libexiv2-dev fftw3-dev openexr pkg-config build-
essential libtiff-dev libopenexr-dev libgsl0-dev
svn co https://qtpfsgui.svn.sourceforge.net/svnroot/qtpfsgui/trunk qtpfsgui
cd qtpfsgui/qtpfsgui
qmake-qt4
make
sudo make install
In LuminanceHDR, try first to "Open HDR image" and open a RAW file (if you have
it). How does it look? Next, try to open one of the HDR generated by
align_image_stack. How does it look? Next, hit the "New HDR image" button,
load one of your stack and go through the process of creating an HDR image out
of it. How does it look?
> Some spots don't line
> up, but as long as I ignore those few spots, I'm doing OK.
are these spots movement in the scene, such as wind moving leaves or water?
align_image_stack is usually very good at correcting for camera movement, but
if the movement is in the scene what you need is deghosting, not alignment.
And if there are both, complication is compounded. You will want to go with
the "diagnostic" method and fine-tune it in that you'll be removing CPs that
were placed on moving subjects.
> I got a bit more ambitious on this vacation :-)
Ambition is good. What you need now is thoroughness and perseverance. For a
first attempt at HDR, I would have recommended the use of a tripod. I don't
know where you live, but there must be something photogenic enough for you to
go and shoot a few brackets to merge? Just to gain a sense for how things
work when the brackets are perfects, before starting to deal with the handheld
brackets.
Do I assume correctly that you used your camera's bracketing function while
shooting? what exposure mode was the camera on? and what white balance mode?
how many images are there for each project?
> I'm willing to accept incremental improvements over time, but I'm
> trying to understand what's going on here.
you'll get there. it would be easier to guide you if you could post a few
samples of your input images somewhere - say two adjacent brackets for a
start. It would be even easier if you'd meet an experienced Hugin user in
your neighborhood and look at your project with him. Online it takes a lot of
patience - just to get on the same page.
Yuv
Robert Krawitz
>
> On October 23, 2010 06:41:17 pm Robert Krawitz wrote:
>> > 1. fused image
>> > align_image_stack -a pre1 exposure[1-3].jpg
>> > enfuse -o image1.jpg pre1*
>>
>> ...and at some point in there fine tune the stack -- I shot it
>> hand-held and even with 8 fps there's some motion.
>
> no need to further fine tune the stack. align_image_stack takes
> care of your motion. If there is motion in the scene, you will need
> deghosting. There is some deghosting built into hugin_hdrmerge.
The optimizer when align_image_stack was run said there was on average
1 pixel error in the control points. Usually when I do this in Hugin
I get the worst case error under 0.5.
>> I'm getting garbage from HDR files (even 8-bit HDR files). It looks
>> largely like noise, with some areas that vaguely look like they make
>> sense.
>
> OK, let's try to solve this one first. What camera did you use? did
> you shoot RAW or JPG?
JPEG, but I don't think that's the problem. It really is garbage --
looks like high saturation noise, with some moire in places and a few
areas that look very vaguely like the original. It only happens when
generating HDR.
> If you don't have it yet on your machine (BTW, what system are you
> on?) install LuminanceHDR. If you're on Ubuntu, do:
OpenSUSE 11.3.
> In LuminanceHDR, try first to "Open HDR image" and open a RAW file
> (if you have it). How does it look? Next, try to open one of the
> HDR generated by align_image_stack. How does it look? Next, hit the
> "New HDR image" button, load one of your stack and go through the
> process of creating an HDR image out of it. How does it look?
The .exr file opened fine and looks quite good (it looked like an
empty layer in Cinepaint, but I'm quite willing to believe that's a
Cinepaint bug, and I have nothing else that can handle EXR files). A
bit dark, but that's what high dynamic range is for. The HDR .tif
file still looks like noise. Now I'm sure that JPEG vs. RAW is not
the problem :-)
>> Some spots don't line
>> up, but as long as I ignore those few spots, I'm doing OK.
>
> are these spots movement in the scene, such as wind moving leaves or
> water? align_image_stack is usually very good at correcting for
> camera movement, but if the movement is in the scene what you need
> is deghosting, not alignment. And if there are both, complication
> is compounded. You will want to go with the "diagnostic" method and
> fine-tune it in that you'll be removing CPs that were placed on
> moving subjects.
The spots I was referring to are parallax issues near the camera. In
this case, I wasn't referring to align_image_stack issues. Sorry :-)
I do have ghost issues in some shots. I'm actually less worried about
cleaning them up. For now. I just delete any CP's on moving subjects.
>> I got a bit more ambitious on this vacation :-)
>
> Ambition is good. What you need now is thoroughness and
> perseverance. For a first attempt at HDR, I would have recommended
> the use of a tripod. I don't know where you live, but there must be
> something photogenic enough for you to go and shoot a few brackets
> to merge? Just to gain a sense for how things work when the
> brackets are perfects, before starting to deal with the handheld
> brackets.
Well, absolutely a tripod is best when it's usable. I do have another
one I'm working on (a sunset near North Conway) where I did use a
tripod. However, there are some cases where I wasn't able to use a
tripod for one reason or another, or didn't have it with me. I'm not
going to not take the shots just because I don't have my tripod with
me; I'll use a monopod if I have it or hand held if I don't.
Sometimes I come across something that just cries out for a panorama,
or sometimes my wife doesn't have the patience to wait for me to fetch
the tripod.
> Do I assume correctly that you used your camera's bracketing
> function while shooting? what exposure mode was the camera on? and
> what white balance mode? how many images are there for each
> project?
Yes (0, -2, +2). Using manual exposure, trying to expose for the
brightest part of the scene. I usually use an appropriate fixed white
balance mode, but I've been known to be lazy :-(. The number of
images varies; anywhere between 4 and 7 (multiplied by the bracketing
if I used it).
>> I'm willing to accept incremental improvements over time, but I'm
>> trying to understand what's going on here.
>
> you'll get there. it would be easier to guide you if you could post
> a few samples of your input images somewhere - say two adjacent
> brackets for a start. It would be even easier if you'd meet an
> experienced Hugin user in your neighborhood and look at your project
> with him. Online it takes a lot of patience - just to get on the
> same page.
Oh, I'll get there, all right. It's far from "bad" right now. This
just came up because I don't understand why nona is brightening the
dark exposures and giving me a pale sky that's going to be very hard
to darken. And no, I couldn't use a polarizer anyway because my Sigma
8-16 doesn't have any provisions for filters. The trials and
tribulations of wide angle lenses :-)
This problem with HDR TIFF files, however, I think is a bug.
kfj
On 24 Okt., 02:39, Robert Krawitz <r...@alum.mit.edu> wrote:
> And no, I couldn't use a polarizer anyway because my Sigma
> 8-16 doesn't have any provisions for filters. The trials and
> tribulations of wide angle lenses :-)
make panoramas from polarized shots anyway. Take a look at
http://www.summitpost.org/article/207284/using-polarisation-filters.html
There's a section on panoramas and why not to use polarizers for them,
and that's not the only source saying that.
As far as your HDR efforts are concerned, let me quote from
http://tech.groups.yahoo.com/group/PanoToolsNG/message/43124
where Erik Krause points out that
... I didn't look very much into HDR any
more after enfuse was out since enfuse results usually look much
better
without tweaking, which often isn't the case for HDR tonemapping.
...
I think he's right, having thought about it for a while. The enfuse
process picks 'the best' from the individual images, rather than just
reconstructing the photometric properties of the scene and the
tonemapping that into a displayable range. Often if you look at the
enfused result and a tonemapped HDR image, you think that the enfused
image is what you actually had in mind while the tonemapped HDR isn't
quite there.
with regards
KFJ
Yuval Levy
> The optimizer when align_image_stack was run said there was on average
> 1 pixel error in the control points. Usually when I do this in Hugin
> I get the worst case error under 0.5.
one of the things I've learned with experience is not to trust that statistics
- because it can't discern in the first place if the CPs used are good or bad
ones. One single CP out by 100px can skew the whole thing, and if you have
ghosting in the scene, CPs on ghosts can do the same. If you want to be
really anally rententive about this part of the process, yes, do it manually,
but don't orient yourself to the statistical error. What you can add manually
is the knowledge of what points to orient yourself to (i.e. what was fixed in
the scene) and what parameters to optimize and what not.
With a recent version of Hugin I'd optimize y/p/r/X/Y/Z only, and I don't know
if align_image_stack has been upgraded to take advantage of the relatively
recent X/Y/Z transforms.
I have not done this, so it is pure theoretical conjecture. It has been ages
since I had the luxury of doing HDR, or even just bracketing / exposure
fusion.
> >> I'm getting garbage from HDR files (even 8-bit HDR files). It looks
> >> largely like noise, with some areas that vaguely look like they make
> >> sense.
> >
> > OK, let's try to solve this one first. What camera did you use? did
> > you shoot RAW or JPG?
>
> JPEG, but I don't think that's the problem.
no, but it helps understand the situation. I'm currently blind trying to help
you. You are my eyes. I can only ask questions and try to guess... so
again, what camera model?
> It really is garbage --
> looks like high saturation noise, with some moire in places and a few
> areas that look very vaguely like the original. It only happens when
> generating HDR.
generating HDR how? with what tool? sorry if I will sound very pedantic at
time, I can not guess what happens between your JPG and HDR and I need to know
to find out what's wrong.
> > In LuminanceHDR, try first to "Open HDR image" and open a RAW file
> > (if you have it). How does it look? Next, try to open one of the
> > HDR generated by align_image_stack. How does it look? Next, hit the
> > "New HDR image" button, load one of your stack and go through the
> > process of creating an HDR image out of it. How does it look?
>
> The .exr file opened fine and looks quite good (it looked like an
> empty layer in Cinepaint, but I'm quite willing to believe that's a
> Cinepaint bug, and I have nothing else that can handle EXR files). A
> bit dark, but that's what high dynamic range is for. The HDR .tif
> file still looks like noise. Now I'm sure that JPEG vs. RAW is not
> the problem :-)
to be sure I am on the same page as you: what did you use to generate the
.exr file that opned fine and looks quite good?
If you think Cinepaint is a problem, try Krita.
The darkness you can "correct" in LuminanceHDR by scrolling left and right in
the histogram indicator (above the HDR image IIRC). It does not change the
image data, just how it is displayed.
What is the HDR .tif file that you mention? how it is generated and how it is
different to the HDR .exr file you mention? I am afraid I lost you here...
> The spots I was referring to are parallax issues near the camera. In
> this case, I wasn't referring to align_image_stack issues. Sorry :-)
ok, got it.
> However, there are some cases where I wasn't able to use a
> tripod for one reason or another
wait until you have kids. [0] is handheld *and* with a toddler in the back-
pack ;-)
> Yes (0, -2, +2). Using manual exposure, trying to expose for the
> brightest part of the scene. I usually use an appropriate fixed white
> balance mode, but I've been known to be lazy :-(
fixed white balance (or RAW shooting) helps photometry but is not critical.
We'll fix this when we get there.
> The number of
> images varies; anywhere between 4 and 7 (multiplied by the bracketing
> if I used it).
OK, so those are reasonably small projects for an exercise.
> This
> just came up because I don't understand why nona is brightening the
> dark exposures and giving me a pale sky that's going to be very hard
> to darken.
can you post the PTO file that leads to this problem?
> This problem with HDR TIFF files, however, I think is a bug.
I am still not understanding, sorry. Which HDR TIFF files are you talking
about? how are they generated?
Yuv
[0] <http://panospace.wordpress.com/2009/09/30/pushing-the-boundaries/>
Yuval Levy
> ... I didn't look very much into HDR any
> more after enfuse was out since enfuse results usually look much
> better
> without tweaking, which often isn't the case for HDR tonemapping.
> ...
>
> I think he's right, having thought about it for a while.
partially disagree. it all depends on what you're aiming for.
if all you're aiming for is a pleasant, "natural looking" photo, then enfuse
does it indeed, although I will challenge you on the definition of "natural
looking" - a decade of digital photography has got our eyes used to the high
contrast low detail of less than perfect silicon sensors, most of whom still
don't come close to the dynamic range and vibrance of film (and have more noise
artefacts than film had grain).
if you're aiming for a photometrically exact capture of the environment,
bracketing and HDR is the way to go (and well beyond the -2/0/+2 range of most
cameras).
if you need a background to light a generated scene, enfuse won't do.
and last but not least, if you're looking to be creative, HDR/tonemapping just
opens up a lot more possibilities. aesthetic judgment remains a personal
choice.
Yuv
Robert Krawitz
> As far as your HDR efforts are concerned, let me quote from
>
> http://tech.groups.yahoo.com/group/PanoToolsNG/message/43124
>
> where Erik Krause points out that
>
> ... I didn't look very much into HDR any
> more after enfuse was out since enfuse results usually look much
> better
> without tweaking, which often isn't the case for HDR tonemapping.
> ...
>
> I think he's right, having thought about it for a while. The enfuse
> process picks 'the best' from the individual images, rather than
> just reconstructing the photometric properties of the scene and the
> tonemapping that into a displayable range. Often if you look at the
> enfused result and a tonemapped HDR image, you think that the
> enfused image is what you actually had in mind while the tonemapped
> HDR isn't quite there.
The point is precisely that the LDR workflow wasn't doing the right
thing. Enfuse is not the problem; nona is: I looked at the individual
images remapped with nona and even the darkest exposure had the sky
lightened when it was remapped, so enfuse never got a good sky to
begin with. When I tried Yuval's suggestion to enfuse a stacked set
without using align_image_stack, the tonality was good.
Robert Krawitz
>
> On October 23, 2010 08:39:18 pm Robert Krawitz wrote:
>> The optimizer when align_image_stack was run said there was on average
>> 1 pixel error in the control points. Usually when I do this in Hugin
>> I get the worst case error under 0.5.
>
> one of the things I've learned with experience is not to trust that
> statistics - because it can't discern in the first place if the CPs
> used are good or bad ones. One single CP out by 100px can skew the
> whole thing, and if you have ghosting in the scene, CPs on ghosts
> can do the same. If you want to be really anally rententive about
> this part of the process, yes, do it manually, but don't orient
> yourself to the statistical error. What you can add manually is the
> knowledge of what points to orient yourself to (i.e. what was fixed
> in the scene) and what parameters to optimize and what not.
The point was that when I used align_image_stack to generate an image
directly I got an average error worse than the worst point error I got
by hand. It may well have been a single point off, but if I use
align_image_stack directly (without generating a .pto file), that's
what I get. So I have to bring it all into hugin anyway to fix that.
(And besides, doesn't align_image_stack have to use nona -- which I
believe I've demonstrated to be the problem -- to remap the stack
anyway?)
> With a recent version of Hugin I'd optimize y/p/r/X/Y/Z only, and I
> don't know if align_image_stack has been upgraded to take advantage
> of the relatively recent X/Y/Z transforms.
I find if I try to optimize translation I always have a lot of
problemss with the alignment. Optimizing "everything except
translation" works well.
>> >> I'm getting garbage from HDR files (even 8-bit HDR files). It looks
>> >> largely like noise, with some areas that vaguely look like they make
>> >> sense.
>> >
>> > OK, let's try to solve this one first. What camera did you use? did
>> > you shoot RAW or JPG?
>>
>> JPEG, but I don't think that's the problem.
>
> no, but it helps understand the situation. I'm currently blind
> trying to help you. You are my eyes. I can only ask questions and
> try to guess... so again, what camera model?
Canon EOS 7D.
>> It really is garbage -- looks like high saturation noise, with some
>> moire in places and a few areas that look very vaguely like the
>> original. It only happens when generating HDR.
>
> generating HDR how? with what tool? sorry if I will sound very
> pedantic at time, I can not guess what happens between your JPG and
> HDR and I need to know to find out what's wrong.
Hugin, using high dynamic range panorama output to a TIFF file. Even
if I specify "-d 8" (or -d 16) as command line options for enblend,
this happens. If I generate LDR TIFF files (depth either 8 or 16),
they're fine in any tool.
>> > In LuminanceHDR, try first to "Open HDR image" and open a RAW file
>> > (if you have it). How does it look? Next, try to open one of the
>> > HDR generated by align_image_stack. How does it look? Next, hit the
>> > "New HDR image" button, load one of your stack and go through the
>> > process of creating an HDR image out of it. How does it look?
>>
>> The .exr file opened fine and looks quite good (it looked like an
>> empty layer in Cinepaint, but I'm quite willing to believe that's a
>> Cinepaint bug, and I have nothing else that can handle EXR files). A
>> bit dark, but that's what high dynamic range is for. The HDR .tif
>> file still looks like noise. Now I'm sure that JPEG vs. RAW is not
>> the problem :-)
>
> to be sure I am on the same page as you: what did you use to
> generate the .exr file that opned fine and looks quite good?
Hugin, using high dynamic range panorama output to a TIFF file.
> If you think Cinepaint is a problem, try Krita.
Krita had the same problem with those TIFF files: they were filled
with noise.
> The darkness you can "correct" in LuminanceHDR by scrolling left and
> right in the histogram indicator (above the HDR image IIRC). It
> does not change the image data, just how it is displayed.
Yup.
> What is the HDR .tif file that you mention? how it is generated and
> how it is different to the HDR .exr file you mention? I am afraid I
> lost you here...
I've tried generating HDR's as both .tif and .exr from Hugin, using
high dynamic range panorama output. The TIFF files look like noise
(not pure noise, but mostly). The EXR files don't open correctly in
cinepaint, which is what I believe to be the cinepaint problem, but
they open fine within LuminanceHDR, so I believe that they are
correct.
>> This
>> just came up because I don't understand why nona is brightening the
>> dark exposures and giving me a pale sky that's going to be very hard
>> to darken.
>
> can you post the PTO file that leads to this problem?
Attached.
>> This problem with HDR TIFF files, however, I think is a bug.
>
> I am still not understanding, sorry. Which HDR TIFF files are you talking
> about? how are they generated?
See above description: generated in Hugin by high dynamic range
panorama output.
Robert Krawitz
I tried creating remapped images in two ways:
* Exposure corrected, low dynamic range: the -2 exposure was much too
light, the +2 exposure was too dark.
* No exposure correction, low dynamic range: everything was good.
If I then enfused matching images with "no exposure correction", I got
good results. Unfortunately, there does not appear to be a way to get
hugin to automate that.
(That's also not really right, because with this kind of lens I do
need vignetting correction. But certainly the tonality looks a lot
better.)

Felix Hagemann
> One more experiment.
>
> I tried creating remapped images in two ways:
>
> * Exposure corrected, low dynamic range: the -2 exposure was much too
> light, the +2 exposure was too dark.
This is expected as the exposure optimization tries to bring the
brightness of all images to the one that is marked as the exposure
anchor.
> * No exposure correction, low dynamic range: everything was good.
>
> If I then enfused matching images with "no exposure correction", I got
> good results. Unfortunately, there does not appear to be a way to get
> hugin to automate that.
If I understand you correctly, then there is a way, it's a bit
cumbersome though:
Anchor one image from one exposure set, say 0ev, for exposure in the
image tab. Use "Custom parameters below" in the exposure tab and mark
all images of the 0ev set and vignetting (probably unmark Camera
Response, I get flat images when using it). Optimize exposure. Do the
same for the +2ev stack und for the -2ev stack.
Hope this helps,
Felix
Robert Krawitz
Yes, it does. Camera Response (which doesn't appear to be too well
defined anywhere) looks like it was responsible for most of the
problem. I'm not yet trying your last suggestion (about optimizing
exposure for each exposure layer separately), but I'll try that
if it looks like I need something more.
I'm creating individual remapped shots w/o exposure correction and
blended layers, and they look pretty good. I think I can use those to
play around with enfuse parameters to get what I want. The enfuse
defaults seem to create an image that's paler than what I want. I
suspect the parameters that are most important from this perspective are
exposure-mu, exposure-sigma, and gray-projector, and will need to play
around with them to get the right combo.
An enfuse GUI (is luminance the right thing here?) would be very
helpful for this kind of thing, to visualize how the different
parameters affect the result.
Robert Krawitz
--exposure-mu and --exposure-sigma actually do.
I've posted very small versions of all the shots on
http://rlk.smugmug.com/Photography/enfuse-test.
I'm trying to fuse
* 0EV:
http://rlk.smugmug.com/Photography/enfuse-test/14365255_gYhFw#1064008497_nVtDY
* -2EV:
http://rlk.smugmug.com/Photography/enfuse-test/14365255_gYhFw#1064008676_Qysth
* +2EV:
http://rlk.smugmug.com/Photography/enfuse-test/14365255_gYhFw#1064008675_hU5dR
With different options to enfuse, I have the following results (I'm
using -l 1 in all cases to see where enfuse makes its decisions):
* No options:
http://rlk.smugmug.com/Photography/enfuse-test/14365255_gYhFw#1064010124_sBN5B
* --exposure-mu=.1:
http://rlk.smugmug.com/Photography/enfuse-test/14365255_gYhFw#1064010223_GqVkf
* --exposure-mu=.1 --exposure-sigma=.01:
http://rlk.smugmug.com/Photography/enfuse-test/14365255_gYhFw#1064010348_gmdUu
* --exposure-mu=0 --exposure-sigma=.01:
http://rlk.smugmug.com/Photography/enfuse-test/14365255_gYhFw#1064010451_D9WRj
My understanding of --exposure-mu is that it should bias the exposure
toward that level, and indeed, the shadows are darker with
--exposure-mu=.1. However, the seam in the sky is in the same place
in all of these cases, and the highlights are actually brighter with
--exposure-mu=0 than with --exposure-mu=.1.
The enfuse manual isn't very clear on what's going on, and I'm
certainly not. What I really want is for the sky and most of the
sunny ground (except for the shadows) to have the tonality of the -2EV
image and the shadows to be appropriately lightened, but I can't find
a combination of parameters that gets anywhere near that.

paul womack
>
> An enfuse GUI (is luminance the right thing here?) would be very
> helpful for this kind of thing, to visualize how the different
> parameters affect the result.
An Enfuse Gui you say? If only we could come
up with a memorable or obvious name for such
a thing ;-)
http://software.bergmark.com/enfuseGUI/Main.html
BugBear
Robert Krawitz
It's useless to me since it's not in source form (i. e. runs on Linux).

Tim Nugent
--
You received this message because you are subscribed to the Google Groups "Hugin and other free panoramic software" group.
A list of frequently asked questions is available at: http://wiki.panotools.org/Hugin_FAQ
To post to this group, send email to hugi...@googlegroups.com
To unsubscribe from this group, send email to hugin-ptx+...@googlegroups.com
For more options, visit this group at http://groups.google.com/group/hugin-ptx
Robert Krawitz
>
> Try KImagefuser
>
> http://wiki.panotools.org/Enfuse#Linux
Yup, found it.
I can certainly change what's happening, but whatever I do I cannot
seem to get the sky dark. What's more, *any* combination of settings
(using levels=1) yields that discontinuity at the same place in the
sky. I can change the relative darkness above and below that line
(most effectively by changing exposure-sigma), but it always stays in
the same place.
So there's obviously something I don't understand about what enfuse is
doing.
Robert Krawitz
> On Tue, 26 Oct 2010 14:09:00 +0200, Tim Nugent wrote:
>>
>> Try KImagefuser
>>
>> http://wiki.panotools.org/Enfuse#Linux
>
> Yup, found it.
>
> I can certainly change what's happening, but whatever I do I cannot
> seem to get the sky dark. What's more, *any* combination of settings
> (using levels=1) yields that discontinuity at the same place in the
> sky. I can change the relative darkness above and below that line
> (most effectively by changing exposure-sigma), but it always stays in
> the same place.
>
> So there's obviously something I don't understand about what enfuse is
> doing.
Actually, it looks like using hard mask gets rid of this. It has
other undesirable effects, though.

Dale Beams

Carl von Einem
> On Tue, 26 Oct 2010 14:09:00 +0200, Tim Nugent wrote:
>>
>> Try KImagefuser
>
> seem to get the sky dark.
My first thought was: why don't you shoot at night if you want a dark
sky? But then I had a look at your examples at smugmug:
> I'm trying to fuse
> * 0EV:
> <http://rlk.smugmug.com/Photography/enfuse-test/14365255_gYhFw#1064008497_nVtDY>
> * -2EV:
> <http://rlk.smugmug.com/Photography/enfuse-test/14365255_gYhFw#1064008676_Qysth>
> * +2EV:
> <http://rlk.smugmug.com/Photography/enfuse-test/14365255_gYhFw#1064008675_hU5dR>
These images are already remapped and one has a different canvas size.
Since they were not cropped after remapping they all contain black
pixels in the undefined areas. I bet these just "confuse" enfuse,
resulting in your "pale" sky.
I think there are two general enfuse workflows for a bracketed panorama
shot:
- first enfuse every single bracketed stack of jpgs to preferably a 16
bit file (tif), and stitch those
or (should work if you used a tripod)
- stitch all different exposure steps with the same settings so you get
three panoramas (-2, 0, +2 EV) and enfuse those
Both workflows don't exactly propose to first remap the images.
This little experiment...
- make sure canvas size is identical (I pasted one image on top and
aligned using difference mode, then cropped to these smaller boundaries)
- mask the black undefined areas using an alpha mask, save as tiff
...gives me a better result than your "No options" example:
> With different options to enfuse, I have the following results (I'm
> using -l 1 in all cases to see where enfuse makes its decisions):
> * No options:
> http://rlk.smugmug.com/Photography/enfuse-test/14365255_gYhFw#1064010124_sBN5B
This image containes a pseudo halo which looks as if the black "frame"
is actually used by enfuse.
Carl
Yuval Levy
> The point was that when I used align_image_stack to generate an image
> directly I got an average error worse than the worst point error I got
> by hand. It may well have been a single point off, but if I use
> align_image_stack directly (without generating a .pto file), that's
> what I get. So I have to bring it all into hugin anyway to fix that.
You are being stubborn, Robert. Would you please ignore the "average error"?
the entity calculating that average error does not know about the quality of
the CPs used to calculate it. In the range you are stubbornly trying to
fight/improve there is not much improvement to look for at this stage of the
process.
> (And besides, doesn't align_image_stack have to use nona -- which I
> believe I've demonstrated to be the problem -- to remap the stack
> anyway?)
It is more likely that the problem are the parameters fed into nona than nona
itself. If you use align_image_stack from scratch as I told you, you don't
introduce such parameters.
> > With a recent version of Hugin I'd optimize y/p/r/X/Y/Z only, and I
> > don't know if align_image_stack has been upgraded to take advantage
> > of the relatively recent X/Y/Z transforms.
>
> I find if I try to optimize translation I always have a lot of
> problemss with the alignment. Optimizing "everything except
> translation" works well.
that's because to optimize translation you need all CPs to be in the same
plane. Sorry for omitting this very important detail. That said, if you use
align_image_stack, you should not even get here.
> Canon EOS 7D.
ok, so we know it is a camera that produces useful EXIF data. And the lens?
> Hugin, using high dynamic range panorama output to a TIFF file.
OK, now I get it. I never had a need to use the TIFF HDR, I always use the
EXR format. Can't help you further with this, sorry.
> > can you post the PTO file that leads to this problem?
>
> Attached.
Thank you.
My impression is that you are trying to do too many things at the same time.
The attached PTO is for HDR output, not for "Fused exposures are too light".
Change output from HDR-TIFF to HDR-EXR and that problem is out of the way.
Yes it is a bug, thank you for reporting it. Somebody may look into it.
You posted before pictures of a washed out sky. It is not this project, is
it?
This specific project feeds white balance adjustments into nona. Go into the
Camera and Lens tab, select the Photometric sub-tab and reset the multipliers
to 1. Generate remapped images (no exposure correction, low dynamic range)
and check if there are still color issues like the one you posted with the
blue sky.
Using align_image_stacks to produce TIFF output as I asked you to do
previously should yield a similar result, with color being preserved. It
should generate one LDR TIFF for every exposure, not an HDR TIFF. These are
TIFFs you want to fuse.
As KJF already kindly pointed to you, doing photometric adjustment and then
enfusing is counter-producing. On the other hand, it is very important for
HDR, especially when the input images are JPG with no constant white balance.
I don't know why the PTO has Vm5 for vignetting adjustment (with all other
values being default). Vm5 is not documented [0] and to fit all other params
in the PTO file it should be Vm0 (default), not Vm5.
Other than that, the PTO file looks OK, and I still can't explain the washed
out pictures. Where did you get Hugin from?
Yuv
[0] http://hugin.hg.sourceforge.net/hgweb/hugin/hugin/file/tip/doc/nona.txt
Robert Krawitz
>
> On October 24, 2010 11:57:09 am Robert Krawitz wrote:
>> The point was that when I used align_image_stack to generate an image
>> directly I got an average error worse than the worst point error I got
>> by hand. It may well have been a single point off, but if I use
>> align_image_stack directly (without generating a .pto file), that's
>> what I get. So I have to bring it all into hugin anyway to fix that.
>
> You are being stubborn, Robert. Would you please ignore the
> "average error"? the entity calculating that average error does not
> know about the quality of the CPs used to calculate it. In the
> range you are stubbornly trying to fight/improve there is not much
> improvement to look for at this stage of the process.
All right, that point is fair.
>> (And besides, doesn't align_image_stack have to use nona -- which I
>> believe I've demonstrated to be the problem -- to remap the stack
>> anyway?)
>
> It is more likely that the problem are the parameters fed into nona
> than nona itself. If you use align_image_stack from scratch as I
> told you, you don't introduce such parameters.
I've since done further experiments that I believe confirm your
statement. When I omitted optimizing for camera response, things got
a lot better -- at least as far as what nona produced. So I now
believe you're correct that nona is not the problem.
>> > With a recent version of Hugin I'd optimize y/p/r/X/Y/Z only, and I
>> > don't know if align_image_stack has been upgraded to take advantage
>> > of the relatively recent X/Y/Z transforms.
>>
>> I find if I try to optimize translation I always have a lot of
>> problemss with the alignment. Optimizing "everything except
>> translation" works well.
>
> that's because to optimize translation you need all CPs to be in the
> same plane. Sorry for omitting this very important detail. That
> said, if you use align_image_stack, you should not even get here.
And mine decidedly weren't...
>> Canon EOS 7D.
>
> ok, so we know it is a camera that produces useful EXIF data. And the lens?
Sigma 8-16 f/4.5-5.6
>> > can you post the PTO file that leads to this problem?
>>
>> Attached.
>
> Thank you.
>
> My impression is that you are trying to do too many things at the
> same time. The attached PTO is for HDR output, not for "Fused
> exposures are too light".
Sorry, I am trying a lot of different things.
> Change output from HDR-TIFF to HDR-EXR and that problem is out of
> the way. Yes it is a bug, thank you for reporting it. Somebody may
> look into it.
Fine. Now that I have LuminanceHDR working, EXR is fine and so this
problem's not a showstopper.
> You posted before pictures of a washed out sky. It is not this
> project, is it?
>
> This specific project feeds white balance adjustments into nona. Go
> into the Camera and Lens tab, select the Photometric sub-tab and
> reset the multipliers to 1. Generate remapped images (no exposure
> correction, low dynamic range) and check if there are still color
> issues like the one you posted with the blue sky.
The remapped images are fine when I do that. It looks like camera
response was the main culprit, but in some cases vignetting correction
didn't help.
> Using align_image_stacks to produce TIFF output as I asked you to do
> previously should yield a similar result, with color being
> preserved. It should generate one LDR TIFF for every exposure, not
> an HDR TIFF. These are TIFFs you want to fuse.
Right, and *those* TIFFs are fine.
Now, here's where the problem is. If I just run
enfuse TEST000*.tif
(the prefix for the aligned image stack), the sky and foreground are
too light. If, however, I use
enfuse --hard-mask TEST000*.tif
the overall tone is much better, but there are some artifacts.
I've tried experimenting with --exposure-mu among other things. If I
set exposure-mu to something very small (like 0.1, or even 0.01), I
get darker and darker foregrounds, but the sky and the sunlit
background are still too light.
> As KJF already kindly pointed to you, doing photometric adjustment
> and then enfusing is counter-producing. On the other hand, it is
> very important for HDR, especially when the input images are JPG
> with no constant white balance.
OK, I didn't know that, but I believe it from my results.
> I don't know why the PTO has Vm5 for vignetting adjustment (with all
> other values being default). Vm5 is not documented [0] and to fit
> all other params in the PTO file it should be Vm0 (default), not
> Vm5.
No idea myself. How would I even get there?
> Other than that, the PTO file looks OK, and I still can't explain
> the washed out pictures. Where did you get Hugin from?
Mercurial source as of a few days ago.
Robert Krawitz
> Robert Krawitz schrieb am 26.10.10 14:22:
>
>> * 0EV:
>> <http://rlk.smugmug.com/Photography/enfuse-test/14365255_gYhFw#1064008497_nVtDY>
>> * -2EV:
>> <http://rlk.smugmug.com/Photography/enfuse-test/14365255_gYhFw#1064008676_Qysth>
>> * +2EV:
>> <http://rlk.smugmug.com/Photography/enfuse-test/14365255_gYhFw#1064008675_hU5dR>
>
> These images are already remapped and one has a different canvas
> size. Since they were not cropped after remapping they all contain
> black pixels in the undefined areas. I bet these just "confuse"
> enfuse, resulting in your "pale" sky.
Sorry, my mistake for not explaining what happened: I did use aligned
TIFF files. The problem is that SmugMug won't allow me up upload TIFF
files, so I converted them to JPEG files (where the masked region
looks black) before uploading them.
> I think there are two general enfuse workflows for a bracketed panorama shot:
> - first enfuse every single bracketed stack of jpgs to preferably a 16 bit file (tif), and stitch those
Which is essentially what I'm doing via hugin.
> or (should work if you used a tripod)
> - stitch all different exposure steps with the same settings so you get three panoramas (-2, 0, +2 EV) and enfuse those
Which I didn't.
> Both workflows don't exactly propose to first remap the images.
>
> This little experiment...
> - make sure canvas size is identical (I pasted one image on top and aligned using difference mode, then cropped to these smaller boundaries)
> - mask the black undefined areas using an alpha mask, save as tiff
> ...gives me a better result than your "No options" example:
>> With different options to enfuse, I have the following results (I'm
>> using -l 1 in all cases to see where enfuse makes its decisions):
>> * No options:
>> http://rlk.smugmug.com/Photography/enfuse-test/14365255_gYhFw#1064010124_sBN5B
> This image containes a pseudo halo which looks as if the black "frame" is actually used by enfuse.
I don't believe that that's the case, since I actually did this on
TIFF files using an alpha mask (that had been created by hugin, or
really nona).
Yuval Levy
> Sigma 8-16 f/4.5-5.6
good EXIF. probably vignetting to take into account at wider zoom settings.
> Right, and *those* TIFFs are fine.
Good! I'm happy to see that we are making progress.
> Now, here's where the problem is. If I just run
>
> enfuse TEST000*.tif
>
> (the prefix for the aligned image stack), the sky and foreground are
> too light. If, however, I use
>
> enfuse --hard-mask TEST000*.tif
>
> the overall tone is much better, but there are some artifacts.
>
> I've tried experimenting with --exposure-mu among other things. If I
> set exposure-mu to something very small (like 0.1, or even 0.01), I
> get darker and darker foregrounds, but the sky and the sunlit
> background are still too light.
OK, so now you are trying to achieve a better distribution. There are many
ways to achieve this.
What counts in the end is the result, not the tool used. Enfuse only weight
the pixels in the stack to retain the maximum information possible. It has no
sense of aesthetics. You do.
Open the enfused image in Gimp. Play with curves. Do you get any further?
even more sophisticated: play with masks / gradient masks and curves. Any
better?
Tweaking at the enfuse parameters is no different than tweaking at the curves
and masks in Gimp. Only the first one is more or less blind, while the second
one gives you a visual feedback. As long as you don't have too many
over/under exposed pixels, curves are the way to go.
> Where did you get Hugin from?
>
> Mercurial source as of a few days ago.
and from your credentials I assume it was easy for you to build. No build
problems whatsoever? Did you also build enblend from mercurial? if so, you
have a wonderful handbook on your machine (or you should make the appropriate
target). Full of explanations for you.
After all of these efforts, I can't wait to see the results...
Yuv
Robert Krawitz
>
> On October 26, 2010 08:29:18 pm Robert Krawitz wrote:
>> Sigma 8-16 f/4.5-5.6
>
> good EXIF. probably vignetting to take into account at wider zoom settings.
So the question is, should I do that by optimizing photometry in Hugin?
>> Now, here's where the problem is. If I just run
>>
>> enfuse TEST000*.tif
>>
>> (the prefix for the aligned image stack), the sky and foreground are
>> too light. If, however, I use
>>
>> enfuse --hard-mask TEST000*.tif
>>
>> the overall tone is much better, but there are some artifacts.
>>
>> I've tried experimenting with --exposure-mu among other things. If I
>> set exposure-mu to something very small (like 0.1, or even 0.01), I
>> get darker and darker foregrounds, but the sky and the sunlit
>> background are still too light.
>
> OK, so now you are trying to achieve a better distribution. There
> are many ways to achieve this.
>
> What counts in the end is the result, not the tool used. Enfuse
> only weight the pixels in the stack to retain the maximum
> information possible. It has no sense of aesthetics. You do.
>
> Open the enfused image in Gimp. Play with curves. Do you get any
> further? even more sophisticated: play with masks / gradient masks
> and curves. Any better?
I did this with a previous non-exposure-fused panorama and it worked
fine. The problem here is that by the look of it the sky is likely
too faded to be able to achieve very much with the curves, even in HSL
space (which works a lot better than the normal HSV space). Perhaps
16 bit files would preserve enough information, but cinepaint is too
flaky and we all know what is(n't) happening with GIMP in that regard.
The other thing I want to do is to retain enough interesting detail in
clouds (there are only a few tiny ones in that example, but I have
another one from the same trip with a few clouds closer to the sun
that get completely blown out if I'm not careful early on).
The problem is that if the sky is too light, particularly in 8-bit
mode, the relationships between the color channels, specifically hue
and saturation, vary greatly with only small changes in pixel values.
Darkening the sky will amplify those differences.
> Tweaking at the enfuse parameters is no different than tweaking at
> the curves and masks in Gimp. Only the first one is more or less
> blind, while the second one gives you a visual feedback. As long as
> you don't have too many over/under exposed pixels, curves are the
> way to go.
And that's the issue: I want to get the best tonality I can prior to
editing any 8 bit result.
>> Where did you get Hugin from?
>>
>> Mercurial source as of a few days ago.
>
> and from your credentials I assume it was easy for you to build. No build
> problems whatsoever? Did you also build enblend from mercurial? if so, you
> have a wonderful handbook on your machine (or you should make the appropriate
> target). Full of explanations for you.
No issues of major consequence (nothing that I feel the need to
complain about, let's put it that way) once I got the latest libpano
built and installed.
> After all of these efforts, I can't wait to see the results...
It will be interesting. I have an even more interesting one queued up
that was the subject of my first note, but I'd really like to get rid
of that slight misalignment in the ocean. Even a 1 pixel misalignment
is perceptible if it's vertical and at the horizon. But that's in
part an enblend issue and the subject for another day (unless you
*want* me to ask about it).
kfj
On Oct 23, 4:54 am, Robert Krawitz <r...@alum.mit.edu> wrote:
> I'm trying to build panoramas with multiple exposures (-2, 0, +2)
> ...
Finally you did post some images. Now I only looked at some of them
yesterday, but I'll make some points which may help with the issue.
- I'm also using a Canon camera. Canon is known to expose rather on
the generous side, and with my EOS450D, especially using a wide angle
lens, a proper exposure of a scene like your's is usually up to two EV
under what the automatic wants. If you take that as your middle value,
and do a +/- 2 bracket, you have everything nicely covered. Your
brightest image is so overexposed that you can't gain much from it.
- Be that as it may, enfuse doesn't orient itself by some sort of
'optimal' exposure. What would that be? medium grey? It only does
statistics where it comes to the exposure weighting. This is reflected
by statistical terms sigma and mu, being the standard deviation and
the mean. Mean of what? Well, stacked pixels at a given position. If
you take the mean of a series which is, by rule of thumb, 2 EV
overexposed, you'll get an overexposed fusion. You noticed that if you
modify the mu value, you can shift the output to brighter or darker
values. But I feel you might just as well discard the last (brightest)
shot of your series, it really doesn't help.
- You say you want a 'darker' sky. Are you sure you don't just want a
more saturated sky? Have you tried passing, e.g. --saturation-
weight=1, as additional parameter to enfuse? You can even go down with
the --exposure-weight from 1, the default, just to see what happens.
(you can do this in the stitcher tab; if you select that you wish an
exposure fusion you are offered the option to pass additional
parameters to enfuse)
- And --hard-mask is really for focus stacks, it will, as you noticed,
produce artifacts when it is used for exposure fusion.
- Are you actually aware of the enfuse manual? This is a quite
detailed, 50 page document explaining every point in great detail, and
it should be part of your hugin installation, living in the folder doc/
enblend off your hugin installation folder. I contains much more than
the command line parameter list you get when you call enfuse --help.
- Finally, let me counsel you that you often run into problems which
become totally untrackable by just trying to somehow right a botched
up hugin project. Best to just discard it and start afresh,
particularly if you are asking for help. The less steps you have taken
before arriving at a result you feel is wrong, the more likely it
becomes that a problem, a mistake or a misconception can actually be
identified and dealt with. And if you keep to a ratio of one problem
per post, it's less easy to get confused about which of your problems
is currently adressed.
Exposure blending sometimes feels like a bit of black magic, and it
takes quite a while to fully grasp the concept, let alone master the
process. But it's effort well spent, just like the wrestling with
hugin's plethora of options ;)
with regards
KFJ
Robert Krawitz
>
> On Oct 23, 4:54 am, Robert Krawitz <r...@alum.mit.edu> wrote:
>> I'm trying to build panoramas with multiple exposures (-2, 0, +2)
>> ...
>
> Finally you did post some images. Now I only looked at some of them
> yesterday, but I'll make some points which may help with the issue.
>
> - I'm also using a Canon camera. Canon is known to expose rather on
> the generous side, and with my EOS450D, especially using a wide
> angle lens, a proper exposure of a scene like your's is usually up
> to two EV under what the automatic wants. If you take that as your
> middle value, and do a +/- 2 bracket, you have everything nicely
> covered. Your brightest image is so overexposed that you can't gain
> much from it.
I've often had to do that, but in this situation the shadows are so
deep that the +2 brings out a lot of detail. In the future I'll
probably do -3/-1/+1 or something like that, though.
> - Be that as it may, enfuse doesn't orient itself by some sort of
> 'optimal' exposure. What would that be? medium grey? It only does
> statistics where it comes to the exposure weighting. This is
> reflected by statistical terms sigma and mu, being the standard
> deviation and the mean. Mean of what? Well, stacked pixels at a
> given position. If you take the mean of a series which is, by rule
> of thumb, 2 EV overexposed, you'll get an overexposed fusion. You
> noticed that if you modify the mu value, you can shift the output to
> brighter or darker values. But I feel you might just as well discard
> the last (brightest) shot of your series, it really doesn't help.
I experimented with that. I got no significant improvement to the
sky, a slight improvement to the background, and very dark shadows.
So I still need that +2EV shot.
> - You say you want a 'darker' sky. Are you sure you don't just want
> a more saturated sky? Have you tried passing, e.g. --saturation-
> weight=1, as additional parameter to enfuse? You can even go down
> with the --exposure-weight from 1, the default, just to see what
> happens. (you can do this in the stitcher tab; if you select that
> you wish an exposure fusion you are offered the option to pass
> additional parameters to enfuse)
I'll experiment with that.
Which definition of "saturated" is enfuse using -- value (HSV) or
lightness (HSL)? I've found that that makes a very big difference :-)
> - And --hard-mask is really for focus stacks, it will, as you noticed,
> produce artifacts when it is used for exposure fusion.
Yes, but it's doing something very different to the sky and to a
lesser extent the (bright) background.
> - Are you actually aware of the enfuse manual? This is a quite
> detailed, 50 page document explaining every point in great detail,
> and it should be part of your hugin installation, living in the
> folder doc/ enblend off your hugin installation folder. I contains
> much more than the command line parameter list you get when you call
> enfuse --help.
Yes, I am aware of it and I've read it, but it doesn't answer all of
my questions.
> - Finally, let me counsel you that you often run into problems which
> become totally untrackable by just trying to somehow right a botched
> up hugin project. Best to just discard it and start afresh,
> particularly if you are asking for help. The less steps you have
> taken before arriving at a result you feel is wrong, the more likely
> it becomes that a problem, a mistake or a misconception can actually
> be identified and dealt with. And if you keep to a ratio of one
> problem per post, it's less easy to get confused about which of your
> problems is currently adressed.
Which is why I'm experimenting with align-image-stack on image triples
and fusing those simple stacks.
> Exposure blending sometimes feels like a bit of black magic, and it
> takes quite a while to fully grasp the concept, let alone master the
> process. But it's effort well spent, just like the wrestling with
> hugin's plethora of options ;)
That's the stage I'm at right now.
kfj
On Oct 27, 2:02 pm, Robert Krawitz <r...@alum.mit.edu> wrote:
> > - And --hard-mask is really for focus stacks, it will, as you noticed,
> > produce artifacts when it is used for exposure fusion.
>
> Yes, but it's doing something very different to the sky and to a
> lesser extent the (bright) background.
hard mask, the transition from from the image has the 'best' value in
a certain area to another image that has it in another area will be
quite sudden. Since at this boundary, other parameters (like
stauration, precise colour) will not be identical, you will get a
visible transition - a discontinuity, not a smooth blend. There are
only rare cases where such discontinuities are wanted, and focus
stacks are among them.
with regards
Kay
Yuval Levy
> On Wed, 27 Oct 2010 03:01:24 -0400, Yuval Levy wrote:
> > On October 26, 2010 08:29:18 pm Robert Krawitz wrote:
> >> Sigma 8-16 f/4.5-5.6
> >
> > good EXIF. probably vignetting to take into account at wider zoom
> > settings.
>
> So the question is, should I do that by optimizing photometry in Hugin?
depends on how you like the results :)
photometry optimization is a tricky business.
Ideally you do a lens calibration once under ideal circumstances (tripod!) and
you get those parameters from there. You will need to calibrate for different
F/stops if you try to achieve perfection.
> > Open the enfused image in Gimp. Play with curves. Do you get any
> > further? even more sophisticated: play with masks / gradient masks
> > and curves. Any better?
>
> I did this with a previous non-exposure-fused panorama and it worked
> fine. The problem here is that by the look of it the sky is likely
> too faded to be able to achieve very much with the curves
we are getting more and more into the realm of image editing.
Some of the things I do in similar circumstances:
1. generate a mask for the sky. usually the magic wand is good enough to grab
the sky quickly. I blur the boundaries of the mask with a little bit of
gaussian blur.
2. treat the two areas (masked/not masked) separately.
This can be something like: stitch the dark exposure, add it as a layer to
your image editor, mask it so that the sky is visible and use that sky.
Or in the case of less extreme situations / good input images / or even for a
single LDR exposure - use a different set of curves for the sky and for the
rest.
You can play endlessly. The trick is not to overdo it.
> cinepaint is too
> flaky and we all know what is(n't) happening with GIMP in that regard.
I am not ashamed to admit that I spent the money to buy a Photoshop license
and to say that it is worth every penny as far as image editing goes. I use
the GIMP occasionally for the small thing when I don't feel like starting
Photoshop; and for the magic of MathMap and a few other neat things not
available in Photoshop.
> The other thing I want to do is to retain enough interesting detail in
> clouds
with the selection set to the appropriate mask, play with different contrast
settings.
> I'd really like to get rid
> of that slight misalignment in the ocean. Even a 1 pixel misalignment
> is perceptible if it's vertical and at the horizon.
been there, done that. Sometimes using horizontal CPs between adjacent images
and even further beyond help. Other times, swallow your pano-pride and use
your image editor. With the rectangular selector, select a long stripe above
the horizon (edge just at the horizon) and use the clone tool. move the
selection below the horizon and repeat. Who said that panoramic images must
show the ugly reality?
Yuv
Robert Krawitz
>
> On October 27, 2010 07:07:19 am Robert Krawitz wrote:
>> On Wed, 27 Oct 2010 03:01:24 -0400, Yuval Levy wrote:
>> > On October 26, 2010 08:29:18 pm Robert Krawitz wrote:
>> >> Sigma 8-16 f/4.5-5.6
>> >
>> > good EXIF. probably vignetting to take into account at wider zoom
>> > settings.
>>
>> So the question is, should I do that by optimizing photometry in Hugin?
>
> depends on how you like the results :)
>
> photometry optimization is a tricky business.
In what regards?
> Ideally you do a lens calibration once under ideal circumstances
> (tripod!) and you get those parameters from there. You will need to
> calibrate for different F/stops if you try to achieve perfection.
And different focal lengths...
>> cinepaint is too
>> flaky and we all know what is(n't) happening with GIMP in that regard.
>
> I am not ashamed to admit that I spent the money to buy a Photoshop license
> and to say that it is worth every penny as far as image editing goes. I use
> the GIMP occasionally for the small thing when I don't feel like starting
> Photoshop; and for the magic of MathMap and a few other neat things not
> available in Photoshop.
I don't have Windows or a Mac (well, my wife does, but it's
underpowered for this purpose).
>> I'd really like to get rid
>> of that slight misalignment in the ocean. Even a 1 pixel misalignment
>> is perceptible if it's vertical and at the horizon.
>
> been there, done that. Sometimes using horizontal CPs between
> adjacent images and even further beyond help. Other times, swallow
> your pano-pride and use your image editor. With the rectangular
> selector, select a long stripe above the horizon (edge just at the
> horizon) and use the clone tool. move the selection below the
> horizon and repeat. Who said that panoramic images must show the
> ugly reality?
OK, I've done that too; I was wondering if there were some good tricks
people had for it.

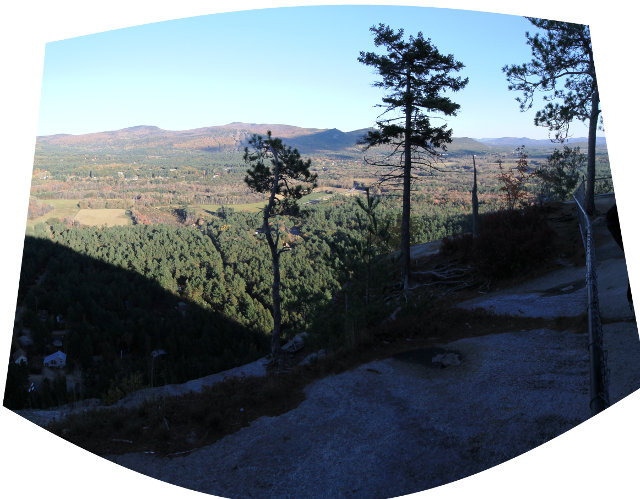
Bob Bright
Assuming that you'd rather do the latter, check out Bruno's tutorial at:
http://wiki.panotools.org/Mending_parallax_errors_with_the_shear_tool
No doubt you'll want to adapt his technique to your own preferred ways of working in the gimp or whatever photo editor you use, but the basic technique is worth its weight in gold. I generally use the gimp's pespective tool rather than the shear tool, since I find it more flexible. And I don't bother measuring the misalignment as Bruno suggests. I simply use the free select tool or the path tool to select the area I want to work on, copy and paste, then switch to the perspective tool and drag the handles until everything lines up. Anchor the floating selection, a little judicious use of the clone/smudge tools, and the error is gone.
Cheers,
BBB
--
Bob Bright
Vancouver Island Digital Imaging
http://VictoriaVR.ca
Bruno Postle
>
>Assuming that you'd rather do the latter, check out Bruno's tutorial at:
>
>http://wiki.panotools.org/Mending_parallax_errors_with_the_shear_tool
>
>No doubt you'll want to adapt his technique to your own preferred
>ways of working in the gimp or whatever photo editor you use, but the
>basic technique is worth its weight in gold. I generally use the
>gimp's pespective tool rather than the shear tool, since I find it
>more flexible. And I don't bother measuring the misalignment as
>Bruno suggests.
Yes, with practice you can skip most of these steps. The 'shear'
technique has the advantage that it doesn't require any artistic
skill - In fact it is so mechanical that it could be implemented as
a Gimp plug-in.
--
Bruno
Robert Krawitz
>
> There's no such thing as a perfect stitch. There are _always_ going
> to be some misaligned areas in your stitches (especially if you're
> shooting fisheye, since there's no such thing as a NPP for fisheye
> lenses). You can spend hours in hugin, fiddling with lens
> parameters and setting and removing control points and re-optimizing
> in an effort to fix that one pixel misalignment on the horizon
> without screwing up the alignment elsewhere in your pano. Then you
> can waste some more time masking problem areas and re-blending in
> hopes than enblend or smartblend will hide the inevitable
> misalignment. OR: you can spend a few minutes in your favorite
> photo editor fixing the errors, and get on with shooting and
> stitching more panoramas.
>
> Assuming that you'd rather do the latter, check out Bruno's tutorial at:
>
> http://wiki.panotools.org/Mending_parallax_errors_with_the_shear_tool
That does indeed look easy. Thanks.
Yuval Levy
> I don't have Windows or a Mac (well, my wife does, but it's
> underpowered for this purpose).
Photoshop (at least my old CS2, I did not feel a need to upgrade so far) works
pretty well with wine.
Yuv
Robert Krawitz
I'm getting remarkably better results by fusing only the +2 and -2
exposures (omitting the middle exposure). Setting saturation weight
to 1 and exposure mu to .333 helps more.
Yuval Levy
> I hate to keep beating this rather lifeless horse...but...
>
> I'm getting remarkably better results by fusing only the +2 and -2
> exposures (omitting the middle exposure). Setting saturation weight
> to 1 and exposure mu to .333 helps more.
nothing wrong with that. Aesthetics is an art, not a science. If you find the
fusion of +2 and -2 with above parameters more aesthetically pleasing, just
use it.
In the old days before enfuse, photographers would manually expose for the
highlight and for the shadow and manually mask the two (e.g. exterior through
window and interior view). No importance whatsoever was given to the EV
difference and to the quantity of in between exposures.
This of course, applies to exposure fusion only. HDR is a completely different
issue.
Yuv