Hugin places first (left) image in the middle of the panorama - Why?
56 views
Skip to first unread message

Len Philpot
Sep 18, 2021, 2:07:02 AM9/18/21
to hugin and other free panoramic software
I've noticed this a couple of times, both of which were 360 degree panoramas (intended for use as localized terrestrial backgrounds in astronomical planetaria software). I shoot the images left to right, starting at north, going clockwise around to north again. Vertical frames, plenty of overlap, etc., etc.
Hugin loads the images in the correct order and they stitch / align properly, but north (i.e., first / left image) ends up in the center of the pano, not at the left edge where it should be. This means I have to tediously split and rejoin the two image halves in an image editor.
I've created many other panos with Hugin and this doesn't happen. But for some reason it does occasionally (so far only on 360 degree panos). I found a reference in the FAQs to possibly re-anchoring the initial image but it references things I don't see in the GUI.
Any ideas?
I'm using 2018.0.0.5abfb4de7961, which is the newest available for my Xubuntu 2018.04 system.
Thanks.
Len Philpot
Sep 18, 2021, 10:54:30 AM9/18/21
to hugin and other free panoramic software
Update -- I discovered it's possible to manually drag the whole pano chain around in the preview window. I guess I was looking for something a bit more precise and numerical, but it more or less works. However, it doesn't answer why Hugin is rotating the pano by 90 degrees in the first place.

Luís Henrique Camargo Quiroz
Sep 18, 2021, 11:30:18 AM9/18/21
to hugi...@googlegroups.com
Hi Len!
In your first message you told that you never saw in the GUI things you read in FAQs. So I guess you do your stitchings, all this time, using the default option, the "simple interface". I use the "Specialist", but the "Advanced" can help you too with our needs, so, please, look for that in the fourth menu.
Now, when you load your photos, you can see in the first tab (photos), when display/general (right column, after the photos' information display) is selected, an "anchor" column. Now, right clicking, you can select the photo you want for the center position. You may have already read about two kinds of anchors: position and exposition. But there are other ways to position the image with, say, absolute precision! As the anchor will not move to the sides, albeit is can be rotated and even have some pitch (inclination), so you can define a precise yaw angle to fix this image center (and as result the whole panorama) to a know position, 0 degree being the center of the canvas/panorama. If you right click you anchor, or double click it, you can enter the values yourself. Just think that, after an optimization to align the photos, some values could change, but not the yaw.
And besides dragging the panorama with the mouse, in the fast preview window (with the GL in the icon) you can find a move/drag tab, with some fields available to enter angular values to apply to the shown preview. The "regular" preview window, which is slower but with a higher image quality, also has a "numerical transform" for the same purpose.
It may be a matter of personal taste, but I like to start my photos pointing to the north, so the center of my panoramas is the true north. Of course, for your planetary software, the center appears to be the East. Or South? If the pano is a 360 one, the borders will be +180 and -180, not 90 deg.
Well, I missed you used some of the preview windows already, so maybe you have discovered the numerical transformations yourself.
Be a happy Hugin user!
sincerely,
Luis Henrique
--
A list of frequently asked questions is available at: http://wiki.panotools.org/Hugin_FAQ
---
You received this message because you are subscribed to the Google Groups "hugin and other free panoramic software" group.
To unsubscribe from this group and stop receiving emails from it, send an email to hugin-ptx+...@googlegroups.com.
To view this discussion on the web visit https://groups.google.com/d/msgid/hugin-ptx/23e02f5a-4381-4427-96d4-f4955085a62an%40googlegroups.com.
--
--
Luis Henrique Camargo Quiroz
http://luishcq.br.tripod.com - http://www.christusrex.org/www2/cantgreg
http://panoramaslh.net/
Luis Henrique Camargo Quiroz
http://luishcq.br.tripod.com - http://www.christusrex.org/www2/cantgreg
http://panoramaslh.net/
Len Philpot
Sep 18, 2021, 5:26:24 PM9/18/21
to hugin and other free panoramic software
Luis,
In Advanced, as you pointed out, I can right click an image and "Anchor this image for position" is one of the choices. I had not noticed this before -- Thanks. But the weird thing is, the first (i.e., north / left) image was marked as anchor ("AC"). But in the preview and in the final pano, that image was actually in the center of the spread. That's what really puzzled me.
What I didn't find from the FAQ was "or select the middle photo, hit anchor this image for position and reset in the images tab, then reoptimise" (https://wiki.panotools.org/Hugin_FAQ#Half_the_panorama_is_black.2C_my_pictures_fill_only_the_right_half_of_the_output). Maybe I was being too literal in my search. Anyway, I got it adjusted.
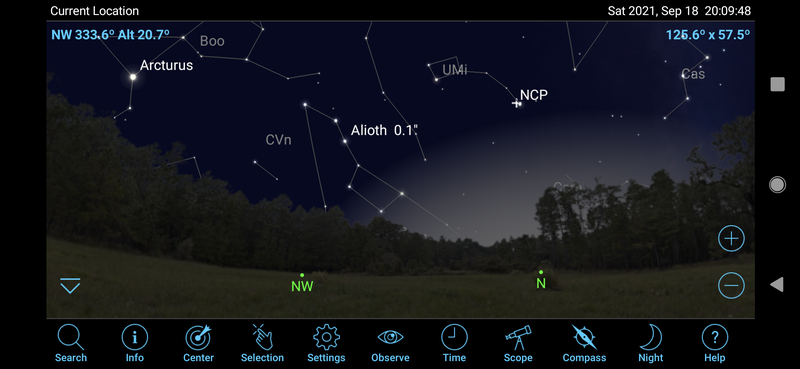
The panos I make for SkySafari need to start at azimuth zero on the left and go clockwise through 180 to azimuth 359.xx on the right. Other programs (Stellarium, Cartes du Ciel, etc.) provide an azimuth offset value so it doesn't matter, but not SkySafari. FYI, here's what it looks like in SkySafari on my phone (I added the skyglow from a nearby town, since it's there), the sky otherwise is generated by SkySafari:
Just shoot / stitch the pano, add an alpha channel, delete the sky (trickiest around the trees) and save as a PNG of the correct size and orientation.
Thanks for the info, for future reference.
Luís Henrique Camargo Quiroz
Sep 19, 2021, 10:00:16 AM9/19/21
to hugi...@googlegroups.com
Hi,
So it seems a matter of phrasing:
1 - the middle image = the image that must appear at the center (I assume 0 degree for this) or
2 - the image halfway in the particular series you photographed.
Thanks for sharing a picture of your use case. The panorama, now restricted to ground and vegetation, in the dark, is, in this case, not the most important to be seen... and even so it gives a deeper sense of realism to the imagery!
To view this discussion on the web visit https://groups.google.com/d/msgid/hugin-ptx/30cee940-1cbf-47c7-a364-d7eb5f1df8e3n%40googlegroups.com.
Reply all
Reply to author
Forward
0 new messages