Stuck on 'Waiting for data' yellow led
54 views
Skip to first unread message

Stuart Eaton
Jan 19, 2015, 8:27:31 AM1/19/15
to gfr-p...@googlegroups.com
Hi. I have ported the printer.ino to Spark core. It was less of a task that I thought it would be - I had to change the printer to connect using Serial1 and some changes to the SD and connection code. It all compiles and seems to be working but with some issues.
I have tested the printer separately using the adafruit thermal library (ported to Spark, not by me) - it works fine and all the test pages print as expected. The SD has been wired up and works fine using some test apps.
I can see my printer on http://printer.exciting.io/my-printer (although it not as reliable as hoped). When its working it does receive data and has once or twice printed the test page but very very faintly, i suppose i need to fiddle with the heat time settings. After working once then the next time it just gets stuck on 'Waiting for data' with the yellow led on. The image archive online shows the image was created correctly but the app just cant seem to get the data. Any ideas? I should also add i have done away with the push button and changed the code so it just prints straight away.
I feel like I am really close to getting this working but thus last bit is becoming really frustrating (mainly due to my lack of skills!)
Any chance of helping me work through whats wrong, it would be great to get this working and the code shared for the Spark core. (its well handy having wifi built in on such tiny device!)
Kind regards
Stuart
Stuart Eaton
Jan 19, 2015, 8:32:09 AM1/19/15
to gfr-p...@googlegroups.com
I should have also added that when it is stuck in the 'Waiting for data' loop i get no other errors - server disconnected etc. I could leave the terminal open for hours and it keep printing 'waiting for data'
Its odd though because there has been moments where i could send a few print requests to it (although the prints were too faint, that will be the next challenge! One step at a time) but then it would just all stop working for no reason that I can see.

James Adam
Jan 19, 2015, 8:56:09 AM1/19/15
to gfr-p...@googlegroups.com
Hi Stuart,
Well done getting this far! I’d be happy to help investigate, as getting it working reliably on the Spark will be really great. Can you share your modified script with me so I can take a look?
— James
On 19 Jan 2015, at 13:32, Stuart Eaton <stu...@wearemothership.com> wrote:
I should have also added that when it is stuck in the 'Waiting for data' loop i get no other errors - server disconnected etc. I could leave the terminal open for hours and it keep printing 'waiting for data'Its odd though because there has been moments where i could send a few print requests to it (although the prints were too faint, that will be the next challenge! One step at a time) but then it would just all stop working for no reason that I can see.
--
You received this message because you are subscribed to the Google Groups "Printer" group.
To unsubscribe from this group and stop receiving emails from it, send an email to gfr-printer...@googlegroups.com.
To post to this group, send email to gfr-p...@googlegroups.com.
Visit this group at http://groups.google.com/group/gfr-printer.
For more options, visit https://groups.google.com/d/optout.
Stuart Eaton
Jan 19, 2015, 9:04:31 AM1/19/15
to gfr-p...@googlegroups.com
Hi James. Thanks for the swift reply!
The printer did just spit out a few more lines (spooled the paper a bit anyway), not entirely sure why! :)
By the way, Spark didn't need the other headers only the sd library i added. (which was a port to spark from and Arduino sketch)
#include "sd-card-library.h"
// -- Settings for YOU to change if you want
byte mac[] = { 0x08, 0x00, 0x28, 0x56, 0xF5, 0x4D }; // physical mac address
// The printerType controls the format of the data sent from the server// If you're using a completely different kind of printer, change this// to correspond to your printer's PrintProcessor implementation in the// server.//// If you want to control the darkness of your printouts, append a dot and// a number, e.g. A2-raw.240 (up to a maximum of 255).//// If you want to flip the vertical orientation of your printouts, append// a number and then .flipped, e.g. A2-raw.240.flippedconst char printerType[] = "A2-raw";
const unsigned int port = 80;
const unsigned long pollingDelay = 10000; // delay between polling requests (milliseconds)
int errorLED = D7; // the red LEDint downloadLED = D5; // the amber LEDint readyLED = D6; // the green LED/*int buttonPin = D3; // the print button*/const uint8_t chipSelect = A2;const uint8_t mosiPin = A5;const uint8_t misoPin = A4;const uint8_t clockPin = A3;
//#define DEBUG // When debug is enabled, log a bunch of stuff to the hardware Serial
// -- Everything below here can be left alone
const char sketchVersion[] = "1.0.6";
// -- Debugging
#ifdef DEBUGvoid debugTimeAndSeparator() { Serial.print(millis()); Serial.print(": ");}void debug(const char *a) { debugTimeAndSeparator(); Serial.println(a);}#define debug2(a, b) debugTimeAndSeparator(); Serial.print(a); Serial.println(b);#else#define debug(a)#define debug2(a, b)#endif
// -- Initialize the printer ID
const byte idAddress = 0;char printerId[17]; // the unique ID for this printer./*char printerId[] = "323456789qwertyu";*/
inline void initPrinterID() { /*for(int i = 0; i < 16; i++ ) { EEPROM.write(idAddress + i, printerId[i]); } Serial.print("Saved printer ID: "); Serial.println(printerId);*/
if ((EEPROM.read(idAddress) == 255) || (EEPROM.read(idAddress+1) == 255)) { debug("Generating new ID"); randomSeed(analogRead(0) * analogRead(5)); for(int i = 0; i < 16; i += 2) { printerId[i] = random(48, 57); // 0-9 printerId[i+1] = random(97, 122); // a-z EEPROM.write(idAddress + i, printerId[i]); EEPROM.write(idAddress + i+1, printerId[i+1]); } } else { for(int i = 0; i < 16; i++) { printerId[i] = (char)EEPROM.read(idAddress + i); } } printerId[16] = '\0'; debug2("ID: ", printerId);}
// -- Initialize the LEDs
inline void initDiagnosticLEDs() { pinMode(errorLED, OUTPUT); pinMode(downloadLED, OUTPUT); pinMode(readyLED, OUTPUT); digitalWrite(errorLED, HIGH); digitalWrite(downloadLED, HIGH); digitalWrite(readyLED, HIGH); delay(1000); digitalWrite(errorLED, LOW); digitalWrite(downloadLED, LOW); digitalWrite(readyLED, LOW); delay(500);}
// -- Initialize the printer connection
#define PRINTER_WRITE(b) Serial1.write(b)
inline void initPrinter() { debug("Initializing printer"); Serial1.begin(19200); /* Not sure how to set this! it's printing the first few rows ok then the rest light. delay(2000); Serial1.write(55); // Esc 7 (print settings) Serial1.write(55); Serial1.write(20); // Heating dots (20=balance of darkness vs no jams) Serial1.write(255); // Library default = 255 (max) Serial1.write(225); // Heat interval (500 uS = slower, but darker)*/}
// -- Initialize the SD card
inline void initSD() { Serial.begin(115200); /*while (!Serial.available());*/ delay(2000); debug("Initializing SD card");
// Initialize HARDWARE SPI with user defined chipSelect if (!SD.begin(chipSelect)) { debug("initialization failed!"); terminalError(2); return; }}
// -- Initialize connection & DHCP
TCPClient client;inline void initNetwork() { debug("initialization network..."); IPAddress myIP = WiFi.localIP(); Serial.println(myIP); // prints the core's IP address}
// -- Setup; runs once on boot.
void setup(){#ifdef DEBUG Serial.begin(9600);#endif initDiagnosticLEDs(); initPrinterID(); initSD(); initNetwork(); initPrinter();}
// -- Check for new data and download if found
boolean downloadWaiting = false;char cacheFilename[] = "TMP";unsigned long content_length = 0;boolean statusOk = false;
void checkForDownload() { unsigned long length = 0; content_length = 0; statusOk = false;
#ifdef DEBUG unsigned long start = millis();#endif
if (SD.exists(cacheFilename)) { if (!SD.remove(cacheFilename)) { // Failed to clear cache. terminalError(4); } } File cache = SD.open(cacheFilename, FILE_WRITE);
debug2("Attempting to connect to ", host); if (client.connect(host, port)) { digitalWrite(downloadLED, HIGH); client.print("GET "); client.print("/printer/"); client.print(printerId); client.println(" HTTP/1.0"); client.print("Host: "); client.print(host); client.print(":"); client.println(port); client.flush(); client.print("Accept: application/vnd.exciting.printer."); client.println(printerType); client.print("X-Printer-Version: "); client.println(sketchVersion); client.println(); boolean parsingHeader = true;
while(client.connected()) { while(client.available()) { //Serial.print(client.peek(), HEX); if (parsingHeader) { debug("parsingHeader"); client.find((char*)"HTTP/1.1 "); char statusCode[] = "xxx"; client.readBytes(statusCode, 3); statusOk = (strcmp(statusCode, "200") == 0); client.find((char*)"Content-Length: "); char c; while (isdigit(c = client.read())) { content_length = content_length*10 + (c - '0'); } debug2("Content length: ", content_length); client.find((char*)"\n\r\n"); // the first \r may already have been read above parsingHeader = false; } else { debug("Writing to SD"); cache.write(client.read()); length++; } } debug("Waiting for data"); }
debug("Server disconnected"); digitalWrite(downloadLED, LOW); // Close the connection, and flush any unwritten bytes to the cache. client.stop(); cache.seek(0);
if (statusOk) { if ((content_length == length) && (content_length == cache.size())) { if (content_length > 0) { downloadWaiting = true; digitalWrite(readyLED, HIGH); } }#ifdef DEBUG else { debug2("Failure, content length: ", content_length); if (content_length != length) debug2("length: ", length); if (content_length != cache.size()) debug2("cache: ", cache.size()); digitalWrite(errorLED, HIGH); }#endif } else { debug("Response code != 200"); recoverableError(); } } else { debug("Couldn't connect"); recoverableError(); }
cache.close();
#ifdef DEBUG unsigned long duration = millis() - start; debug2("Bytes: ", length); debug2("Duration: ", duration);#endif}
void flashErrorLEDs(unsigned int times, unsigned int pause) { while (times--) { digitalWrite(errorLED, HIGH); delay(pause); digitalWrite(errorLED, LOW); delay(pause); }}
inline void recoverableError() { flashErrorLEDs(5, 100);}
inline void terminalError(unsigned int times) { flashErrorLEDs(times, 500); digitalWrite(errorLED, HIGH); // no point in carrying on, so do nothing forevermore: while(true);}
// -- Print send any data from the cache to the printer
inline void printFromDownload() { File cache = SD.open(cacheFilename); byte b; while (content_length--) { b = (byte)cache.read(); PRINTER_WRITE(b); } cache.close(); downloadWaiting = false; digitalWrite(readyLED, LOW);}
// -- Check for new data, print if the button is pressed.
void loop() { if (downloadWaiting) { /*bouncer.update();*/ /*if (bouncer.read() == HIGH) {*/ printFromDownload(); /*}*/ } else { checkForDownload(); if (!downloadWaiting) { delay(pollingDelay); } }}
Stuart
Stuart Eaton
Jan 19, 2015, 10:19:28 AM1/19/15
to gfr-p...@googlegroups.com
... actually it's constantly printing the line 'Writing to SD' I put that in there when I was testing if it was writing to the SD or not. Thats not possibly not the write place. Even so, should it be consulate running that bit of code?
Stuart Eaton
Jan 19, 2015, 10:25:41 AM1/19/15
to gfr-p...@googlegroups.com
Dunno if this helps. Looks like it is only getting the first chunk of the image. Maybe its not saving it all correctly to the SD.

James Adam
Jan 19, 2015, 10:27:06 AM1/19/15
to gfr-p...@googlegroups.com
> On 19 Jan 2015, at 15:25, Stuart Eaton <stu...@wearemothership.com> wrote:
>
> Dunno if this helps. Looks like it is only getting the first chunk of the image. Maybe its not saving it all correctly to the SD.
— James
Stuart Eaton
Jan 21, 2015, 3:48:53 AM1/21/15
to gfr-p...@googlegroups.com
Hi James.
Did you manage to get anywhere with this? (No worries if not!)
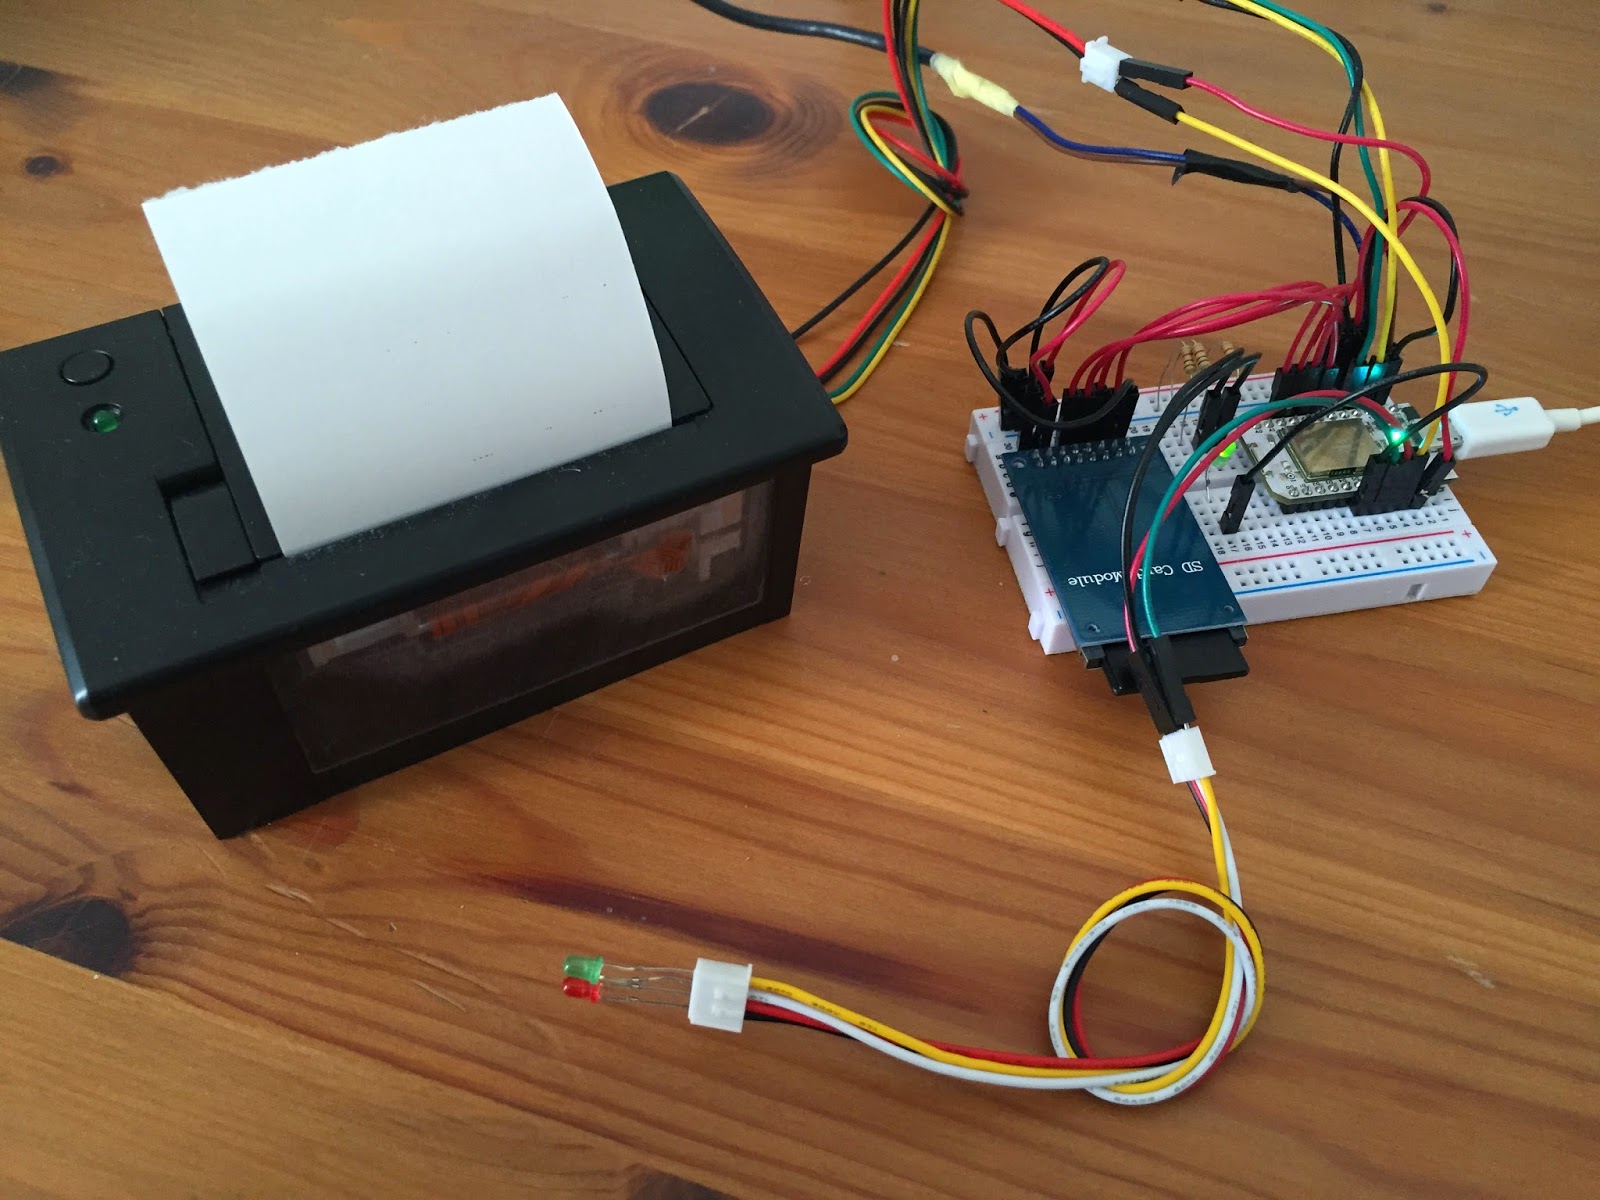
I did recheck all my wiring and tested the SD card and Printer again, all seems to be ok. My wiring is starting to look a bit chaotic though - I will try and rebuild it with short jumper wires rather than the push in pin type wires.
A couple of questions though:
When it's getting data doe that also include printer commands? Do you have an example of what the data stream should look like. I was wondering if i could set something up locally to play with. (or i might just try and install your server locally)
I also added the push button, I'm not sure if it would make any difference to print starlight away as soon as it has the data or if the delay in having to push a button helps.
Cheers
Stuart
Stuart Eaton
Jan 21, 2015, 5:20:28 AM1/21/15
to gfr-p...@googlegroups.com
I have done some more tests this morning. I created a new app to just print from the TMP file from the SD (https://www.dropbox.com/s/2jy3vj591i23j3y/TMP.zip?dl=0 I couldn't attach the file here). According the to serial out put the content length should be 9185.
It prints each time I press the button but the output is still the same as i was seeing before. (same as in one of the images above). I am not entirely sure if the issue is it didn't get all the data or its just not printing. Anyway of converting the TMP file back into an image?
This is the code I am using to test:
#include "sd-card-library.h"
int buttonPin = D3; // the print buttonconst uint8_t chipSelect = A2;const uint8_t mosiPin = A5;const uint8_t misoPin = A4;const uint8_t clockPin = A3;char cacheFilename[] = "TMP";
// -- Initialize the printer connection
#define PRINTER_WRITE(b) Serial1.write(b)
inline void initPrinter() { Serial.print("Initializing printer"); Serial1.begin(19200);}
// -- Initialize the SD card
inline void initSD() { Serial.begin(115200); /*while (!Serial.available());*/ delay(2000); Serial.print("Initializing SD card");
// Initialize HARDWARE SPI with user defined chipSelect if (!SD.begin(chipSelect)) { Serial.print("initialization failed!"); return; }}
// -- Setup; runs once on boot.
void setup(){ Serial.begin(9600); pinMode(buttonPin, INPUT); initSD(); initPrinter();}
// -- Print send any data from the cache to the printerunsigned long content_length = 0;inline void printFromDownload() { content_length = 9185; File cache = SD.open(cacheFilename); byte b; while (content_length--) { b = (byte)cache.read(); PRINTER_WRITE(b); }}
// -- Print if the button is pressed.
void loop() {  if (digitalRead(buttonPin) == HIGH) {    Serial.print("Button pushed .. Print");    printFromDownload();  }}
James Adam
Jan 21, 2015, 11:39:25 AM1/21/15
to gfr-p...@googlegroups.com
Hi Stuart,
On 21 Jan 2015, at 08:48, Stuart Eaton <stu...@wearemothership.com> wrote:
Hi James.Did you manage to get anywhere with this? (No worries if not!)
I’m just wiring it up right now. One issue I have is that my micro SD breakout board appears to be a 5V variant, but the voltage the Spark Core uses is 3.3V, but I am hoping I can overcome that.
I did recheck all my wiring and tested the SD card and Printer again, all seems to be ok. My wiring is starting to look a bit chaotic though - I will try and rebuild it with short jumper wires rather than the push in pin type wires.A couple of questions though:When it's getting data doe that also include printer commands? Do you have an example of what the data stream should look like. I was wondering if i could set something up locally to play with. (or i might just try and install your server locally)
The data that is downloaded is a stream of raw printer commands (essentially: reset & initialise, bitmap in chunks with printer commands). You can see how it’s generated here: https://github.com/exciting-io/printer/blob/master/lib/printer/print_processor/a2_raw.rb#L26-L29
This uses the ‘a2_printer’ library, and the relevant code is here: https://github.com/lazyatom/a2_printer/blob/master/lib/a2_printer.rb#L201-L252
Basically, it’s splitting the given bitmap into chunks of 255 lines (that’s the maximum bitmap height the printer can print in a single go) and then creating a series of printer command blocks to print each chunk (https://github.com/lazyatom/a2_printer/blob/master/lib/a2_printer.rb#L248-L250).
In theory you can look through the downloaded file on your SD card and see these chunks; just look for the byte series (in decimal) “18, 42, 255, 384” and the stream of bytes afterwards are the encoded pixels.
I also added the push button, I'm not sure if it would make any difference to print starlight away as soon as it has the data or if the delay in having to push a button helps.
It should make no difference; I’d be very surprised if this was the issue.
One thing I’ve read in the Adafruit SD card shield documentation is that some shields are particularly sensitive about the interface pins; it might be worth investigating using the information they provide: https://learn.adafruit.com/adafruit-micro-sd-breakout-board-card-tutorial/look-out
You could also use a dummy program to write and read from the SD (you’ll probably want to exercise it with 10-20k of bytes to be realistic) and see if you can reliably read information from the SD card outside of the printer context.
In the meantime, I’ll keep trying to wire up my own Spark Core & SD card — I’ll let you know how I get on.
— James
Stuart Eaton
Jan 21, 2015, 12:34:25 PM1/21/15
to gfr-p...@googlegroups.com
Hi. Thanks James, appreciate your help here.
I will set up a new test on the SD card in the mean time. I'm only using the male pin jumper wires at the moment (don't have anything else yet). I will try and re wire it again and test saving and reading larger files.
Did the tmp file attached look ok? Would have a file that you know works I could test?
If all the print commands are in the data stream then I shouldn't need any other libraries, right? That's a rather ingenious way of doing it!
Stuart Eaton
Kind regards,
Stuart
---------------------------------------------------
Creative Director | Co-founder
Mothership
We are a creative design & development agency. We make beautiful things that work.
--
You received this message because you are subscribed to a topic in the Google Groups "Printer" group.
To unsubscribe from this topic, visit https://groups.google.com/d/topic/gfr-printer/ahWB6cSsQwE/unsubscribe.
To unsubscribe from this group and all its topics, send an email to gfr-printer...@googlegroups.com.
James Adam
Jan 22, 2015, 7:38:41 AM1/22/15
to gfr-p...@googlegroups.com
Hi again Stuart,
So there’s good news and bad news. The good news is that I have my spark core and SD card playing nicely. The bad news is that the sketch still doesn’t seem to reliably work. At the moment, I am not 100% sure why, but this comment, above the ‘loop()’ function in the spark ‘blink an LED’ demo sketch has been wondering:
"Make sure none of your code delays or blocks for too long (like more than 5 seconds), or weird things can happen.”
It’s pretty likely that downloading the printout is going to take more than 5 seconds, and that might explain some of the weird stuff that I’ve been seeing (connections waiting for data all the time, core no longer being flashable without a hard reset...). However, that’s clearly not the issue that you saw, and so I’m going to have to tinker a bit more to figure things out.
BTW, I tried to download your ‘TMP’ file, but Dropbox thinks it has been removed. I’m still happy to take a look, just let me know when it’s visible again.
— James
You received this message because you are subscribed to the Google Groups "Printer" group.
To unsubscribe from this group and stop receiving emails from it, send an email to gfr-printer...@googlegroups.com.
Stuart Eaton
Jan 22, 2015, 9:42:51 AM1/22/15
to gfr-p...@googlegroups.com
Hi James.
I totally rewired my circuit, used shorter jumper cables where possible and ran some SD tests. I could write and read 200k files no problem. So I continued to re-build the rest of the circuit.
I found the problem in the end, and i feel quite embarrassed!, I had not been giving the printer enough volts. It was running off a separate 5.2v usb charger. After giving it 9v it's printing the test pages fine :) I cant print from URL or HTML though but at least the basics are working now.
Then I did something stupid and fried my Sparkcore! Aaaagh! Not quite sure what happened but i think i gave it 9v that was supposed to be going to the printer. Live and learn I suppose. Its a shame because I had managed to package it all up in a box, was starting to to take shape.
When i get a new core I will let you know how I get on at the next stage.
Any ideas how I could still use one power supply 9v to drive the core and printer? I really don't want to power supplies for this thing. I suppose i need some voltage regulator to get from 9v to 5v.
Stuart Eaton
Jan 22, 2015, 9:51:22 AM1/22/15
to gfr-p...@googlegroups.com


James Adam
Jan 22, 2015, 9:56:07 AM1/22/15
to gfr-p...@googlegroups.com
Well done getting it working! If you can share your final sketch & wiring diagram I’ll see if it resolves any of the issues that I’ve had.
Regarding power, I’ve always used power supplies that are 5V and can supply at least 1.5A, and ideally 2A current. Interfacing this with the spark core is pretty simple — just connect it to the ‘VIN’ and ‘Ground’ pins on the core, and you won’t need USB power at all. You can see some example links to power supplies on the github wiki component page.
Again, well done - I’m looking forward to folding this into the main repository as a supported implementation :)
— James
James Adam
Jan 22, 2015, 9:58:14 AM1/22/15
to gfr-p...@googlegroups.com
> On 22 Jan 2015, at 14:56, James Adam <james...@gmail.com> wrote:
>
> Regarding power, I’ve always used power supplies that are 5V and can supply at least 1.5A, and ideally 2A current. Interfacing this with the spark core is pretty simple — just connect it to the ‘VIN’ and ‘Ground’ pins on the core, and you won’t need USB power at all. You can see some example links to power supplies on the github wiki component page.
Just to clarify - by powering your Spark Core using the ‘VIN’ & ‘Ground’ pins, you can also connect your printer to the same pins (or connections on the same breadboard rail). Hopefully that was already clear :)
>
> Regarding power, I’ve always used power supplies that are 5V and can supply at least 1.5A, and ideally 2A current. Interfacing this with the spark core is pretty simple — just connect it to the ‘VIN’ and ‘Ground’ pins on the core, and you won’t need USB power at all. You can see some example links to power supplies on the github wiki component page.
— James
Stuart Eaton
Jan 22, 2015, 10:14:41 AM1/22/15
to gfr-p...@googlegroups.com
Yeh. I was originally doing exactly that but maybe I didn't have enough amps! (it did print perfectly straight away with 9v).
As soon as I get some new cores I will try again with another power supply. I have one which can do 5v at 3000mA
Stuart Eaton
Jan 22, 2015, 11:59:01 AM1/22/15
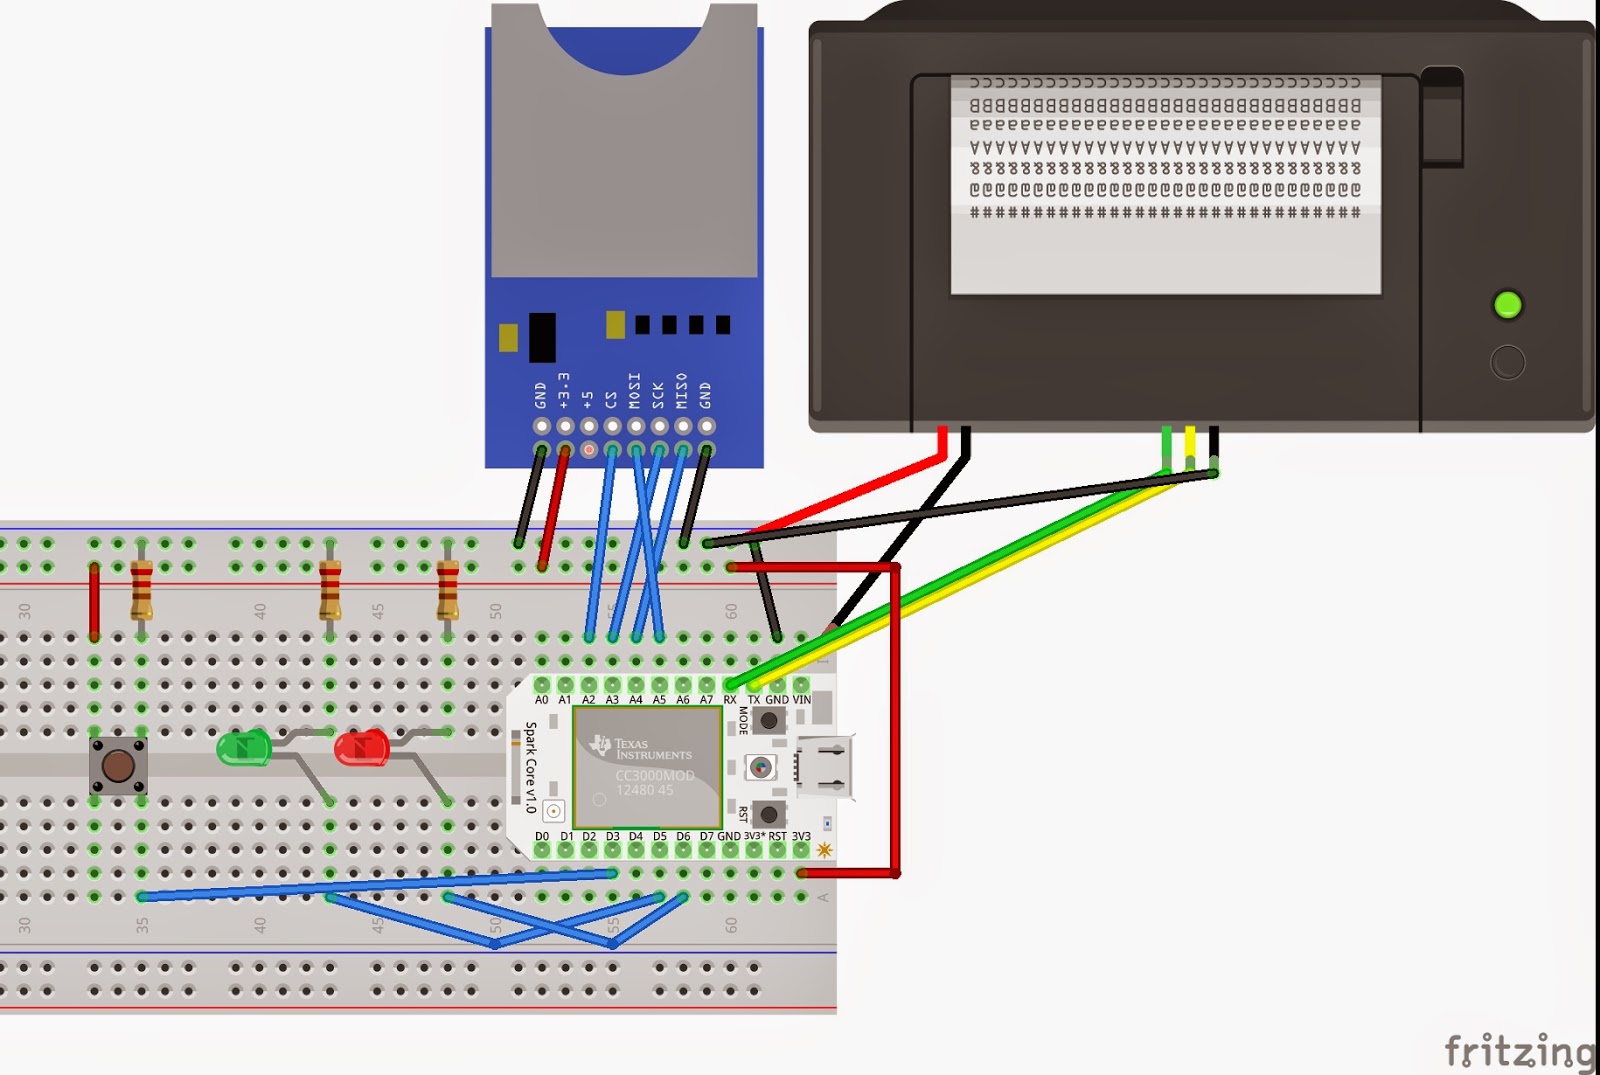
to gfr-p...@googlegroups.com
Here is my wiring. Probably looks a mess, not used Fritzing before.
Stuart Eaton
Jun 14, 2015, 7:54:04 AM6/14/15
to gfr-p...@googlegroups.com
Hi James,
It's been a while! I moved house and a few other things going on, so only now had a chance to look at this again!
I have the spark and printer up and running again. The simple test prints download and print ok but I do find my printer wants 8v+ or it only prints parts of the image! Not sure if its just a quirk with my printer, would have been nice to power both Spark and the printer from 5v 3amps. (Anyway, thats another issue I can resolve another time!)
I am still having the issue of it getting stuck on download if I send it a message anything for that 3 or 4 lines long (using the mail app) and it always gets stuck trying to print any image. (I am using an image tag in the HTML message test - http://printer.exciting.io/my-printer)
Here are my image print archives - http://printer.exciting.io/archive/7f2h2w7f3c6u1x2a
Not sure if there are issues with the backend - its seems hit and miss if it renders the image or not.
Any ideas where I can go from here? I am presuming it is either a Spark core memory issue or as you suggested before that the loop is more than 5 seconds and the core cant hack it. Would there be anyway to chop the image into slices, download the slices to multiple files on the SD then print them one after the other?
Did you get any further with your Spark setup? I have ordered some of the new Photons, maybe they will fare better.
Best regards,
Stuart
On Thursday, 22 January 2015 15:58:14 UTC+1, James Adam wrote:
Reply all
Reply to author
Forward
0 new messages