Head Projects.

Jeffrey Hare

bill pittore
On Mar 23, 2022, at 8:51 PM, Jeffrey Hare <cata...@thehares.com> wrote:
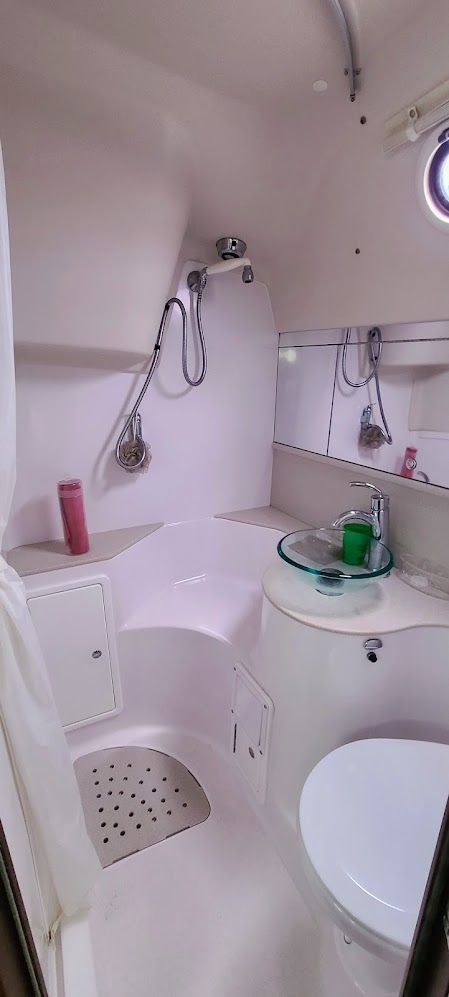
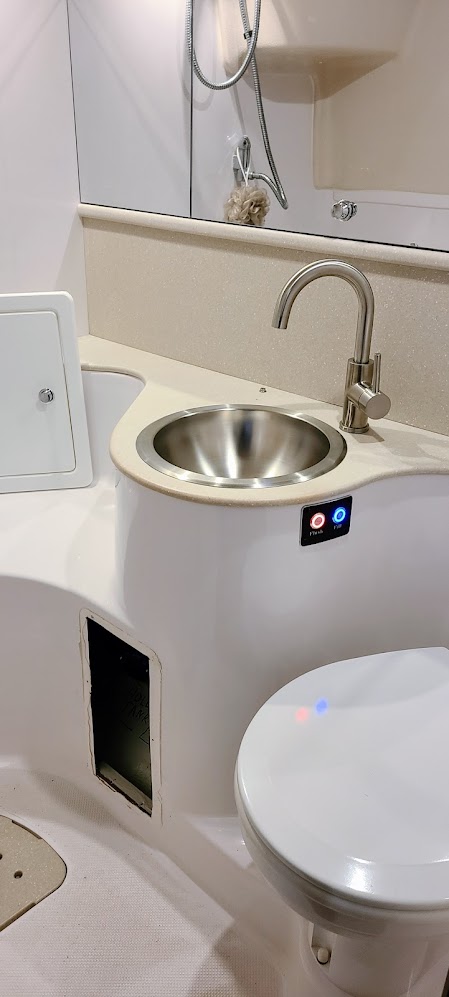
Hi,Just thought I'd share some customizations we made in the head over the winter.1) We decided to change the faucet and away from a vessel sink. We wanted a faucet that would swivel out of the way and a sink that was a bit more accessible.2) On this hull, the head seawater fill and head flush macerator pumps were operated by a single button. We separated single head intake Fill and Flush macerator pumps to have better control over all that. There is a more high-tech vendor-supplied control panel that does what ours does (and more), but I thought I'd go a little simpler to start with. We used FrontPanelExpress.com to make a little aluminum anodized switch plate to handle this. Check them out if you ever want to make custom panels or boxes for any reason.3) We also made a new/larger door for below the sink (shown in second pic) but I haven't installed it just yet.4) On to the air conditioning install prep work..
<headbefore.jpg>
<headafter.jpg>Let me say that I'm usually very averse to making any boat changes that are purely preference items that aren't super easy to revert to stock. In this case, I'd need to replace the short section of the head countertop if I ever wanted to revert to the stock vessel sink. The solid surface is a little difficult to get unstuck from the fiberglass base and would take a couple of hours in the woodshop to fabricate a new top but I figured out how to do it before I started in. I'd tweak the shape a bit so that I could gain a little more usable counter space if I ever were to do that.With all that said, this particular project isn't one for the faint of heart but we think we're happy with the outcome. Just wish we could have found a white semi-recessed sink instead of just a stainless drop-in. Looked for months with no luck.Cheers,-Jeff Hare
--
You received this message because you are subscribed to the Google Groups Catalina355 group. To post to this group, send email to catal...@googlegroups.com. To unsubscribe from this group, send email to catalina355...@googlegroups.com. For more options, visit this group at https://groups.google.com/d/forum/catalina355?hl=en
If changing the topic, please start a new message and send to catal...@googlegroups.com, rather than clicking "reply" to an existing message.
---
You received this message because you are subscribed to the Google Groups "Catalina355" group.
To unsubscribe from this group and stop receiving emails from it, send an email to catalina355...@googlegroups.com.
To view this discussion on the web visit https://groups.google.com/d/msgid/catalina355/923e3ec2-20f6-476d-9d8b-1871177265c9n%40googlegroups.com.
<headbefore.jpg><headafter.jpg>
Jeff Hare

Jeff Hare


bill pittore
To view this discussion on the web visit https://groups.google.com/d/msgid/catalina355/1648089377940.6c3a0af23380881e%40thehares.com.
bill pittore
On Mar 23, 2022, at 8:51 PM, Jeffrey Hare <cata...@thehares.com> wrote:
Hi,Just thought I'd share some customizations we made in the head over the winter.1) We decided to change the faucet and away from a vessel sink. We wanted a faucet that would swivel out of the way and a sink that was a bit more accessible.2) On this hull, the head seawater fill and head flush macerator pumps were operated by a single button. We separated single head intake Fill and Flush macerator pumps to have better control over all that. There is a more high-tech vendor-supplied control panel that does what ours does (and more), but I thought I'd go a little simpler to start with. We used FrontPanelExpress.com to make a little aluminum anodized switch plate to handle this. Check them out if you ever want to make custom panels or boxes for any reason.3) We also made a new/larger door for below the sink (shown in second pic) but I haven't installed it just yet.4) On to the air conditioning install prep work..
<headbefore.jpg>
<headafter.jpg>Let me say that I'm usually very averse to making any boat changes that are purely preference items that aren't super easy to revert to stock. In this case, I'd need to replace the short section of the head countertop if I ever wanted to revert to the stock vessel sink. The solid surface is a little difficult to get unstuck from the fiberglass base and would take a couple of hours in the woodshop to fabricate a new top but I figured out how to do it before I started in. I'd tweak the shape a bit so that I could gain a little more usable counter space if I ever were to do that.With all that said, this particular project isn't one for the faint of heart but we think we're happy with the outcome. Just wish we could have found a white semi-recessed sink instead of just a stainless drop-in. Looked for months with no luck.Cheers,-Jeff Hare
Jeff Hare
No, it came flat. I used the edge of a piece of cardboard to get the aprox radius. Then traced that curve on a small block of wood and cut the curve with a jigsaw. Then just squeezed it in a vice with cardboard protecting the faces and it worked great. Didn’t have to be very precise. Better to slightly under bend than over bend.

To test/install I put double stick tape on the back of the faceplate and stuck it in place. The hole for the original push button was the hole I used for the flush button. I just traced the fill hole and drilled it.
As you could see from the original pics, I removed the original night light and this plate covered that opening also. I figured I could use the night light elsewhere if I wanted to but the red flush light is now the night light.
One suggestion might be to consider adding a small resistor in line with the LED wire. I would rather just have it lightly glow red at night. Don’t need it to be very bright. I’m really not a fan of Blue lights. I should have made both red. But since the switches are socketed, it’s a super easy swap out if I want to. …And we won’t have the fill button enabled/lit up very often anyway.
-Jeff Hare
From: catal...@googlegroups.com <catal...@googlegroups.com> On Behalf Of bill pittore
Sent: Thursday, March 24, 2022 10:00 AM
To: catal...@googlegroups.com
To view this discussion on the web visit https://groups.google.com/d/msgid/catalina355/7734C836-BD0C-488A-B9E0-39716DA4166E%40gmail.com.
bill pittore
On Mar 24, 2022, at 3:13 PM, Jeff Hare <Cata...@thehares.com> wrote:
No, it came flat. I used the edge of a piece of cardboard to get the aprox radius. Then traced that curve on a small block of wood and cut the curve with a jigsaw. Then just squeezed it in a vice with cardboard protecting the faces and it worked great. Didn’t have to be very precise. Better to slightly under bend than over bend.
<image002.jpg>
To view this discussion on the web visit https://groups.google.com/d/msgid/catalina355/01df01d83fb3%2444e90f50%24cebb2df0%24%40thehares.com.