Top 20 Wordpress Plugins for Power Users

Rajesh Kumar Rana
|
Finally something for wordpress folks, my all-time favorite, carefully-selected, top 20 wordpress plugins. Enjoy! 1. Advanced WYSIWYG Editor - adds more editing options to the WYSIWYG post editor. See it below
2. Akismet - default wordpress plugin which does an excellent job at filtering spam comments. To activate it you'll need WordPress API key, which is freely available to every wordpress.com user. Once activated you can access it through 'Options ->Discussion'. 3. BDP RSS Aggregator (update: original site seems to be offline, for now you can download this plugin from here) - lets you grab one or several RSS feeds, mix/style them and publish them on your blog. It's an ideal solution, for any blogger looking for an easy and yet powerful solution to embed RSS feeds on your blog posts or pages. Access it through 'Manage-> RSS feeds'. 4. Bookmark Me - adds links to popular social bookmarking sites. Once installed, it will add 'Bookmark Me' tab under the 'Options' menu, from where you can select which sites you want to be shown. Includes almost all popular sites.
5. Category Tagging - powerful plugin that lets you (1) create tag clouds based on your existing categories and (2) display related posts for each of your posts. 6. Comment Count - can be used to count total number of comments or comments for a specific post. You can see it in action on top of every article on makeuseof
7. Optimal Title - lets you move the position of the title 'separator' to after the blog name rather than before. Even though some folks have been saying that such naming is good from the SEO(Search Engine Optimization) point of view, I think it's just a better way to title your posts. It will also produce better looking pingbacks when you link to external blog posts.
8. Exec-PHP - lets you execute PHP queries within any of your posts or pages
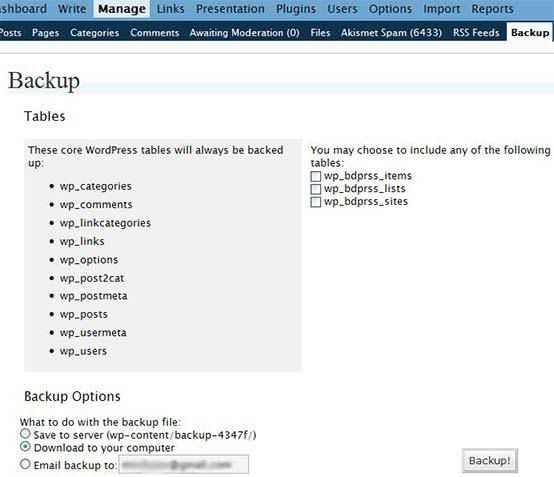
9. Google Sitemaps - handy generator that will create a Google, Yahoo and MSN compliant, auto-updated sitemap of your blog and place it to the indicated location on your server. Access it through 'Options -> Sitemap'. 10. WP-Cache - very fast cache module, that can come in handy for sudden traffic spikes, I.e. When featured on digg's homepage. Once installed and enabled('Options -> WP-Cache -> enable') it will considerably reduce the load from your server, helping you survive the digg effect. (Note: Make sure to disable it once traffic level gets back to normal) 11. WSR Contact Form - lets you quickly create 'contact' page for your blog. See it in action on our contact page 12. Smart Archives - provides simple and clean way to present your archives. Check it out here 13. WordPress Database Backup - On demand backup of your WordPress database. You can either run backups manually or schedule them (daily, weekly, etc.)
14. WordPress Reports - gets stats from Google Analytics and Feedburner and adds them to the new 'Reports' tab
15. Custom Query String (CQS) - allows you to choose how many posts to be shown and specify how they should be ordered, for any of the 'search queries' and blog categories.('Options->CQS') 16. Feedburner Feed Replacement - automatically detects all ways to access your blog feed ( I.e. http://www.yourdomain.com/feed/ or http://www.yourdomai.com/wp-rss2.php, etc.), and redirects them to your FeedBurner feed so you can track every subscriber 17. Digg This - this one is a popular one, it detects incoming links from Digg.com to your wordpress post and automatically displays animated digg-count button(or text link) showing number of diggs a story got. Cool thing about it, is that as soon as your post is submitted to Digg, an email is sent to the site's admin.
18. WP-Postviews - allows you to display the number of times a post has been viewed. In addition, you can use it to display your top 10 most popular posts. 19. HowTo: Separate Comments from Trackbacks - this isn't a plugin but a quick and easy howto explaining how to separate blog comments from Pings/Trackbacks. 20. 1024px-10 - many people expressed interest to the theme used on makeuseof.com, hence I decided to post it here as well. It's a simple theme which is extremely flexible for further buildup. Note that what you see on makeuseof right now is a slightly modified version. I shifted the sidebar menu to the left, this can be done by modifying style.css file in 2 places.
| |||
|
|


Regards,
Rajesh Rana
www.rajeshrana.net
---------- Forwarded message ----------
From: Rajesh Kumar Rana <rajes...@adityabirla.com>
Date: May 3, 2007 12:22 PM
Subject: How to install a WordPress blog in cPanel
To: rkr...@gmail.com
|
How to install a WordPress blog in cPanel W Before we get started You will need a few things before installing WordPress blog, such as:
(You can get domain name and web space from any of Hosting Company.)
STEP 1: Installing Process
- Choose a difficult-to-guess and enter it in the Password field. - Write down the username and password you chose. - Click Add User.
5. Under Databases, select your WordPress username from the User dropdown, then select your database from the Db dropdown. Make sure All is checked under Privileges, then click Add User to Db. Step 3 – Download Wordpress files
Step 4 - Edit the config file
DB_NAME The name of the database you created for WordPress in Step 1 . DB_USER The username you created for WordPress in Step 1. DB_PASSWORD The password you chose for the WordPress username in Step 1. DB_HOST The hostname you determined in Step 1 (usually localhost).
Step 4 – UPLOADING 1.
Use the FTP software to upload the files which you downloaded from step
3. If you don't have FTP software. You can download from
FINAL STEP - Run the installer If you installed into the root directory of your web site, you would visit http://yourdomain.com/wp-admin/install.php. If you installed into a subdirectory called blog, you would visit http://yourdomain.com/blog/wp-admin/install.php. The following screenshots show how the installation progresses. Notice in the second screen, Entering the details, you enter your Weblog title and your e-mail address. Also displayed is a check-box asking if you would like your blog to appear in search engines like Google and Technorati. Leave the box checked if you would like your blog to be visible to everyone, including search engines, and uncheck the box if you want to block search engines, but allow normal visitors. Note all this information can be changed later in your Administration Panels. You can select a different layout or style under the "Presentation" menu. On the bottom of that page, you can click on a link for new WordPress themes, which links you to hundreds of pre-made styles with instructions for how to install them. | |||
|
|
 ordPress
is a great content management system because the system itself is free
and there's a community of people also creating free layouts, plug-ins,
and helpful tutorials. It's powerful enough to manage most individual
and organizational website needs, yet simple enough for everyone to
use. Here is the step by step process to install wordpress blog in
cPanel for your own domain like (
ordPress
is a great content management system because the system itself is free
and there's a community of people also creating free layouts, plug-ins,
and helpful tutorials. It's powerful enough to manage most individual
and organizational website needs, yet simple enough for everyone to
use. Here is the step by step process to install wordpress blog in
cPanel for your own domain like (


