Complete analysis of Jio F90M By: Sachin Borkar

Sachin Borkar
Hi Friends, today I am back with story,fun & Analysis.
Note: An entire post is true story.
Yesterday, I was roam in my house and my eyes just blink after i see my older phone was in garbage.
So I thought, it will be good if I flash software in it, then install new Jio Plan.
Brand: Jio
Model: F90M
Based on Qualcomm.
Topics:
- Prepare to Flash Software;
- Install Drivers;
- Install MegafoneSW Tool;
- Unzip/Setup Flash File;
- Flash Software;
- Process of Porting Recovery;
- How to access Recovery Mode;
- Recover Fully Dead Device Due to Flashing wrong Firmware;
- How To Flash IMEI Number;
- How/When To Write QCN File;
- Process of Porting Custom ROM;
- How to Flash Custom ROM Using Recovery;
Miscellaneous Fixes:
- Keypad Mapping (fix);
- How to create our own Flashable zip;
- What to do or not to do;
Download Links:
- Drivers 32-bit @MediaFire & 64-bit @MediaFire
- Firmware Flash File @Click Here
- MegafoneSW Tool @MediaFire
- Android Image Kitchen @MediaFire
- System Extractor Download @MediaFire
- 7zip @Click Here
- Notepad++ @Click Here
- System Extractor @MediaFire
- QLM IMEI REPAIR Tool @MediaFire
- QPST Download Here @MediaFire
- QCN File Download Here @Click Here
Prepare to Flash Software:
Preparation:
- Download Drivers Here 32-bit: @MediaFire, 64-bit: @MediaFire
- Download Flash File Here @Click Here
- Download MegafoneSW Here @MediaFire
Install Drivers:
I Opened Downloaded Drivers From Above or Download 32-bit @MediaFire & 64-bit @MediaFire
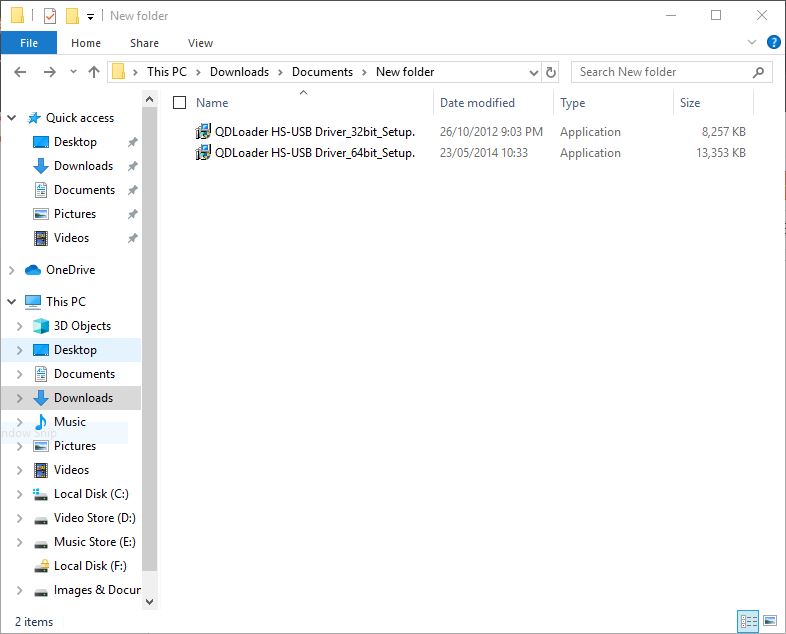
Opened and clicked to "Next >" Until "Finish" Page Doesn't Appears.

Now Drivers are installed.
Install/Extract MegafoneSW
Opened Downloaded File Names as "Megafone_SW_Download_v1.0" Download @MediaFire

Right Clicked on it and select "Extract All"
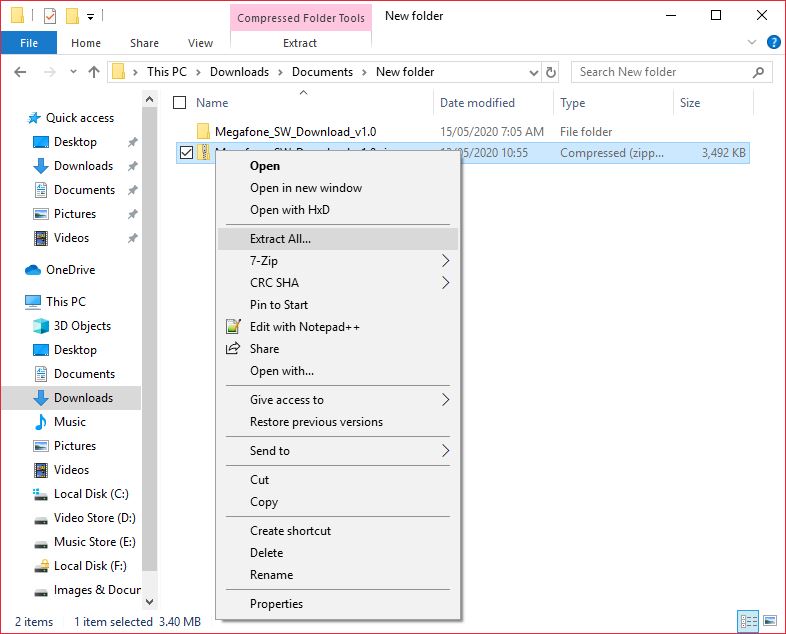
All files was extracted, so I land on another folder "Megafone_SW_Download_v1.0"
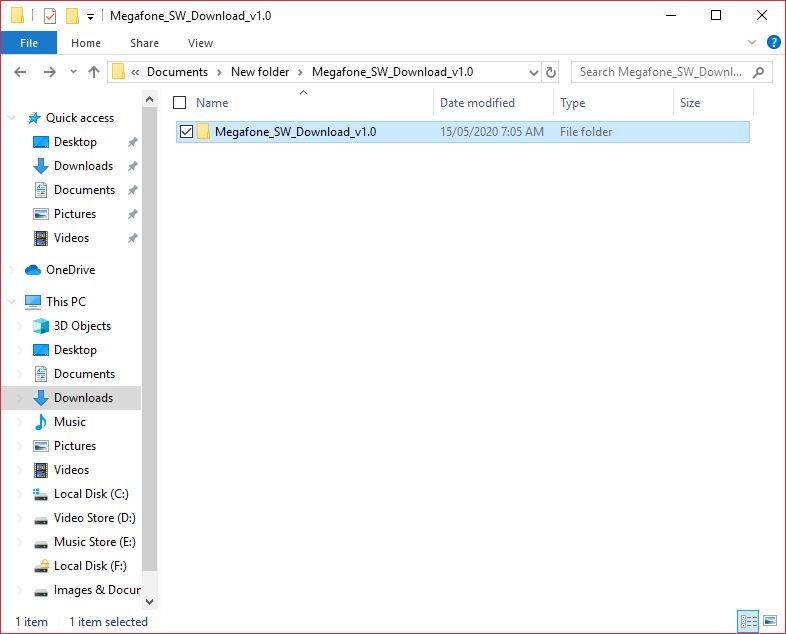
Opened This Folder and I was land up here:

Opened the file that pointed by arrow. "MegafoneSWDownload.exe"
This software was appears.

Now Minimized This software.
Unzip/Setup Flash File:
Downloaded given file:

Extracted it as shown in previous steps.
Now I remember the location:
and Open/Maximize previous tool and click on "Search Path"
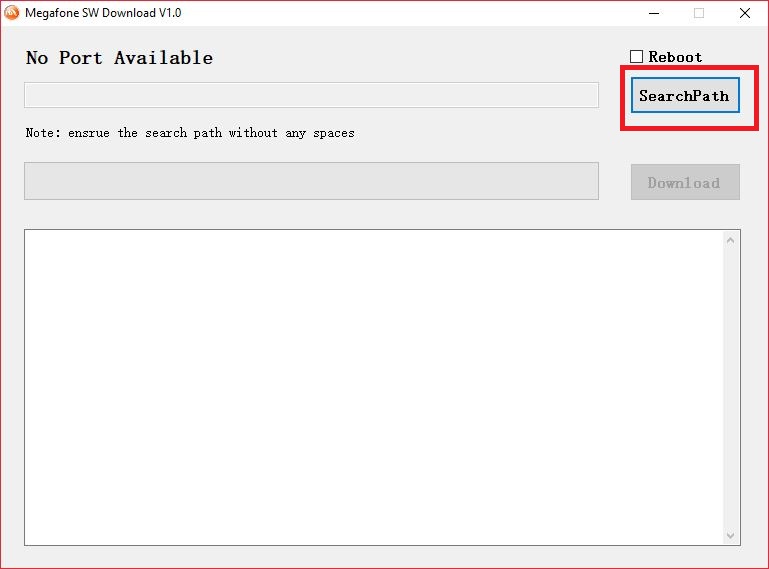
Now window was appears and ask for flash file location

Just opened our Extracted folder
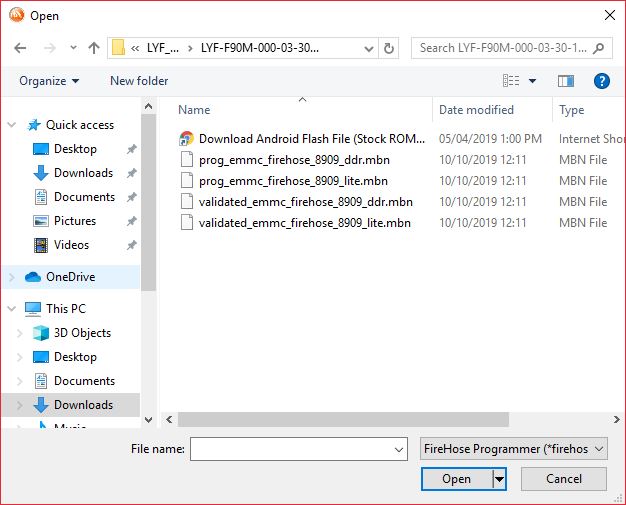
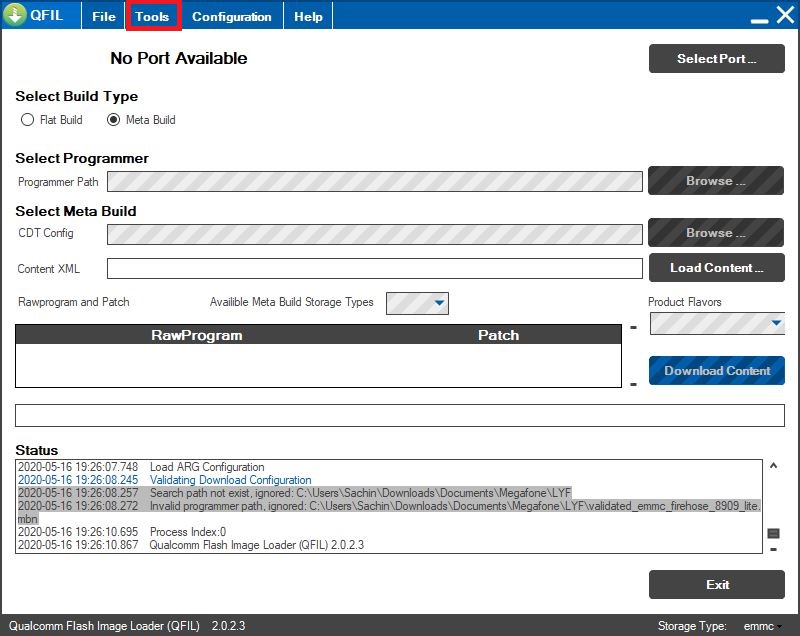
Flash Software:
Resume/Open MegaphoneSW Tool.
Choose The Following File for Flash "validated_emmc_firehose_8909_lite" from firmware directory.

Now There was Most tricky part for your Mobile Phone:
1. Remove Battery and insert it. (Don't Turn your Phone On)
2. Hold Center Button. (OK Button)
3. Connect Your Phone with PC via USB Cable.
My Phone was blinked and turn black/OFF Display.
and Device was connected to my PC
As shown in Following Figure.

The Device "Qualcomm HS-USB QDLoader 9008" was connect
Then Clicked On "Download" Button.
Then Download button was turned Grey
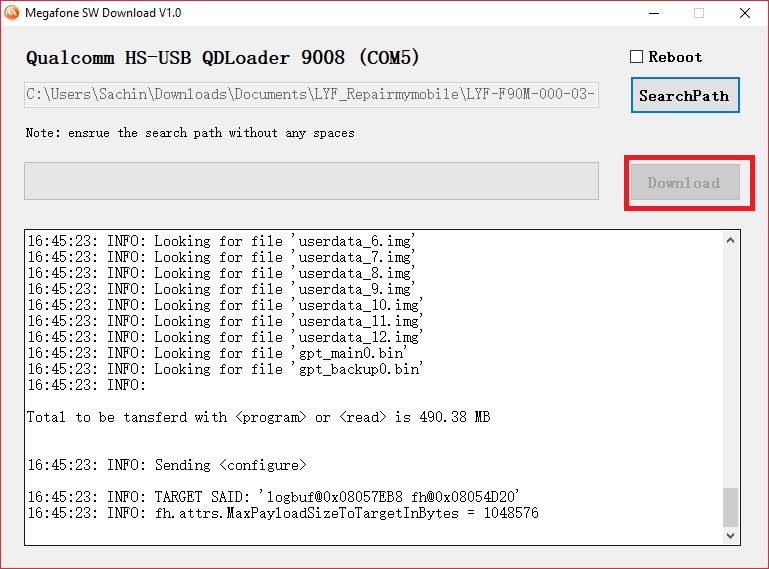
My wait was until the Green line full filled.


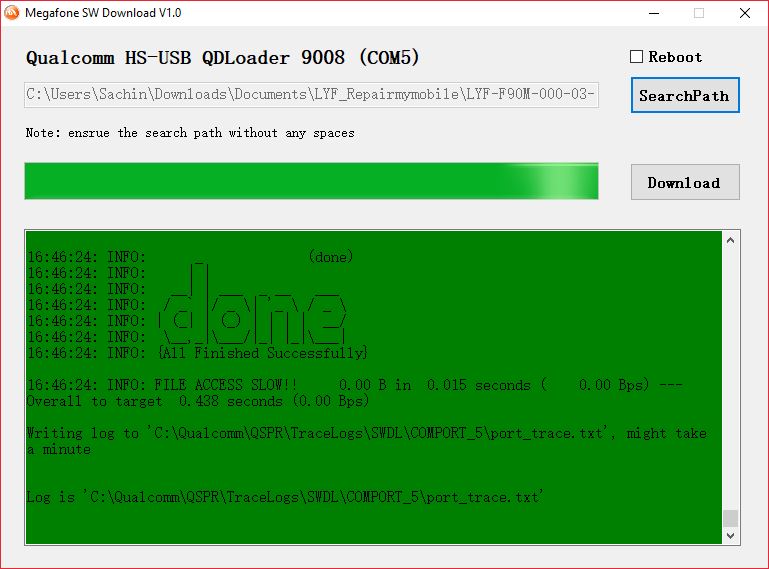
Whollllllaaaaaaaaa! Software Flashed 100%
I turned ON my Phone. ( removed battery and insert then turn on it )
But There was no hotspot and USB Tethering on Jio Stock ROM.
But after this I thought can we install Custom ROM in it ?
But for this we need Recovery.
lets see.
Porting Recovery:
So I decided, lets go to firmware folder

Its Look Families isn't it ? Ans: See Here
Its look Like android Recovery!
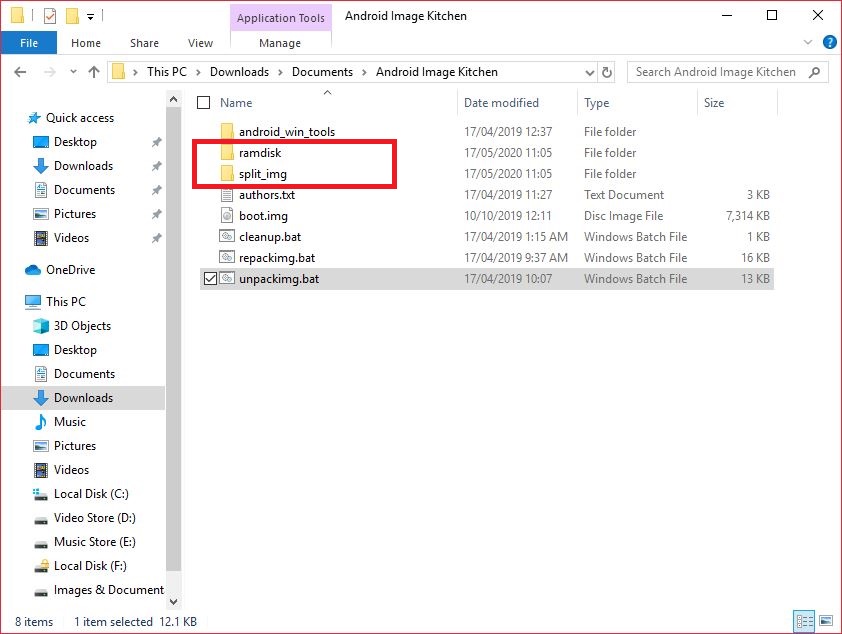
So I Downloaded Android Image Kitchen @MediaFire
and unpacked "recovery.img"

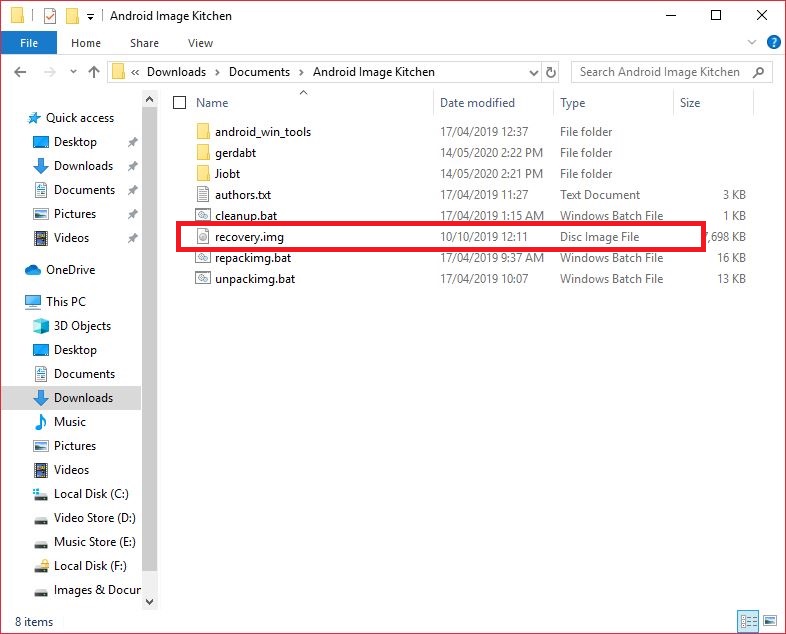
Note: Always Unpack IMGs with Administrator rights.

After Unpack Two folder Appeared in above As shown in figure:
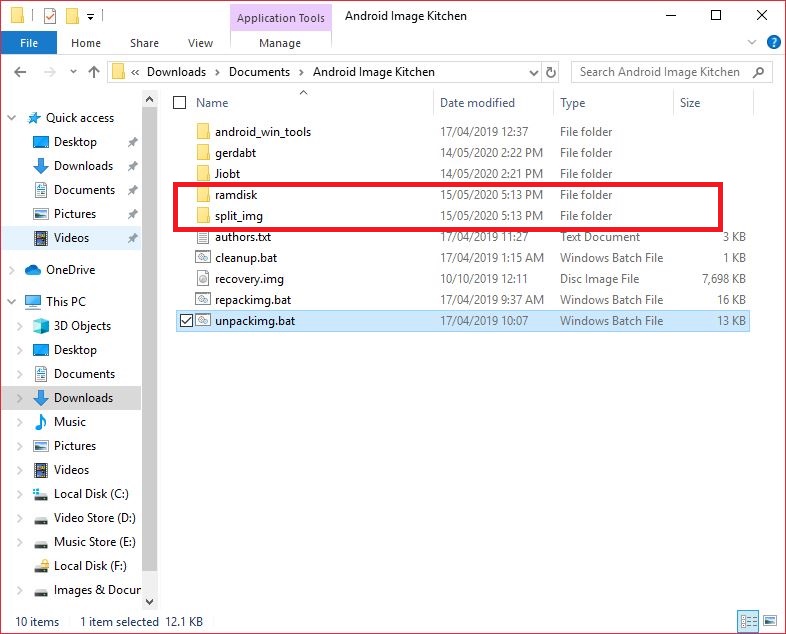
1. >> ramdisk
2. >> split_img
Opened "split_img" Folder
Hwollllllllllllllaaaaaaaaaaaa! There is Kernel As similar to android
Kernel >> recovery.img-zImage
"recovery.img-zImage" is compressed kernel
Copied it or Backup it to some folder

So during port of recovery we need to find the working recovery for this device
So need to find out Processor type:
I Searched on Google and found this:
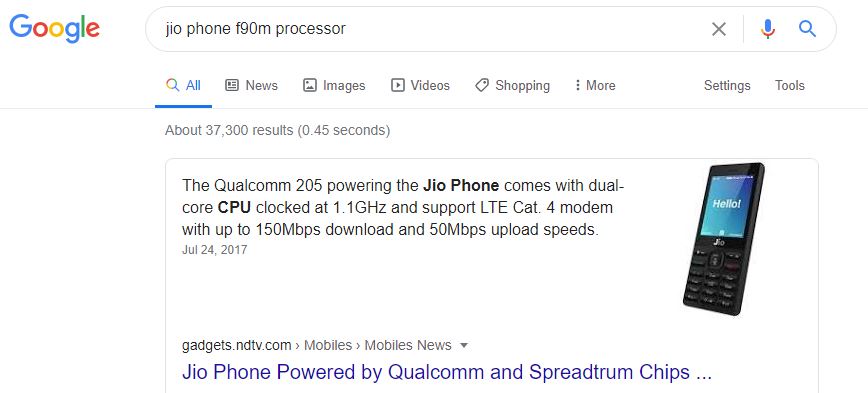
So the Phone is Qualcomm 205 Based.
Lets see is there are any phone available in market with same specification:
Here what I found

Ohhhhh! So Nokia 8110 is also Qualcomm 205 powered device.
Lets see, is there any custom ROM available for Nokia 8110.

I Found Custom ROM named As Gerda OS
See this website @GerdaOS

So, there is recovery too.
I downloaded it and renamed it as "recovery-gerda.img"
and pasted it to android image kitchen directory

Then Unpacked it and
Go To >> split_img << Folder
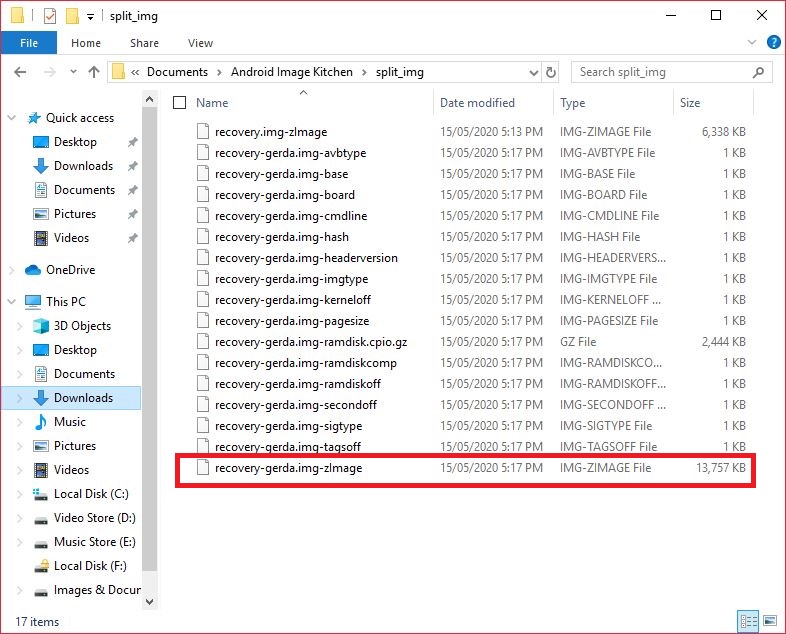
So I copied our previous backed-up "recovery.img-zImage" into split_img Folder
Deleted "recovery-gerda.img-zImage" and Renamed "recovery.img-zImage" to "recovery-gerda.img-zImage"
Repacked it. After Repack, Renamed it as recovery.img
Then Pasted it to flash/firmware file folder.

Then Flashed it.
How to Go Into Recovery Mode:
Note:
- If we flash your own recovery (Ported). Then we can access it only once.
- After flashed custom recovery, do not boot into normal mode, it will replace stock recovery to custom one.
1. After Flashing Custom Recovery >> Remove Battery and reinsert it.
2. Pressed Following buttons at one: Power Button + Volume Up
1. After Flashing Custom Recovery >> Remove Battery and reinsert it.
2. Pressed Following buttons at one: Power Button + Volume Up

After Boot Logo was appears
Then released Power Button. Hold Only Volume Up Button.

and vollllllllllllllllaaaaaaaaaaaaaaa!
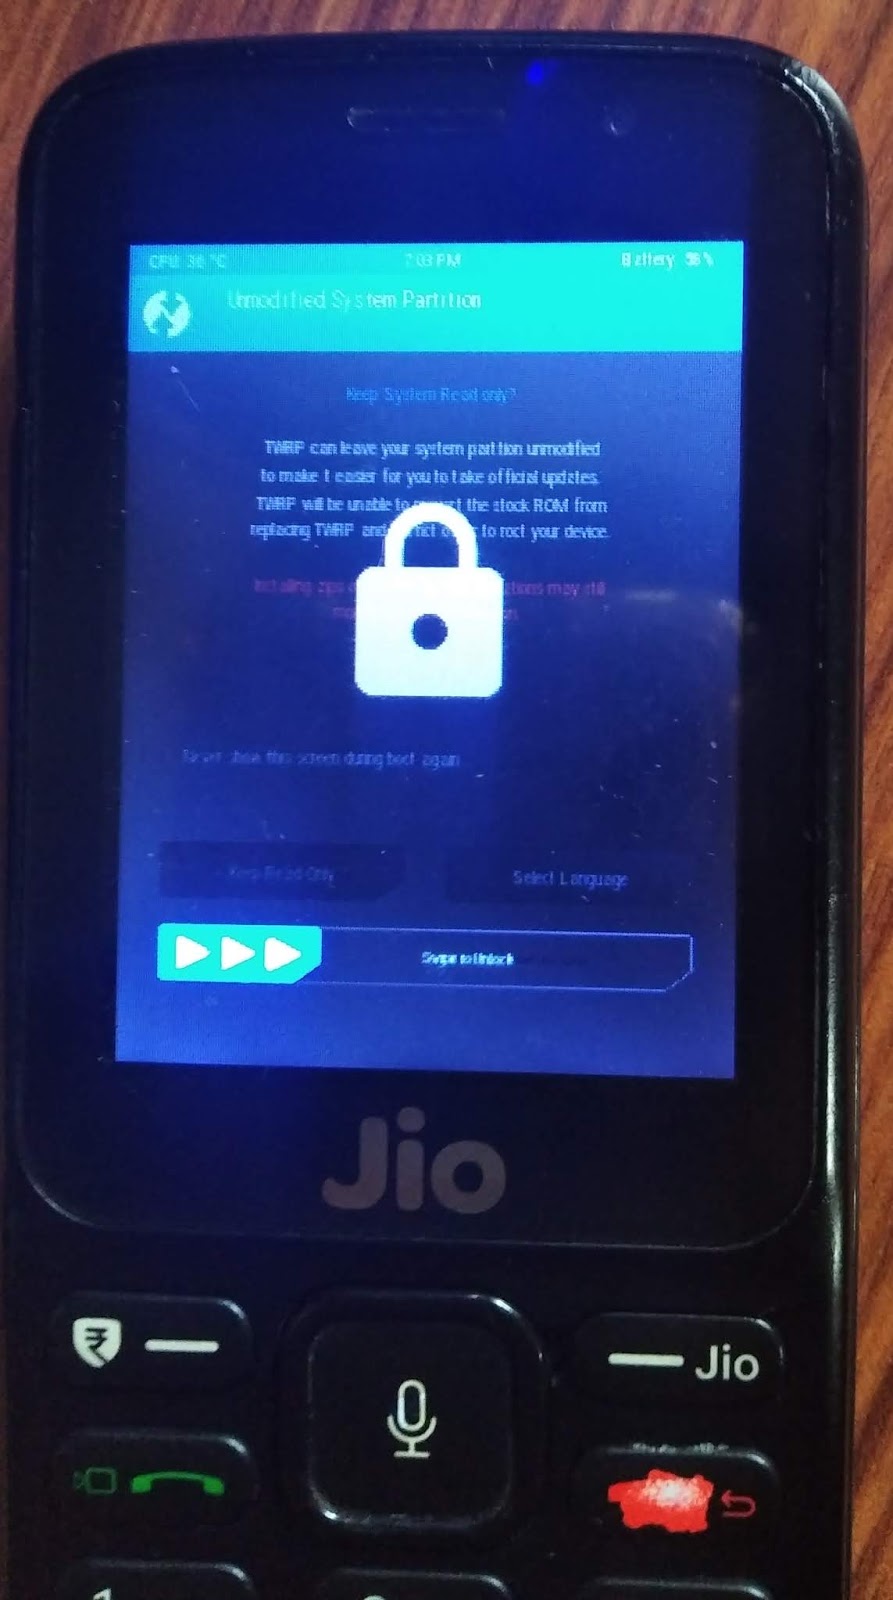
Here we come to My Custom Recovery Mode.
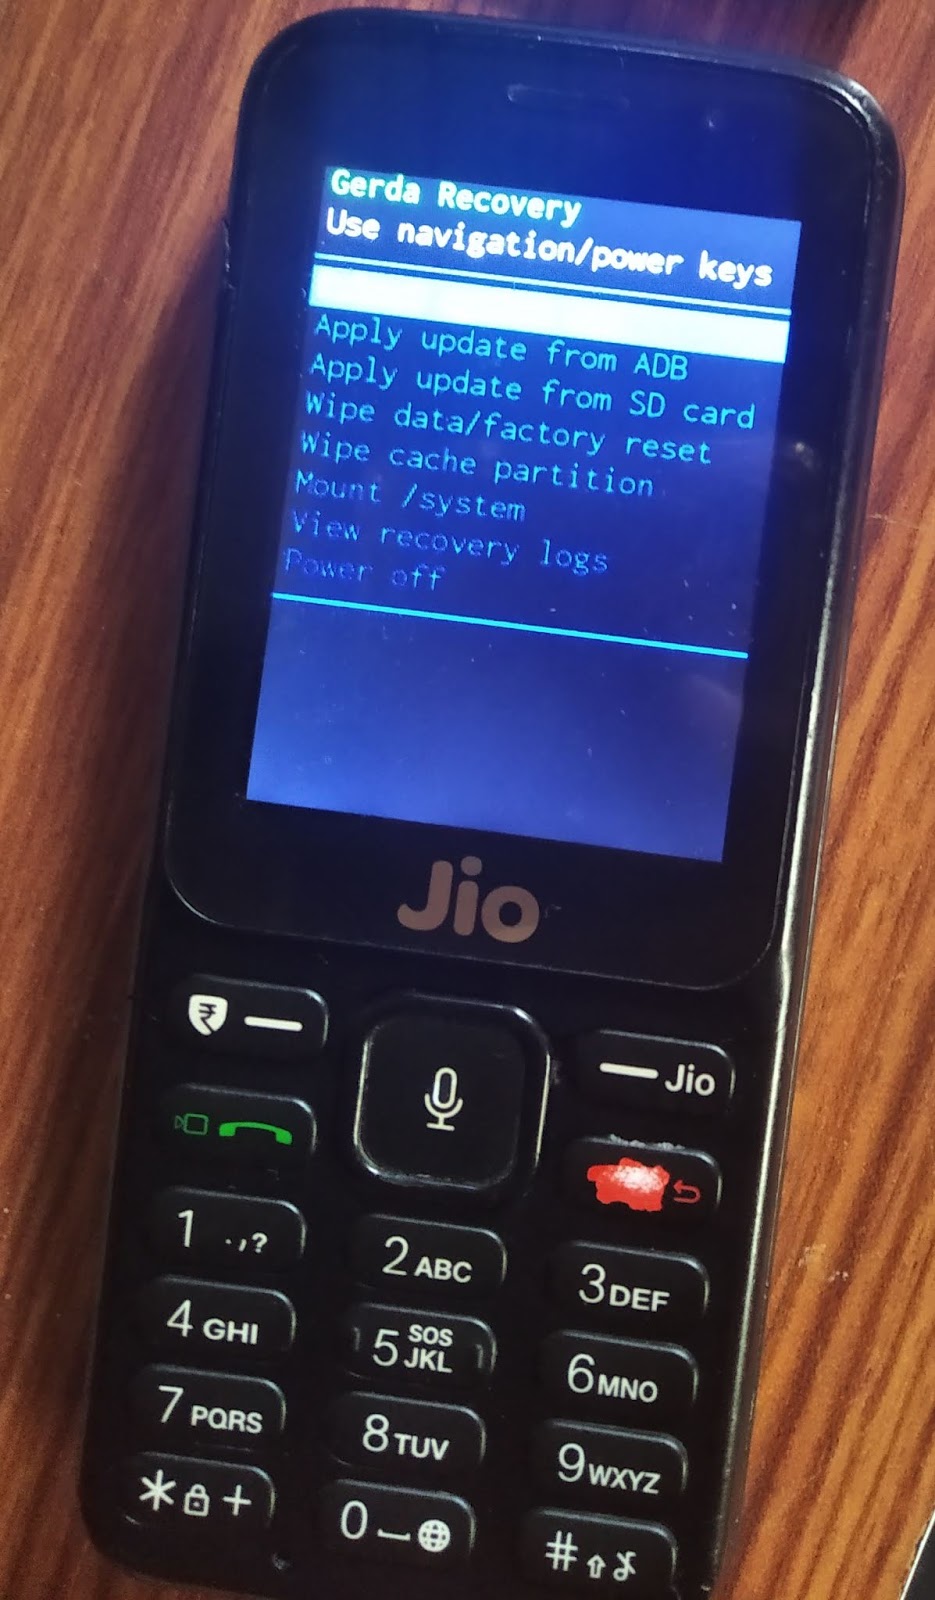

Its Gerda Recovery, You can Download Here @
But Limitations of this are "We cannot Flash Customized ROMs via it"
so I tried to Port TWRP (I know that it's touch based, but I want to give a try, maybe it's buttons calibrated too)
I succeed too,
Have a Look


You can Download it Here @
But After boot, only Power button was working.
it's seems like Buttons aren't calibrated.
So I ported Philz/CWM Recovery You can download Here @

Its Philz Touch Fully working with Keys & Mount Points.
So Porting Recovery was over now.
Time To port Custom ROM.
During ROM Porting, I Bricked this Device and recovered it too, lets see.
Recover Fully Dead Device Due to Flashing wrong Firmware:
During Port of Gerda OS to JIO F90M I made mistakes to port
- Flashed Modem Image of Nokia 8110
- Flashed rpm.img without verifying.
So Due to this My phone won't boot.
Even Did not Recognized by computer as "Qualcomm HS-USB QDLoader 9008"
It was only recognizing as "Qualcomm HS-USB Diagnostics 900E"

So after Some Research I Found Solution:
Preparation:
- Screw Drivers (for opening the motherboard of phone)
- Solder Iron (for soldering two points)
- Wires (to connect two soldered points)
Open Motherboard and find this two points:
- 1. Boot
- 2. IP8/1P8 (I cant able to read it correctly)
In my case they was behind speakers.
Open Motherboard and find this two points:
- 1. Boot
- 2. IP8/1P8 (I cant able to read it correctly)
In my case they was behind speakers.

- Connected those two points via wires.
- Put Battery back into Phone.
- Press "Center/OK" Button & Connect to PC and flash
- It was recognize and shows as "Qualcomm HS-USB QDLoader 9008".
After flash, please unsolder those wires, if you didn't then phone will not start.
But After this I lost my IMEI Number, How to flash IMEI Number Back ?
How to Flash IMEI Number:
On Latest version of Jio phone, we can't flash IMEI directly.
Flashing is only possible at 1'st Boot after Flash.
So Followed This steps:
1. Downloaded "QLM IMEI REPAIR Tool" @MediaFire
2. Copied my IMEI into Notepad. (This is very Important, Because during 1st boot we have to hurry)
Turned ON my Phone:

During Boot Logo wait until some device will connect to your computer.
After This Opened our "QLM IMEI REPAIR Tool" and pasted my copied IMEI Number in both boxes.
If "COM PORT" box already filled then, its sign that device is connected.
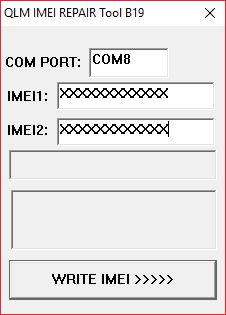
Note: You are thinking why fill two IMEI, its because this software work like this. and it will not accept one IMEI.
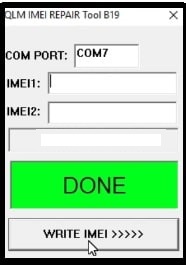
After Paste of IMEI Clicked on "WRITE IMEI"
After this Green message was glows.
- Green Message: DONE (IMEI Flashed)
- Red Message: ERROR (Error)
But after this still sometime phone will show "No SIM Card".
How to fix "No SIM Card" issue in Jio F90M ? (Due to wrong firmware or software)
For solving this we have to flash QCN File.
How to Write QCN File:
Tools Needed:
- QPST Download Here @MediaFire
- QCN File Download Here @MediaFire
Note:
- For latest Jio F90M Model, to overcome or flash QCN we have to reflash previous firmware. Remember: Flash will never erase your IMEI.
- After Flash do not turn on phone until successful flash QCN.
Unziped "QPST" and installed it.

Opened it from Desktop Shortcut.

After Go To >> Tools
Then Go to >> QCN Backup Restore

Opened it and Go to >> Browse
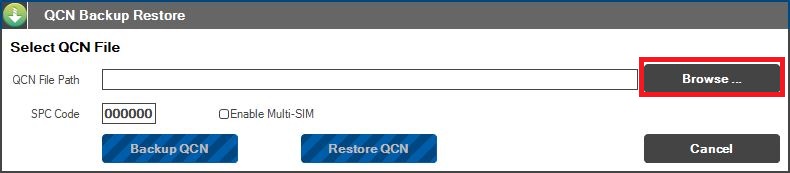
Selected Our QCN File
- JIO_F90M.qcn (Which we already Unzipped)
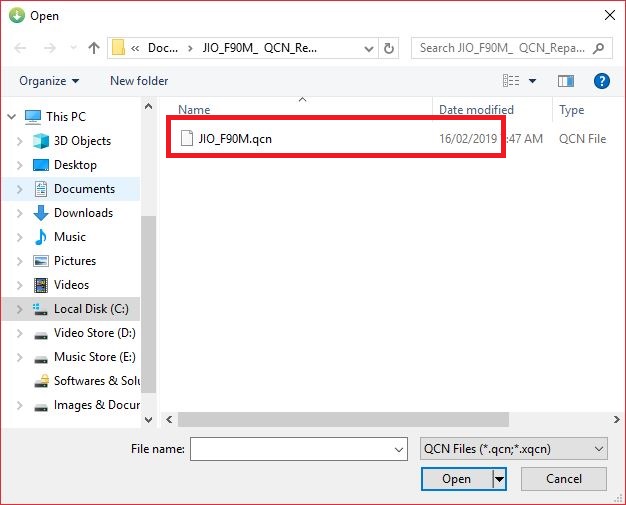
Then Opened it.
Turned On Phone and Connected it to Computer.
After This listen new Device Connect tone from Computer.
Then Click On "Restore QCN". (I haven't screenshot after this but it will not grey for you)

After Boot complete Restart Phone, and get complete working device.
But Question still Remains can we run any Custom ROM in this Device ?
Answer is Yessssssssssss!
I Successfully Ported ROM By Following Instructions.
How To Port Custom ROM:
As I mentioned in previous steps, I Downloaded GerdaOS.
Step 1: Unpacked Stock/Firmware "boot.img" with help of "android image kitchen"


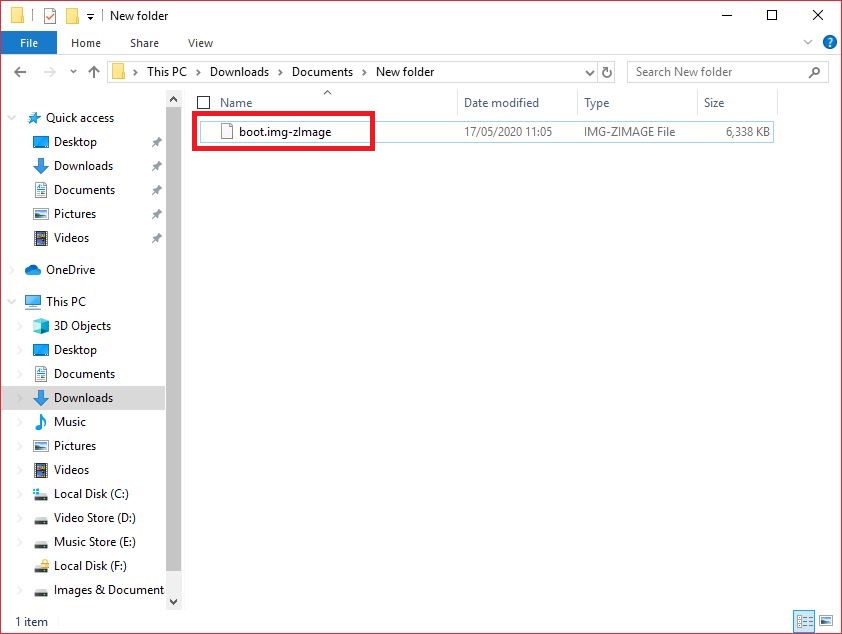
Step 2: Opened >> "split_img" Folder and copied "boot.img-zImage" to any safe place.

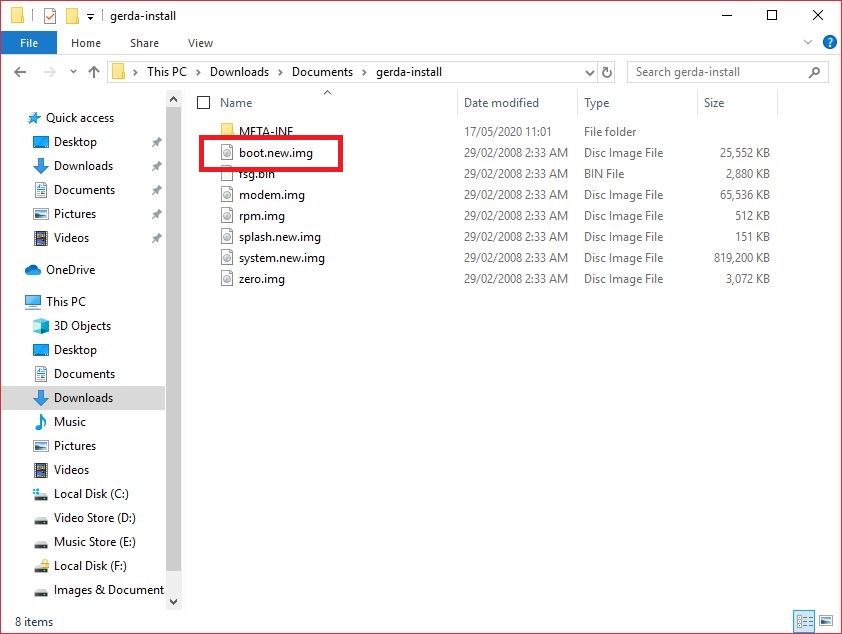
Step 3: Unzip Downloaded "gerda-install-xxxx.zip" and copied "boot.new.img" to "android image kitchen" Folder.
Unpacked "boot.new.img".

After Unpack, two Folder was appeared.

>> ramdisk
>> split-img
Opened "split_img" and copied our "boot.img

Deleteed our "boot.new.img-zImage" and Renamed our "boot.img-zImage" to "boot.new.img-zImage"

Repacked it.

After Repack our new file will generate.
Name of new file "image-new.img"
Copy File to "gerda-install-xxxx"
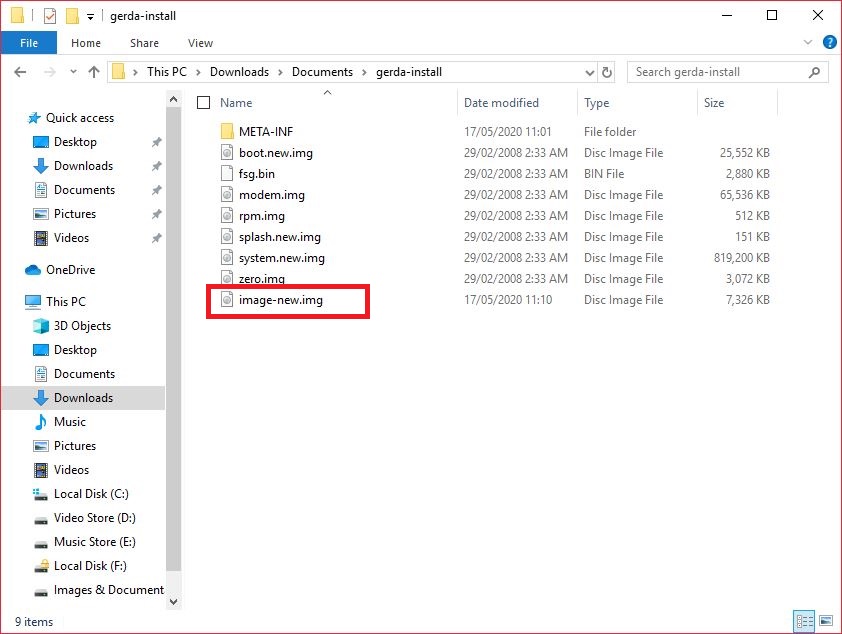
Deleteed "boot.new.img" and Renamed "image-new.img" to "boot.new.img".

Skip 4'rth step and jump on step 5th (I pointed out mistake did by me, so only read it. Do not Follow.)
Step 4: Make zip of it by following this.
Tool:
- 7zip Download @Click Here
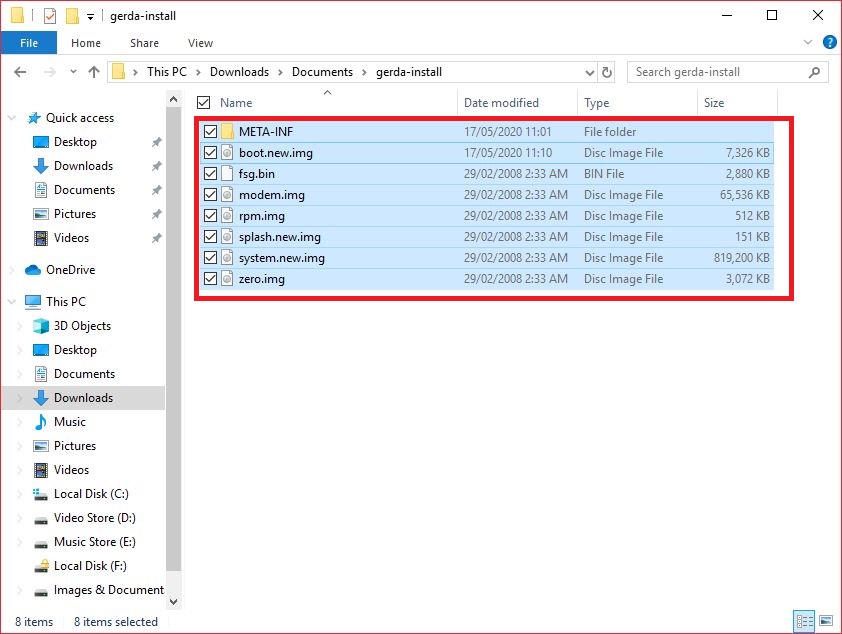
Select all Files By: Ctrl+A


After Flashing this zip my phone was not only dead but unrecognized by PC also.
So I solved this problem and flashed it by This Method;
Reason for Dead Phone: Some files of Custom ROM was only made for Nokia 8110. So Need to Delete those. For deleting those files follow next step.
Step 5: Opened "META-INF" Folder of Custom ROM and Go To "com" >> "google" >> "android" Folder
Tools:
- Notepad++ Download @Click Here


Opened "updater-script" File and Deleted Following Portion and Saved File.


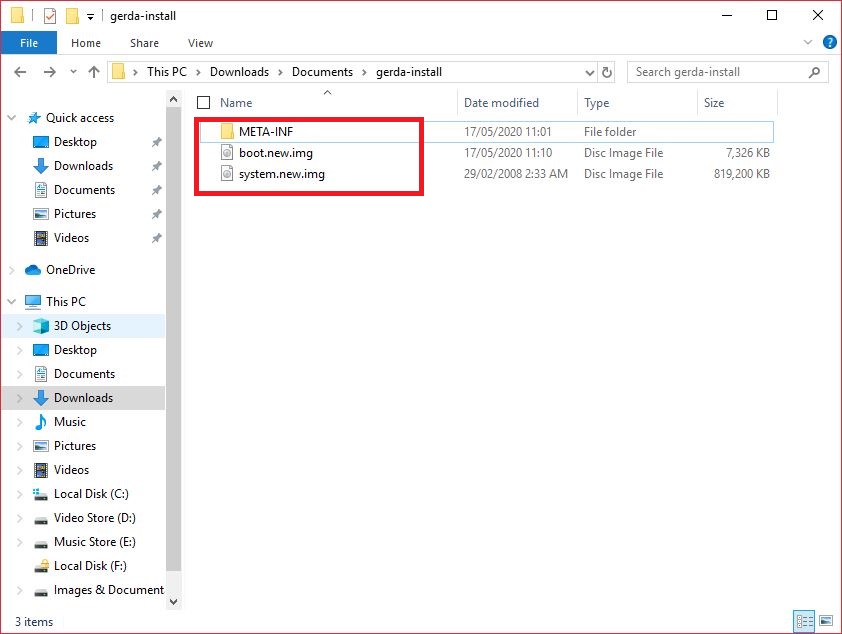
Step 6: Go to Custom ROM Folder and Deleted following Files.
Files:
- fsg.bin
- modem.img
- rpm.img
- splash.new.img
- zero.img
Remained Files are shown As follows:
Then Select All Files and Make ZIP From It.

Okkkkkkkkkkkkk! ROM Ported Succesfully!, But how to Flash ROM to Device ?
Here is Answer.
How to Flash Custom ROM:
Step 1: Copied Custom ROM ZIP File into Micro SD Card.
Step 2: Access Recovery Mode, How To access Recovery Mode? See This Post;

Step 3: Go To >> Wipe and Format Option >> Clean Install >>

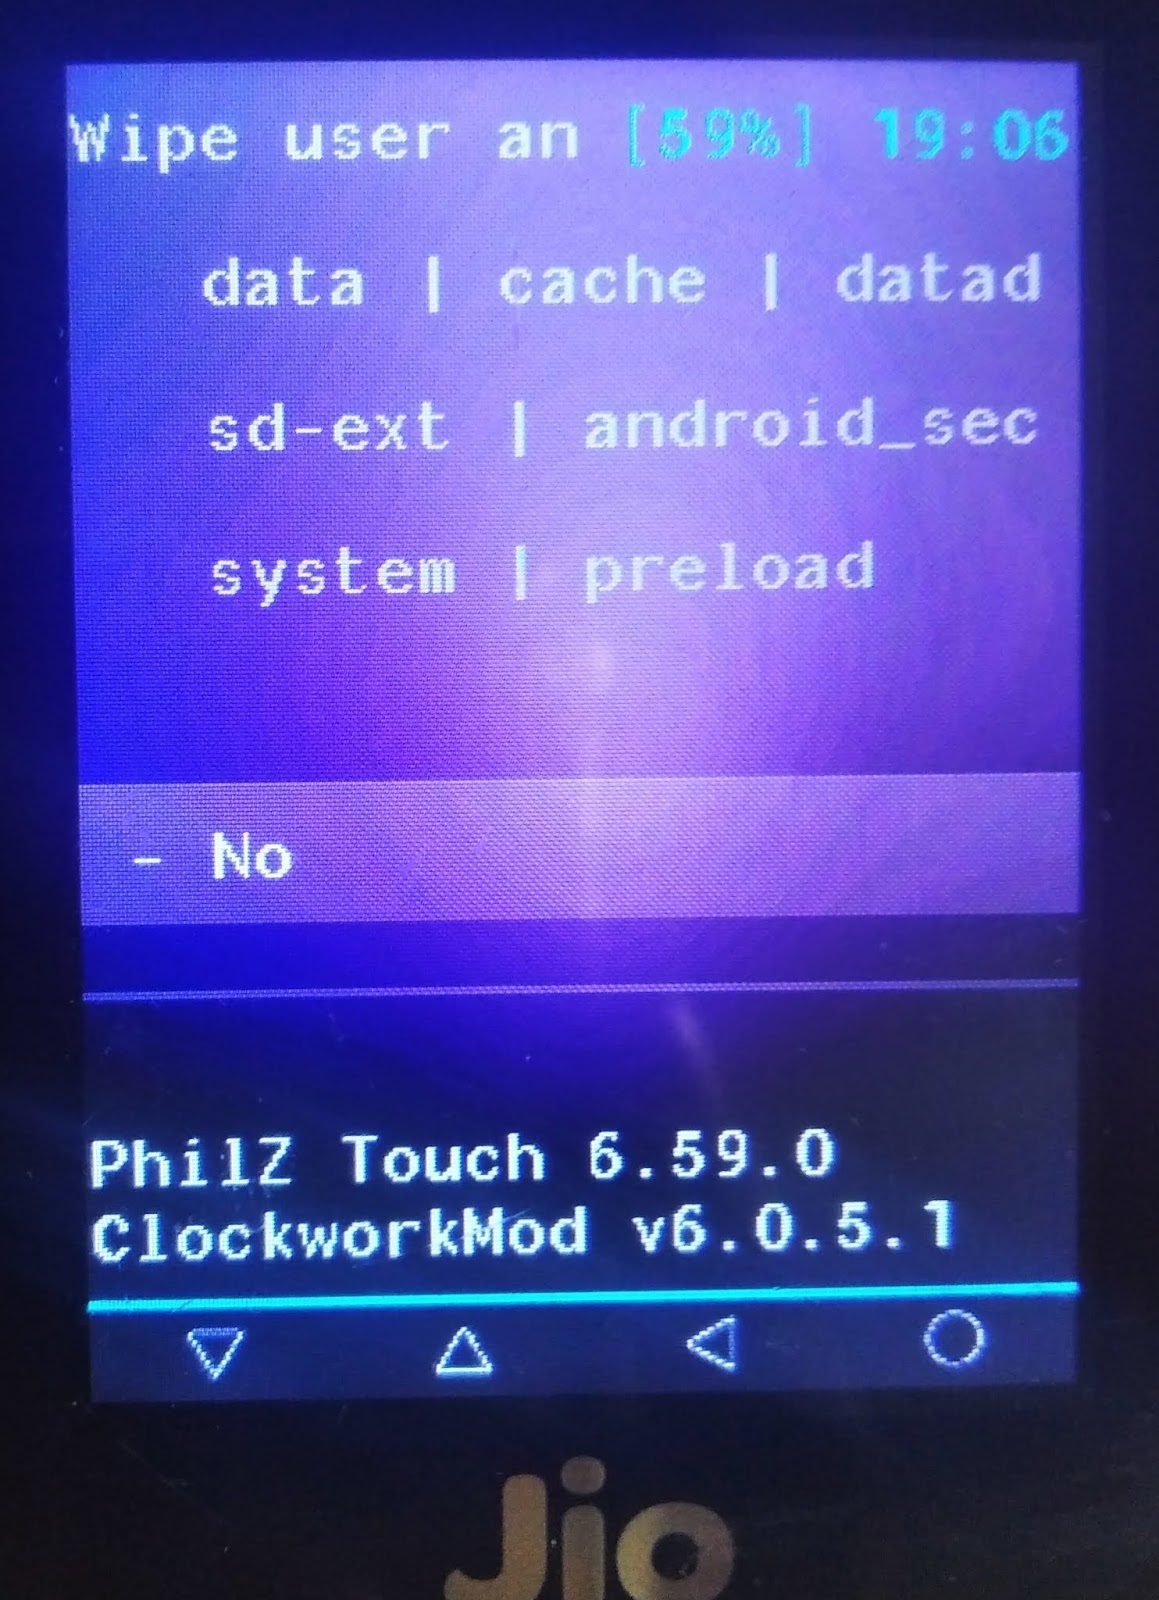
Scroll Down and Clicked to "Yes - Wipe user & System"

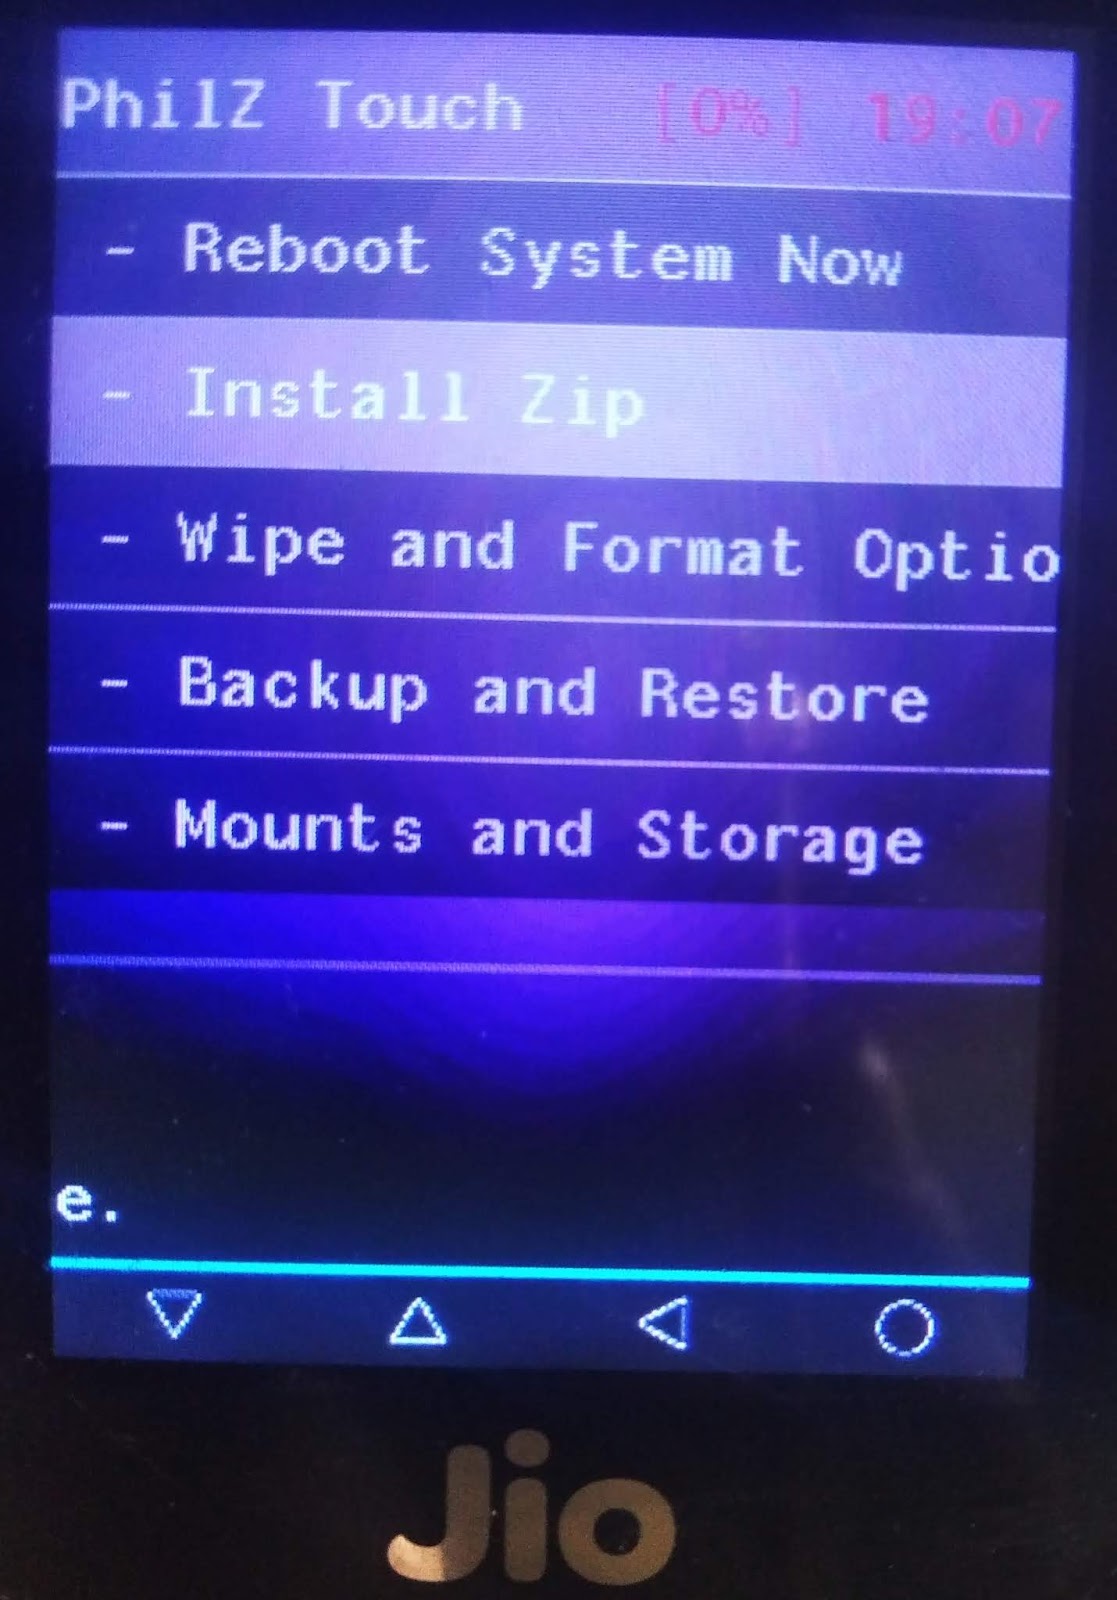
Step 4: Go Back and Click "Install Zip" >> Choose zip from SD Card
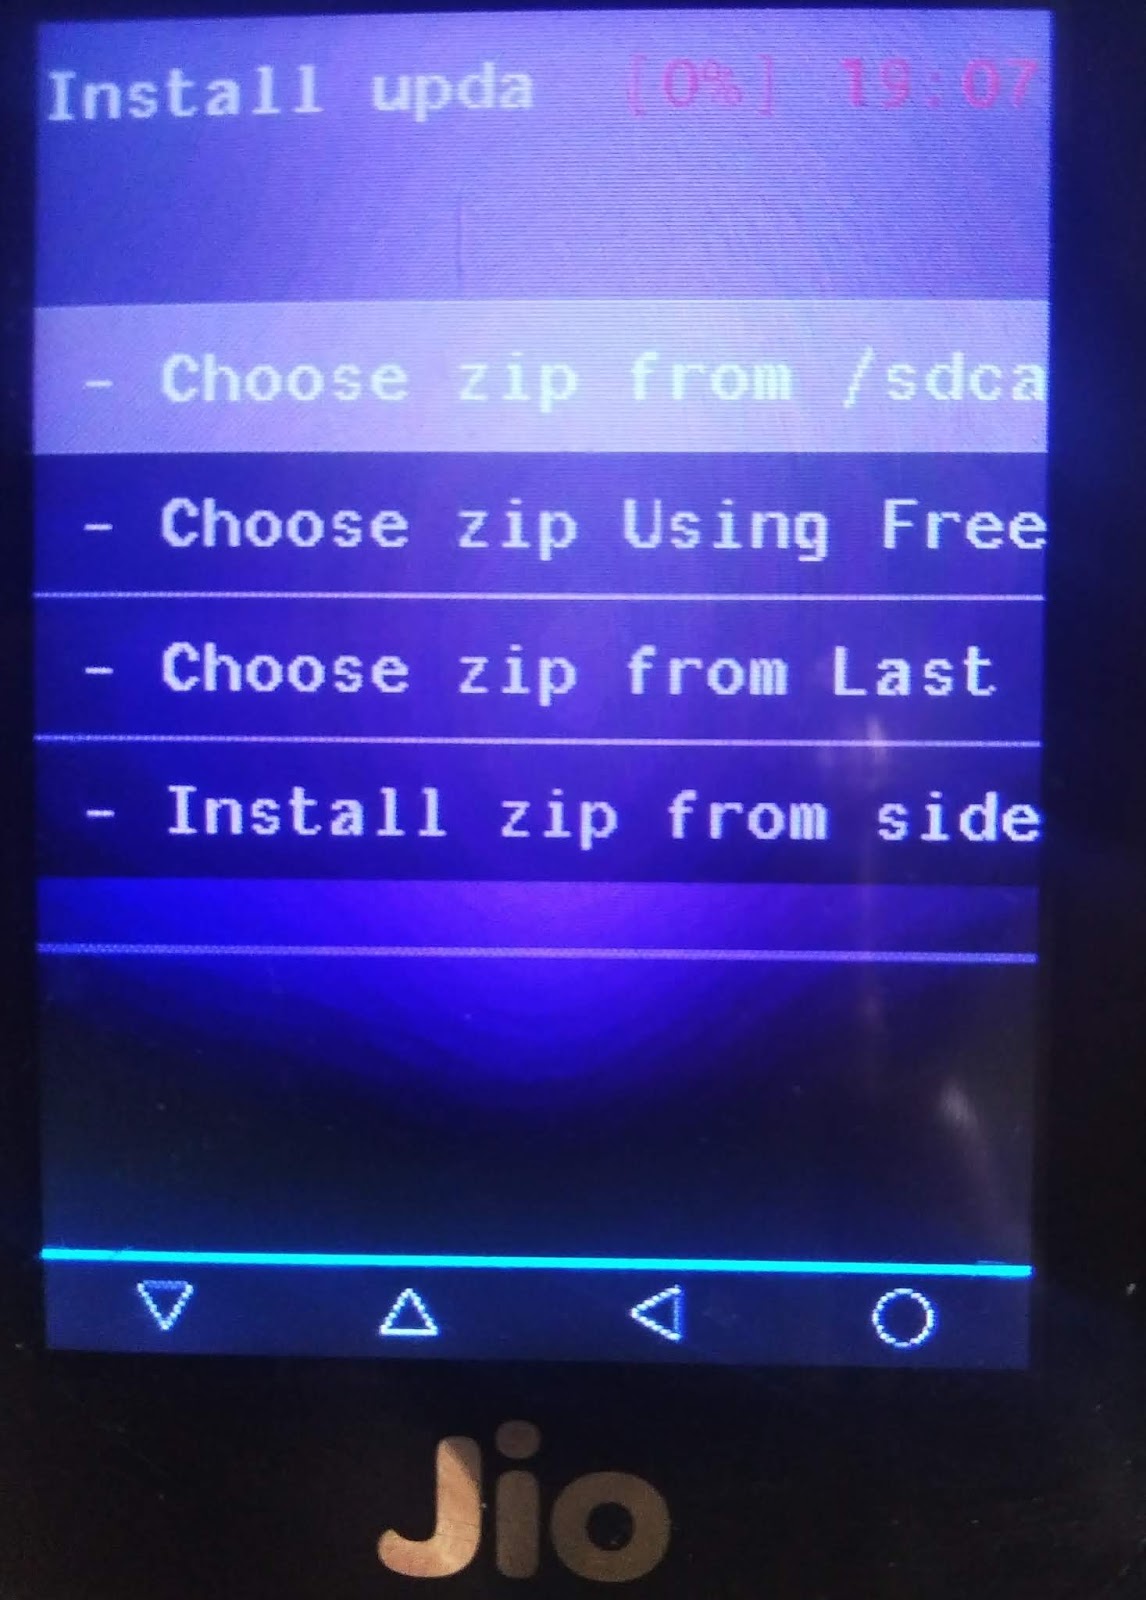
Choose zip file that you Downloaded This Post.
Click "Yes- Install XXXXXXXXX"


After Installed, Go Back and Click On "Reboot Now" If ask you to root Click "No"

and Here You Goooooooooooooo!
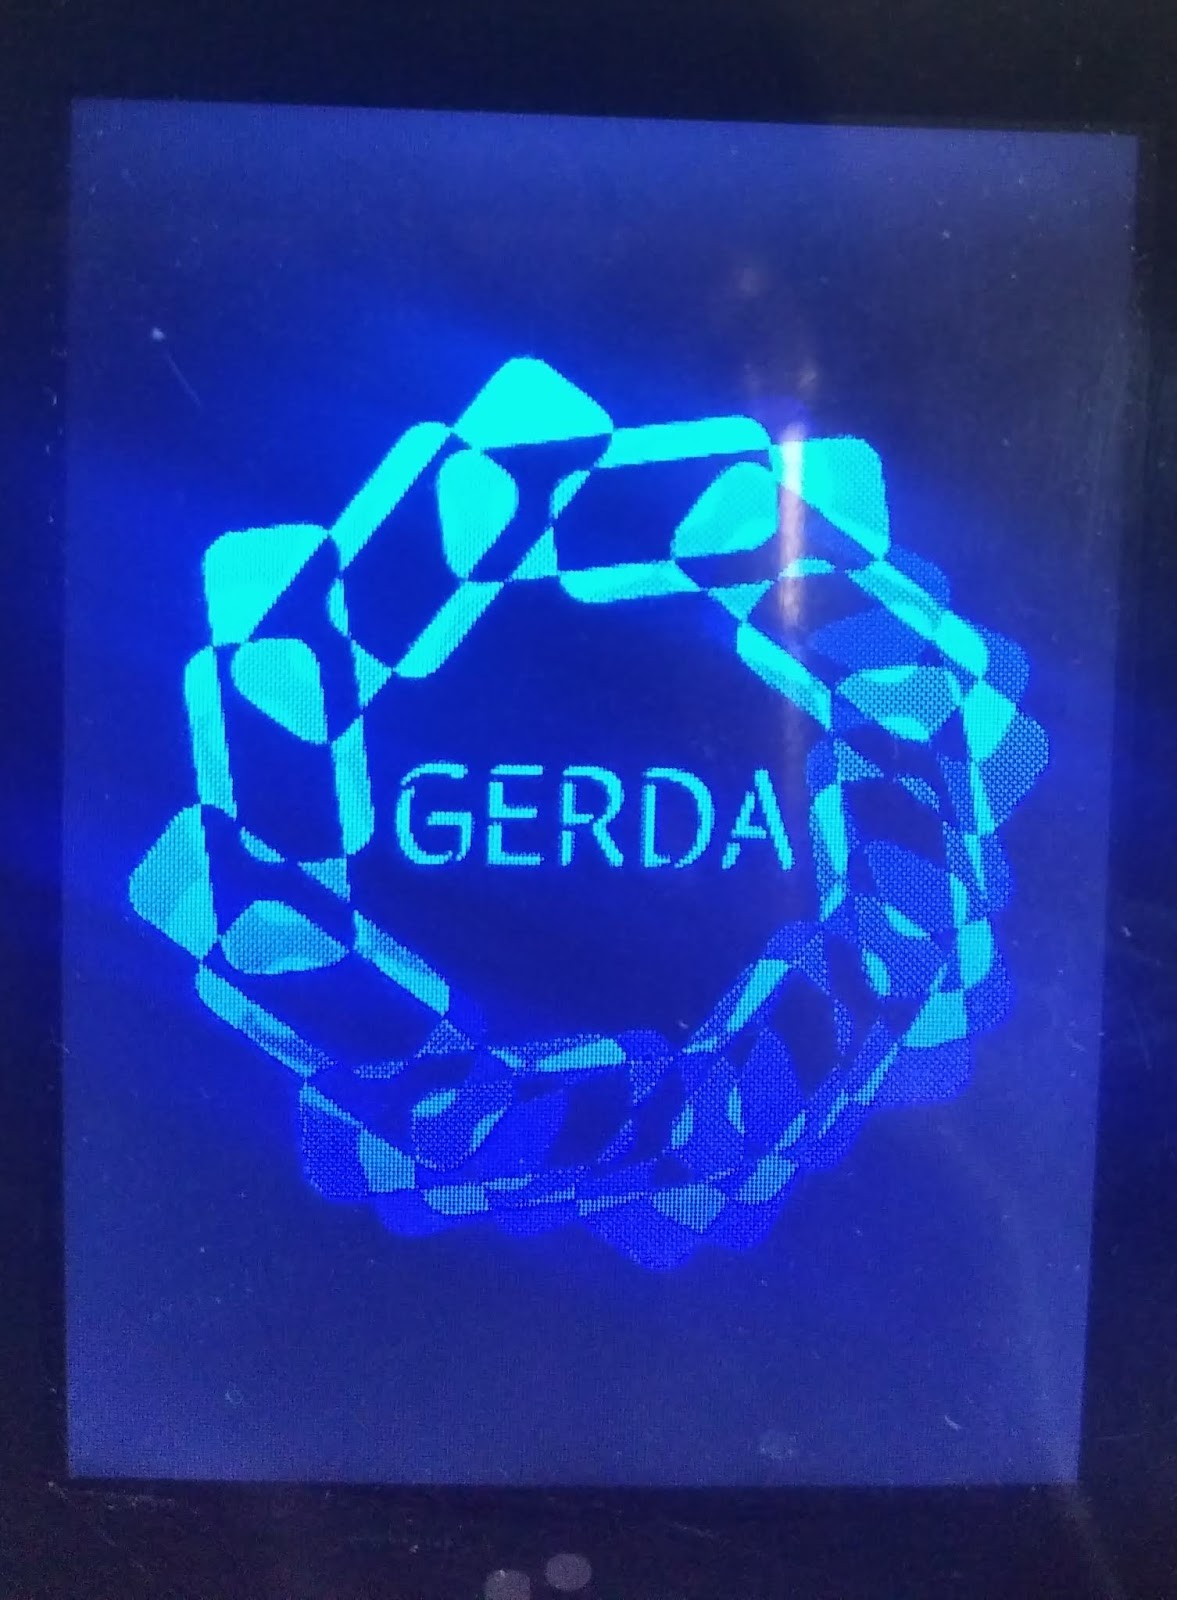
So, Its boot Perfectly.
But wait why it wasn't recognize my keypad.
I pressed buttons many time.
But it was only recognizing Power Button and Volume Up Button.
But at this Time I need sleep. Good Night!
Day 2: with Jio F90M
Miscellaneous Fixes:
Keypad Mapping:
As I already told you all that keypad wasn't working after flashing Gerda OS, but I have already experience with android porting. So Let me tell you what was issue.
Issue: Keypad wasn't mapped for Jio F90M, because this ROM was for Nokia 8110.
Solution: Every Android OS have its own Key Mapped configuration File.
Problem was how to get it ?
Solution: Unpack Stock Firmware (system.img) and pull it.
Tools Required:
- System Extractor Download @MediaFire
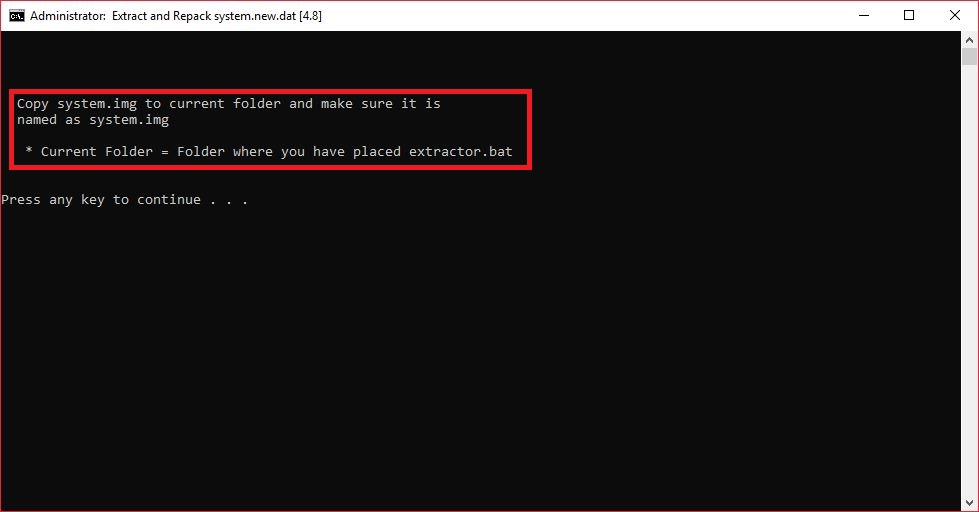
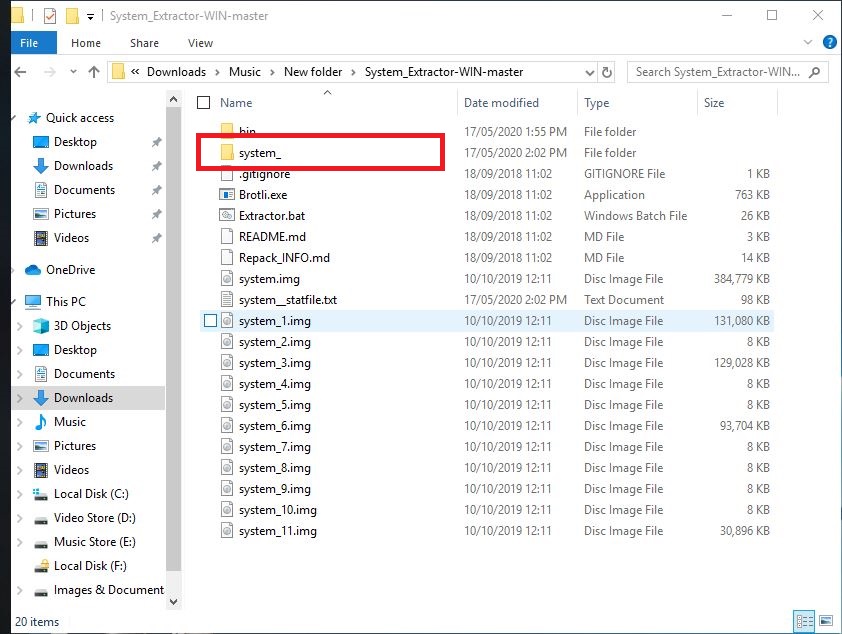
Step 1: Downloaded and Extracted Given Tool, Open/Run "Extractor.bat" with administrator.

Choose Option 4 By Entering "4" In Console and press Enter.

Copy Firmware's (Jio F90M) all system.img Files (system*.img)
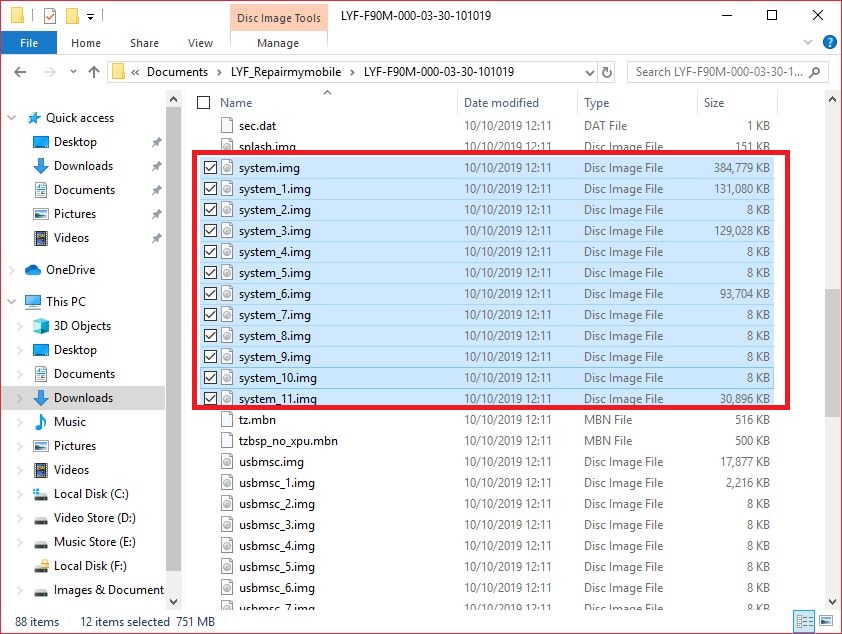
Pasted it in Tool Directory.
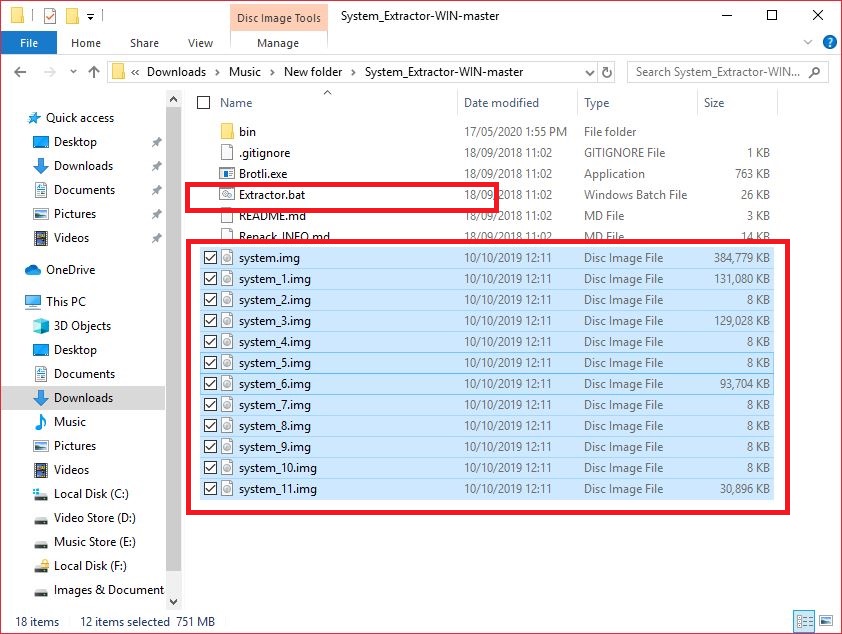
Now Resumed our procedure by Enter Button on Terminal.
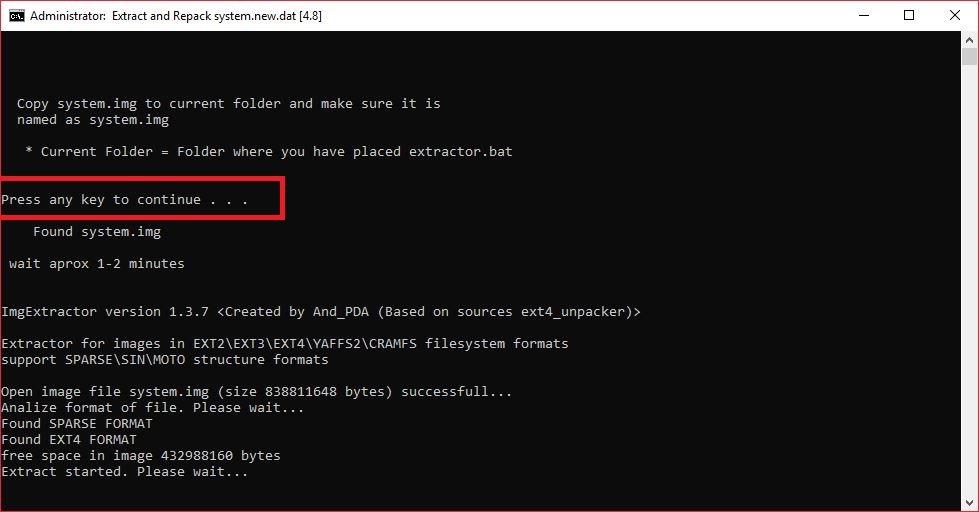
My system.img will unpacked soon and Located in "system_" Folder
Location of Key Mapping File >> system_/usr/keylayout/*

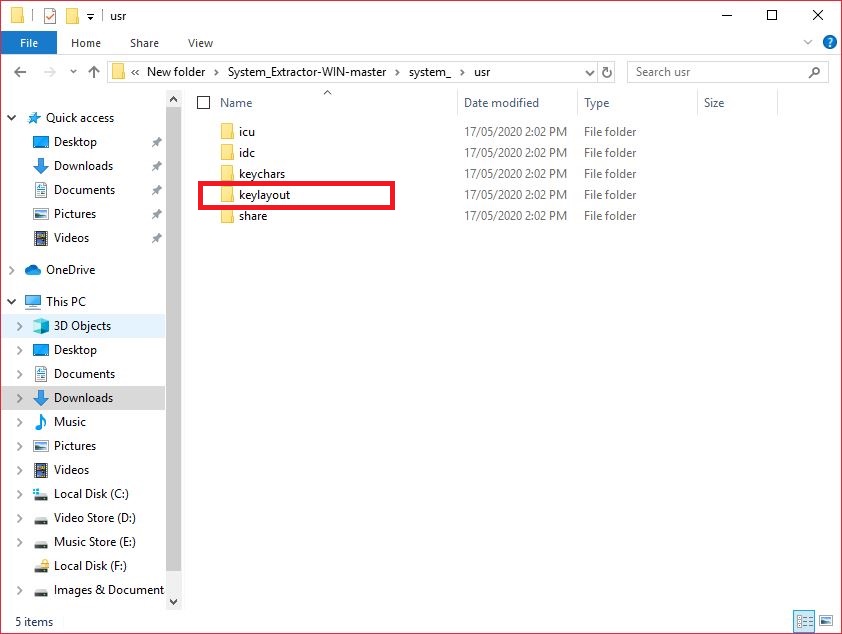
Copy whole folder somewhere else.

But question is how can we flash this file/folder ?
Answer: Create our own Flashable zip file.
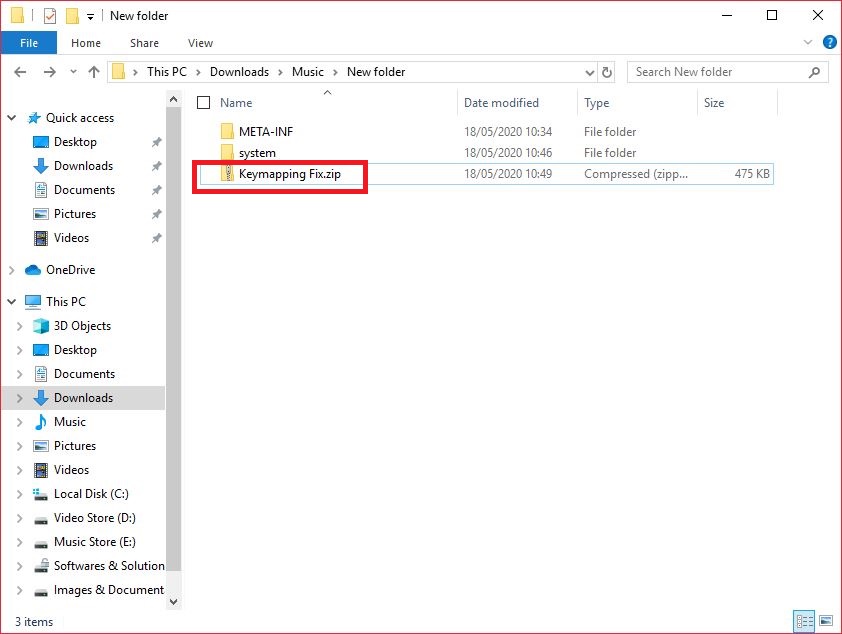
How to create our own Flashable zip:
There are many methods available for making our own flashable zip, but I will show you easy at time of flashing.
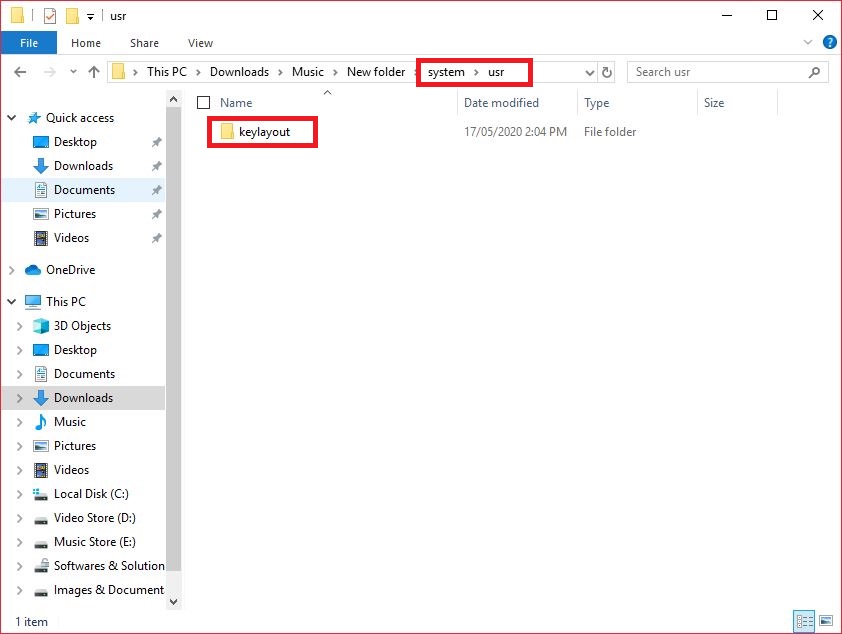
Step 1: Go to Custom ROM Folder and Copy META-INF Folder to where you backed up "keylayout" Folder


Step 2: Create "system" inside that Folder "usr" and Move "keylaout" Folder there.


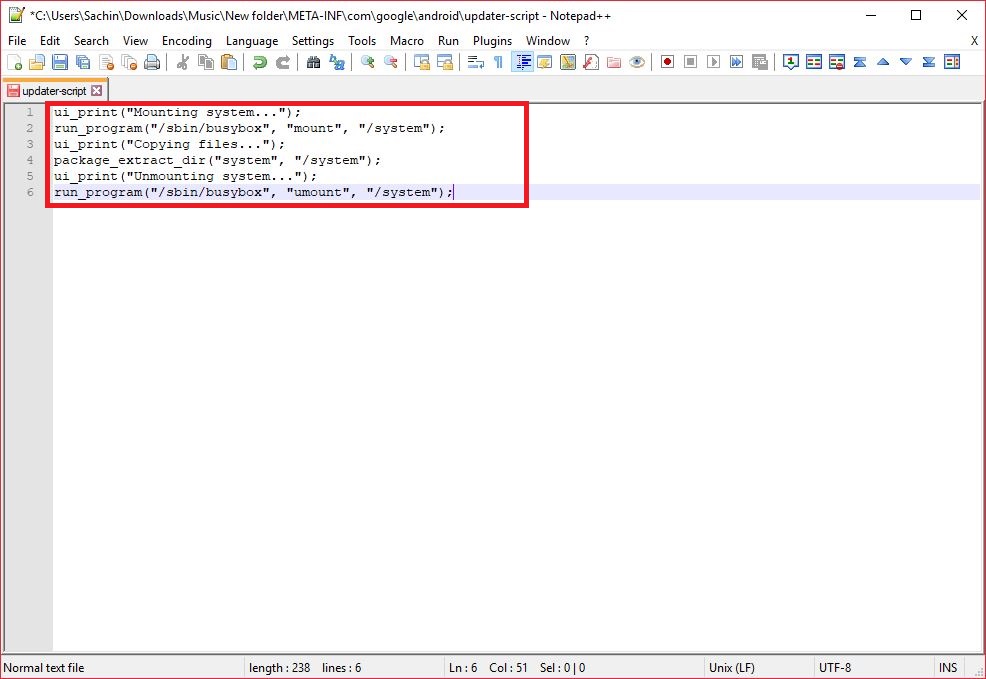
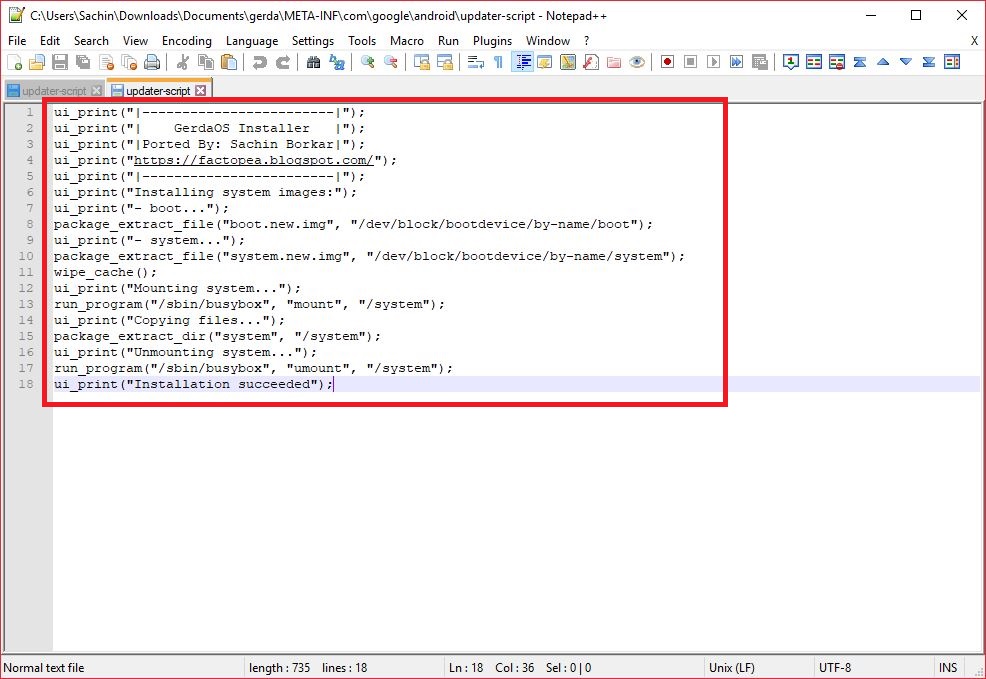
Step 3: Goto "META-INF/com/google/android" Folder and Open "updater-script" File in Notepad++

Step 4: Select all Text and Delete it. Then Paste Following lines in it and Save.

Paste Following Codes:
ui_print("Mounting system...");
run_program("/sbin/busybox", "mount", "/system");
ui_print("Copying files...");
package_extract_dir("system", "/system");
ui_print("Unmounting system...");
run_program("/sbin/busybox", "umount", "/system");
ui_print("Installation succeeded");
After Save the File Create zip and Flash it.
But if you want to include it in custom ROM then You can Paste it in Custom ROM "updater-script" File and kame itself ROM+Patch

What Do Or Not to Do ?
- Do not try to patch /data partition to flash OmniSD or any tool.
Reason: I was so stupid that I tried that, because GerdaOS have its own package installer. What you have to do is just download your application zip file and put it into /internel or /SDCard and open it.
Credits
- @GerdaOS Team and @BananaHackers for GerdaOS.
- @osm0sis for Android Image Kitchen
- @repairmymobile.in for Firmware Flash File of Jio F90M
- Megafone Team for MegafoneSW
- @matrixex for System Extractor
- @Sachin Borkar Author of this Blog. :-)
- Sorry If I missed someone.