Red dot added to 100 watt and LightBurn upgraded to current version
6 views
Skip to first unread message

Jim Frankfort
Sep 26, 2022, 5:14:19 PM9/26/22
to Asheville Makers
Hi, I added a 'red dot' to the 100 watt laser. That in conjunction with the newest version of LightBurn I just installed, enables you to cut something bigger than the laser bed. You use the LightBurn "cut and print' functionality under the 'laser tools' menu. You'll use the pass-through doors to slide your job up for additional cuts. The 'red dot' + 'cut and print' + 'registration marks' you add to your job enables LightBurn to realign after you move what you are cutting.
To use the 'red dot' for this, you will need to make sure it is pointing to the exact spot where the laser will cut. After setting the height of the laser bed, use the 'pulse' function to make a mark where the laser is. Next, make sure the red dot is on the mark made by the pulse. It can be adjusted.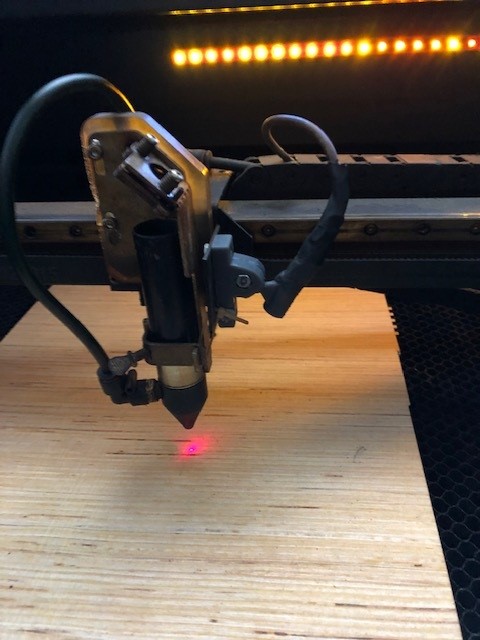
Although it doesn't look like it here, the dot is focused.
Reply all
Reply to author
Forward
0 new messages