Too bubbly details
122 views
Skip to first unread message


Hans-Georg Hettwer
Sep 3, 2021, 12:55:01 PM9/3/21
to AliceVision
Hello,
I do some 3D-reconstruction work for our small museum in my freetime, and I do find a similar behavior reconstucting a flintstone 24 cm in size (link below) or smaller Calcit minerals 2 cm in size (150 pictures from a Nikon 3100 with 4k resulution). The surface is looking like pudding... The pictures were take on a rotation table using a 3-pod and manual camera setting optimized for optimum in depth of fields. What can I do more?

Fabien Castan
Sep 3, 2021, 2:55:06 PM9/3/21
to AliceVision, Hans-Georg Hettwer, complex...@gmail.com
Hi,
I don't know for the flintstone
without seeing the input images.
For
the chair, you need to maximize the number of pixels on the chair! Don't need to have the full chair in the framing.
We
do not want to reconstruct the full garden. So, get closer to the object.
De : 'Hans-Georg Hettwer' via AliceVision <alice...@googlegroups.com>
Envoyé : vendredi 3 septembre 2021 18:55
À : AliceVision <alice...@googlegroups.com>
Objet : Re: Too bubbly details
Envoyé : vendredi 3 septembre 2021 18:55
À : AliceVision <alice...@googlegroups.com>
Objet : Re: Too bubbly details
⚠️ Do not click or open unknown attachments ⚠️
**
--
You received this message because you are subscribed to the Google Groups "AliceVision" group.
To unsubscribe from this group and stop receiving emails from it, send an email to alicevision...@googlegroups.com.
To view this discussion on the web visit https://groups.google.com/d/msgid/alicevision/ced29026-1b42-4826-ae38-2a077ab27b70n%40googlegroups.com.

Jim George
Sep 3, 2021, 8:02:51 PM9/3/21
to Fabien Castan, AliceVision, Hans-Georg Hettwer, complex...@gmail.com
I am by no means an expert with MeshLab but a few things I'm noticing. First off the sample image looks dark so I would either bump up the ISO or get some even lighting and more of it on the object. The green screen on the ground is unnecessary but I get using a ground plane to gather the rocker detail. Why not use a white tarp pulled tight on the ground it will also help light the underside. I'm sure you know but I'll say it anyway, set the focus on your camera and leave it alone. Same for f-stops. Getting closer to the object is a good idea but a moving background is a major source of targeting for MeshLab. Also, more images than you think you could possibly ever need is a very good thing. As the meshing improves I've noticed that spots of glare show up as indentations. I'm thinking this is caused by a conversion to grayscale where whiter parts of the image would usually be the higher points. It seems to be flipped in Meth lab and whiter used as lower points. Some non destructive way of matting the object helps. I've used Brown Tempra water color to kill shine. You, for museum pieces are probably stuck with not many choices or maybe any for matting glare. My two cents worth.
To view this discussion on the web visit https://groups.google.com/d/msgid/alicevision/PH0PR02MB8502EFDE19CE9594E65193FEF0CF9%40PH0PR02MB8502.namprd02.prod.outlook.com.
Hans-Georg Hettwer
Sep 4, 2021, 5:16:19 PM9/4/21
to AliceVision
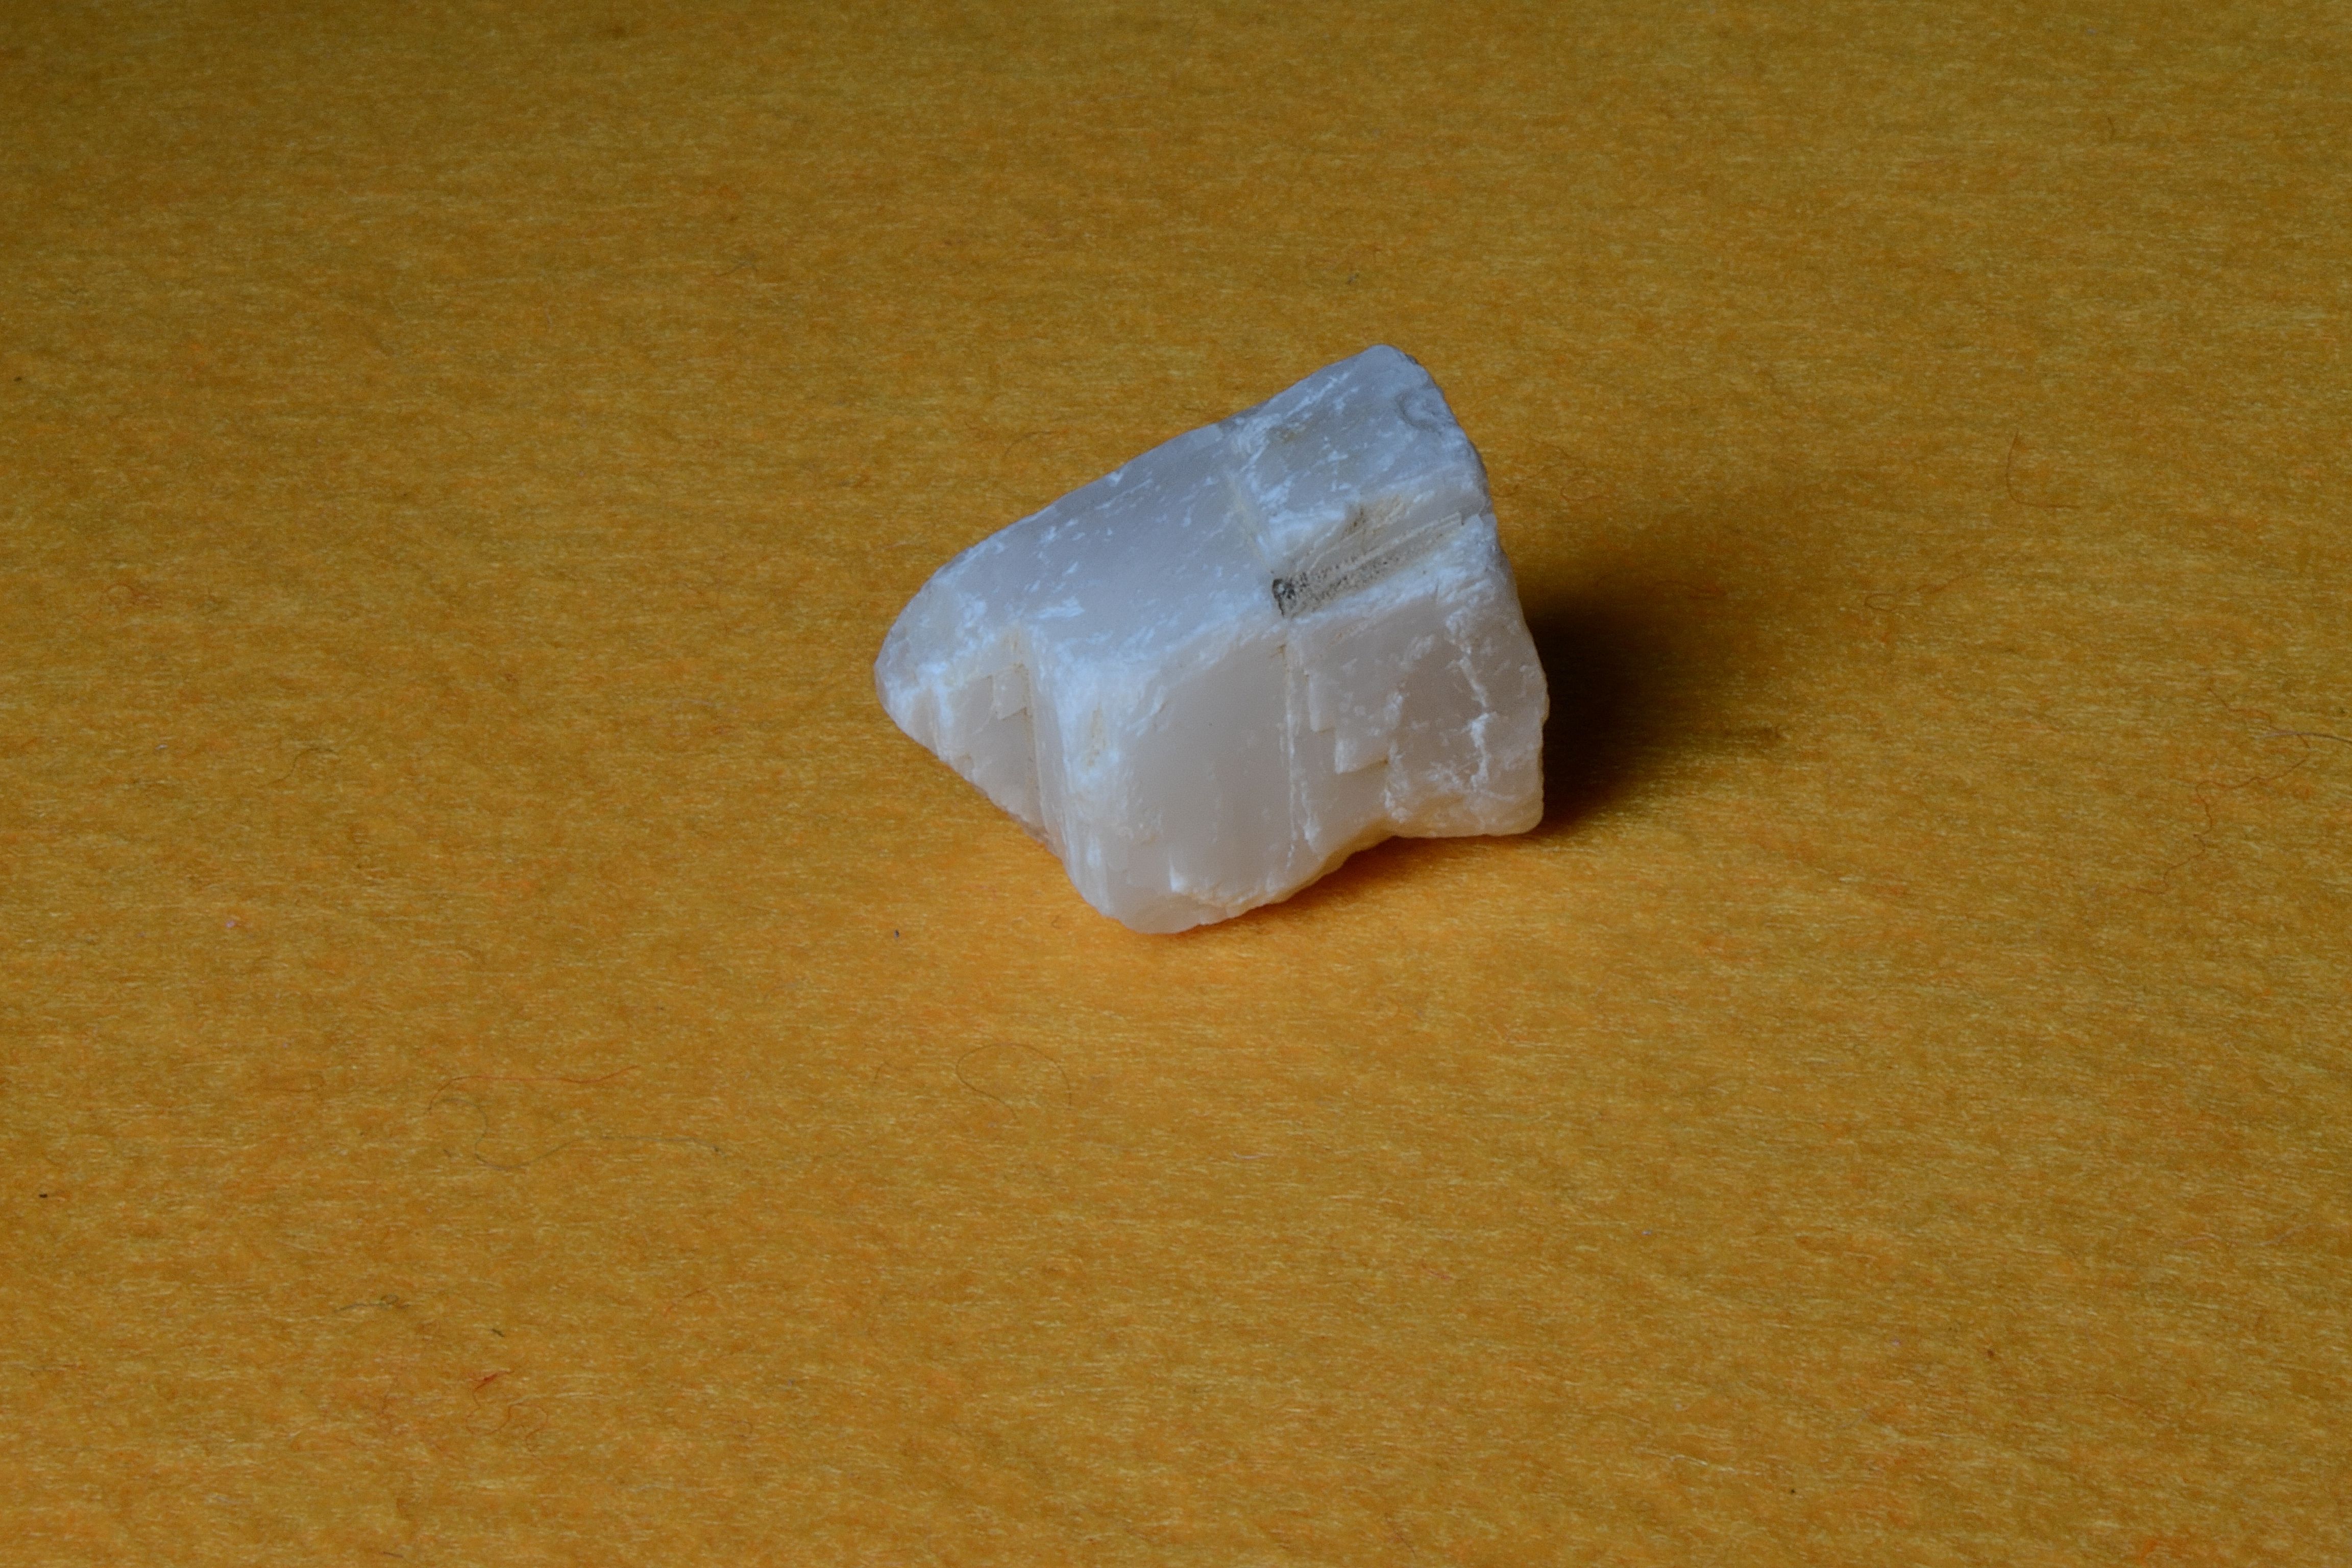
I will give an example what I mean when I am describing, that my reconstructed surfaces of all models are looking alway as pudding. A good example is the Calcit-Crystal (2 cm size), from which I took 167 pictures with a resolution
4608x3072 with my Nikon 3100 and an Macro Lens (80mm) which in in the lens library. The full unreduced mesh and pictures from Meshroom are used on the museums page (https://www.museum-zurholt.de/mnu-virtuelle-3d-modelle/mnu-3d-modell-calcit-kristall). But the surface does not show the nice crytal growth steps which the photographs are showing (attached). This behavior can be found on almost every rendered moldel. Why do I miss all the details in the surface.
May be it is helpful for you, that I do run Meshroom with the original camera photographs without changing any settings in Meshroom manually. It would be fine when you can give me any kind of strategy of improving the quality of the suface rendered.
Thank you.
Link to 3D-model:

David Cattermole
Sep 7, 2021, 8:35:34 PM9/7/21
to Hans-Georg Hettwer, AliceVision
Hello Hans-Georg,
Good luck! Let us know how it goes!
If the issue is caused by not enough details, or specular reflection highlights on the object on on the table, have you considered using a circular polarized lens filter to reduce the specular reflection and bring out more contrast/details?
Or if the table is reflective, simply use a matte object for the table. Reflective surfaces produce artifacts and errors for photogrammetry software.
Otherwise, the ideas Jim gave above seem very helpful. Often making sure the camera and lens settings do not change will allow you to lock down the lens distortion values (AKA lens calibration). Most importantly is the focus distance on the lens, and focal length (if using zoom lens - which I don't recommend, but you're using a macro lens anyway).
If your photo attached in your previous email is an example of the photos you're giving Meshroom, I'd suggest trying to fill the frame with the object more. I can see how such a small object will make that difficult, but if you can you'll likely get better details since there's more resolution used for the main object. The photo above has 90% of the image as the table top, so of your 4K photos, only a tiny amount is used for your subject.
Most often, shooting good photos are the most important part of getting good results from photogrammetry software. People tend to overlook that fact. All the fancy software features are great, and it's interesting to try and experiment, but the people I know tend to ensure they have good photos first and then use "default settings" in the photogrammetry software. Good photos means less time debugging and re-running the software later on.
David
To view this discussion on the web visit https://groups.google.com/d/msgid/alicevision/60f7f703-0f54-4742-a0c3-b77a49f99d40n%40googlegroups.com.
Hans-Georg Hettwer
Sep 8, 2021, 4:06:18 AM9/8/21
to AliceVision
Hello David,
thank you for your comments. With this in mind, I rezized my photographs to view 85% of the object and startet reconstruction run again.
But the result shows no improvement on the rendered surface.
I will now repeat shooting the object with a minimal distance within the next days and I will tell you about improvement.
Kind regards
Hans-Georg
Hans-Georg Hettwer
Sep 12, 2021, 11:05:32 AM9/12/21
to AliceVision
Hi David,
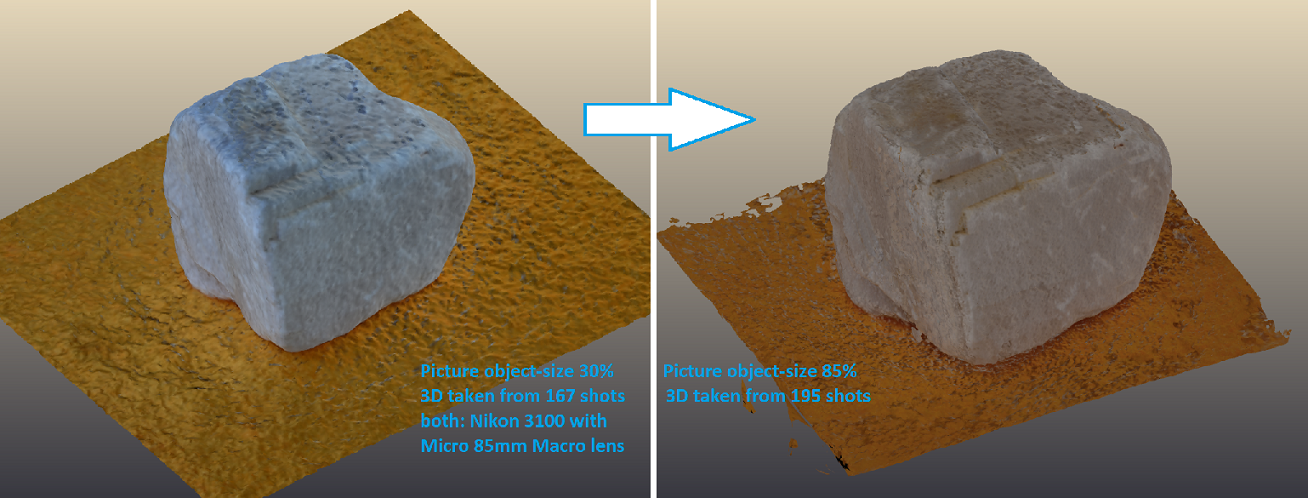
I just did a camera run with changed settings: object size changed from 30% to 85% picture filling (and a little more pictures taken), see below.
Worth noting that, with the improved rendering, the ontrary happens to the consumed file size: The OBJ-file did not grow, it shrinks (a little).
Thank you for all the comments which pushed me into the right direction.
Hans-Georg
Reply all
Reply to author
Forward
0 new messages