Import model files with Textures/Colors
500 views
Skip to first unread message

Sean Craft
Mar 22, 2015, 3:17:09 PM3/22/15
to vpytho...@googlegroups.com
So I know that we can import model files via .stl files into VPython. But this is limited to just shapes. Is there any way to export from, say Blender, a filetype that contains the shape and corresponding textures, and then import it into VPython, with the textures included?
Thanks,
Sean
Sean

Bruce Sherwood
Mar 22, 2015, 4:40:10 PM3/22/15
to vpytho...@googlegroups.com
I don't know whether anyone has done that, but nothing prevents you from writing a Python program to process the Blender file to extract the pieces you need.
--
You received this message because you are subscribed to the Google Groups "VPython-users" group.
To unsubscribe from this group and stop receiving emails from it, send an email to vpython-user...@googlegroups.com.
For more options, visit https://groups.google.com/d/optout.
Sean Craft
Apr 7, 2015, 2:28:51 PM4/7/15
to vpytho...@googlegroups.com
Hey Bruce,
I'm working on this project. I general, when we apply a texture to an object in 3-space, from a 2d image, we have to do it via UV Mapping. I have mapped 2d images to objects in VPython before, using the default mappings (spherical, cubic, rectangular, sign, etc), but in blender I have custom UV Mappings that I need to use for my faces object. I know how to take the .obj, .mtl, and .png files and extract the relevant information, but what I don't know how to do is apply specific sections of an image as texture to specific faces of a VPython faces object. Do I create a faces object for each face and then use one of the default mappings to apply a section of the image (which I would extract) as a texture to that specific face? And then group all of my faces object into one frame? Or is there a way to do custom UV mappings in VPython instead of the default ones, and then just use one faces object with all of my vertices in it, and apply the new texture to the entire object?
Thanks,
Sean
Sean Craft
Apr 7, 2015, 2:31:57 PM4/7/15
to vpytho...@googlegroups.com
Also, what would it take to get opacity working in the faces object?
Sean
Sean Craft
Apr 7, 2015, 3:16:16 PM4/7/15
to vpytho...@googlegroups.com
Bruce,
Also, I have written a short program that is similar to convert_stl, but it works on .obj files instead of .stl files. If you would like, I would like to contribute this in case someone wants an easy way to convert .obj files. Although, I might like to wait until I have worked it out to pull in the textures too after we figure this out. Right now it just pulls in the geometry.
Sean
Bruce Sherwood
Apr 7, 2015, 4:17:06 PM4/7/15
to vpytho...@googlegroups.com, John
Currently there isn't anything in classic VPython to do your own UV mapping. You might study the file site-packages/visual_common/materials.py and see whether you could modify it to do what you need to do.
To get opacity to work in a useful way with faces in classic VPython would require, in my opinion, a complete restructuring to use GPU rendering. Currently, with the relatively minor case of materials, all of the OpenGL operations are carried out in the CPU. One of the consequences is that the opacity scheme used in classic VPython is rather deeply flawed, because the depth-ordering (z-ordering) that is essential to implementing opacity is necessarily based on the z depth of the centers of the objects, not the z depth of each visible pixel of each object. It is for that reason not very difficult to construct scenes where the opacities are rendered incorrectly. Run the following program in classic VPython and carefully inspect the two intersecting slabs:from visual import *
scene.width = scene.height = 600
scene.background = color.gray(0.9)
box(pos=vector(0,0,0), opacity=1, size=vector(1,1,1), material=materials.wood)
sphere(pos=vector(0,0,.9), opacity=0.3, shininess=0, radius=0.2, color=color.green)
s = sphere(pos=vector(0.1,0,1.2), opacity=0.2, shininess=0, radius=0.1, color=color.cyan)
box(pos=s.pos, size=0.06*vector(1,1,1), color=color.gray(.2))
box(pos=vector(0,.5,1), color=color.red, opacity=0.2, size=vector(.05,.2,.8), axis=vector(1,0,1) )
box(pos=vector(0,.5,1), color=color.cyan, opacity=0.2, size=vector(.05,.2,.8), axis=vector(1,0,-1))
http://www.glowscript.org/#/user/GlowScriptDemos/folder/Examples/program/Transparency
Here is a technical description of the "depth-peeling" pixel-level opacity scheme implemented in the GPU for the GlowScript version of VPython.
http://www.glowscript.org/docs/GlowScriptDocs/technical.html
http://www.glowscript.org/docs/GlowScriptDocs/technical.html
In GlowScript VPython there currently is no faces object but there is a more possible scheme in which you create vertex objects and then create triangles or quads that reference those objects. And there is UV mapping. Here is the reference:
http://www.glowscript.org/docs/GlowScriptDocs/triangle.html
http://www.glowscript.org/docs/GlowScriptDocs/triangle.html
There is a third alternative, ivisual by John Coady, running in an IPython notebook (the newer version of IPython is called Jupyter), and it might suit your purposes, though due to being very busy with other matters I'm not completely up to date on whether ivisual already supports textures. The ivisual module runs in a standard Python environment, so one has access to all of the Python libraries, but the rendering in a notebook, in a browser, uses the GlowScript libraries. John, can you comment on this?
I'd be delighted to have your converter program to add to the Contributed section of vpython.org.

John
Apr 8, 2015, 1:04:04 PM4/8/15
to vpytho...@googlegroups.com, john...@shaw.ca
IVisual has not yet implemented support for textures or the faces object. I only implemented the objects where both objects existed VPython and Glowscript. The mapping of VPython faces objects to Glowscript triangles or quads hasn't been implemented in ivisual. This was one of the candidate projects for a student to work on in the summer. If someone wants to put try implementing this in ivisual then feel free to do so.
John
Sean Craft
Apr 8, 2015, 1:34:31 PM4/8/15
to vpytho...@googlegroups.com
My primary concern is being able to do my own UV mapping. In materials.py, I see that the data for the texture is being passed into raw_tx and then into a shader function, but I'm not certain what is doing what after that. I see some large python strings containing c code that are also passed into the shader function as a shader parameter, and it seems that they are the primary aspect responsible for both material properties and mapping, but I am not familiar with the code there (I am familiar with c syntax, just not the code you are using here). Any pointers or references you can help me to, that might help me work towards custom UV mapping?
Sean
Bruce Sherwood
Apr 8, 2015, 2:09:45 PM4/8/15
to vpytho...@googlegroups.com
It does look like C, but it isn't. It's "shader language", the language used to program the GPU. There's a lot to learn to be able to use shader language and work with the the graphical processing unit, but it's conceivable you could get somewhere incrementally, by making small changes to the existing shader programs in materials.py. Those programs are passed in source form to the GPU, which has a shader language compiler built into it.
Thanks, John, for the update. I have come to think that the right way forward isn't to beef up classic VPython but rather to speed up John's ivisual implementation, because it already uses GPU rendering (through the GlowScript graphics libraries) and it is written in pure Python rather than C++ (and John has already shown through a small experiment that Cython can be used to get a big speedup). John has quite sensibly begun ivisual by implementing those objects that are found in both classic VPython and the GlowScript libraries.Though I haven't looked carefully into the issue, it seems possible that faces and materials could be implemented in ivisual for legacy purposes, but it would also make sense to augment ivisual to permit use of the powerful vertex/triangle scheme of GlowScript.
Sean Craft
Apr 8, 2015, 5:44:25 PM4/8/15
to vpytho...@googlegroups.com
Right now I'm working on the incremental change to base VPython approach. You mentioned that we should work on the ivisual implementation, but I'm actually not familiar with ivisual. The reason I am pursuing this is because I am developing a small indie game in VPython and custom textures are necessary to that end - and on that topic, I don't know if I could port over what I already have written to a different framework.
I like the idea that Cython would be faster, but I am not sure it is worth the conversion process. The vertex/triangle scheme sounds useful (although I haven't used glowscript), and I feel like it would be more natural.
Bruce Sherwood
Apr 8, 2015, 6:25:23 PM4/8/15
to vpytho...@googlegroups.com
Perhaps I should say more about why I think ivisual is a more promising development target than classic VPython.
(1) Classic VPython is written in C++ which in itself limits the number of possible contributors. In the entire 15 year history of VPython only three people have worked extensively with the C++ code (David Scherer, Jonathan Brandmeyer, and me, and neither Scherer nor Brandmeyer is now involved), with a few more who have made useful but relatively small contributions. It seems likely that many more people could contribute if the code base were in Python, and John Coady has done a great job of making a pure Python implementation, though it needs to be speeded up, and John has shown good performance in a test case through the use of Cython. I would rather see us speed up a pure Python implementation than spend that time and energy on improving and extending old C++ code.
(2) Classic VPython uses CPU-based OpenGL, whereas ivisual and GlowScript use GPU-based WebGL. I find it hard to face the effort that would be required to convert classic VPython C++ code to use WebGL. If someone else wants to do this, great, but I myself am finding myself very reluctant to make this large investment instead of putting the effort elsewhere.(1) Classic VPython is written in C++ which in itself limits the number of possible contributors. In the entire 15 year history of VPython only three people have worked extensively with the C++ code (David Scherer, Jonathan Brandmeyer, and me, and neither Scherer nor Brandmeyer is now involved), with a few more who have made useful but relatively small contributions. It seems likely that many more people could contribute if the code base were in Python, and John Coady has done a great job of making a pure Python implementation, though it needs to be speeded up, and John has shown good performance in a test case through the use of Cython. I would rather see us speed up a pure Python implementation than spend that time and energy on improving and extending old C++ code.
Sean Craft
Apr 15, 2015, 1:02:51 AM4/15/15
to vpytho...@googlegroups.com
I can appreciate the benefit of ivisual/jupyter/glowscript and any framework that uses WebGL and GPU Rendering over CPU Rendering. The speedup from my limited tests is (as expected) incredible. However, since I don't have the time or skills to make any of these competitive with classic VPython in terms of coverage, and I need the coverage of classic VPython (especially considering that all of my rather large codebase for this project is in classic VPython, and I am on a tight schedule), I decided to try implementing custom UV Mapping in Classic VPython by changing materials.py. I met with no success in this, due to my limited knowledge of the inner working of VPython, and my lack of experience with GLSL.
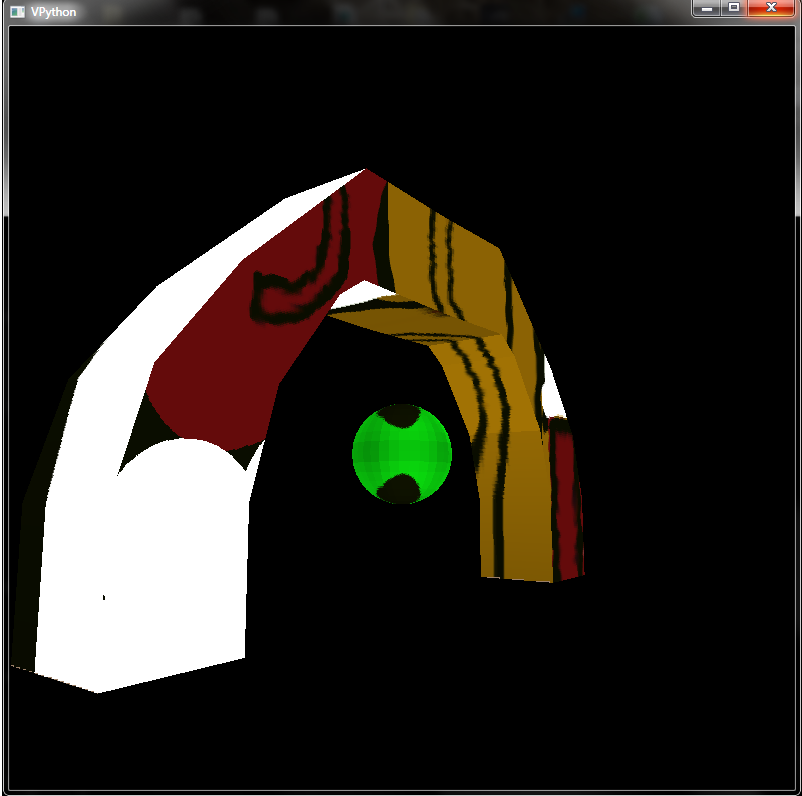
However, I have managed to create a fully-functional Wavefront .obj parser for VPython, as I mentioned I was working on before. Assuming that the .obj file is in the standard form and is accompanied by a .mtl file of the same name (they are companion files), convert_obj_multi.py will create a VPython Scene from the .obj and .mtl file, and even pull in the image files from their location on disk using PIL and apply them to the correct faces (not thoroughly tested, but preliminary tests look good) using a standard VPython "cubic" mapping. You can change the mapping of course, it won't matter that much since I can't get the correct mapping.
To get the correct mapping would require passing another parameter to our material, which would be a list of vectors representing texture coordinates on the given image files (data parameter to material). And of course, it would have to be processed, the image file would have to be parsed for specific points and broken up based on the texture coordinates, and then interpolation would have to be done between each edge (where an edge is a straight line drawn between any two texture coordinates of a given face). I'm a bit tired, that might not have made a lot of sense. But I know how it would have to be done, I just don't know how to make VPython and GLSL do what I need. Regardless, I am handing this off to any volunteers who want to take up the challenge, and if someone does decide to, please let me know how you do it.
Bruce, also, the convert_obj_multi.py file is pretty stable and useful, despite not getting the mapping right due to my limitations. So if you want to host it in your contributed programs, you are more than welcome to (assuming it goes out under a GNU Public Right licence so that everyone is free to use, modify, distribute, etc blah blah - I assume that is the case anyways, I just think it should stay open-source). But you may not want to, because it uses external libraries such as PIL, time, and os. Not sure if that matters to you. I'm using Python 2.7 of course.
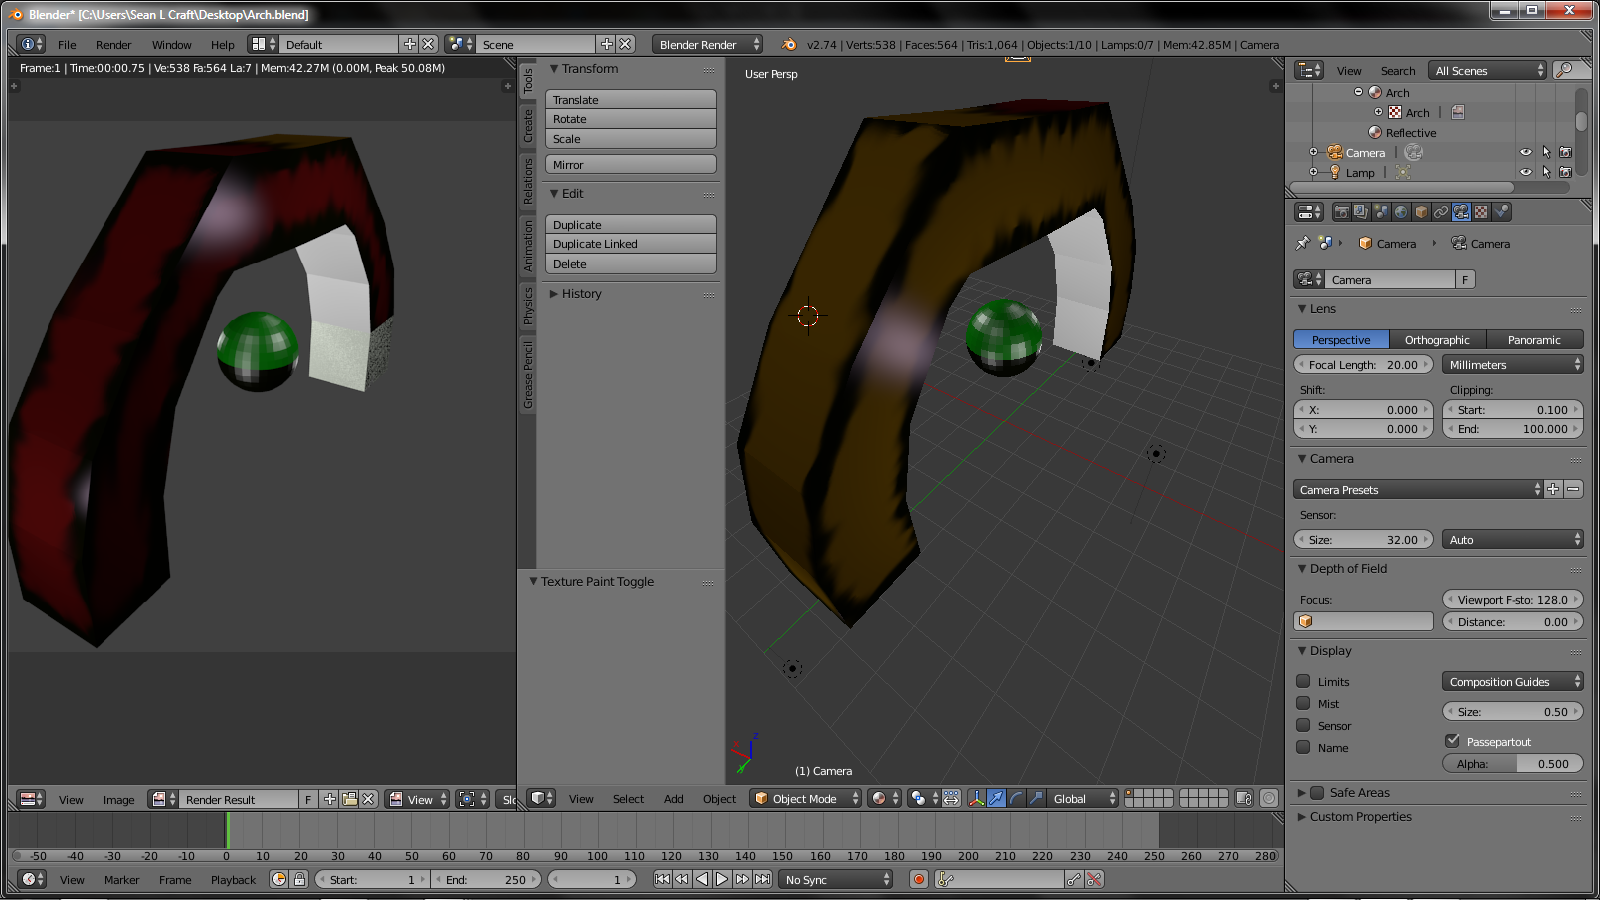
And so below I will provide sample screenshots of a scene I designed in Blender, how it is supposed to look (in Blender), and how VPython renders it. Feel free to ask me about how it works, but basically it creates an object that contains a list of objects, each of which is a faces object. All of the faces objects in this global object are in the same frame, and each one is derived from an object in the .obj file that was parsed (denoted in the .obj file as "o objectName", as per the standard).
Attached is:
convert_obj_multi.py source code
ArchSceneBlenderRender.png (This is how the scene is supposed to look)
ArchScenePythonCubicMapping.png (This is how it actually looks)
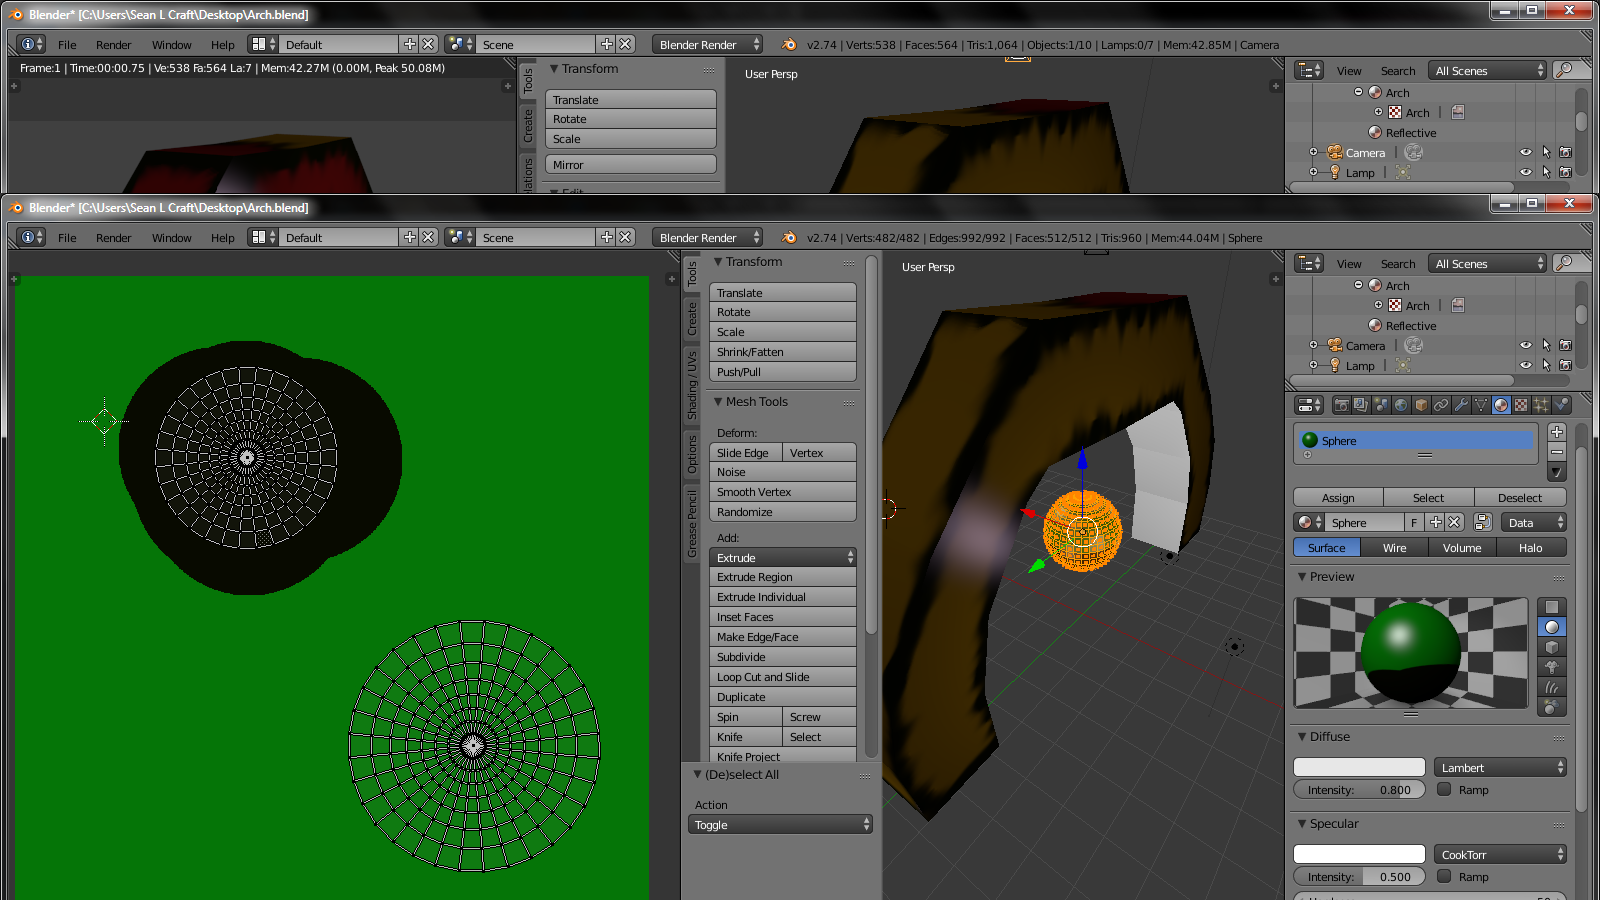
ArchUVUnwrap.png (This is the UV Mapping for the Arch in the scene)
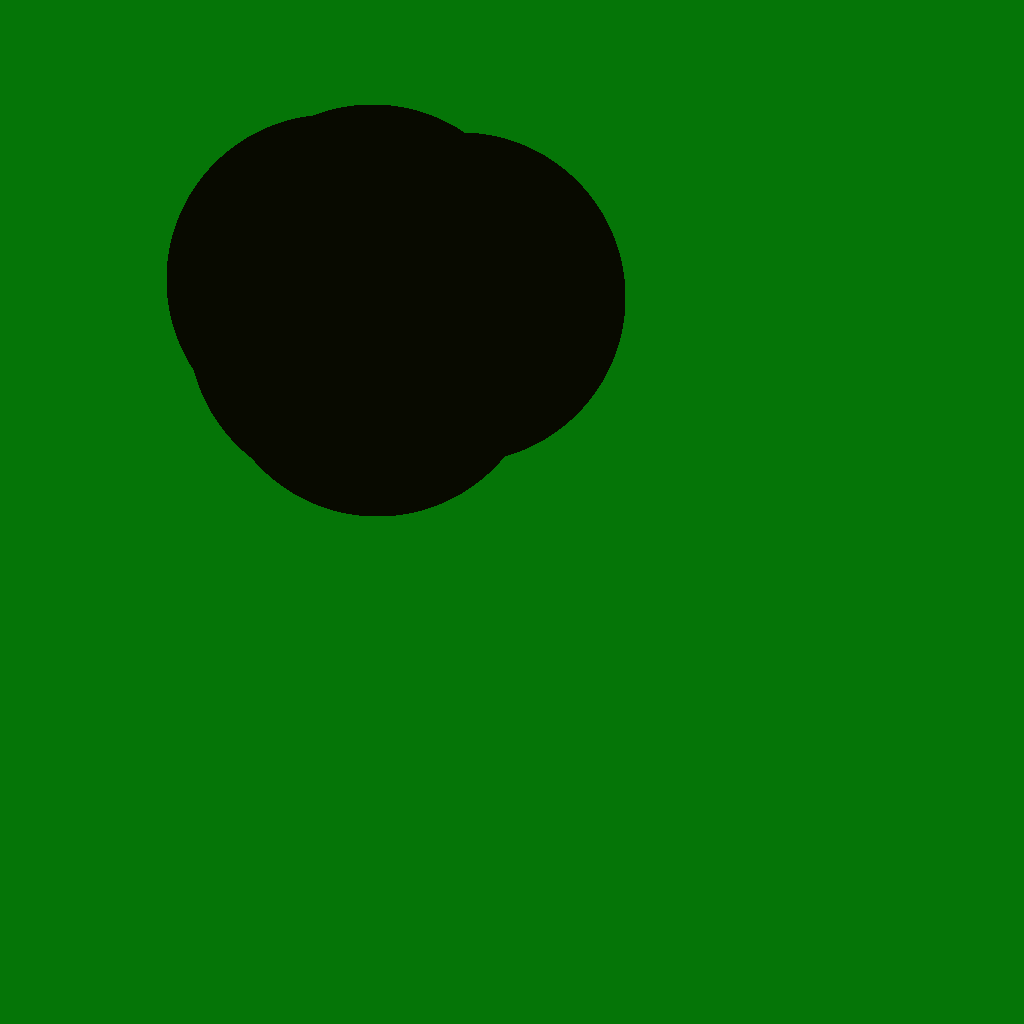
SphereUVUnwrap.png (The UV Mapping for the Sphere in the scene)
Arch.obj (The wavefront .obj file that I was focusing testing on)
Arch.mtl (The wavefront .mtl file)
Arch.png (The texture image file for the Arch)
Sphere.png (The texture image file for the Sphere)
Sean Craft
Apr 20, 2015, 4:26:54 PM4/20/15
to vpytho...@googlegroups.com
Bruce,
I updated the convert_obj_multi.py to be a bit more versatile, and to have documentation included within. So if you do want to put it up in contributed programs for others to use, then use this version. I just changed the name to be convert_obj.py as well. It works really well for blender exports, and I have seen several other programs that export in the correct format. Some don't, but if you need to use it with other formats of .obj, you can always convert the .obj to my standard format or modify convert_obj.py to suit your format (it would be easy to do either way, to anyone with basic knowledge of programming).
Next on my task list: I am going to create a library for importing animations from .obj files, and maybe try to build a framework for particle effects. We'll see how that goes.
Sean

Roberto Sartori
Oct 17, 2015, 1:35:59 PM10/17/15
to VPython-users
Very good work... How do you include images in VPython? I mean, i've my Blender project but when i try to see with VPython i've only white objects. I've some pngs but it doesn't use them...
Bruce Sherwood
Oct 17, 2015, 2:42:00 PM10/17/15
to vpytho...@googlegroups.com
In the VPython documentation see Work with 3D objects > Materials/Textures.
Reply all
Reply to author
Forward
0 new messages