The PandiClock Project
309 views
Skip to first unread message

SWISSNIXIE - Jonathan F.
Oct 10, 2016, 4:26:55 PM10/10/16
to neonixie-l
Hello Folks!
I got a little more time for my hobby the last days, so i started my new project.
As the name suggests, a PANDICON tube (ZM1200) is involved. I like to create a clock, that can display the current time, date, date&time, stop watch and timer! The 14 digits should be enough for this.
I decided to go into the steam-punk design, because the beautiful tube would not fit into a normal case or would not look so great. I mainly will use wood and copper/brass pipes. The tube will fit into custom 3D-Printed sockets and mounted into two 35mm pipe reductions. These will end in brass "wall plates", that i have modified. For decoration I'm planing to install some dead vacuum tubes and a larger neon bulb. In the T-Pieces i will integrate a "lever switch" for controls. To add a little protection to the tube, i will use a small 5mm copper pipe to build a cage over and behind the glass tube. Before final installation, i will polish and spray paint (clear) the copper to preserve it's shining color.
To get a better idea of my idea, I've attached a conceptional drawing (excuse the ugly hand drawing!)
The circuit board is also nearly complete, i just have to solder the through-hole parts. The tube is driven by HV513 Drivers, because they can drive anode and cathode. Atmega328 and DS3231 will do the rest! :)
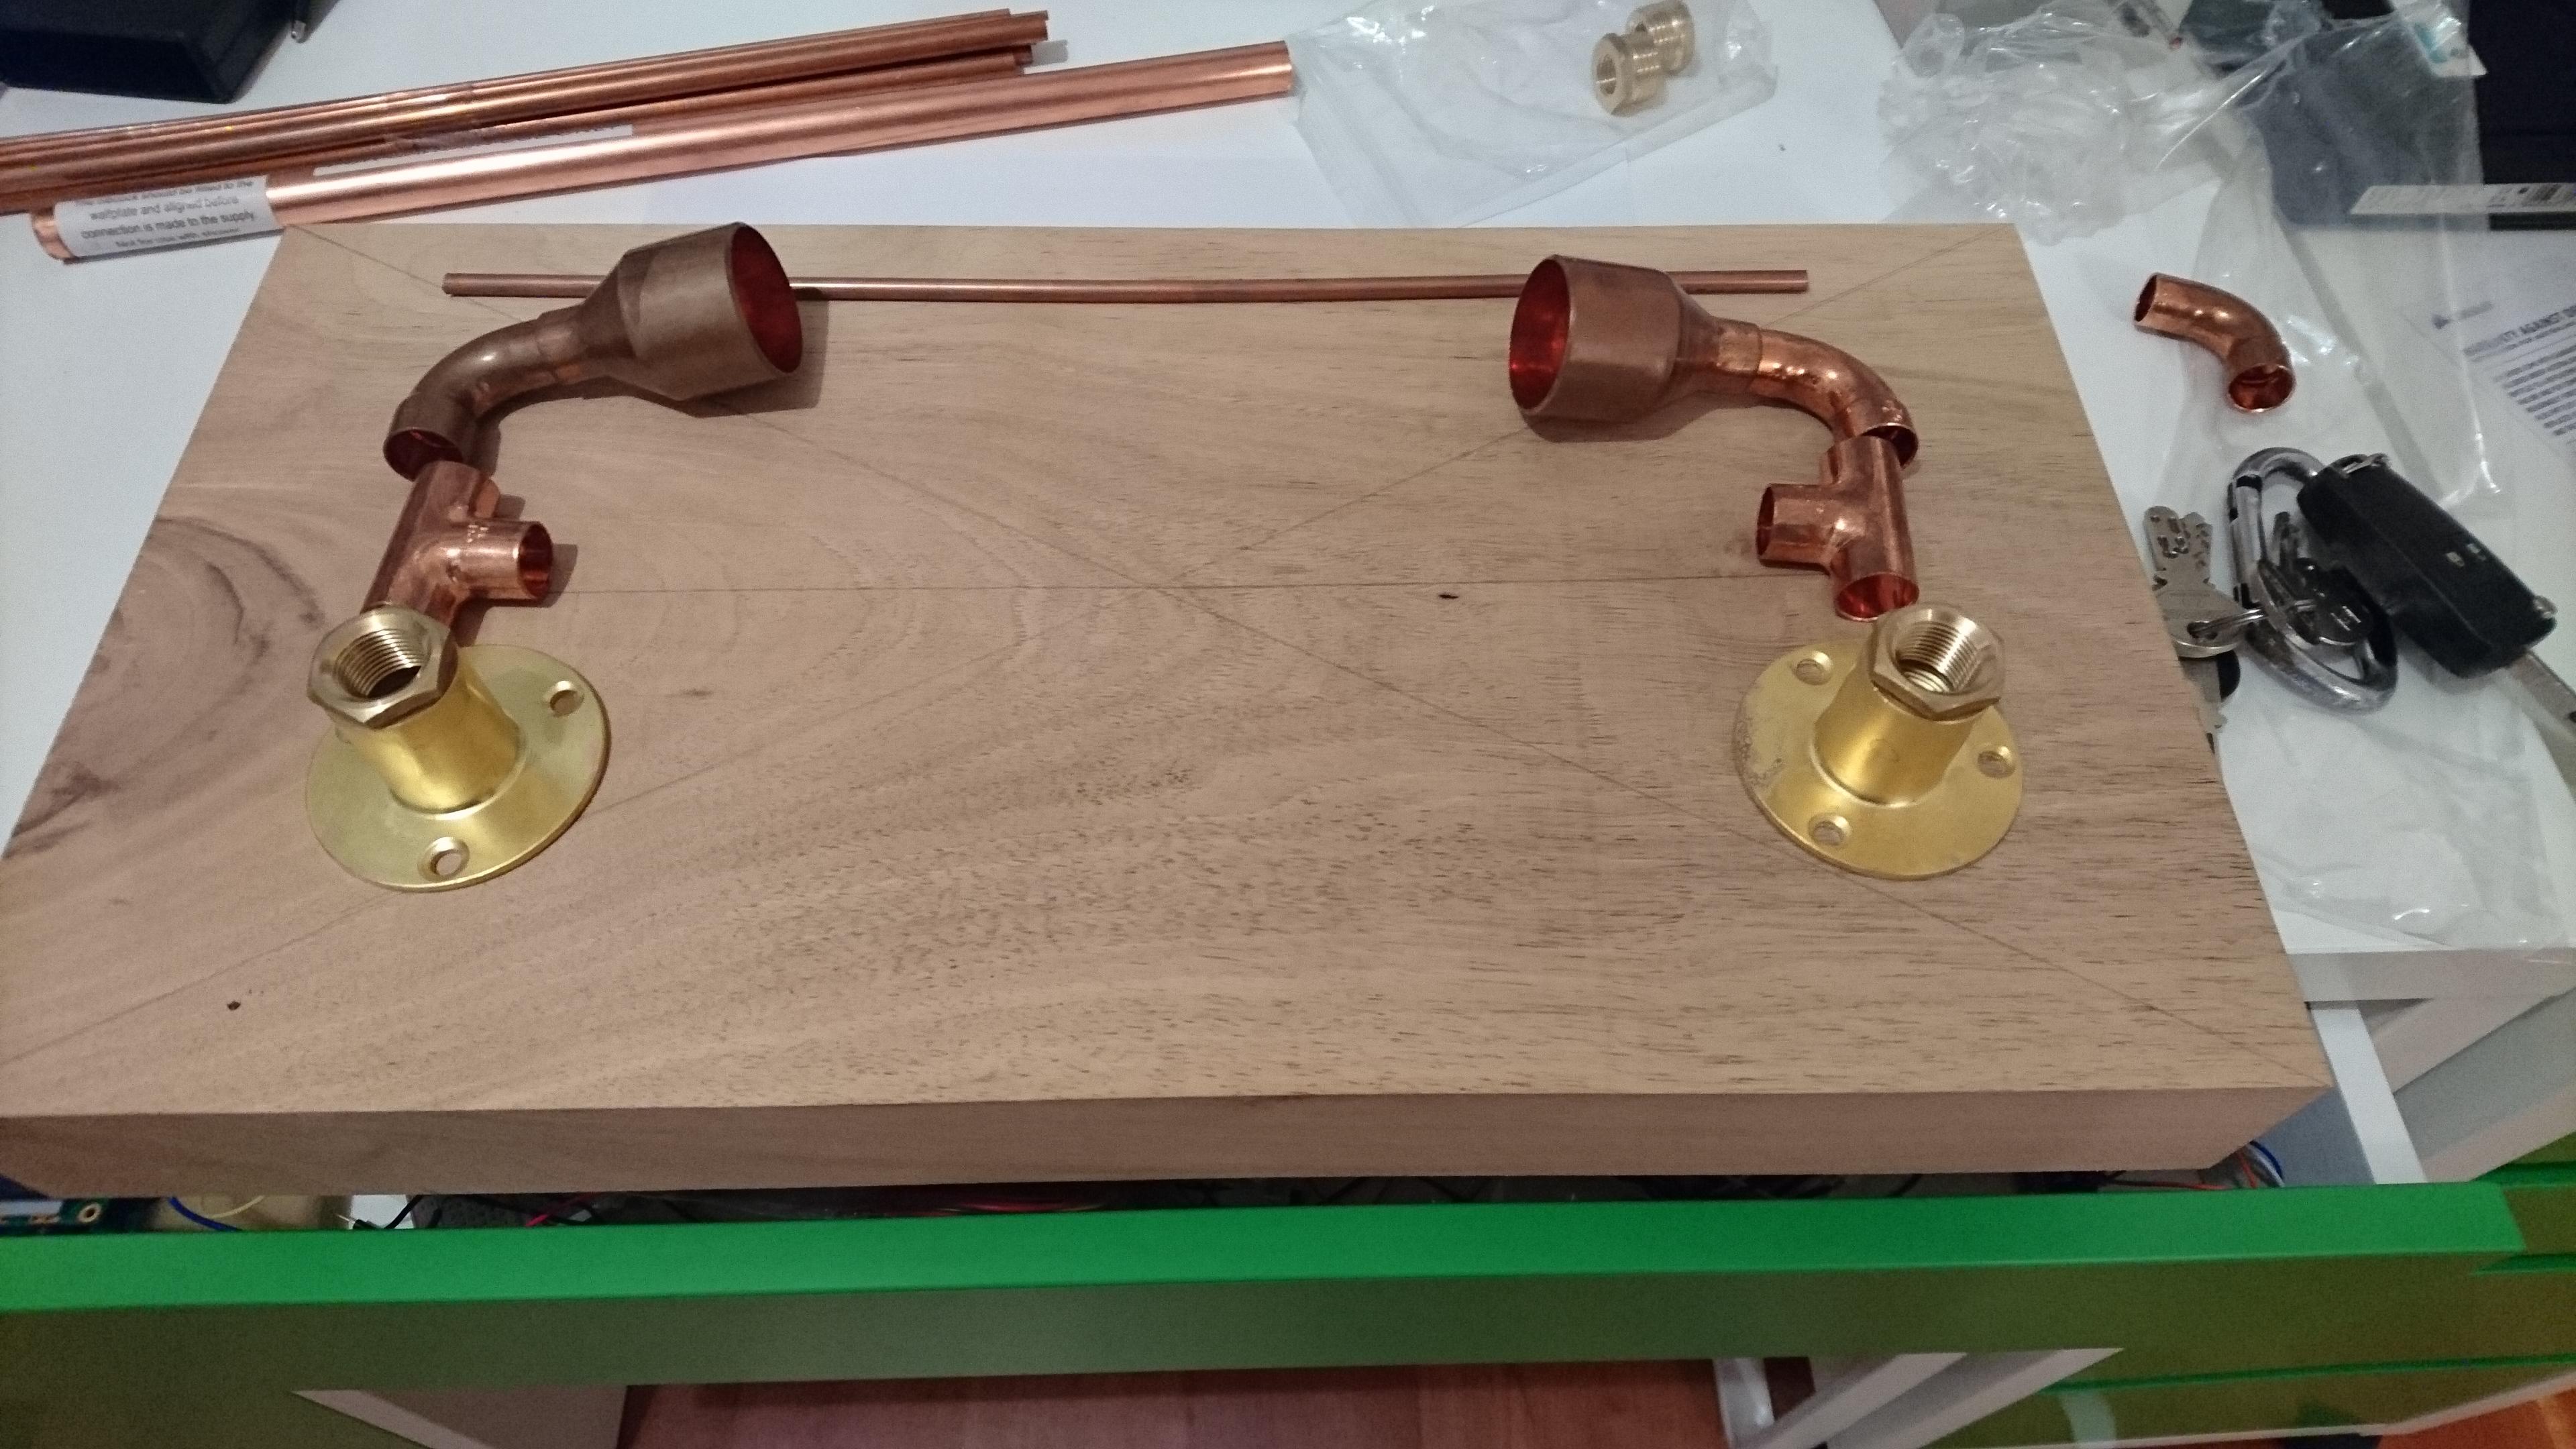
I also got a lot of different copper tubing and connections for practicing soldering. The piece of wood also has been chosen. See the first pics attached!
Since I'm a total newbie to steampunk i will have to try some things and maybe someone can give me a few tipps and tricks!
What do you think about the project? Any ideas what i could add or change?
I will update this topic with future status if you're interested.
I got a little more time for my hobby the last days, so i started my new project.
As the name suggests, a PANDICON tube (ZM1200) is involved. I like to create a clock, that can display the current time, date, date&time, stop watch and timer! The 14 digits should be enough for this.
I decided to go into the steam-punk design, because the beautiful tube would not fit into a normal case or would not look so great. I mainly will use wood and copper/brass pipes. The tube will fit into custom 3D-Printed sockets and mounted into two 35mm pipe reductions. These will end in brass "wall plates", that i have modified. For decoration I'm planing to install some dead vacuum tubes and a larger neon bulb. In the T-Pieces i will integrate a "lever switch" for controls. To add a little protection to the tube, i will use a small 5mm copper pipe to build a cage over and behind the glass tube. Before final installation, i will polish and spray paint (clear) the copper to preserve it's shining color.
To get a better idea of my idea, I've attached a conceptional drawing (excuse the ugly hand drawing!)
The circuit board is also nearly complete, i just have to solder the through-hole parts. The tube is driven by HV513 Drivers, because they can drive anode and cathode. Atmega328 and DS3231 will do the rest! :)
I also got a lot of different copper tubing and connections for practicing soldering. The piece of wood also has been chosen. See the first pics attached!
Since I'm a total newbie to steampunk i will have to try some things and maybe someone can give me a few tipps and tricks!
What do you think about the project? Any ideas what i could add or change?
I will update this topic with future status if you're interested.

Paul Parry
Oct 11, 2016, 3:59:12 AM10/11/16
to neonixie-l
I think that is a super idea for a Steampunk project, and I'm sure I can give you a couple of ideas or pointers on the SP detailing if you want any help.
Best wishes,
Paul

Roddy Scott
Oct 13, 2016, 5:26:28 AM10/13/16
to neonixie-l
A man after my own heart! I work from sketches too until I finalise a design. Sometimes the sketch is all that the clock is made from as I am lax in detailing projects.
I like working with suspended displays, yours looks like it will be a good one. Brass and copper go with Nixies like cheese on toast.
Steampunk always allows you to think out of the box and get creative as there are so many options when turning a though into reality.
Keep us all posted on your progress.
Roddy Scott
Oct 13, 2016, 5:33:42 AM10/13/16
to neonixie-l
I forgot to add this.
For gas soldering of copper fittings I made up a fire proof station from 25mm vermiculite the material that is used to insulate walls from multi fuel stoves. I made two plates about 200mm square and screwed them together with long wood screws to make a 90 degree join. I used the off cuts to level components being soldered together.
.

GastonP
Oct 14, 2016, 8:46:25 AM10/14/16
to neonixie-l
Very nice idea for a nice and scarce tube!
Just be careful not to exert flexion or torsion forces on the tube when mounted, as that will eventually lead to cracks and pressure loss.
My 0.02.
Gaston
Just be careful not to exert flexion or torsion forces on the tube when mounted, as that will eventually lead to cracks and pressure loss.
My 0.02.
Gaston
SWISSNIXIE - Jonathan F.
Oct 18, 2016, 12:13:15 PM10/18/16
to neonixie-l
Thanks for your answers! Im currently looking into steampunkt techniques. I really want to use a few fancy engraved metal plates, but they are terrible expensive.
Update on work:
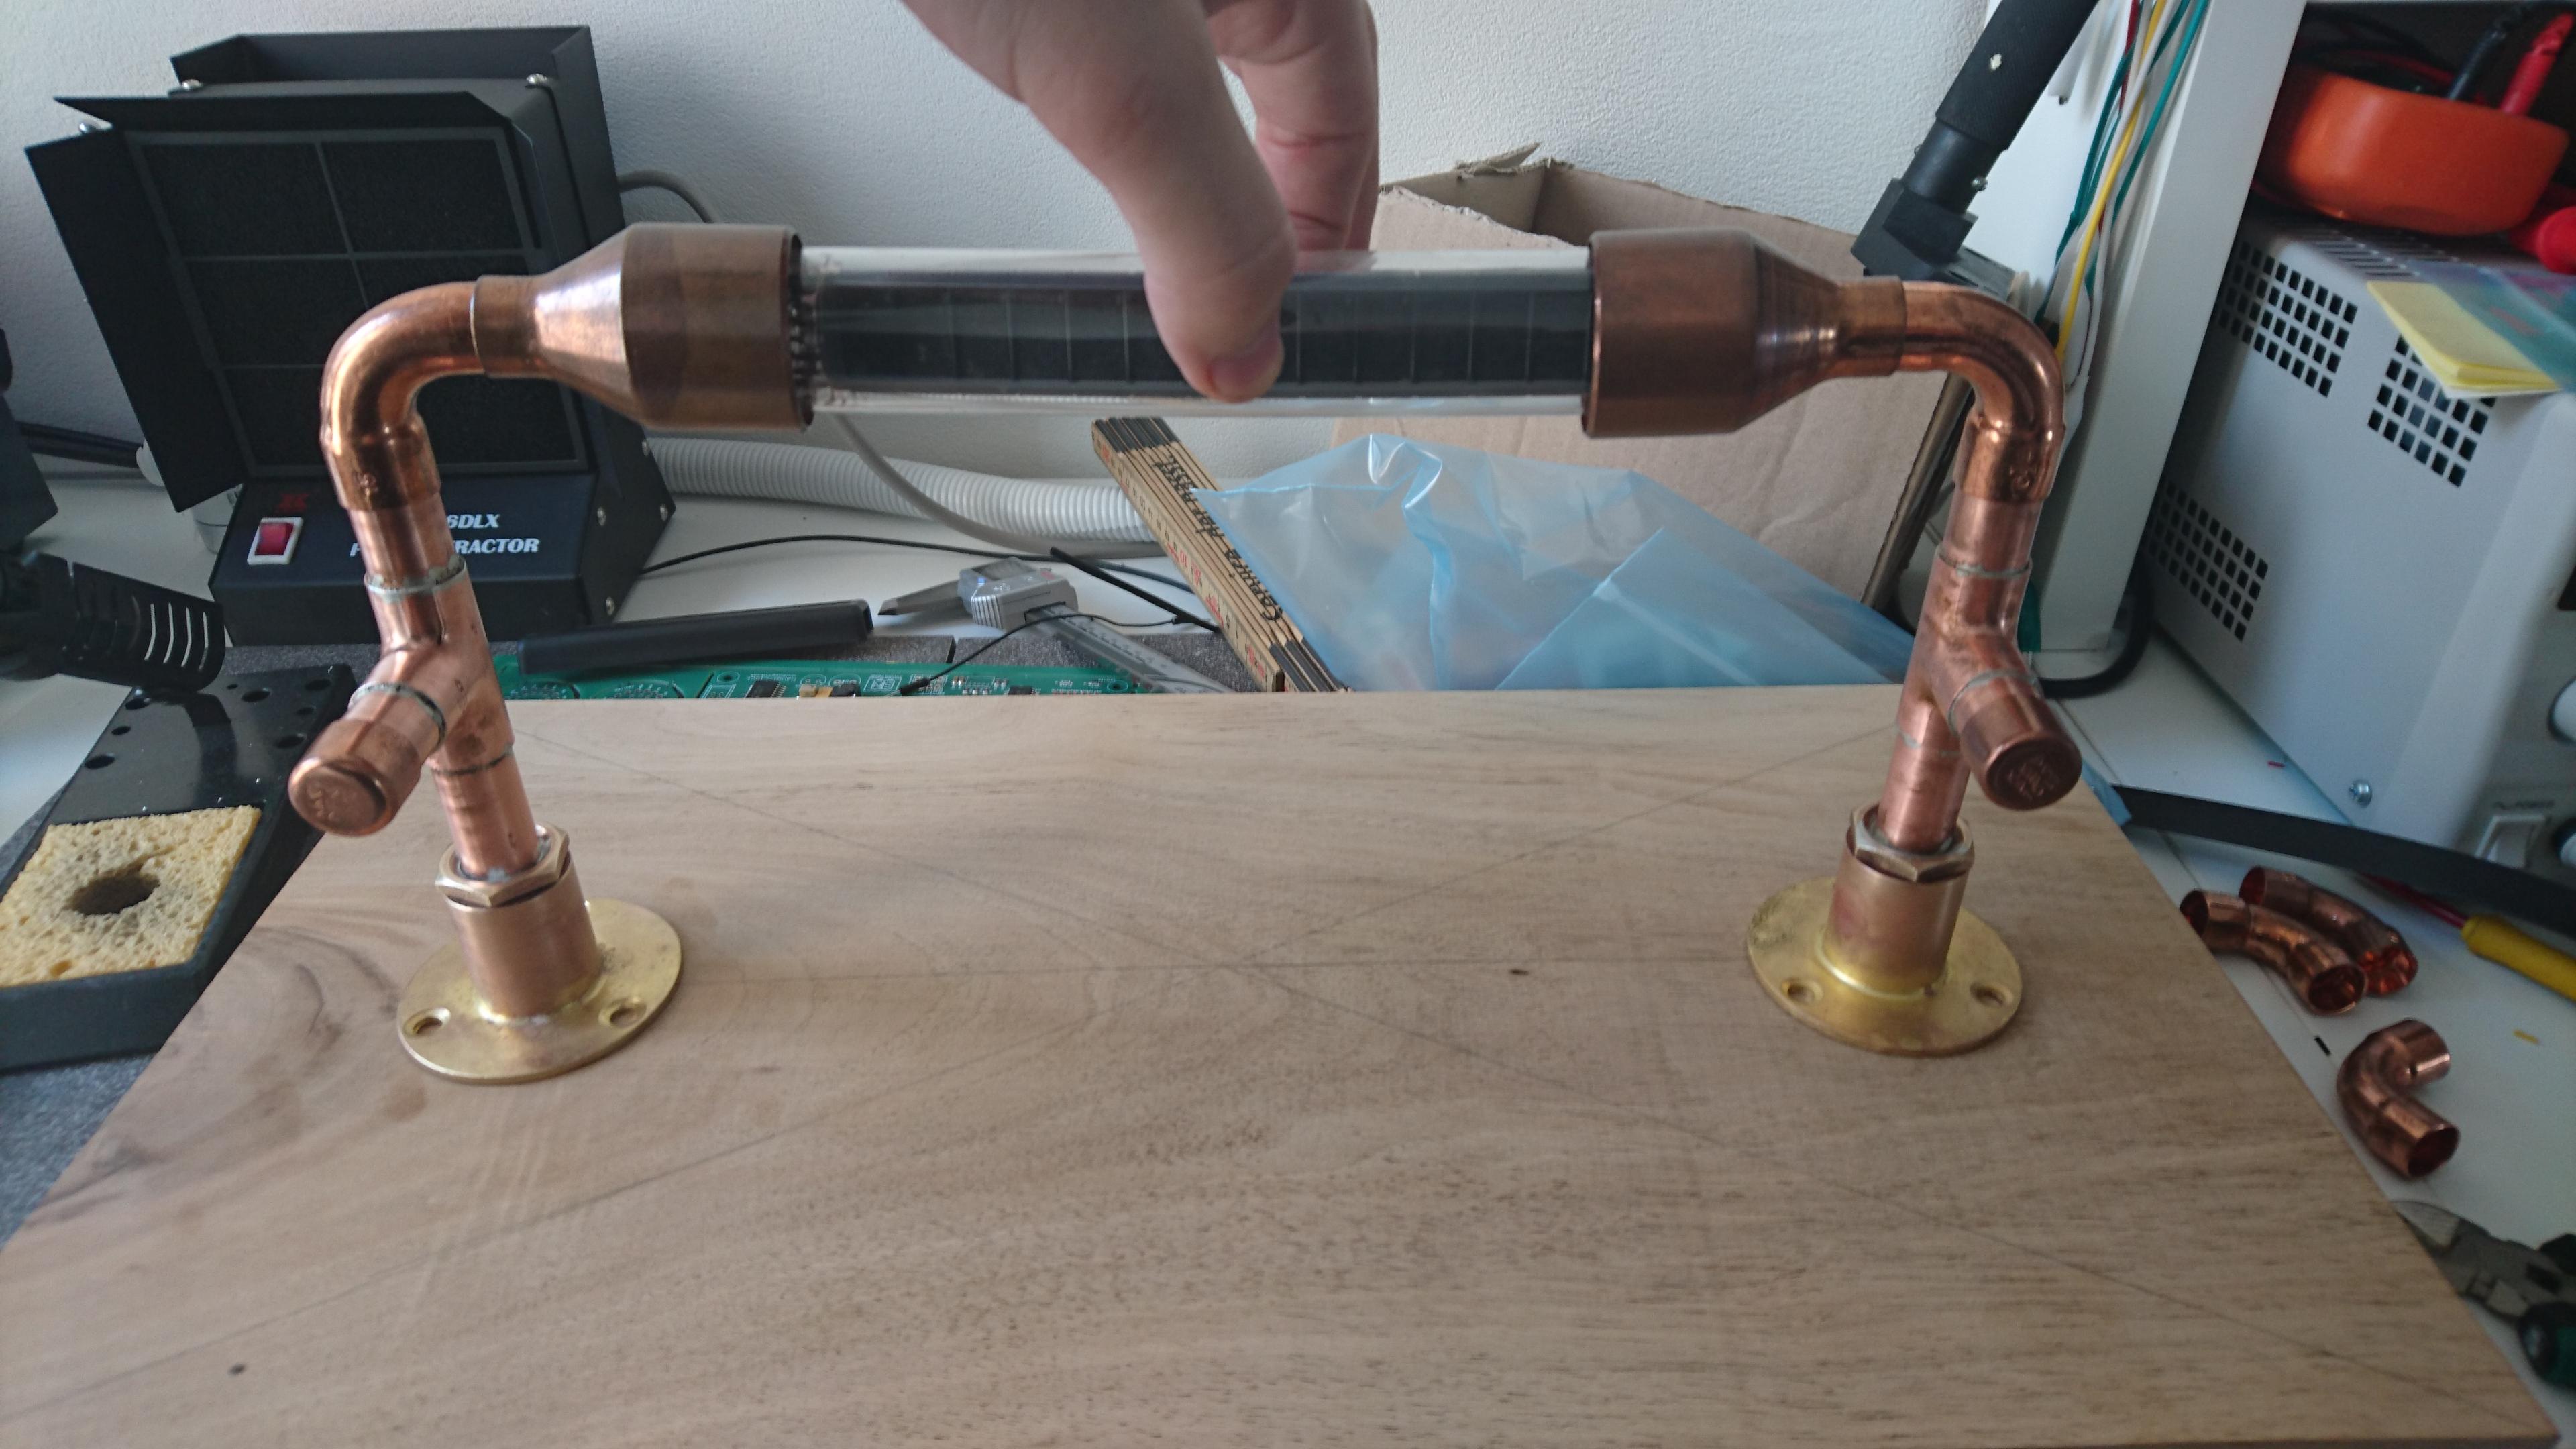
I have soldered some parts of the tube holder, see images attached.
Also you can see how the tube will sit in there.
For the tube i want to use a rubber socket, if i can find someone who can print 3D rubber, if not, i will use the standart 3D print material.
Update on work:
I have soldered some parts of the tube holder, see images attached.
Also you can see how the tube will sit in there.
For the tube i want to use a rubber socket, if i can find someone who can print 3D rubber, if not, i will use the standart 3D print material.
Roddy Scott
Oct 18, 2016, 4:34:15 PM10/18/16
to neonixie-l
Hi Jonathan,
There is a solution called Liver of Sulphate which I have used on Steampunk items. It gives a dark patina to copper and brass to make an antique effect. You can control it by the amount of time the solution is on themetal and also by using wire wool to rub through it to get great aging effects. You can see an example of this in effect at Paul Parry's Bad Dog Design DIY Gallery.
Roddy
GastonP
Oct 19, 2016, 10:30:14 AM10/19/16
to neonixie-l
Ninjaflex (it's just one of the brands) or other flexible materials are pretty common and not very difficult to work with.
Do you already have a socket design in STL or SCAD format?
Gastón
Do you already have a socket design in STL or SCAD format?
Gastón

Instrument Resources of America
Oct 19, 2016, 4:27:32 PM10/19/16
to neoni...@googlegroups.com
Suggestion. If you would like to get away from seeing the solder
next time, try soldering from the 'inside'. You can also do the
following, drill a small hole in the outside piece of copper in
the area where the pieces will fit together, assemble the pieces
together, and then apply the solder through that hole. Ira.
--
You received this message because you are subscribed to the Google Groups "neonixie-l" group.
To unsubscribe from this group and stop receiving emails from it, send an email to neonixie-l+...@googlegroups.com.
To post to this group, send email to neoni...@googlegroups.com.
To view this discussion on the web, visit https://groups.google.com/d/msgid/neonixie-l/ee71646b-a89a-49ba-bdc9-d12181fba015%40googlegroups.com.
For more options, visit https://groups.google.com/d/optout.
SWISSNIXIE - Jonathan F.
Nov 5, 2016, 11:57:21 AM11/5/16
to neonixie-l
UPDATE:
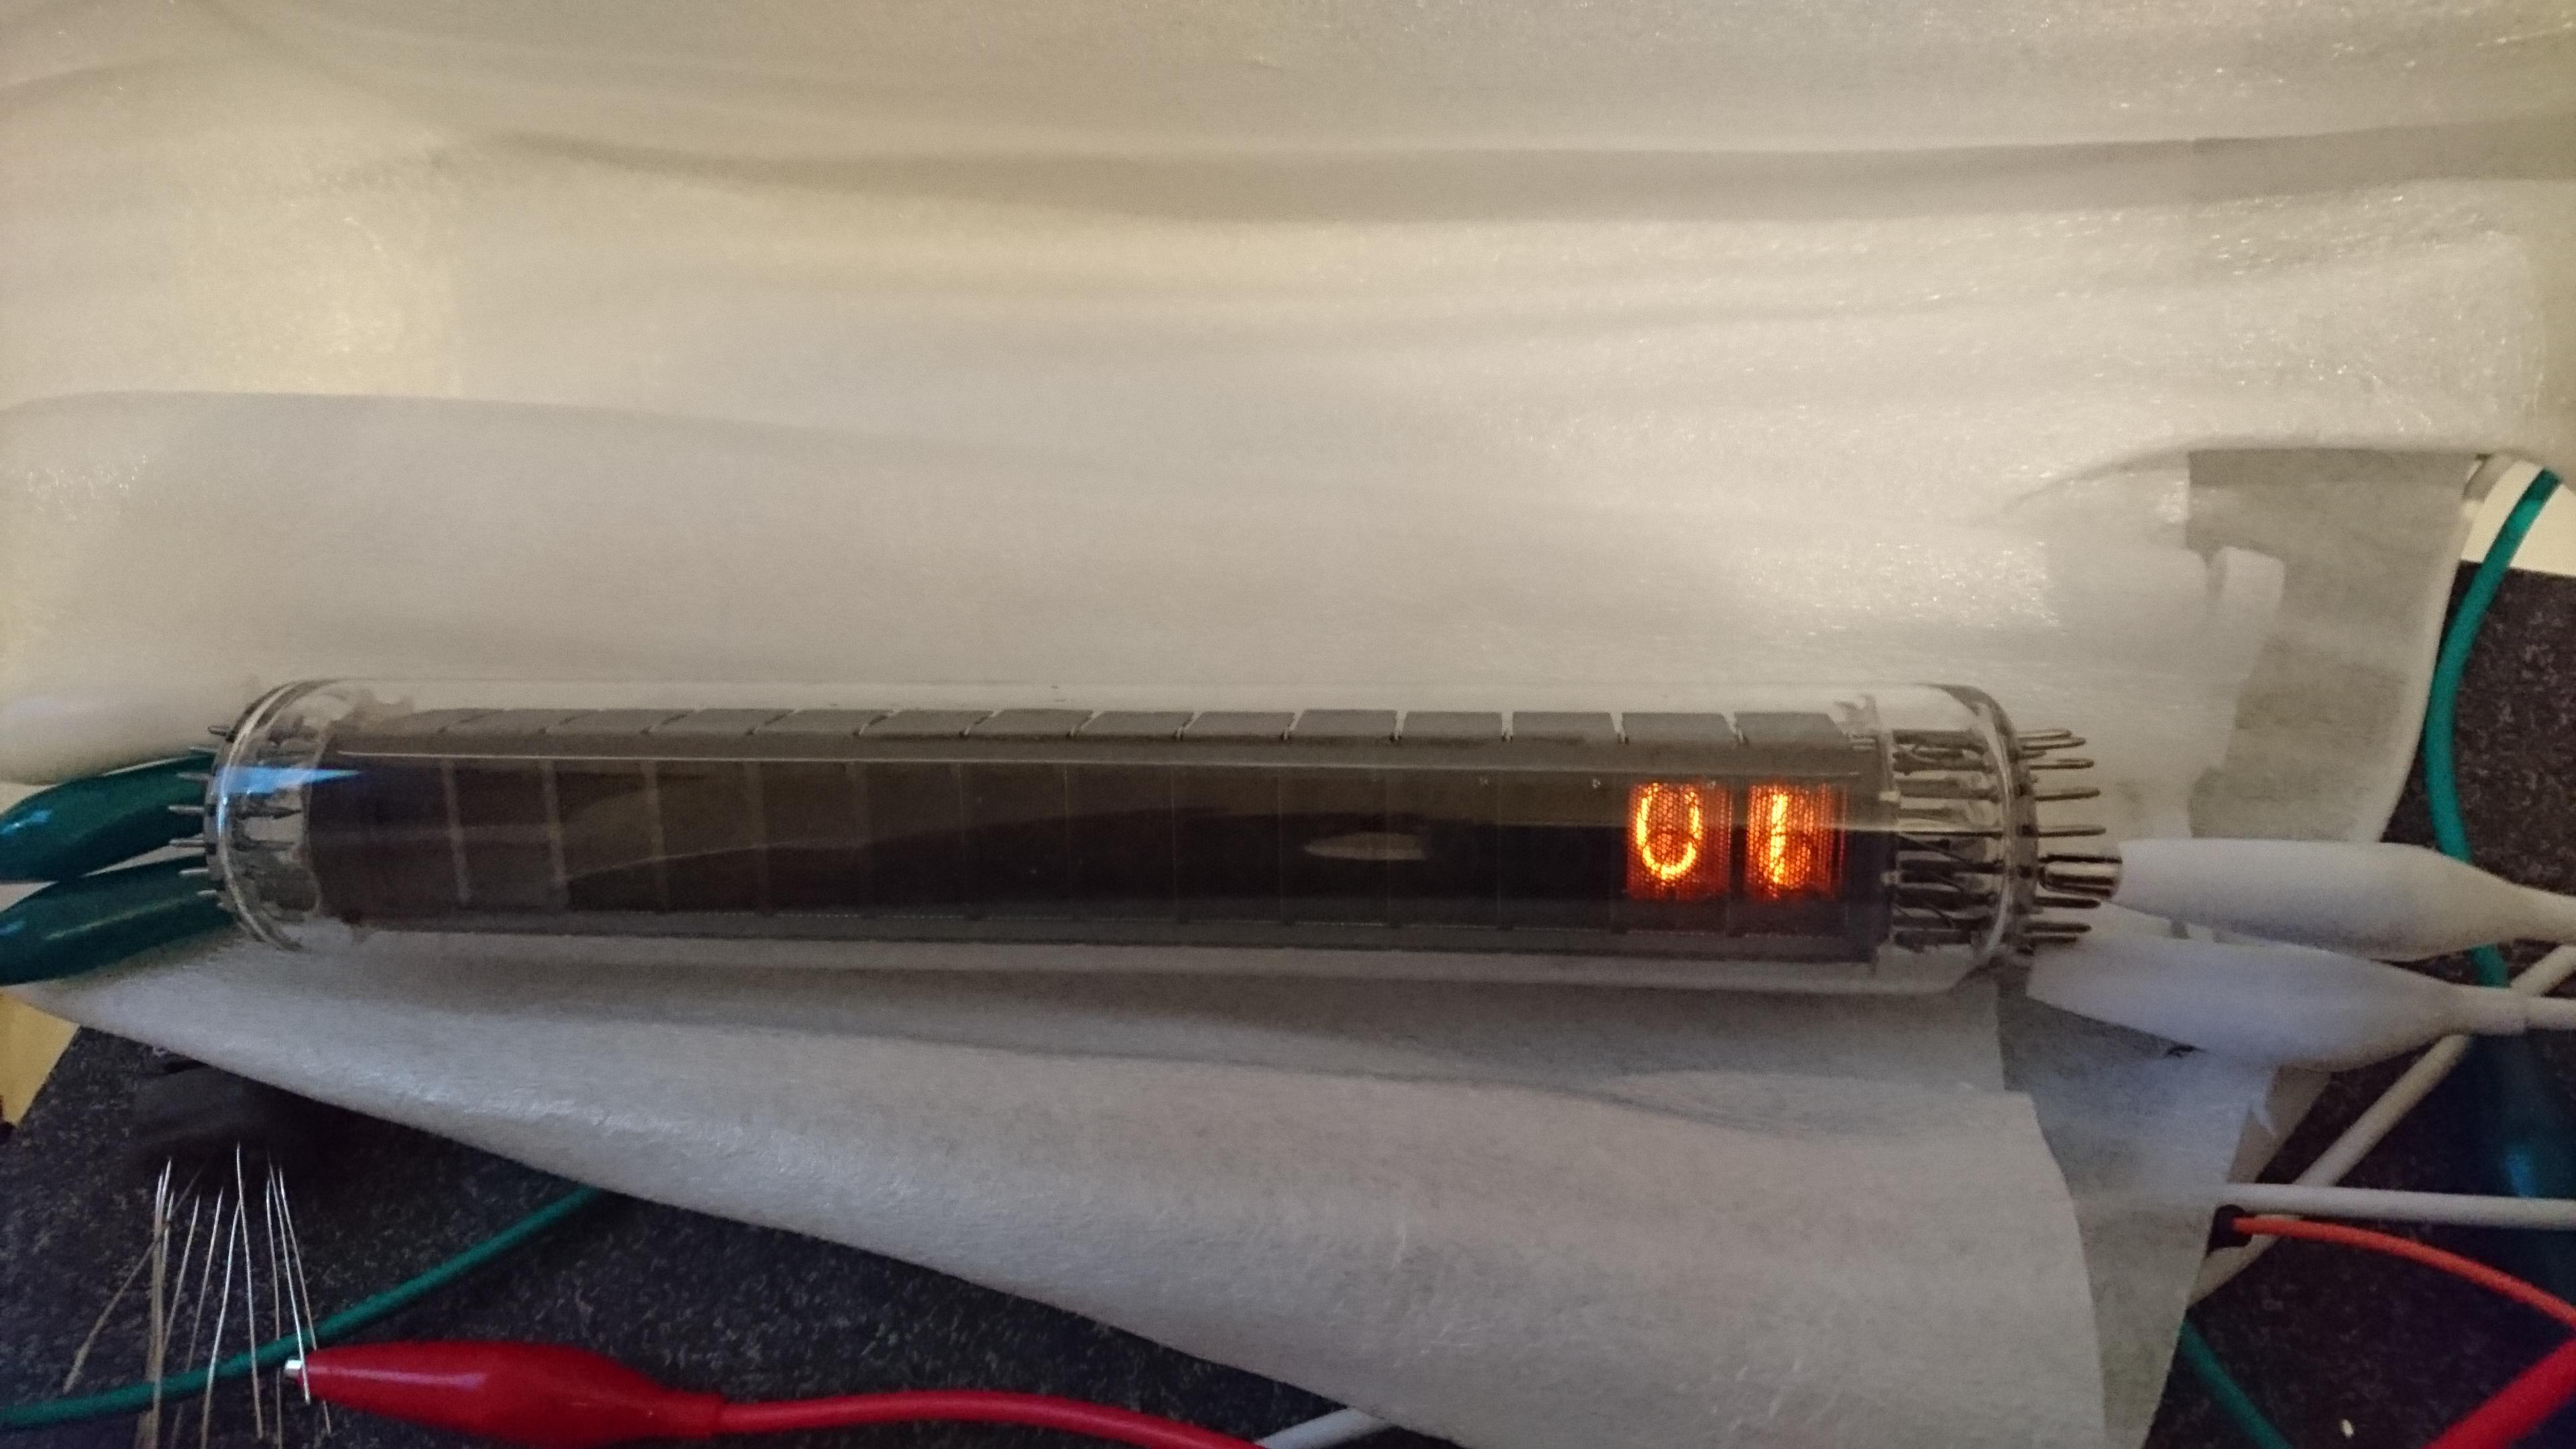
I was assembling an testing the electronic parts, and creating the main multiplex function in code.
Here is a image from a quick, successful test with the tube! Now i can really start making all the other stuff, because i know now that the tube works nicely!
No i don't have a model in that file, but im working on a model in .dwg
Than i have to find someone who can print 3D rubber. Another Idea i had, is making the socket out of silicone/latex type, this could be filled in a cast and then let it try.

Jonathan Peakall
Nov 5, 2016, 5:34:51 PM11/5/16
to neoni...@googlegroups.com
Dang. Those tubes are so cool. Maybe someday I'll find one! They don't
seem to come up often. Anyone have one for sale?
Jonathan
seem to come up often. Anyone have one for sale?
Jonathan
GastonP
Nov 6, 2016, 1:07:28 PM11/6/16
to neonixie-l
No need to use rubber (there is no 3D rubber). The current flexible filaments should be enough for what you intend to do. You will need a good design, though. A 100% fill design would not work, and you have to bear in mind that the soldering must be a really quick job with those materials.
Another option could be to use standard stock of rubber/latex tubing, make the holes to fit the pins and pass them through.
Another option could be to use standard stock of rubber/latex tubing, make the holes to fit the pins and pass them through.

David Forbes
Nov 6, 2016, 1:23:17 PM11/6/16
to neoni...@googlegroups.com
A laser cutter can make a 3-layer stack of wood that would provide good
support for old-fashioned tube socket pins. The top layer has a small
round hole for each pin, the middle layer has a larger hole to hold each
socket fork, and the bottom layer has a slot for each pin's solder tab.
--
David Forbes, Tucson AZ
support for old-fashioned tube socket pins. The top layer has a small
round hole for each pin, the middle layer has a larger hole to hold each
socket fork, and the bottom layer has a slot for each pin's solder tab.
David Forbes, Tucson AZ
GastonP
Nov 7, 2016, 10:18:39 PM11/7/16
to neonixie-l
Well, I remember old tube sockets made of socket pins sandwiched between two thick and varnished cardboard plates :)
Some (marginally) better ones were made of thin pertinax instead of cardboard.
Some (marginally) better ones were made of thin pertinax instead of cardboard.
SWISSNIXIE - Jonathan F.
Nov 23, 2016, 1:16:11 PM11/23/16
to neonixie-l
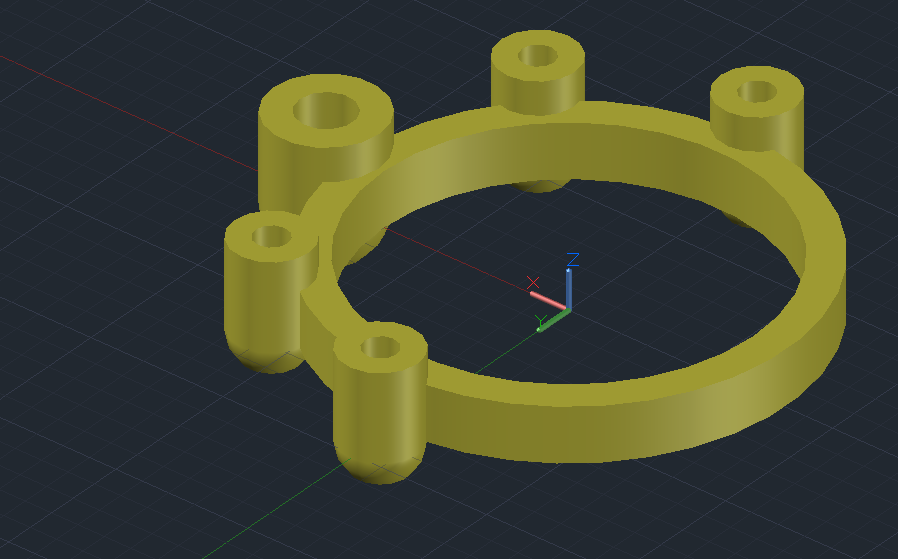
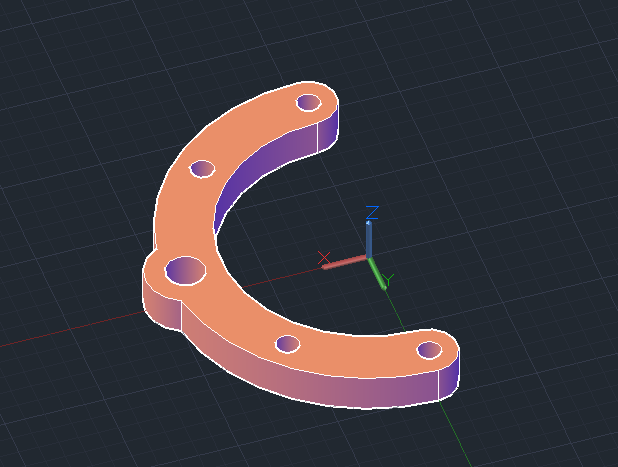
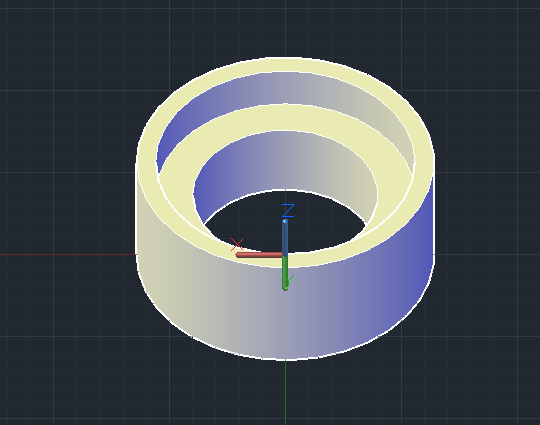
I have made drawings to 3D print:
tubeHolder x2
This will go inside a 32mm Copper Pipe and hold the pcb socket in it, the pcb socket will be glued in with this black elastic glue
pipeHolder1 x2
this part will go on the outside of a 32mm Copper Pipe and hold 3 and 5mm Copper Pipes that will cover the top and in the back
pipeHolder2
this part will go along the small Copper Pipes to hold them together and in form
i will made them out of withe 3D Print material and then paint them either in copper or brass to make them look "genuine"
SWISSNIXIE - Jonathan F.
Dec 20, 2016, 1:38:03 PM12/20/16
to neonixie-l
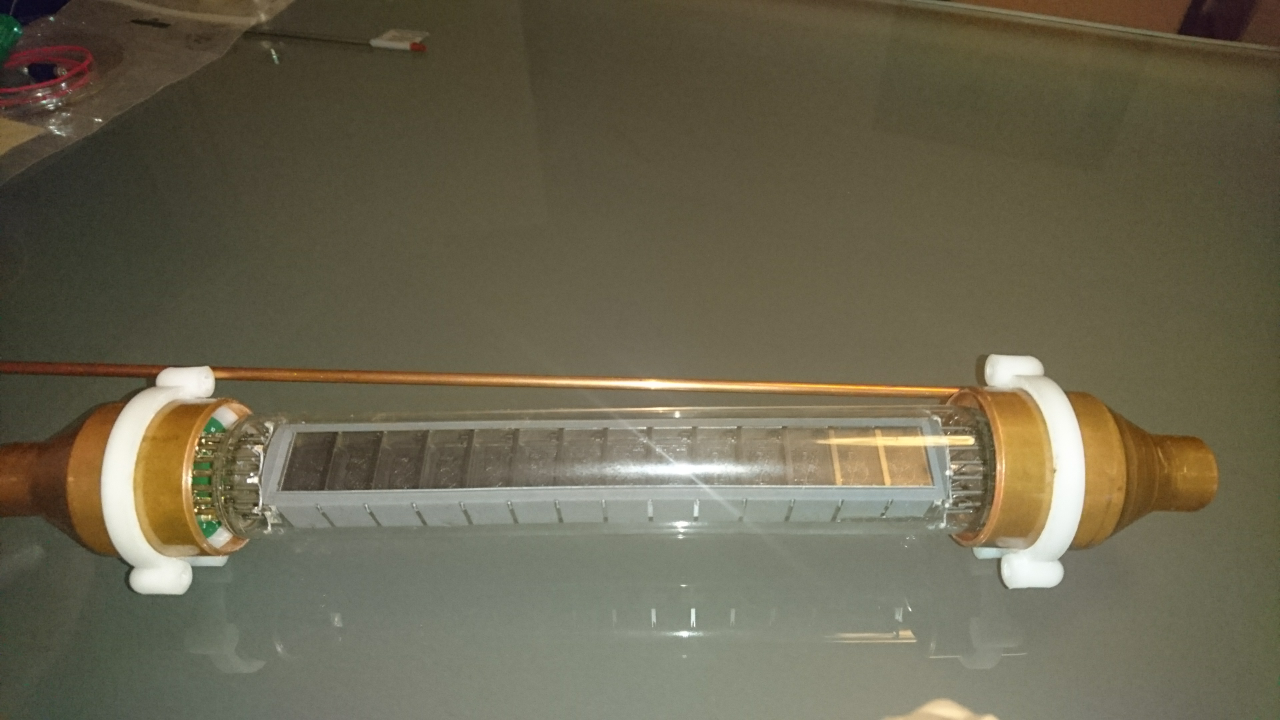
I made a quick assembly est with the tube sockets and the guard-pipe holders, see image attached. The plastic pieces will be painted in gold or copper to make them look like metal.
Currently i'm thinking about all the "optic" features, that have no "usefull" function or are just for design. In the Front of the wooden piece, i will install a front panel with chicken-head switches, and maybe integrate a spinning dekatron or magic eye too. =)
Does someone has any nice ideas what i could add?

John Rehwinkel
Dec 20, 2016, 1:44:13 PM12/20/16
to 'Grahame' via neonixie-l
Currently i'm thinking about all the "optic" features, that have no "usefull" function or are just for design. In the Front of the wooden piece, i will install a front panel with chicken-head switches, and maybe integrate a spinning dekatron or magic eye too. =)
Does someone has any nice ideas what i could add?
A neon bulb or indicator (or any neon device, even a nixie tube) with the "alternate cathode" circuitry makes a good eye-catching detail. Some of the more unusual VFDs and flood-beam CRTs also stand out as bright colorful details that you don't see very often.
Here's one inexpensive and colorful VFD:
- John
Reply all
Reply to author
Forward
0 new messages