Aligning two images one on top of another
525 views
Skip to first unread message

Yo'av Moshe
Mar 31, 2015, 11:17:54 AM3/31/15
to hugi...@googlegroups.com
Hi,
Knowing that Hugin is made specifically for creating panorama images, I was wondering if I can use it for the following task:
I have two scanned images (scanned from a roll film). Image A is larger than image B, but image B has better colours and saturation. What I was thinking to do is to put image B on top of image A, and then to apply only the hue and saturation properties of it onto image A.
To do this, I need to have both images aligned perfectly on top of another. Problem is that as as expected with any scanned image, the cropping is slightly different, there are minor distortions etc'.
I wanted to use Hugin to create a file based on image B, that is aligned according to image A (meaning: it's the same size as image A and all elements in it are aligned correctly).
Can Hugin, or any of the tools that come with it, be used to do that?
Thank you so very much!
Yo'av

Alex Mandel
Mar 31, 2015, 1:03:18 PM3/31/15
to hugi...@googlegroups.com
stitching/blending step at the end. Really what you are doing is some
form of HDR/exposure blending.
Thanks,
Alex
Yo'av Moshe
Apr 1, 2015, 4:39:25 AM4/1/15
to hugi...@googlegroups.com, te...@wildintellect.com
Thanks Alex!
Any ideas for how to do it?
Thanks!
Yo'av

boomslang
Apr 1, 2015, 10:05:33 AM4/1/15
to hugi...@googlegroups.com
Hi Yo'av,
I do not consider myself an expert, but as I see no further hints, I'll give it a try.
Try ticking one of the 'exposure corrected' or 'exposure fused' boxes under 'Panorama outputs' in the Stitcher tab. You'll get transformed and scaled .tiff files of the original scans.
Import them in Photoshop/Gimp, increase the canvas of both images, align them manually (shouldnt be too hard as the distortions are identical now) and do your operations. Perhaps in the log files you can find the exact shifts needed for perfect alignment.
I am sure there is also a trick to obtain a two-layered TIFF file with both images already aligned but I don't know how to do that.
Good luck,
boomslang
--------------------------------------------
On Wed, 1/4/15, Yo'av Moshe <bje...@gmail.com> wrote:
Subject: Re: [hugin-ptx] Aligning two images one on top of another
To: hugi...@googlegroups.com
Cc: te...@wildintellect.com
Date: Wednesday, 1 April, 2015, 9:39
--
A list of frequently asked questions is available at: http://wiki.panotools.org/Hugin_FAQ
---
You received this message because you are subscribed to the
Google Groups "hugin and other free panoramic
software" group.
To unsubscribe from this group and stop receiving emails
from it, send an email to hugin-ptx+...@googlegroups.com.
To view this discussion on the web visit https://groups.google.com/d/msgid/hugin-ptx/212ba4c3-975d-43b2-bf9c-049348ef1e14%40googlegroups.com.
For more options, visit https://groups.google.com/d/optout.
I do not consider myself an expert, but as I see no further hints, I'll give it a try.
Try ticking one of the 'exposure corrected' or 'exposure fused' boxes under 'Panorama outputs' in the Stitcher tab. You'll get transformed and scaled .tiff files of the original scans.
Import them in Photoshop/Gimp, increase the canvas of both images, align them manually (shouldnt be too hard as the distortions are identical now) and do your operations. Perhaps in the log files you can find the exact shifts needed for perfect alignment.
I am sure there is also a trick to obtain a two-layered TIFF file with both images already aligned but I don't know how to do that.
Good luck,
boomslang
--------------------------------------------
On Wed, 1/4/15, Yo'av Moshe <bje...@gmail.com> wrote:
Subject: Re: [hugin-ptx] Aligning two images one on top of another
To: hugi...@googlegroups.com
Cc: te...@wildintellect.com
Date: Wednesday, 1 April, 2015, 9:39
A list of frequently asked questions is available at: http://wiki.panotools.org/Hugin_FAQ
---
You received this message because you are subscribed to the
Google Groups "hugin and other free panoramic
software" group.
To unsubscribe from this group and stop receiving emails
from it, send an email to hugin-ptx+...@googlegroups.com.
To view this discussion on the web visit https://groups.google.com/d/msgid/hugin-ptx/212ba4c3-975d-43b2-bf9c-049348ef1e14%40googlegroups.com.
For more options, visit https://groups.google.com/d/optout.

Don Johnston
Apr 1, 2015, 10:24:17 AM4/1/15
to Hugin Pano

Carlos Eduardo G. Carvalho (Cartola)
Apr 1, 2015, 2:19:13 PM4/1/15
to hugi...@googlegroups.com
Don't know if you are using windows, but if you have command line skills you can just use align_image_stack tool that comes with hugin to generate two aligned images from the originals.
Inside Hugin you can use the "Remapped images" to obtain the original images aligned.To view this discussion on the web visit https://groups.google.com/d/msgid/hugin-ptx/201504011424.t31EOEGZ013256%40mail-relay2.accesscomm.ca.

Terry Duell
Apr 2, 2015, 12:55:53 AM4/2/15
to hugi...@googlegroups.com
On Wed, 01 Apr 2015 01:47:59 +1100, Yo'av Moshe <bje...@gmail.com> wrote:
> Hi,
> Knowing that Hugin is made specifically for creating panorama images, I
> was wondering if I can use it for the following task:
>
> I have two scanned images (scanned from a roll film). Image A is larger
> than image B, but image B has better colours and saturation. What I was
> thinking to do is to put image B on top of image A, and then to apply
> only the hue and saturation properties of it onto image A.
> To do this, I need to have both images aligned perfectly on top of
> another.
> Problem is that as as expected with any scanned image, the cropping is
> slightly different, there are minor distortions etc'.
>
> I wanted to use Hugin to create a file based on image B, that is aligned
> according to image A (meaning: it's the same size as image A and all
> elements in it are aligned correctly).
>
Have you had any success with this?
> Hi,
> Knowing that Hugin is made specifically for creating panorama images, I
> was wondering if I can use it for the following task:
>
> I have two scanned images (scanned from a roll film). Image A is larger
> than image B, but image B has better colours and saturation. What I was
> thinking to do is to put image B on top of image A, and then to apply
> only the hue and saturation properties of it onto image A.
> To do this, I need to have both images aligned perfectly on top of
> another.
> Problem is that as as expected with any scanned image, the cropping is
> slightly different, there are minor distortions etc'.
>
> I wanted to use Hugin to create a file based on image B, that is aligned
> according to image A (meaning: it's the same size as image A and all
> elements in it are aligned correctly).
>
If not, try following the "stitching flat scanned images" tutorial
<http://hugin.sourceforge.net/tutorials/scans/en.shtml>,
and instead of selecting a panorama output in the Stitcher tab, select one
of the Remapped images outputs, which will save a set of aligned images.
You could also try exposure fusion in the Stitcher tab, as has been
suggested.
In both cases, you may need to manually add/edit control points to ensure
a very accurate alignment.
Let's know how you get on so others can learn from your experience.
Cheers,
--
Regards,
Terry Duell
Yo'av Moshe
Apr 2, 2015, 4:06:44 AM4/2/15
to hugi...@googlegroups.com
Hi,
Thank you all so much for the help.
I've managed to generate two separate files that have the same size, using the "remapped images" option as you suggested. But when I'm layering them one on top of another and fixing the alignment, the distortions are still there :-(
At first I thought my control points might be off, and so I checked and they indeed were - the automatic control points finder did a really poor job, probably because of the noise one of the images have. So I removed all control points and added 20 new ones (is this enough?), which are as accurate as I could find.
Still, generating the images doesn't fix the distortion I get when trying to align them afterwards.
Is it possible that Hugin is ignoring my control points for some reason? Maybe I forgot to tick something?
As for align_image_stack, I've tried it but I think it can't find any control points. That's the output I'm getting:
---
$ align_image_stack -p debug.pto -a stacked 14560002.JPG 14560014.JPG ⏎
No Feature Points
Bad params
No Feature Points
Bad params
An error occured during optimization.
Try adding "-p debug.pto" and checking output.
Exiting...
---
debug.pto doesn't seem to contain anything useful.
Any ideas for why my control points doesn't seem to fix the distortion? I believe Hugin is giving them a really bad score (I had to take the threshold to 0.3 in the preferences panel) but I think it's because of the noise and the size difference. Do I need to add more maybe?
I'm using Hugin 2014.0.0.5da69bc383dd on Arch Linux for what it matters...
Thanks again.
Yo'av

panostar
Apr 2, 2015, 1:35:29 PM4/2/15
to hugi...@googlegroups.com
On Thursday, April 2, 2015 at 9:06:44 AM UTC+1, Yo'av Moshe wrote:
Still, generating the images doesn't fix the distortion I get when trying to align them afterwards.Is it possible that Hugin is ignoring my control points for some reason? Maybe I forgot to tick something?
I'm not sure what this distortion is that you are encountering. Since the images are different sizes and presumably covering slightly differing angles of view, I trust that you are assigning different lens parameters to the two images?
John
Terry Duell
Apr 2, 2015, 6:04:14 PM4/2/15
to hugi...@googlegroups.com
Hello Yo'av,
On Thu, 02 Apr 2015 19:06:44 +1100, Yo'av Moshe <bje...@gmail.com> wrote:
>
> Any ideas for why my control points doesn't seem to fix the distortion? I
> believe Hugin is giving them a really bad score (I had to take the
> threshold to 0.3 in the preferences panel) but I think it's because of
> the noise and the size difference. Do I need to add more maybe?
>
It's not obvious what the problem is without seeing your project images.
Are you able to make them available so we can look more closely at the
problem?
If so, a good way to do that is put the images on Dropbox or similar,
along with your .pto file.
On Thu, 02 Apr 2015 19:06:44 +1100, Yo'av Moshe <bje...@gmail.com> wrote:
>
> Any ideas for why my control points doesn't seem to fix the distortion? I
> believe Hugin is giving them a really bad score (I had to take the
> threshold to 0.3 in the preferences panel) but I think it's because of
> the noise and the size difference. Do I need to add more maybe?
>
Are you able to make them available so we can look more closely at the
problem?
If so, a good way to do that is put the images on Dropbox or similar,
along with your .pto file.
Yo'av Moshe
Apr 3, 2015, 3:20:53 AM4/3/15
to hugi...@googlegroups.com
Hi,
Thank you again for your kind help!
Both jpegs and the .pto file can be downloaded here: http://bit-else.com/hugin.zip
@panostar - I generally never touched any of the lens parameters, but I noticed the focal length was set slightly differently for both images so I set them both to 23.56 (the original setting of one them). It didn't seem to change much when aligning them though :-(
Yo'av
Donald Johnston
Apr 3, 2015, 4:00:12 PM4/3/15
to Hugin Pano
Can you include your output with the distortion you’re talking about and a description of what you mean by the distortion. I loaded the two images into hugin (using assistant), gave them both a HFOV of 30 (seemed like a good number), did the align and stitch, and got a lot better image alignment then what your pro file created. Here is a small jpeg of what I created. I didn’t use separate lens.
--
A list of frequently asked questions is available at: http://wiki.panotools.org/Hugin_FAQ
---
You received this message because you are subscribed to the Google Groups "hugin and other free panoramic software" group.
To unsubscribe from this group and stop receiving emails from it, send an email to hugin-ptx+...@googlegroups.com.
To view this discussion on the web visit https://groups.google.com/d/msgid/hugin-ptx/a83d0f95-e24d-4dab-8b8c-539ce982a588%40googlegroups.com.
Terry Duell
Apr 3, 2015, 6:23:56 PM4/3/15
to hugi...@googlegroups.com
Hello Yo'av,
On Fri, 03 Apr 2015 18:20:53 +1100, Yo'av Moshe <bje...@gmail.com> wrote:
> Hi,
> Thank you again for your kind help!
>
> Both jpegs and the .pto file can be downloaded here:
> http://bit-else.com/hugin.zip
>
I had a try at aligning and producing a fused stitch.
I had to add quite a few control points, and eventually got a mean
optimisation error of about 2 and a max of about 13. I have attached my
.pto.
When loading the images I assigned a FOV of 50 ( a guess) to each image
and hugin automatically assigned a different lens to each image.
Here I see quite a bit of barrel distortion, which didn't show up nearly
as much with the automatically generated control points. A screenshot of
my fused stitch is attached, which you can reproduce from my .pto.
Hope this helps.
On Fri, 03 Apr 2015 18:20:53 +1100, Yo'av Moshe <bje...@gmail.com> wrote:
> Hi,
> Thank you again for your kind help!
>
> Both jpegs and the .pto file can be downloaded here:
> http://bit-else.com/hugin.zip
>
I had to add quite a few control points, and eventually got a mean
optimisation error of about 2 and a max of about 13. I have attached my
.pto.
When loading the images I assigned a FOV of 50 ( a guess) to each image
and hugin automatically assigned a different lens to each image.
Here I see quite a bit of barrel distortion, which didn't show up nearly
as much with the automatically generated control points. A screenshot of
my fused stitch is attached, which you can reproduce from my .pto.
Hope this helps.
Terry Duell
Apr 4, 2015, 7:24:19 PM4/4/15
to hugi...@googlegroups.com
On Sat, 04 Apr 2015 09:23:28 +1100, Terry Duell <tdu...@iinet.net.au>
wrote:
> Here I see quite a bit of barrel distortion, which didn't show up nearly
> as much with the automatically generated control points. A screenshot of
> my fused stitch is attached, which you can reproduce from my .pto.
>
Experimenting a bit more with this project, I can get quite varying
results, some show almost no distortion, others quite high/strange
distortion, and all with normally acceptable optimisation results. I have
been using the CP editor in the Fast Preview window (hugin-2014.1.0) to
automatically add and delete CPs in selected areas.
It's not obvious why such varying results are being obtained, but wonder
if the high noise levels are providing features for the CPs to latch onto.
I also tried using Autopano-SIFT-C as the CP detector. It found more
control points than CPFind, and they were confined to the central area of
the images ( as were the CPs initially found by CPFind) where there are
more obvious features. Without any manual editing of CPs the final
optimisation yielded a mean error of 0.9 and a max of 2.9. The result does
show some distortion.
I have attached my .pto and a screenshot of the fused stitch.
Grist for the mill, for any who ponder the whys and hows of this business.
wrote:
> Here I see quite a bit of barrel distortion, which didn't show up nearly
> as much with the automatically generated control points. A screenshot of
> my fused stitch is attached, which you can reproduce from my .pto.
>
results, some show almost no distortion, others quite high/strange
distortion, and all with normally acceptable optimisation results. I have
been using the CP editor in the Fast Preview window (hugin-2014.1.0) to
automatically add and delete CPs in selected areas.
It's not obvious why such varying results are being obtained, but wonder
if the high noise levels are providing features for the CPs to latch onto.
I also tried using Autopano-SIFT-C as the CP detector. It found more
control points than CPFind, and they were confined to the central area of
the images ( as were the CPs initially found by CPFind) where there are
more obvious features. Without any manual editing of CPs the final
optimisation yielded a mean error of 0.9 and a max of 2.9. The result does
show some distortion.
I have attached my .pto and a screenshot of the fused stitch.
Grist for the mill, for any who ponder the whys and hows of this business.

Roger Broadie
Apr 5, 2015, 1:32:50 PM4/5/15
to hugi...@googlegroups.com
I agree with Terry Duell (05 Apr 2015 09:23:51 +1000) that this project
is proving surprisingly difficult. I can’t get the two images to align
to the pixel
I am starting from the assumption that the two images are scans of the
same original photograph, probably with the same scanner but with the
controls set differently. Yo’av would be able to confirm if that is
correct.
My conjecture is that the root of the problem is that the blotches that
provide many of the control points are of different sizes because of the
different apparent exposures, and probably also differ in shape,
depending on the exact configuration of the standing stone where they fall.
I doubt if the best way of using Hugin is to rely on the presets that
optimise position (which in this context actually means angular
alignment) and other parameters, but not translation. That approach pins
the optimisation to the central-viewpoint model that applies to a normal
panorama but not to scans. As far as I can see, traditionally the
central-viewpoint model has been finessed into working with scans either
by relying on the d and e parameter that are designed to define shift of
the sensor relative to the optical centre of the lens (as in Bruno
Postle’s original version of the scanning tutorial, available e.g. here:
http://web.archive.org/web/20080409195552/http://hugin.sourceforge.net/tutorials/scans/en.shtml)
or by artificially setting the angle of view very small, to give the
effect of a central-viewpoint camera at a great distance (which is the
method recommended by the PTGui). But now, as Terry implied in his
message of 02 Apr 2015 15:55:47 +1100 when he pointed to his revision of
the scanning tutorial, we have the ability to use translation parameters
X, Y and Z, which does directly what we want.
At this point I think I should offer a pto file. The one I have
attached is based on Terry’s latest pto file, using its control points
but resetting the parameter values to zero and then optimising just X,
Y, Z and roll for just the second image. Its average control-point
distance (at optimal size) is 3.2 and the maximum 6.0.
It seemed better to leave one image untouched (here image 0) rather than
to allow parameters of both to vary. Frankly, I do not believe that the
barrel/pincushion distortions of Terry’s images are more than artefacts
of the optimiser, which if given enough parameters to play with can
drive down the average error by juggling parameters. Any such
distortion in the original photograph is irrelevant here and would be
intolerable if introduced into scanned images.
I used only a single lens, since fov does not need to vary, differences
in cropping being accommodated by changes in Z. I also eliminated a few
control points by running the Clean control points function.
Unfortunately, the preview (unless I'm missing something) does not
combine the two images here. Image 0 masks image 1, which sits behind
it, as can be seen by toggling the images on and off in the preview
window. Thus the preview with both images enabled gives no clue as to
the degree of alignment, although toggling the right images on and off
in the preview window gives an impression of the degree of alignment.
This all may be more than Yo’av wants to know about Hugin and he may
well wonder how he managed to get as good an alignment as he did based
on the central-viewpoint model. I suspect the answer is that his
alignment was so nearly right to start with that the values of yaw and
pitch that Hugin determined were so small that they introduced little
distortion.
Roger Broadie
Terry Duell
Apr 5, 2015, 7:13:48 PM4/5/15
to hugi...@googlegroups.com
Hello Roger,
On Mon, 06 Apr 2015 03:32:45 +1000, Roger Broadie
<roger....@ogea.freeserve.co.uk> wrote:
> I agree with Terry Duell (05 Apr 2015 09:23:51 +1000) that this project
> is proving surprisingly difficult. I can’t get the two images to align
> to the pixel
>
Thanks for your well argued and detailed discussion on this project.
> I am starting from the assumption that the two images are scans of the
> same original photograph, probably with the same scanner but with the
> controls set differently. Yo’av would be able to confirm if that is
> correct.
That's where I started, but for some reason quickly strayed off the path
of righteousness.
[snip]
>
> It seemed better to leave one image untouched (here image 0) rather than
> to allow parameters of both to vary. Frankly, I do not believe that the
> barrel/pincushion distortions of Terry’s images are more than artefacts
> of the optimiser, which if given enough parameters to play with can
> drive down the average error by juggling parameters. Any such
> distortion in the original photograph is irrelevant here and would be
> intolerable if introduced into scanned images.
I think you are right about the distortion I was seeing in my result.
>
> I used only a single lens, since fov does not need to vary, differences
> in cropping being accommodated by changes in Z. I also eliminated a few
> control points by running the Clean control points function.
> Unfortunately, the preview (unless I'm missing something) does not
> combine the two images here. Image 0 masks image 1, which sits behind
> it, as can be seen by toggling the images on and off in the preview
> window. Thus the preview with both images enabled gives no clue as to
> the degree of alignment, although toggling the right images on and off
> in the preview window gives an impression of the degree of alignment.
>
> This all may be more than Yo’av wants to know about Hugin
Probably, but a useful discussion nevertheless.
On Mon, 06 Apr 2015 03:32:45 +1000, Roger Broadie
<roger....@ogea.freeserve.co.uk> wrote:
> I agree with Terry Duell (05 Apr 2015 09:23:51 +1000) that this project
> is proving surprisingly difficult. I can’t get the two images to align
> to the pixel
>
> I am starting from the assumption that the two images are scans of the
> same original photograph, probably with the same scanner but with the
> controls set differently. Yo’av would be able to confirm if that is
> correct.
of righteousness.
[snip]
>
> It seemed better to leave one image untouched (here image 0) rather than
> to allow parameters of both to vary. Frankly, I do not believe that the
> barrel/pincushion distortions of Terry’s images are more than artefacts
> of the optimiser, which if given enough parameters to play with can
> drive down the average error by juggling parameters. Any such
> distortion in the original photograph is irrelevant here and would be
> intolerable if introduced into scanned images.
>
> I used only a single lens, since fov does not need to vary, differences
> in cropping being accommodated by changes in Z. I also eliminated a few
> control points by running the Clean control points function.
> Unfortunately, the preview (unless I'm missing something) does not
> combine the two images here. Image 0 masks image 1, which sits behind
> it, as can be seen by toggling the images on and off in the preview
> window. Thus the preview with both images enabled gives no clue as to
> the degree of alignment, although toggling the right images on and off
> in the preview window gives an impression of the degree of alignment.
>
> This all may be more than Yo’av wants to know about Hugin
Terry Duell
Apr 6, 2015, 2:27:40 AM4/6/15
to hugi...@googlegroups.com
> I agree with Terry Duell (05 Apr 2015 09:23:51 +1000) that this project
> is proving surprisingly difficult. I can’t get the two images to align
> to the pixel
[snip]
> is proving surprisingly difficult. I can’t get the two images to align
> to the pixel
> At this point I think I should offer a pto file. The one I have
> attached is based on Terry’s latest pto file, using its control points
> but resetting the parameter values to zero and then optimising just X,
> Y, Z and roll for just the second image. Its average control-point
> distance (at optimal size) is 3.2 and the maximum 6.0.
see if I could reproduce your result, as per your .pto.
If I start from scratch, load images, same lens, use autopano-SIFT-C to
generate CPs, then optimise just X,Y,Z and roll I get good alignment, but
a silly result. Image #1 (14560014.JPG) is shown as expected in the centre
of the preview window, and only part of image #0 (14560002.JPG) is shown
some distance away to the SE (see attached screenshot)....and if I try to
use the Edit CP tool in the preview window (hugin-2014.1.0) by selecting
an area in image #1 hugin tells me it can't generate control points as the
region is only covered by a single image, but when I go to the Control
points tab, the control points look OK.
What had escaped me up until this point was that the image sizes were
significantly different.
Image #0 is 4181x6305, whilst image #1 is 1024x1545.
Normally when I load the two images hugin will select different lenses for
the two images, I assume because of the different images sizes. If I
proceed with different lenses, optimising as described above, the result
is good with sub pixel alignment (mean 0.2, max 0.5).
When using one lens for the project hugin reports the images as having the
same resolution but things go haywire in the Fast Preview window.
Stitching throws a precondition violation...images different size.
When I run the project by loading Roger's pto (tld-apsc-a.pto, which uses
one lens), hugin knows the images are different sizes, displays the
project correctly in the FPpreview window and stitches without throwing
the precondition violation.
So, why does hugin reset the image sizes here when I select the same
lens...and subsequently go haywire, but happily keeps the correct images
sizes, with same lens, and work OK, when the project is loaded via Roger's
.pto?
Roger Broadie
Apr 6, 2015, 5:09:11 PM4/6/15
to hugi...@googlegroups.com
Terry, I have no idea why you got the odd effects you saw in the example
you attached to your post of Mon, 06 Apr 2015 at 16:27:23 +1000. I did
find at one point that one of my constituent images suddenly vanished
except for one corner. That proved to be because a crop had been
incorporated, for no reason that I know of. I suppose that did not
happen to you?
Nor do I know why using a single lens for your project might cause the
two images to be recorded as of the same size, which I think is what you
are telling us happened to you.
It did not happen to me with the pto I submitted. I have also tried an
example with an old central-viewpoint stitch where I resized one image
to 50% of its original size. The sizes were correctly recorded (in the
Photos tab) but there was a problem. The halved image was given its own
lens with a reduced field-of-view, which suggests the size was treated
as fixing the field-of-view. The stitch was messed up until the
field-of-view was put right, either in its own lens or by merging that
lens into the one used for the non-resized images. I rather think one
needs to be wary about using automatic procedures where the images are
of different sizes.
Roger Broadie

Pell Emanuelsson
Apr 6, 2015, 5:57:31 PM4/6/15
to Yo'av Moshe, hugi...@googlegroups.com
Yo'av,
You didn't send the message to the list, I think - just to me personally, so Donald and Terry probably didn't see your answer.
In any case I believe there is no Hugin mystery here.
First, as I wrote, if you scan the same photo twice, even with different resolutions, it should be enough to translate, rotate and scale one image in order to have a perfect fit. (I'm ignoring shear here.)
There's no use for the full Hugin camera model. If you don't get a good fit, then there's something else wrong with your scanning process, something Hugin can't compensate for.
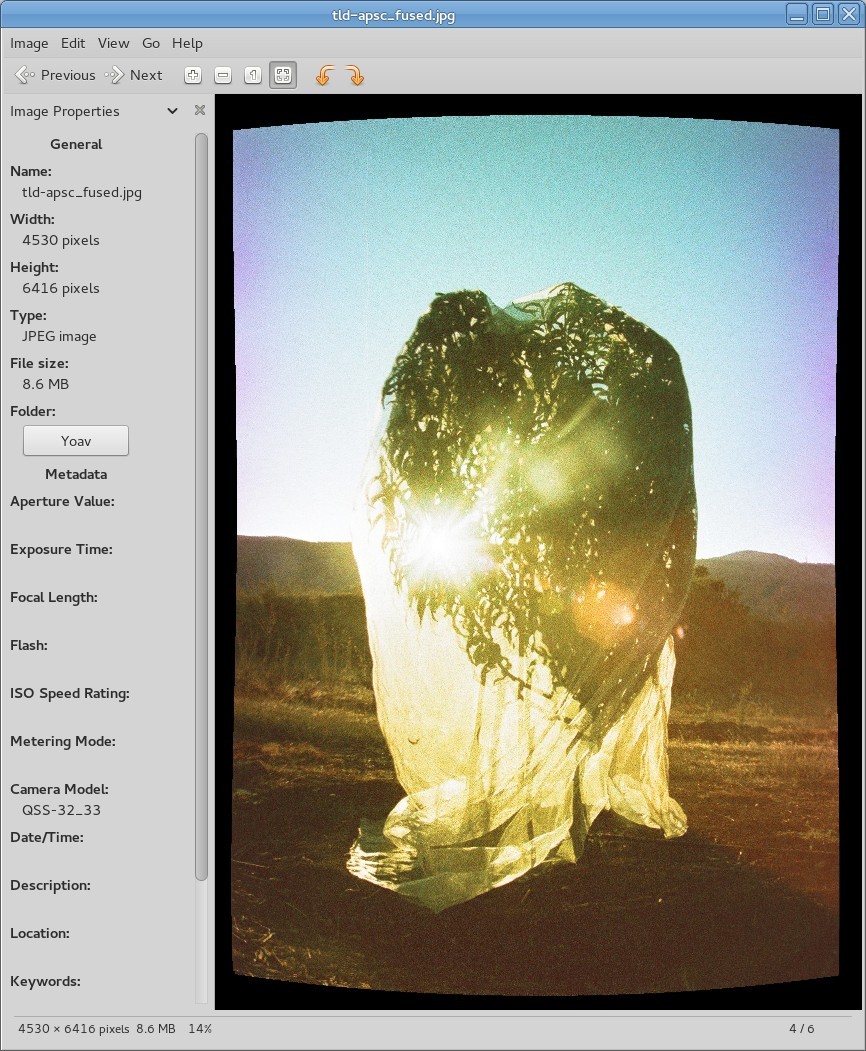
Just looking at the two source images in an image viewer gives the impression that the shrouded tree has the same width, but has a larger height in 14560014.jpg. Comparing width and height of this object gives:
14560002.jpg W: 803-3205=2402 H: 1200-5271=4071 Aspect: 1.6948
14560014.jpg W: 201-787=586 H: 300-1298=998 Aspect: 1.7031
Difference: 1.7031-1.6948=0.0083 At 4000 px: 4000*0.0083=33 px
So the two images don't have the same resolution proportions in X and Y. Keeping the width the same, the height differs by 0.8% which at around 4000 pixels gives an error of 33 pixels. So this is why Hugin can't optimize. If it lines up the X values of the control points perfectly, the Y values can differ by up to 33 pixels due to the different Y resolutions of the images. And Hugin can't just scale one dimension of a photo, as far as I know (though I'm still at the 2012 version, so something might have changed).
To check if this is the only problem, I scaled down the hi-res image from 4181x6305 to 4160x6305 and then tried to optimize again.
I now get almost a perfect fit.
However, it's still not quite perfect. Since the images are now so close to eachother, visual comparison is possible. I get the impression that the resolution varies a little over the whole image, i.e. some pixel rows are closer together, some are further apart and I don't see this in the X direction. This indicates that the scanning sled motion is not perfectly linear. This is also probably never the case and I can't say if this scanner is better or worse than any other.
I placed my project and input/output images here:
https://dl.dropboxusercontent.com/u/95455644/hugin.zip
Regards,
Pell
You didn't send the message to the list, I think - just to me personally, so Donald and Terry probably didn't see your answer.
In any case I believe there is no Hugin mystery here.
First, as I wrote, if you scan the same photo twice, even with different resolutions, it should be enough to translate, rotate and scale one image in order to have a perfect fit. (I'm ignoring shear here.)
There's no use for the full Hugin camera model. If you don't get a good fit, then there's something else wrong with your scanning process, something Hugin can't compensate for.
Just looking at the two source images in an image viewer gives the impression that the shrouded tree has the same width, but has a larger height in 14560014.jpg. Comparing width and height of this object gives:
14560002.jpg W: 803-3205=2402 H: 1200-5271=4071 Aspect: 1.6948
14560014.jpg W: 201-787=586 H: 300-1298=998 Aspect: 1.7031
Difference: 1.7031-1.6948=0.0083 At 4000 px: 4000*0.0083=33 px
So the two images don't have the same resolution proportions in X and Y. Keeping the width the same, the height differs by 0.8% which at around 4000 pixels gives an error of 33 pixels. So this is why Hugin can't optimize. If it lines up the X values of the control points perfectly, the Y values can differ by up to 33 pixels due to the different Y resolutions of the images. And Hugin can't just scale one dimension of a photo, as far as I know (though I'm still at the 2012 version, so something might have changed).
To check if this is the only problem, I scaled down the hi-res image from 4181x6305 to 4160x6305 and then tried to optimize again.
I now get almost a perfect fit.
However, it's still not quite perfect. Since the images are now so close to eachother, visual comparison is possible. I get the impression that the resolution varies a little over the whole image, i.e. some pixel rows are closer together, some are further apart and I don't see this in the X direction. This indicates that the scanning sled motion is not perfectly linear. This is also probably never the case and I can't say if this scanner is better or worse than any other.
I placed my project and input/output images here:
https://dl.dropboxusercontent.com/u/95455644/hugin.zip
Regards,
Pell
On 2015-04-05 09:43, Yo'av Moshe wrote:
Hi,
Donald - could you include your pto file? As for the distortion I'm seeing, it's quite easy to notice on my output - I'm aligning image B on top of image A, matching the the top left corner of the tree, and then when checking the bottom right corner I can see it's off by about 15px-20px . That's the distortion I mean.
Terry - I've tried both pto and they both still seem to include some distortion when aligning the images. I can't really tell how good the fused image on your screenshot is because it's quite zoomed out :-/
Pell - The noise doesn't have to do with the quality of the scanning AFAIK. It's a scanned film from a quite good lab over here, and the noise is because of the type of the film and the relatively high ISO/ASA level. However, while I understand why this can create false control points, I'm not really sure why it would matter when I'm setting the control points myself? I've tried putting the two images in your zip file one on top of the other and again there seem to be the same distortion I mentioned above.
Please note that I'm not trying to create the fused image using Hugin - I'm generating two different files specifically so I can tweak the final result of mixing the two later on using Photoshop/Gimp.
Anyway thank you all so much for your time. It really is appreciated a lot. I won't be available during the coming week (holiday over here!) so sorry in advance for the my delayed response.
And again thank you.
Yo'av
2015-04-05 3:50 GMT+03:00 Pell Emanuelsson <p_eman...@gmx.net>:Yo'av,
I'm not sure what you are trying to do. None of the images are scanned very well... Much noise.
Anyway, since it's the same photo scanned twice, there's no need to change any camera parameters.
They are the same for the two images. Due to repeatability issues it might make sense to optimize FOV for one of the photos.
Also no need to set many control points. I set only four points and they match quite well. At least well enough for optimizing exposure.
To transfer the exposure parameters from one photo to the other, I simply chose to optimize the high-res image for exposure, color and camera response. I chose to use 4000 points instead of the default 400, since the whole images overlap.
I still think it would be better to experiment with different settings while scanning.
If your scan program doesn't support this, check out VueScan.
http://www.hamrick.com/
I placed the two result images and a PTO here:
https://dl.dropboxusercontent.com/u/95455644/hugin.zip
The image 14560014-145600020001.jpg is the one you want (the high resolution with new exposure).
The PTO is for Hugin 2012.0.0.
Regards,
Pell
--
You received this message because you are subscribed to the Google Groups "hugin and other free panoramic software" group.
To unsubscribe from this group and stop receiving emails from it, send an email to hugin-ptx+...@googlegroups.com.
To view this discussion on the web visit https://groups.google.com/d/msgid/hugin-ptx/a83d0f95-e24d-4dab-8b8c-539ce982a588%40googlegroups.com.
For more options, visit https://groups.google.com/d/optout.
--
Yo'av Moshe
Donald Johnston
Apr 7, 2015, 3:00:41 PM4/7/15
to Hugin Pano
Here is my pro file:
# hugin project file
#hugin_ptoversion 2
p f0 w821 h1258 v32 E0 R0 S25,780,0,1141 n"TIFF_m c:LZW r:CROP"
m g1 i0 f0 m2 p0.00784314
# image lines
#-hugin cropFactor=1
i w4181 h6305 f0 v30 Ra0 Rb0 Rc0 Rd0 Re0 Eev0 Er1 Eb1 r-1.99893914018634e-12 p2.25706389628805 y-0.274849518695532 TrX0 TrY0 TrZ0 Tpy0 Tpp0 j0 a0 b0 c0 d0 e0 g0 t0 Va1 Vb0 Vc0 Vd0 Vx0 Vy0 Vm5 n"14560002.JPG"
#-hugin cropFactor=1
i w1024 h1545 f0 v30 Ra0 Rb0 Rc0 Rd0 Re0 Eev0 Er1 Eb1 r1.99920544152276e-12 p2.44304473111548 y-0.369857668322311 TrX0 TrY0 TrZ0 Tpy0 Tpp0 j0 a0 b0 c0 d0 e0 g0 t0 Va1 Vb0 Vc0 Vd0 Vx0 Vy0 Vm5 n"14560014.JPG"
# specify variables that should be optimized
v Ra0
v Rb0
v Rc0
v Rd0
v Re0
v Vb0
v Vc0
v Vd0
v Ra1
v Rb1
v Rc1
v Rd1
v Re1
v Eev1
v r1
v p1
v y1
v Vb1
v Vc1
v Vd1
v
# control points
c n0 N1 x825.022286862588 y3455.78480877144 X205.954875194407 Y852.051352033934 t0
c n0 N1 x812.682486620123 y5089.81361881057 X200.546508727828 Y1253.34676477777 t0
c n0 N1 x213.547305515808 y6086.97914150293 X55.4847453011067 Y1500.49028923902 t0
c n0 N1 x1433.63840050291 y1299.74012527778 X354.367433452982 Y323.763156452695 t0
c n0 N1 x1054.17909401605 y2681.43290303793 X261.805254863911 Y663.767997000226 t0
c n0 N1 x1374.07491623692 y3462.52104956626 X340.657401107209 Y852.95687169241 t0
c n0 N1 x1207.94085236359 y5200.61428599698 X298.51655908337 Y1281.32448495085 t0
c n0 N1 x2030.4189279187 y1842.35722234585 X500.175307460152 Y458.101827799735 t0
c n0 N1 x1959.99616026983 y2300.85544457984 X482.912925257133 Y569.069518211624 t0
c n0 N1 x1733.59593362952 y3793.43628996955 X428.049368920136 Y935.355939282536 t0
c n0 N1 x2058.56801947459 y5062.38065435841 X506.670430297875 Y1247.10861810857 t0
c n0 N1 x1775.39916703776 y5174.03197131337 X438.159124342456 Y1274.2739042156 t0
c n0 N1 x2384.72596537744 y1365.43420147429 X587.500012016446 Y340.52131109056 t0
c n0 N1 x2597.58555661418 y2833.86209026929 X638.302322573718 Y700.575003700678 t0
c n0 N1 x2858.77820527546 y4104.65993747657 X700.785247448063 Y1012.60910369741 t0
c n0 N1 x2574.15866172809 y4948.22543251576 X634.367133836147 Y1218.94772280914 t0
c n0 N1 x2313.07537427925 y5206.09873147636 X569.094568199993 Y1281.32297034091 t0
c n0 N1 x3024.37125319911 y1719.49936055248 X742.512209670846 Y426.399208846189 t0
c n0 N1 x3301.76105109094 y3034.48487114456 X809.709584154192 Y750.443305172942 t0
c n0 N1 x3002.63383924115 y3850.15416724066 X737.928849744098 Y949.506947440259 t0
c n0 N1 x3038.51216607222 y4326.18929721218 X747.594730459521 Y1065.19635729627 t0
c n0 N1 x3173.22088039004 y5153.17463060511 X779.157263435366 Y1268.35440833639 t0
#hugin_optimizeReferenceImage 0
#hugin_blender enblend
#hugin_remapper nona
#hugin_enblendOptions
#hugin_enfuseOptions
#hugin_hdrmergeOptions -m avg -c
#hugin_outputLDRBlended false
#hugin_outputLDRLayers false
#hugin_outputLDRExposureRemapped false
#hugin_outputLDRExposureLayers false
#hugin_outputLDRExposureBlended true
#hugin_outputLDRStacks false
#hugin_outputLDRExposureLayersFused false
#hugin_outputHDRBlended false
#hugin_outputHDRLayers false
#hugin_outputHDRStacks false
#hugin_outputLayersCompression LZW
#hugin_outputImageType jpg
#hugin_outputImageTypeCompression LZW
#hugin_outputJPEGQuality 30
#hugin_outputImageTypeHDR exr
#hugin_outputImageTypeHDRCompression LZW
#hugin_outputStacksMinOverlap 0.7
#hugin_outputLayersExposureDiff 0.5
#hugin_optimizerMasterSwitch 1
#hugin_optimizerPhotoMasterSwitch 21
To view this discussion on the web visit https://groups.google.com/d/msgid/hugin-ptx/5523013F.3010703%40gmx.net.
Terry Duell
Apr 7, 2015, 7:02:35 PM4/7/15
to hugi...@googlegroups.com
On Wed, 08 Apr 2015 05:00:37 +1000, Donald Johnston
<dgjoh...@accesscomm.ca> wrote:
> Here is my pro file:
Probably better to add the pto as an attachment, mail readers have a nasty
<dgjoh...@accesscomm.ca> wrote:
> Here is my pro file:
habit of adding carriage return and/or linefeed characters which make it
hard to correctly reproduce the file.
>>>
>>> Terry - I've tried both pto and they both still seem to include some
>>> distortion when aligning the images. I can't really tell how good the
>>> fused image on your screenshot is because it's quite zoomed out :-/
>>>
>>> Please note that I'm not trying to create the fused image using Hugin
>>> - I'm generating two different files specifically so I can tweak the
>>> final result of mixing the two later on using Photoshop/Gimp.
OK. I'm sure you have already sorted this out, but just in case you
>>> - I'm generating two different files specifically so I can tweak the
>>> final result of mixing the two later on using Photoshop/Gimp.
haven't, you need to optimise translation parameters, as described by
Roger, but only generate the remapped images. You could do that from
Roger's .pto (tld-apsc-a.pto), a slightly modified version (two lenses) is
attached.
Terry Duell
Apr 7, 2015, 10:37:43 PM4/7/15
to hugi...@googlegroups.com
Hello Donald,
On Wed, 08 Apr 2015 09:52:57 +1000, Donald Johnston
<dgjoh...@accesscomm.ca> wrote:
> Here is my pto file: (sounds like there’s an echo in here ;o) )
That works OK here, subpix alignment almost as good as we've achieved with
optimising translations and roll.
> and it was the spell checker that made it pro in the first message!
>
Of course it was.
On Wed, 08 Apr 2015 09:52:57 +1000, Donald Johnston
<dgjoh...@accesscomm.ca> wrote:
> Here is my pto file: (sounds like there’s an echo in here ;o) )
optimising translations and roll.
> and it was the spell checker that made it pro in the first message!
>
Don Johnston
Apr 8, 2015, 1:33:32 PM4/8/15
to Hugin Pano
On Apr 7, 2015 8:37 PM, Terry Duell <tdu...@iinet.net.au> wrote:
>
> Hello Donald,
>
> On Wed, 08 Apr 2015 09:52:57 +1000, Donald Johnston
> <dgjoh...@accesscomm.ca> wrote:
>
> > Here is my pto file: (sounds like there’s an echo in here ;o) )
>
> That works OK here, subpix alignment almost as good as we've achieved with
> optimising translations and roll.
>
I must hold my mouth just right when I use hugin as it always seems to give me good results! I use a Mac book pro (pro not pto).
> > and it was the spell checker that made it pro in the first message!
> >
>
> Of course it was.
Ha!
>
> Cheers,
> --
> Regards,
> Terry Duell
>
> --
> A list of frequently asked questions is available at: http://wiki.panotools.org/Hugin_FAQ
> ---
> You received this message because you are subscribed to the Google Groups "hugin and other free panoramic software" group.
> To unsubscribe from this group and stop receiving emails from it, send an email to hugin-ptx+...@googlegroups.com.
> To view this discussion on the web visit https://groups.google.com/d/msgid/hugin-ptx/op.xwq5k0v9rs0ygh%40localhost.localdomain.
Yo'av Moshe
Apr 11, 2015, 6:05:32 AM4/11/15
to hugi...@googlegroups.com
Hi,
Sorry for accidentally not sending my previous message to the list.
Just to confirm - the two images are indeed scans of the same frame from same film.
I find what Pell is saying about the aspect ratio of the scan very interesting. I thought that if Hugin has enough control points then it should be able to overcome the little differences in the scanning and fix it. I've actually got no clue if a glitch like the one you're showing, of 33px, is reasonable when scanning a 135mm film to a size like that or not. I doubt the photography lab here know either :-/
I'll try the files you all sent later on today.
Thanks again. It's been a while since I saw a mailing list with so many devoted participants. I might start creating panorama images just to take part here more often ;-)
Yo'av
You received this message because you are subscribed to a topic in the Google Groups "hugin and other free panoramic software" group.
To unsubscribe from this topic, visit https://groups.google.com/d/topic/hugin-ptx/DPrppm2_1v4/unsubscribe.
To unsubscribe from this group and all its topics, send an email to hugin-ptx+...@googlegroups.com.
To view this discussion on the web visit https://groups.google.com/d/msgid/hugin-ptx/3fade36c-6a8c-435d-b745-947379c4e7e4%40email.android.com.
For more options, visit https://groups.google.com/d/optout.
Yo'av Moshe
Reply all
Reply to author
Forward
0 new messages