Large Laser - Laser Senor Mount
18 views
Skip to first unread message

Timothy Gregg
Jan 16, 2017, 10:52:04 AM1/16/17
to Hive13 Hackerspace
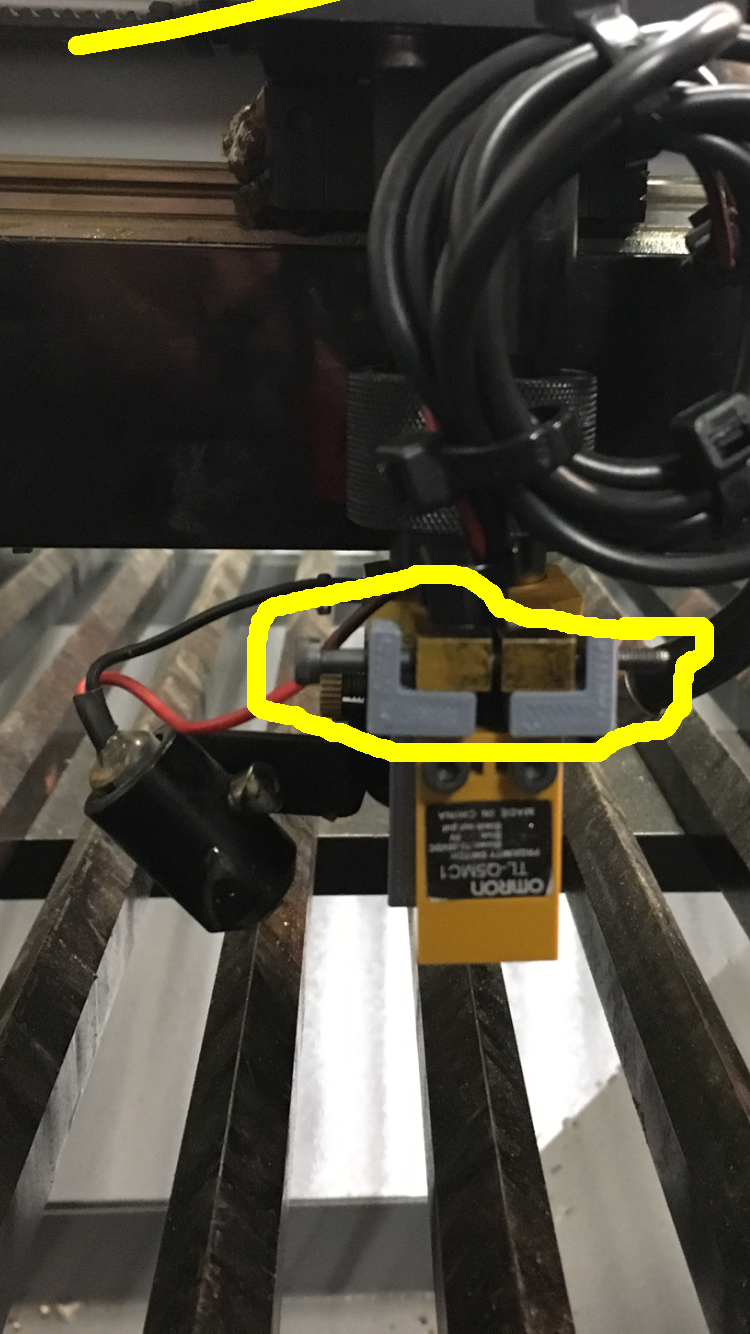
I have mounted the laser sensor to the big laser and it's untested.
Before the mob comes and beats me for not doing this to their satisfaction remember these things
Thanks to Ryan, John, Brad and Lorin each having a hand in getting this together.
Before the mob comes and beats me for not doing this to their satisfaction remember these things
- I never saw how this was in a working manner and have no reference to go by outside of the wiki
- I worked only with what was easily or quickly available to me at the time
- The Large laser has sat dormant in a "non fully functional" format as long as I've been a member...4 months(maybe before this)
- The Hive is as much a Do-Ocracy as it is a Re-Do-Ocracy but let's not make this "Undo-Ocracy"
- The large cable with several zip ties(I'd like to make this shorter with a little slack), Before starting I had no idea how long of a cable I would need so I chose not to cut it at all, so it is untrimmed.
- The large D3 inside the yellow circle is unappealing to me but was what I could find to work with(any ideas the piece uses the same threads as D3)
- The thickness on the plane with two holes for mounting the sensor is too close to the sensor I was unable to mount the sensor with bolts and is instead relying on the threading through the plastic, which I was unaware of this definitely being required prior to starting so I had drilled the holes slightly larger and made through holes(so either editing the model or a reprint but not drilling through holes on this plane will solve the problem, unless we would like to use glue I am open to suggestions).
- Is this mounted to the correct area?
- Seemed like the most logical area
- Is this the correct height?
- Again seemed logical
- Is this particular rotation correct?
Thanks to Ryan, John, Brad and Lorin each having a hand in getting this together.

Tiffany Bell-Horwath
Jan 16, 2017, 10:54:42 AM1/16/17
to cincihac...@googlegroups.com
woohoo! thanks!
--
You received this message because you are subscribed to the Google Groups "Hive13 Hackerspace" group.
To unsubscribe from this group and stop receiving emails from it, send an email to cincihackerspace+unsubscribe@googlegroups.com.
For more options, visit https://groups.google.com/d/optout.
Tiffany R. Bell-Horwath
Chemistry Ph.D
Visiting Assistant Professor
University of Cincinnati

Dave B.
Jan 16, 2017, 11:12:50 AM1/16/17
to cincihac...@googlegroups.com
Thanks!

Andrew
Jan 16, 2017, 11:32:55 AM1/16/17
to Hive13 Hackerspace
Looks great, thanks for doing this Tim. Hopefully we'll have a functioning laser for some time.

Mike
Jan 16, 2017, 11:36:44 AM1/16/17
to Hive13 Hackerspace
Good work guys :) As you said there is some room for improvement, perhaps editing the 3D printed piece with some slots for nuts
...but it looks like this is working solution which is way better than we were!
Mike
On Monday, January 16, 2017 at 11:12:50 AM UTC-5, Dave B. wrote:
Thanks!
On Mon, Jan 16, 2017 at 10:54 AM, Tiffany Bell-Horwath <tiffan...@gmail.com> wrote:
woohoo! thanks!
On Mon, Jan 16, 2017 at 10:52 AM, Timothy Gregg <timothyw...@gmail.com> wrote:
I have mounted the laser sensor to the big laser and it's untested.
Before the mob comes and beats me for not doing this to their satisfaction remember these thingsSome things that are definitely "less optimal"(as brad would say).
- I never saw how this was in a working manner and have no reference to go by outside of the wiki
- I worked only with what was easily or quickly available to me at the time
- The Large laser has sat dormant in a "non fully functional" format as long as I've been a member...4 months(maybe before this)
- The Hive is as much a Do-Ocracy as it is a Re-Do-Ocracy but let's not make this "Undo-Ocracy"
Some questions?
- The large cable with several zip ties(I'd like to make this shorter with a little slack), Before starting I had no idea how long of a cable I would need so I chose not to cut it at all, so it is untrimmed.
- The large D3 inside the yellow circle is unappealing to me but was what I could find to work with(any ideas the piece uses the same threads as D3)
- The thickness on the plane with two holes for mounting the sensor is too close to the sensor I was unable to mount the sensor with bolts and is instead relying on the threading through the plastic, which I was unaware of this definitely being required prior to starting so I had drilled the holes slightly larger and made through holes(so either editing the model or a reprint but not drilling through holes on this plane will solve the problem, unless we would like to use glue I am open to suggestions).
- Is this mounted to the correct area?
- Seemed like the most logical area
- Is this the correct height?
- Again seemed logical
- Is this particular rotation correct?
Thanks to Ryan, John, Brad and Lorin each having a hand in getting this together.
--
You received this message because you are subscribed to the Google Groups "Hive13 Hackerspace" group.
To unsubscribe from this group and stop receiving emails from it, send an email to cincihackerspa...@googlegroups.com.
For more options, visit https://groups.google.com/d/optout.
--Tiffany R. Bell-HorwathChemistry Ph.DVisiting Assistant ProfessorUniversity of Cincinnati
--
You received this message because you are subscribed to the Google Groups "Hive13 Hackerspace" group.
To unsubscribe from this group and stop receiving emails from it, send an email to cincihackerspa...@googlegroups.com.
Timothy Gregg
Jan 16, 2017, 9:56:34 PM1/16/17
to Hive13 Hackerspace
Tom Meyer was here earlier and showed me how to use the datum on the Z to detect the sensor.
The sensor lit up and it, changed lighting when the aluminum block was close.
However this failed and crunched the wood when we attempted to test.
I saw an email from Jon that the wiring was wrong, I corrected the wiring and tested again(maybe damaged the sensor from the wiring).
This failed again and I was not as quick to stop the Z as Tom and the Z is definitely not level at this point.
Sorry, guys I was no help and might have made things worse :(
Definitely still not working.
Andrew
Jan 16, 2017, 10:15:34 PM1/16/17
to Hive13 Hackerspace
On Monday, January 16, 2017 at 9:56:34 PM UTC-5, Timothy Gregg wrote:
Sorry, guys I was no help and might have made things worse :(Definitely still not working.
Eh, trying your best is the only way to get better at something. And right now it's broken anyway, so I don't see how it can get much worse. Try to avoid breaking anything expensive, and fail early, fail often, and fail quickly. If you keep trying sooner or later you'll succeed.
Reply all
Reply to author
Forward
0 new messages