Laser cutting marble
13 views
Skip to first unread message

Zak Smolen
Oct 29, 2016, 11:46:12 PM10/29/16
to ashevil...@googlegroups.com
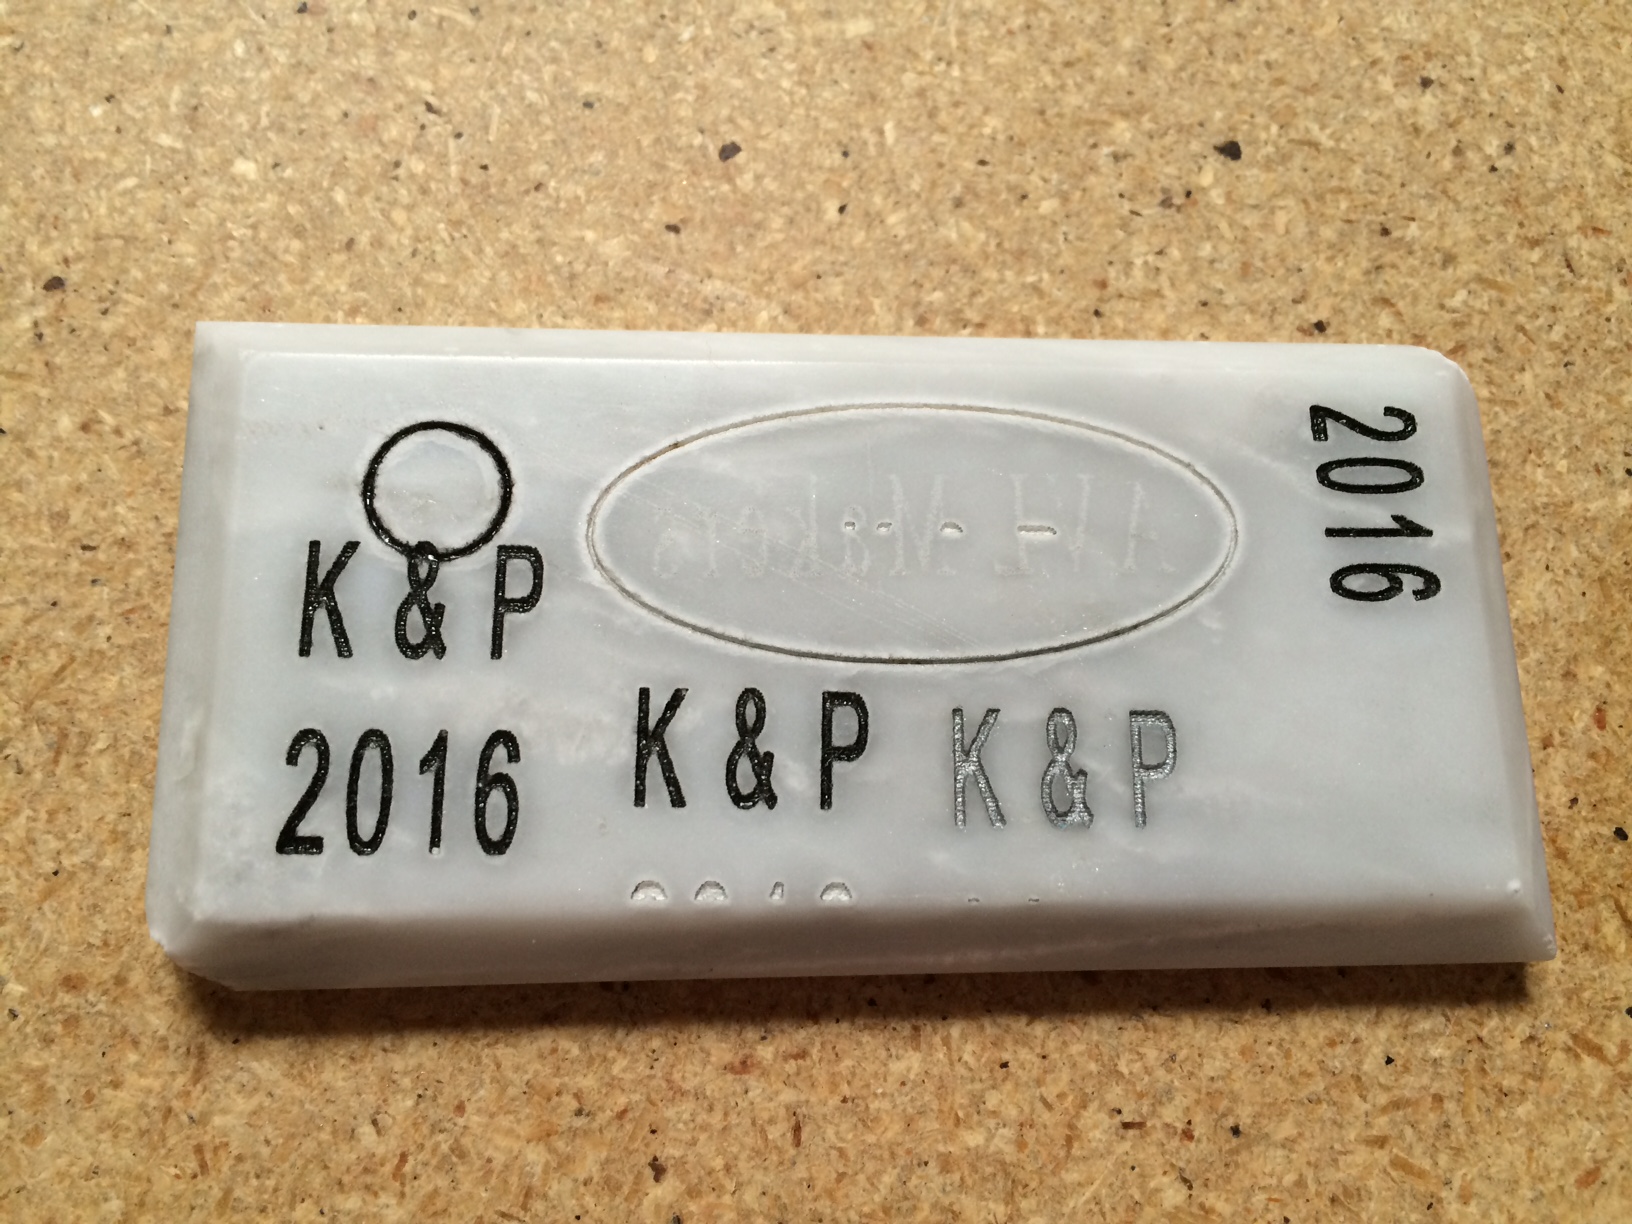
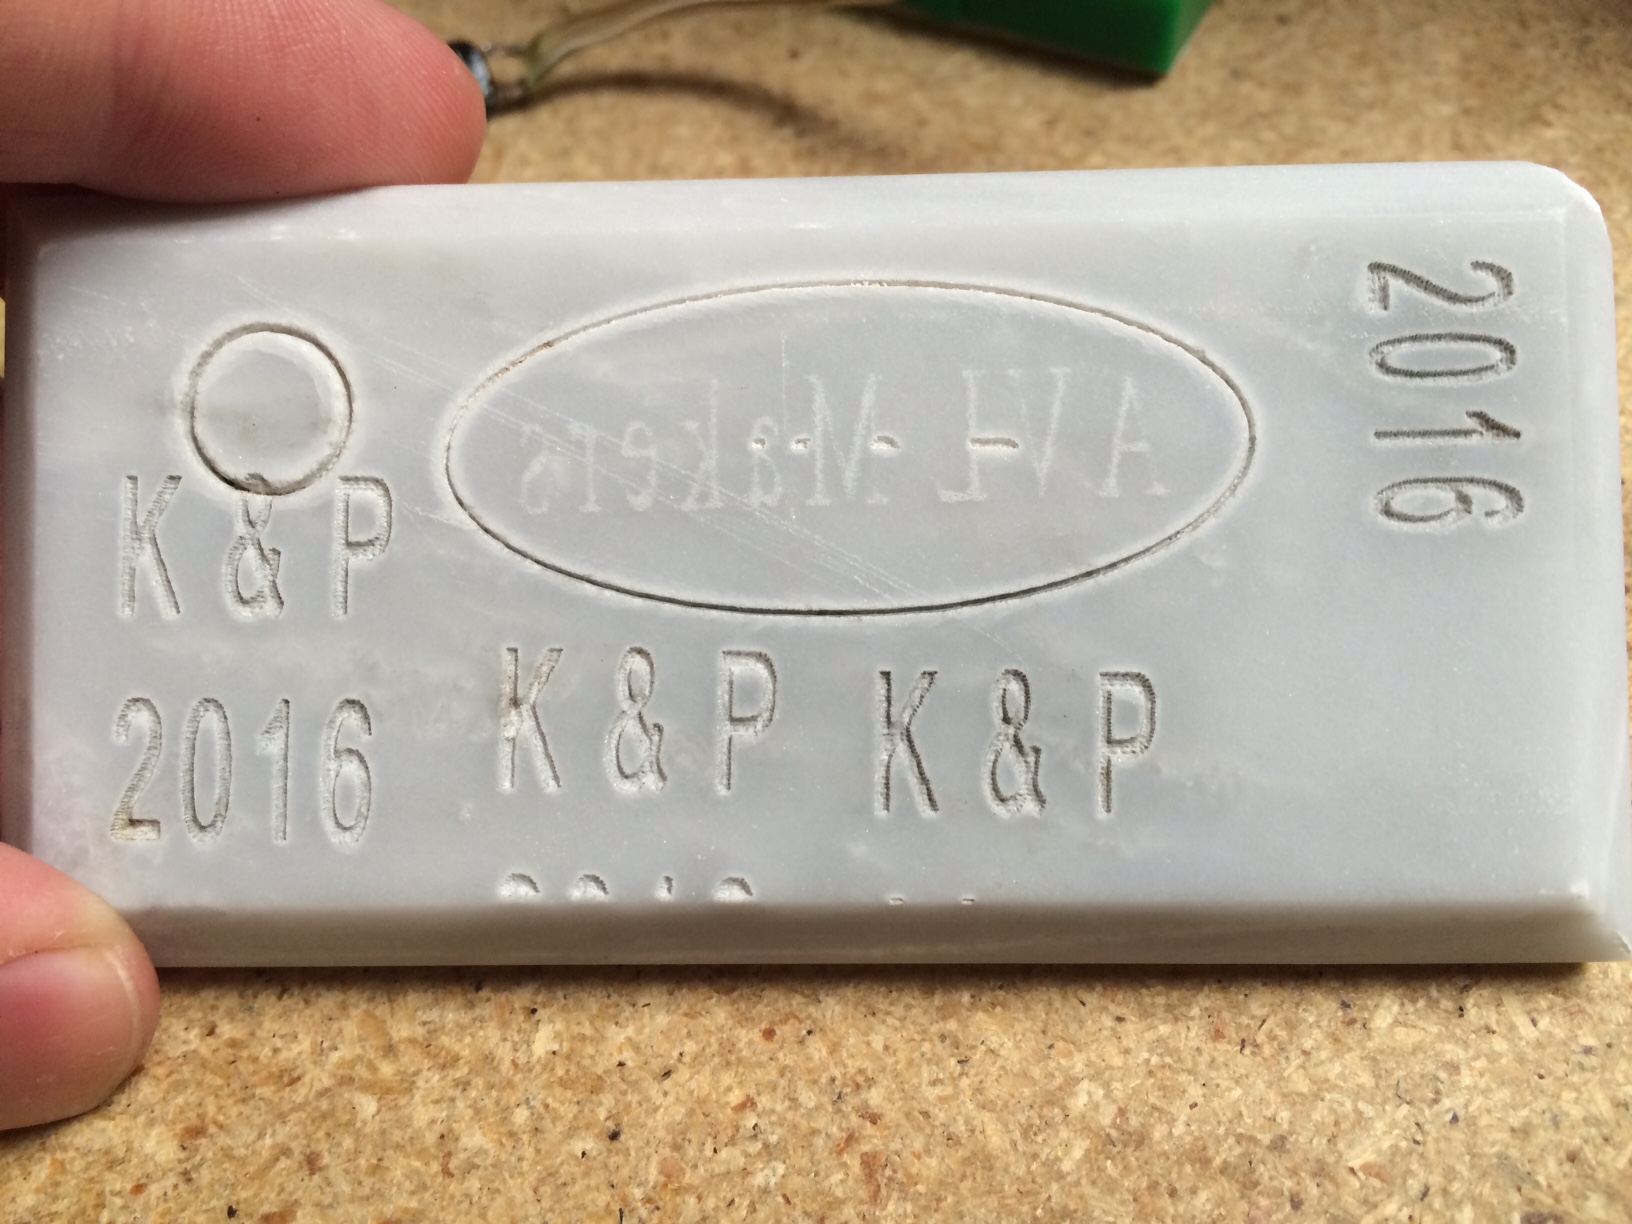
I picked up a mosaic sheet of marble tiles at the hardware store today. They are thin and finished pieces, and relatively cheap, so I figured that would be a good choice for experimentation since I don't have to worry about cutting up a large tile and finishing the edges. Anyway, it laser cut beautifully! I ran a few things that were already on the printer as tests.
The first test I did (top left corner) was a little circle which is 10 mm/s speed and 60% power. I ran that a few times, just to see how the material did with that. It engraved a bit deeper than the initial run and didn't leave too messy of an edge (something I have seen with multiple runs on other materials).
I then tried the check out file. The outline cut great at 10 mm/s, 60%. The letters even showed up at 200 mm/s 20%, though barely at that. That said, the letters didn't fade when I cleaned it with a wire brush.
The final tests I did was some file that says "K & P 2016" which I assume was from Patrick's slate experiments. The letters were filled in with scan mode and run at 10 mm/s, 60%. It only took one pass and it left a very nice and clean look.
I'm going to try finding some paint to fill in the letters as Tim suggested. If anyone has some cool things they want to try with marble I would be happy to part with a few of the tiles. All together it seems like a great material that our laser cutter handles well. Just don't look directly at it while it cuts... It's quite bright.

Steve Altemeier
Oct 30, 2016, 5:17:22 AM10/30/16
to ashevil...@googlegroups.com
That looks great! Would you mind putting some of these setting on the wiki? wiki.ashevillemakers.org, click on the laser cutter/engraver, and then settings for different materials are at the bottom of the page. You can add info by just clicking the Edit button on the bottom right and copying the format for the materials already there. Thanks!
--
You received this message because you are subscribed to the Google Groups "Asheville Makers" group.
To unsubscribe from this group and stop receiving emails from it, send an email to ashevillemakers+unsubscribe@googlegroups.com.
To post to this group, send email to ashevillemakers@googlegroups.com.
For more options, visit https://groups.google.com/d/optout.

Bob Sinclair
Oct 30, 2016, 10:42:49 AM10/30/16
to Asheville Makers

Zak Smolen
Oct 30, 2016, 11:48:11 AM10/30/16
to ashevil...@googlegroups.com
I went with the nail polish approach since it's easily available in lots of colors. Looks good and easy to clean with some light wiping with acetone and some 1500 grit sandpaper. I'm sure it's not as durable as something like epoxy but it should be good for experimentation.
--
You received this message because you are subscribed to the Google Groups "Asheville Makers" group.
To unsubscribe from this group and stop receiving emails from it, send an email to ashevillemake...@googlegroups.com.
To post to this group, send email to ashevil...@googlegroups.com.
Zak Smolen
Oct 30, 2016, 1:20:30 PM10/30/16
to ashevil...@googlegroups.com
Big news! I just figured out how to control the laser frequency. I know Tim was saying that would give us a lot more control over our results. All you need to do is click "Advance..." Next to processing mode when setting up the layers. I don't know enough to test that out but it's something we should look into soon.

Tim Swihart, Sr.
Oct 31, 2016, 1:29:30 AM10/31/16
to Asheville Makers
I saw the freq setting there..but couldn't find any documentation on what the max value can be... I'm used to having a known upper and lower limit (the Epilogs I used allow settings ranging from 1 to 5,000 pulses per inch of travel). The higher end is used for smoother edges when cutting acrylic (essentially flame polishing the edges as they're cut) while the lower end is handy for cutting wood/etc without excessive charring.
I believe that setting for our laser is simply frequency, so we'd have to do a wee bit of math to figure out the right settings based on whatever cutting speed has been set). It would still be very handy to know the upper limit of our machine (though perhaps that's a simple matter of just setting an arbitrarily large value and seeing if the software forces a lower limit on it). :-)
Tim Swihart, Sr.
Oct 31, 2016, 1:37:08 AM10/31/16
to Asheville Makers
Nice results! Any heavy bodied acrylic paint is supposed to work well with engraved stone/tile. Those might be easier to clean up any stray splotches.
There are also wax/pigment combinations readily available. "Rub N Buff" is a popular one I've tried....cool metallic colors! It sometimes dries VERY quickly and sticks amazingly well (so clean up can be a bit more work).
I suggest for any of these that instead of rubbing a soft cloth (paper towel, etc) over the stone, put the cloth on a flat surface and rub the stone/tile on the cloth. That will minimize how often the solvent-laced soft cloth will get pushed into the engraving and remove some of the color effect.
Lowes sells 12" x 12" tiles, a half inch thick, of polished black marble that engraves reasonably well and really pops when you put gold metallic fill into the engraving! I expect the copper and bronze fills would also look pretty cool.
Lowes sells 12" x 12" tiles, a half inch thick, of polished black marble that engraves reasonably well and really pops when you put gold metallic fill into the engraving! I expect the copper and bronze fills would also look pretty cool.
I'm hoping to get some laser time Tuesday to do some accuracy tests. The things I've cut so far where size matters have been off by a non-trivial amount. I set up a test file with some exact sizes that I'll engrave or cut then measure. The error could be in the drawing program or could be in the laser itself. If it's consistent, we can account for it in any design where it matters...
On Saturday, October 29, 2016 at 11:46:12 PM UTC-4, Zak Smolen wrote:
Reply all
Reply to author
Forward
0 new messages