New Front Panel Build

Terry Smedley

Norby
On Jul 1, 2021, at 8:34 AM, Terry Smedley <terry....@gmail.com> wrote:
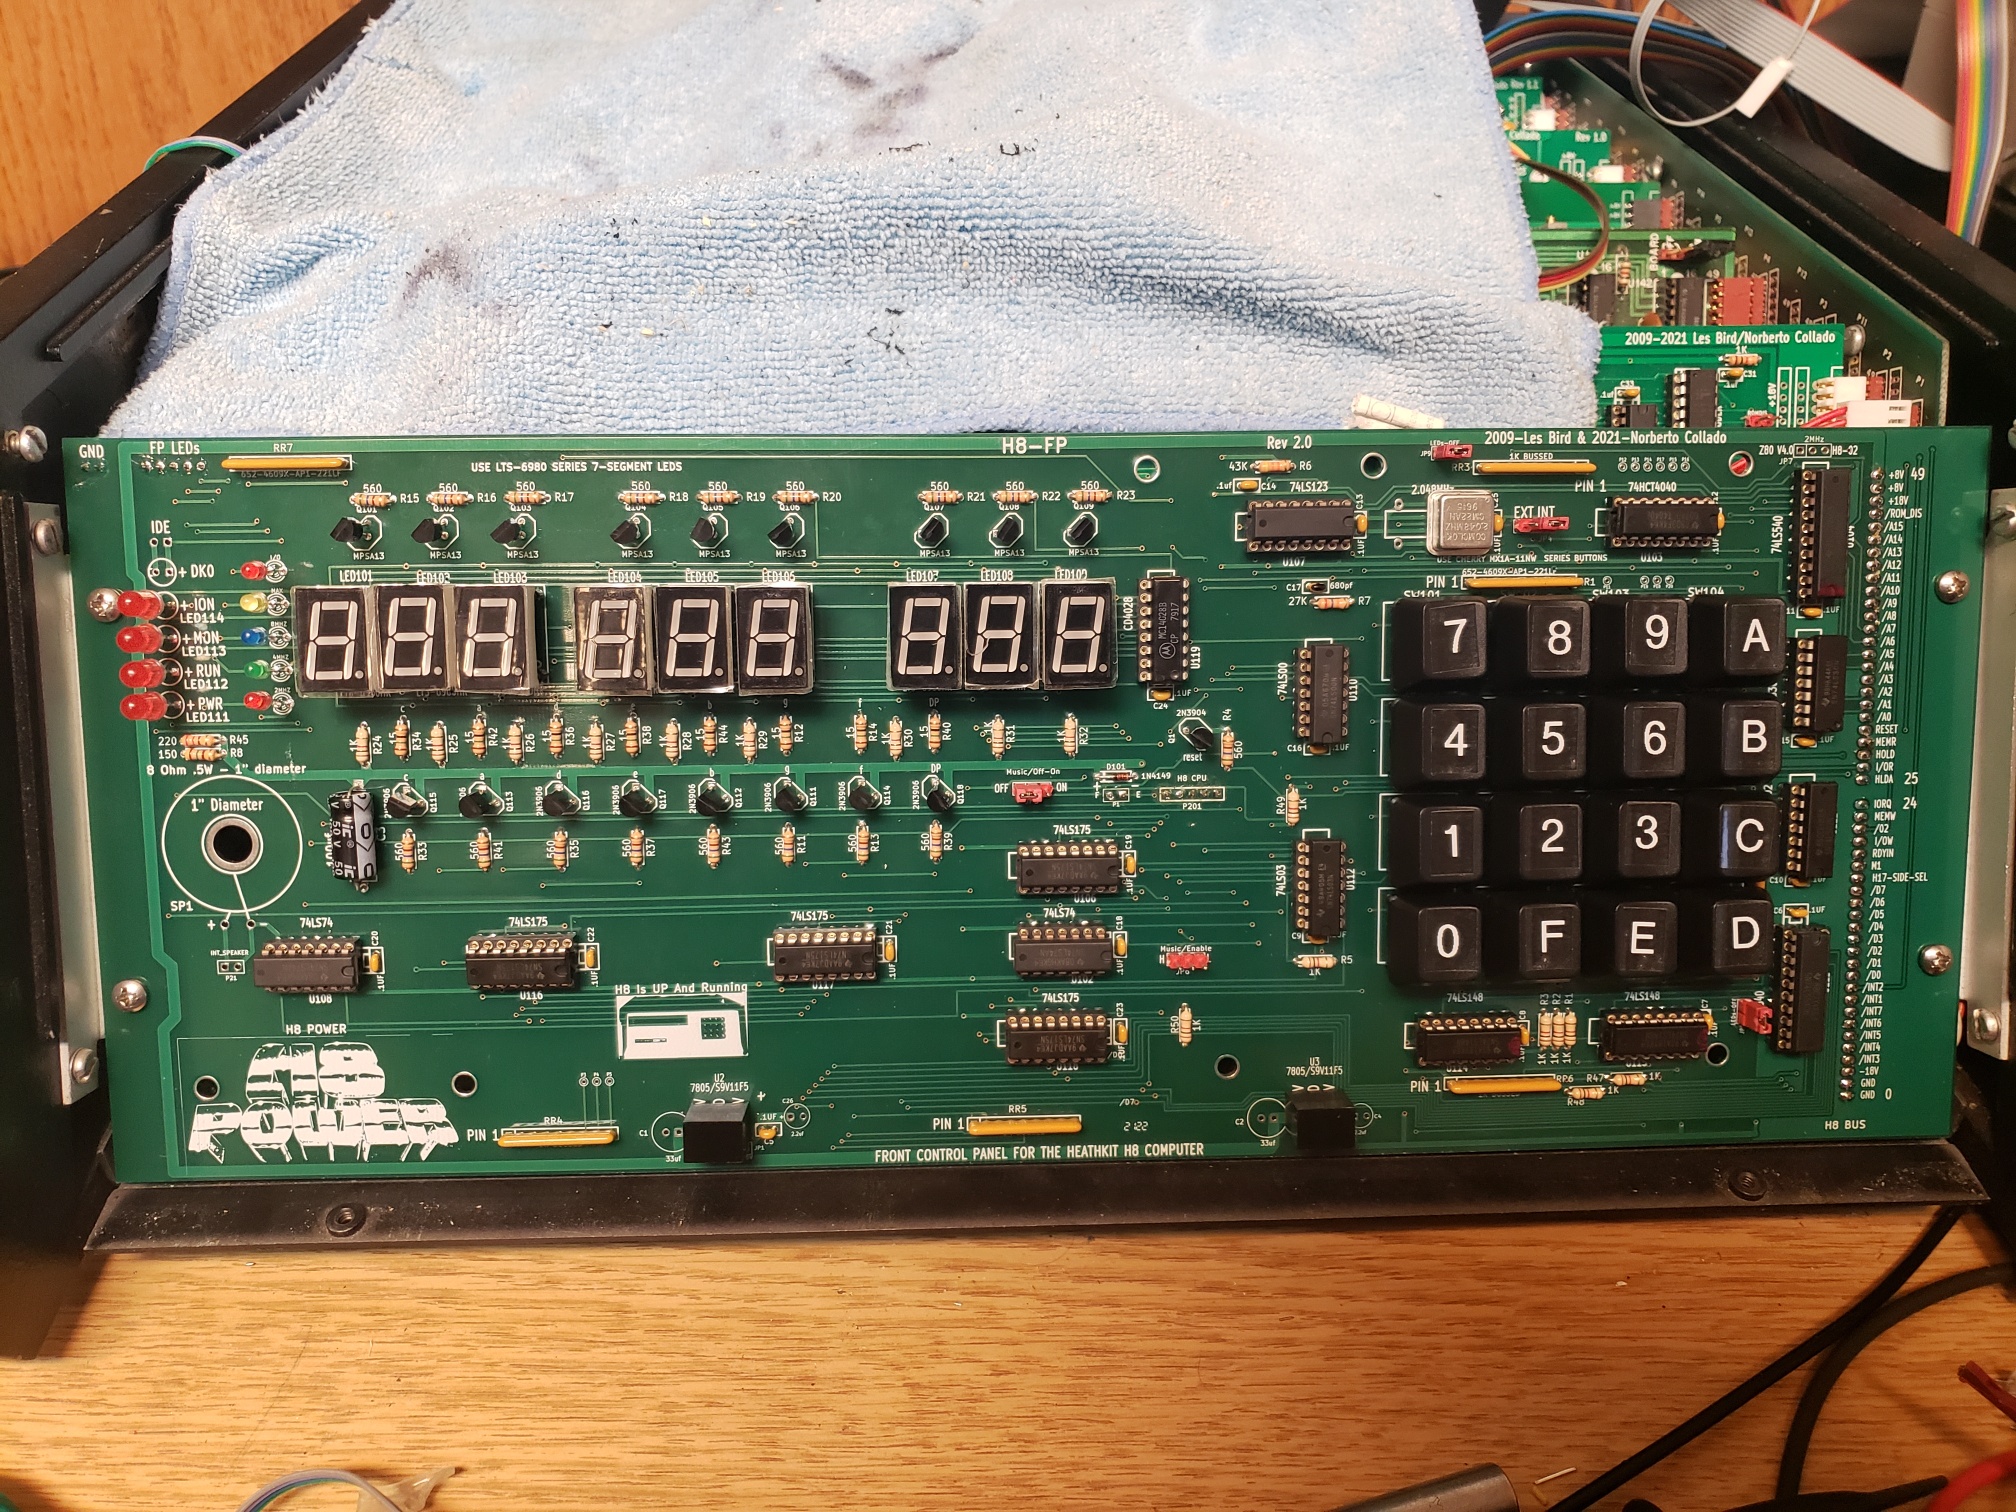
Here are some pictures from building Norberto's new front panel. Construction was quite smooth. One minor issue with the BOM noted (only affects the connection to the 3mm speed indicating LEDs).
--
You received this message because you are subscribed to the Google Groups "SEBHC" group.
To unsubscribe from this group and stop receiving emails from it, send an email to sebhc+un...@googlegroups.com.
To view this discussion on the web visit https://groups.google.com/d/msgid/sebhc/a7c97edf-095a-4861-94b1-25cac18fa1ecn%40googlegroups.com.
<FP Cable Assemblies.pdf><multi-color_LEDs.jpg><front_panel_wiring_cleanup.jpg><smoke_acrylic_8MHz.jpg>
Terry Smedley
Norberto Collado
Very nice and great to see it working.
On Ptouch labels you can use the following files:
http://koyado.com/Heathkit/H8_DUAL_GIDE_Controller_files/PAM37-Part1.lbx.zip
http://koyado.com/Heathkit/H8_DUAL_GIDE_Controller_files/PAM37IDE-Part2.lbx.zip
Norberto
--
You received this message because you are subscribed to the Google Groups "SEBHC" group.
To unsubscribe from this group and stop receiving emails from it, send an email to sebhc+un...@googlegroups.com.
To view this discussion on the web visit https://groups.google.com/d/msgid/sebhc/cf3bf519-4e8a-4353-a39a-072d7c390a24n%40googlegroups.com.
norberto...@koyado.com
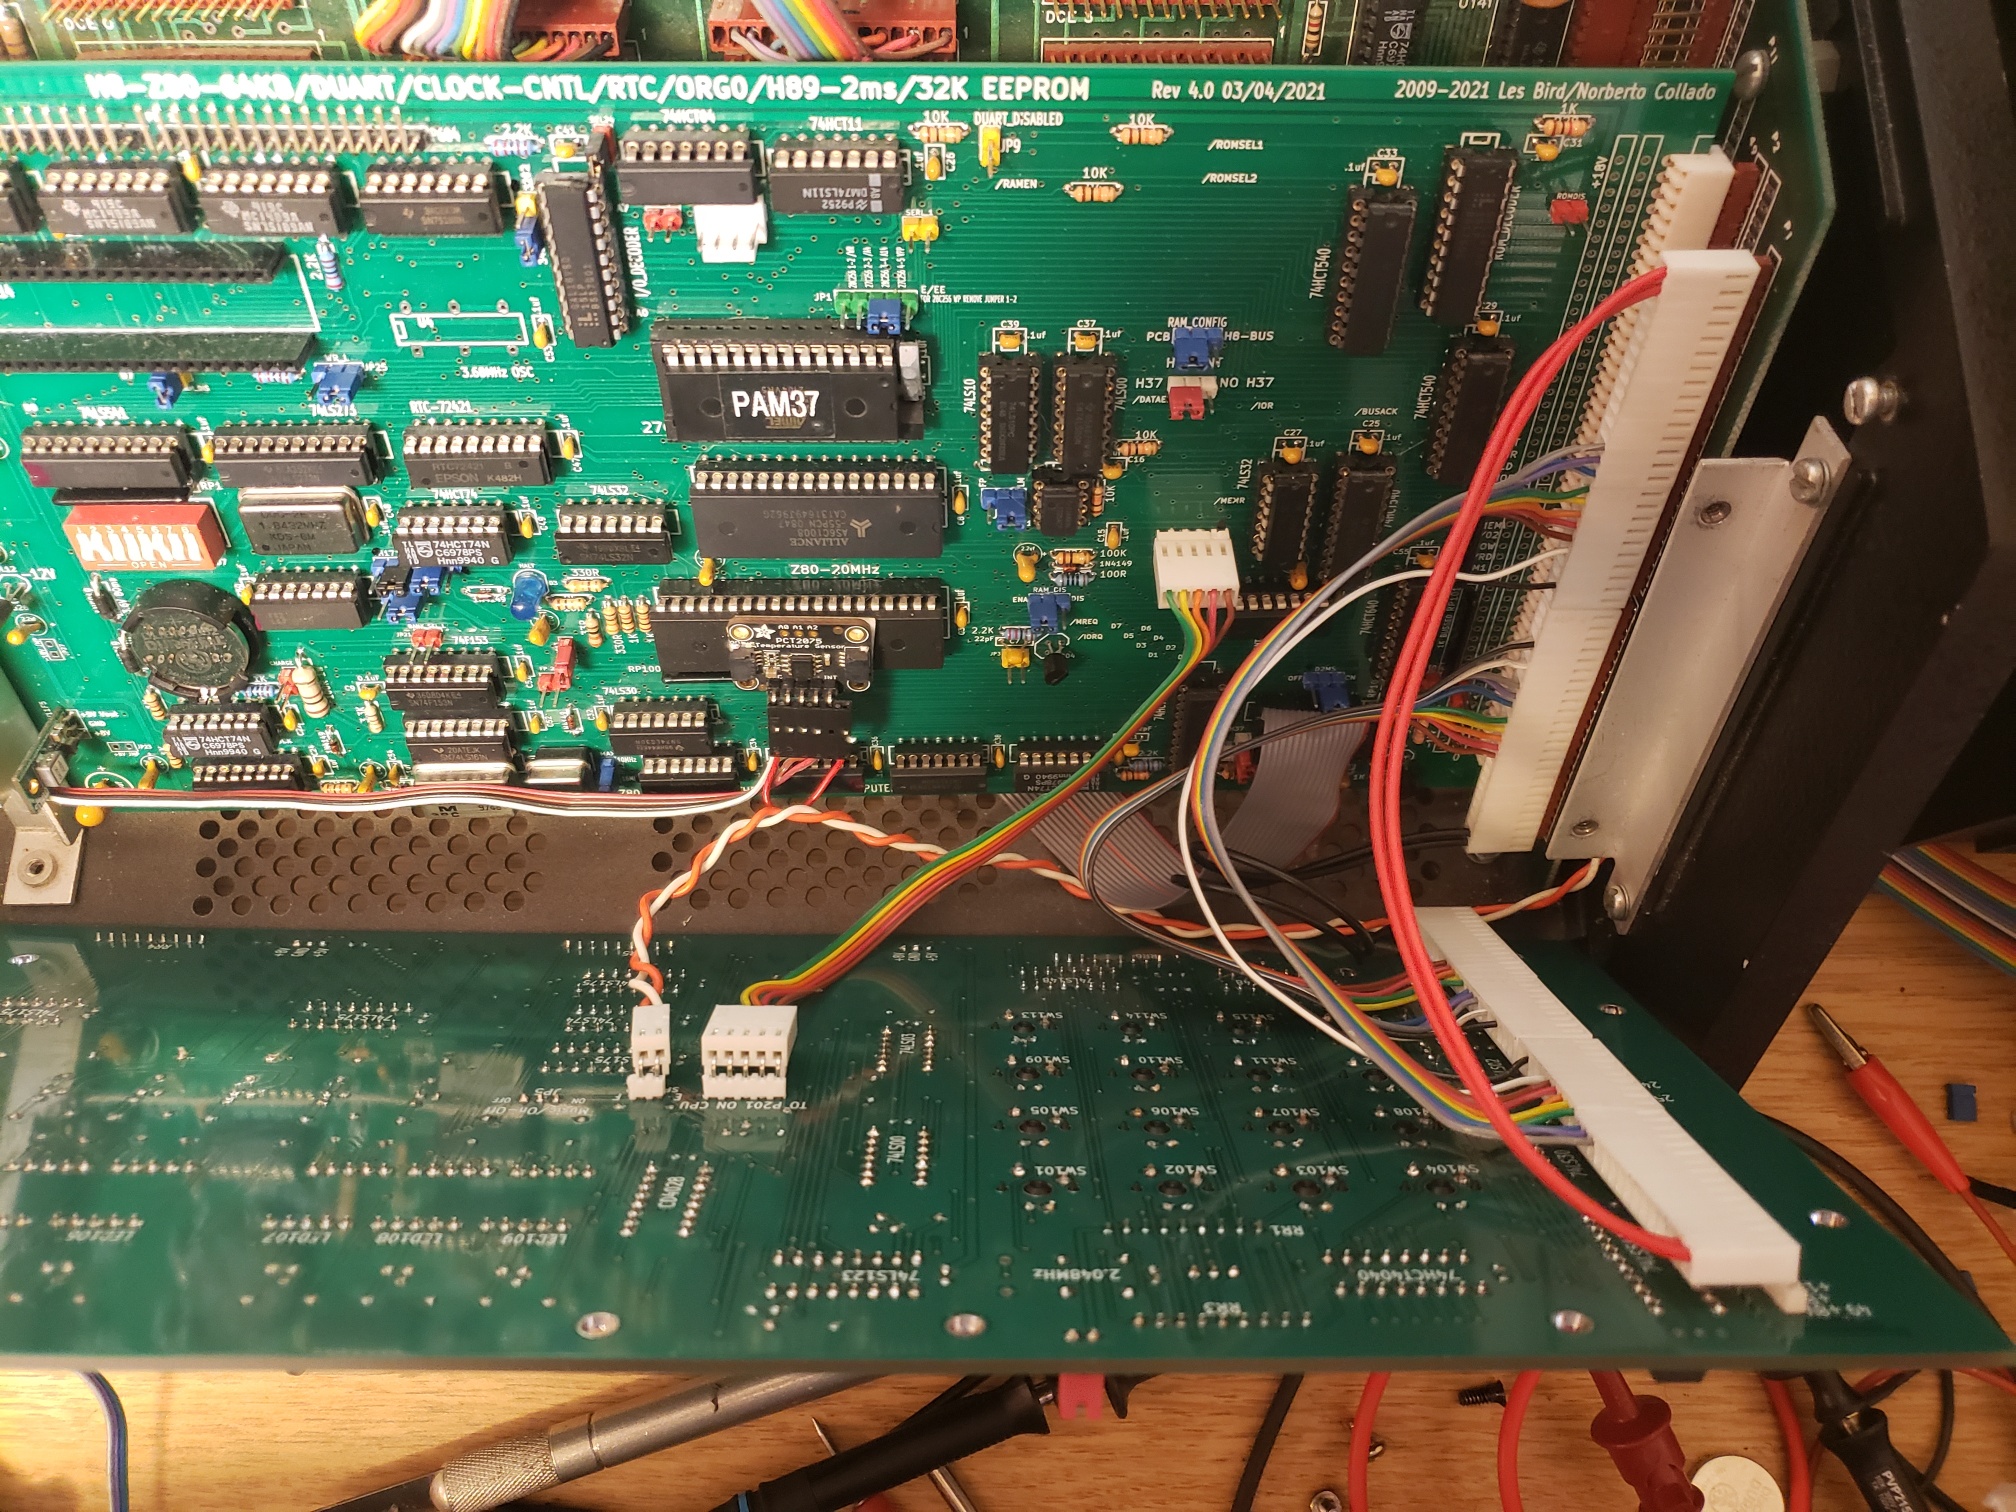
- My suggestion would be not to try to use the Heath clip that supported the front panel circuit board from the metal front cover. First off, the clip doesn't immediately fit the thicker board. But more importantly, the +8v trace at the top front of the board could be shorted to the ground plane on the back of the board or to the metal front panel.
Ouch! I missed that. Please no clips as the board is thicker. And no need for the bottom/top metal stiffener bar unless you are using the 7805 regulator as it serves as a heatsink as well. We highly recommend to use switching regulators and to be installed on side 1 of the board. Side 2 will be for the 7805 regulators on bottom stiffener bar.
Norberto
To view this discussion on the web visit https://groups.google.com/d/msgid/sebhc/33DACA3B-D31E-4E54-A17B-770CDDBC57E4%40koyado.com.

s shumaker
steve
To view this discussion on the web visit https://groups.google.com/d/msgid/sebhc/00b501d76ebd%24ee5bb1e0%24cb1315a0%24%40koyado.com.
norberto...@koyado.com
Yes, on the buildout board doc.
Norberto
To view this discussion on the web visit https://groups.google.com/d/msgid/sebhc/6ba8a1f5-9931-0a83-a899-f3e5439103e9%40att.net.

Glenn Roberts
Perhaps a REMarks issue too.
To view this discussion on the web visit https://groups.google.com/d/msgid/sebhc/00ce01d76ec9%24016929b0%24043b7d10%24%40koyado.com.
Glenn Roberts
First of all congratulations and thanks for leading the way Terry.
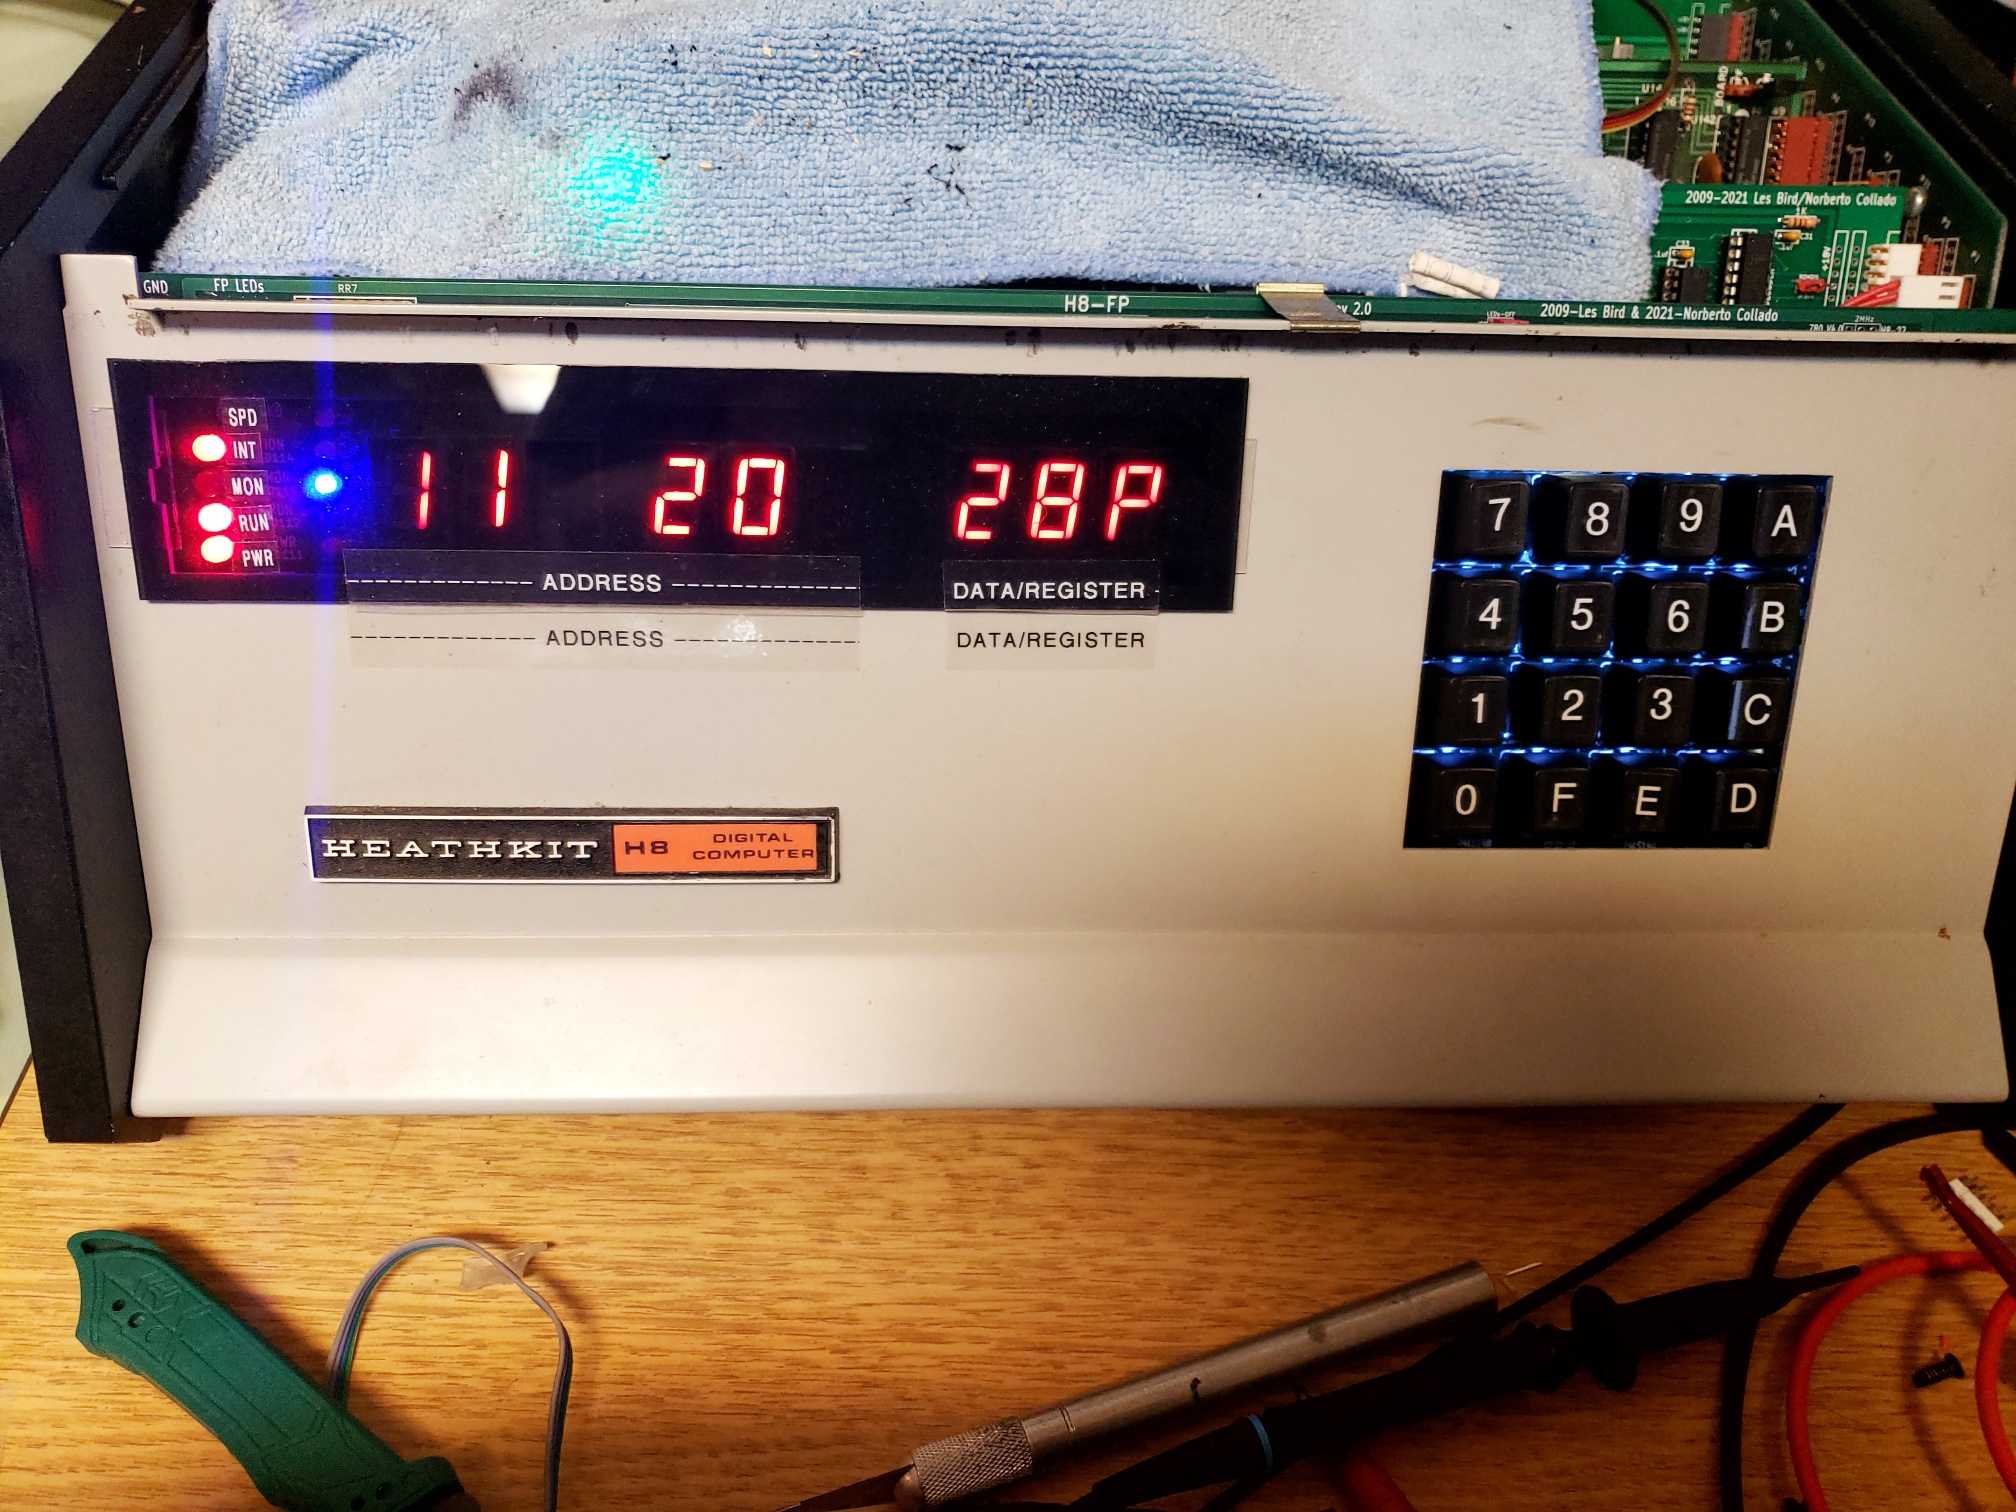
I don’t recall seeing many ideas/suggestions here for replacements on the acrylic lens. The smoky acrylic looks great! I love the visible speed LEDs (and the video you shared that shows the “step down” to 2Mhz when needed for H17). Since the lenses are often missing or damaged on older H8s we’ve needed a good replacement solution. You could consider using dry transfer lettering instead of the pTouch labels. Or I guess we could silkscreen these? (can you silkscreen acrylic? Is that how Heath did it?) I’ve often thought that small allen head screws would be a nice way to secure the lens but haven’t yet been willing to drill into the front of the chassis to do that!
Curious if you’ve tried installing the DUART/VDIP daughterboard on the CPU? How’s the clearance with the new front panel board?
I notice your 7-segment LEDs still have the plastic protectant sheet on them. that can be removed with no issue.
The instructions for the Z80 4.0 board jumper say “When installed, sends 2 MHz clock to the H8 backplane regardless of CPU speed. This is to support the new H8-Front-Panel V1.2 if users want to sync with the CPU clock.” Is this to essentially make things work like the original H8 design (vs the new approach of putting a 2.048 Mhz oscillator on the FP board?) not sure if/when one would want to do that?
Wow. It’s been a whirlwind year so far with all these new boards! I’m sure it’s hard for many in the group to keep up. We’ll need to make sure we capture and share all the knowledge as many of our members may not get to these builds for a while…
- Glenn
--
You received this message because you are subscribed to the Google Groups "SEBHC" group.
To unsubscribe from this group and stop receiving emails from it, send an email to sebhc+un...@googlegroups.com.
To view this discussion on the web visit https://groups.google.com/d/msgid/sebhc/a7c97edf-095a-4861-94b1-25cac18fa1ecn%40googlegroups.com.
Terry Smedley

Steven Feinsmith
Also, it is possible somewhere in China can do that kind of thing for a lower price.
Steven
To view this discussion on the web visit https://groups.google.com/d/msgid/sebhc/057601d76ed7%241c019a10%245404ce30%24%40gmail.com.
norberto...@koyado.com
The clearance issues with the VDIP1 on the DUART really aren't changed.
I will provide guidance on this as it is working for me.
Norberto
To view this discussion on the web visit https://groups.google.com/d/msgid/sebhc/32a4372a-7cda-42b7-83cc-094b97dcee3fn%40googlegroups.com.
Norberto Collado
Updated Front Panel BOM as two typos were encountered during build-out.
- Fixed 6 pin header instead of 5 pin header (for the speed 3mm LED’s)
- Fixed 6 pin housing instead of 5 pin housing (for the speed 3mm LED’s)
- Added MX Key Switch Dampers (Highly recommended to add them to avoid plastic against plastic friction when pressing on the MX switch).
- Added Keycap Removal Tool (The keycaps are hard to remove from the MX switch if inserted into the wrong switch position – recommended)
- Fixed some broken links to 74LS74 and 74LS123.
Link to updated BOM: http://koyado.com/heathkit/New-H8-Website/download/h8-fp_v13_bom.xlsx.zip
Thanks,
Norberto
From: "se...@googlegroups.com" <se...@googlegroups.com> on behalf of Glenn Roberts <glenn.f...@gmail.com>
Reply-To: "se...@googlegroups.com" <se...@googlegroups.com>
Date: Thursday, July 1, 2021 at 5:13 PM
To: "se...@googlegroups.com" <se...@googlegroups.com>
To view this discussion on the web visit https://groups.google.com/d/msgid/sebhc/057601d76ed7%241c019a10%245404ce30%24%40gmail.com.
Terry Smedley

geneb
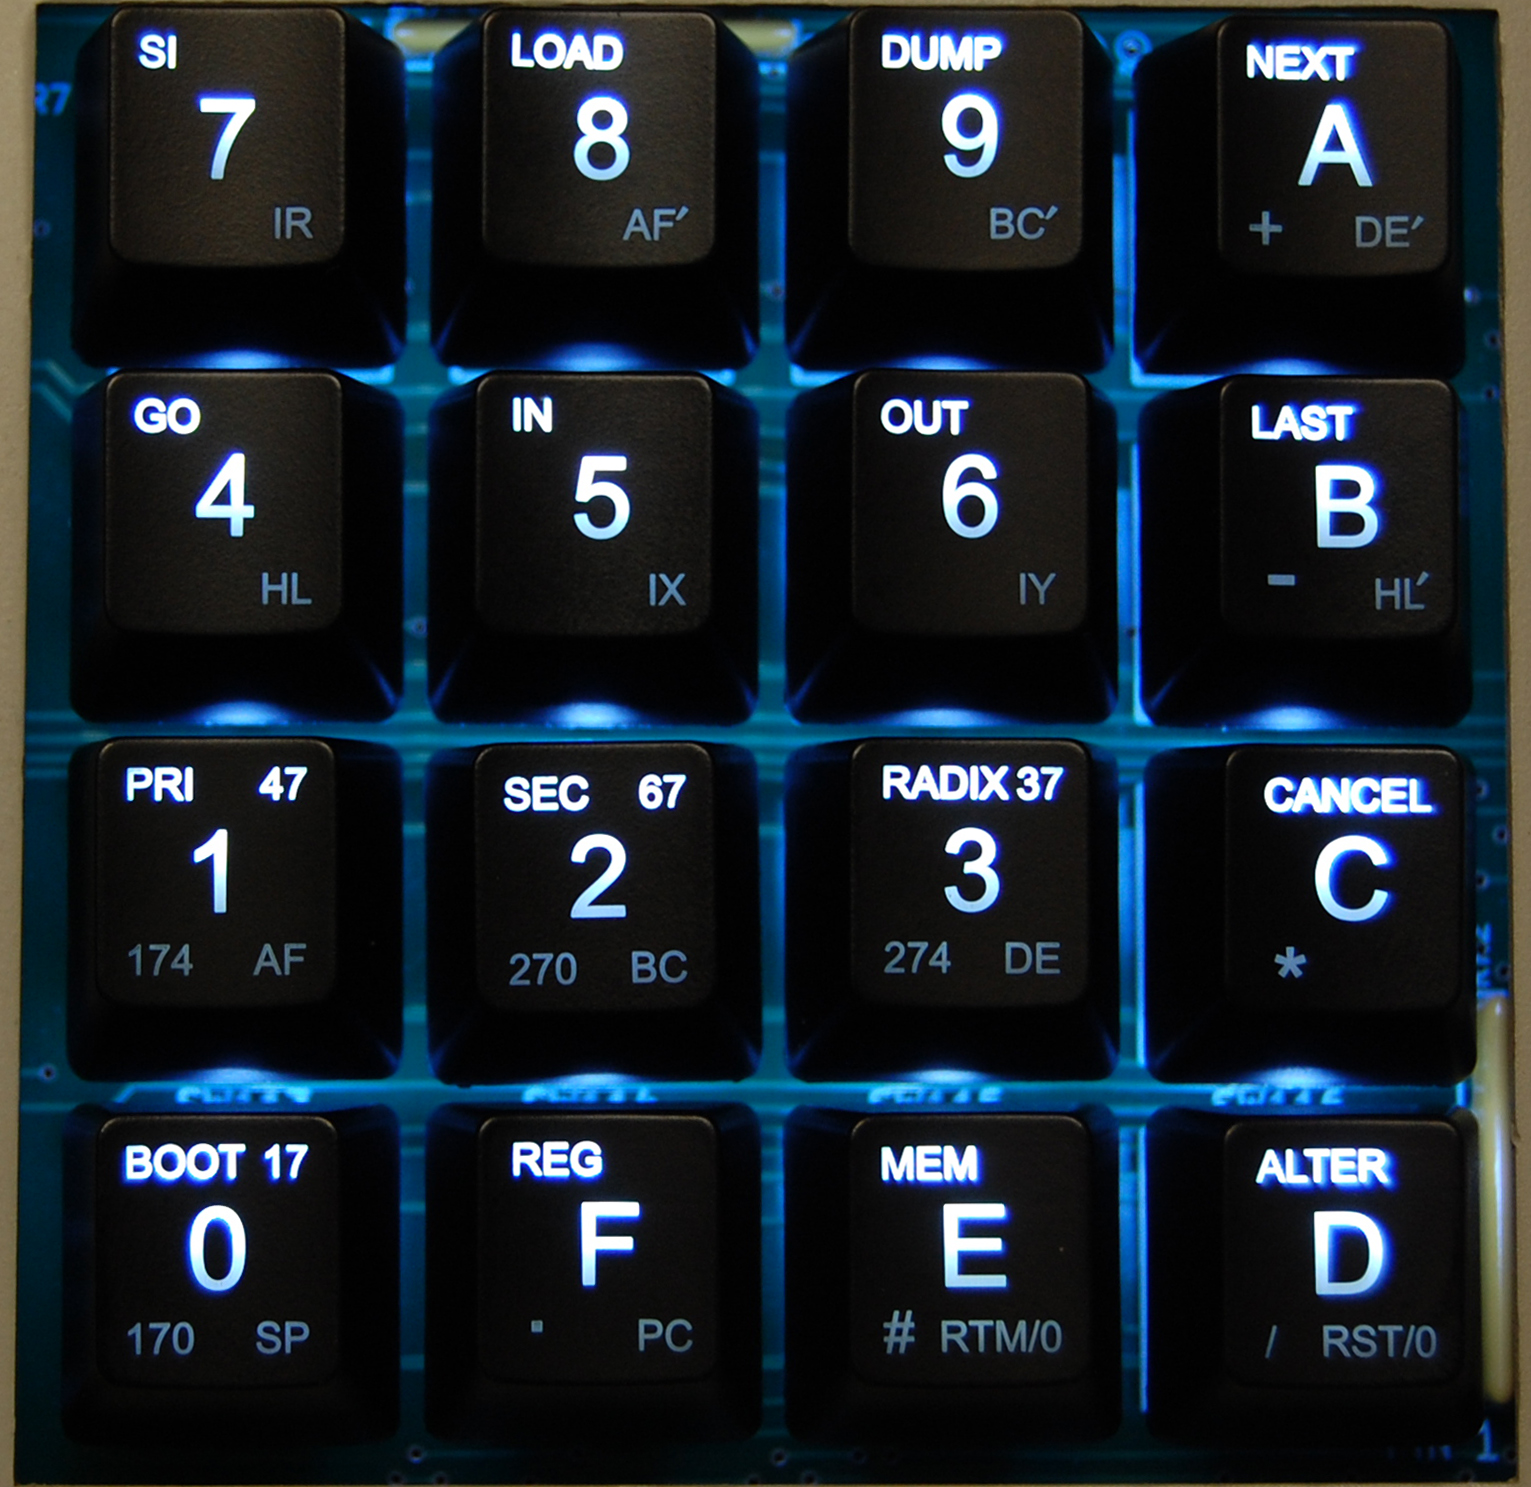
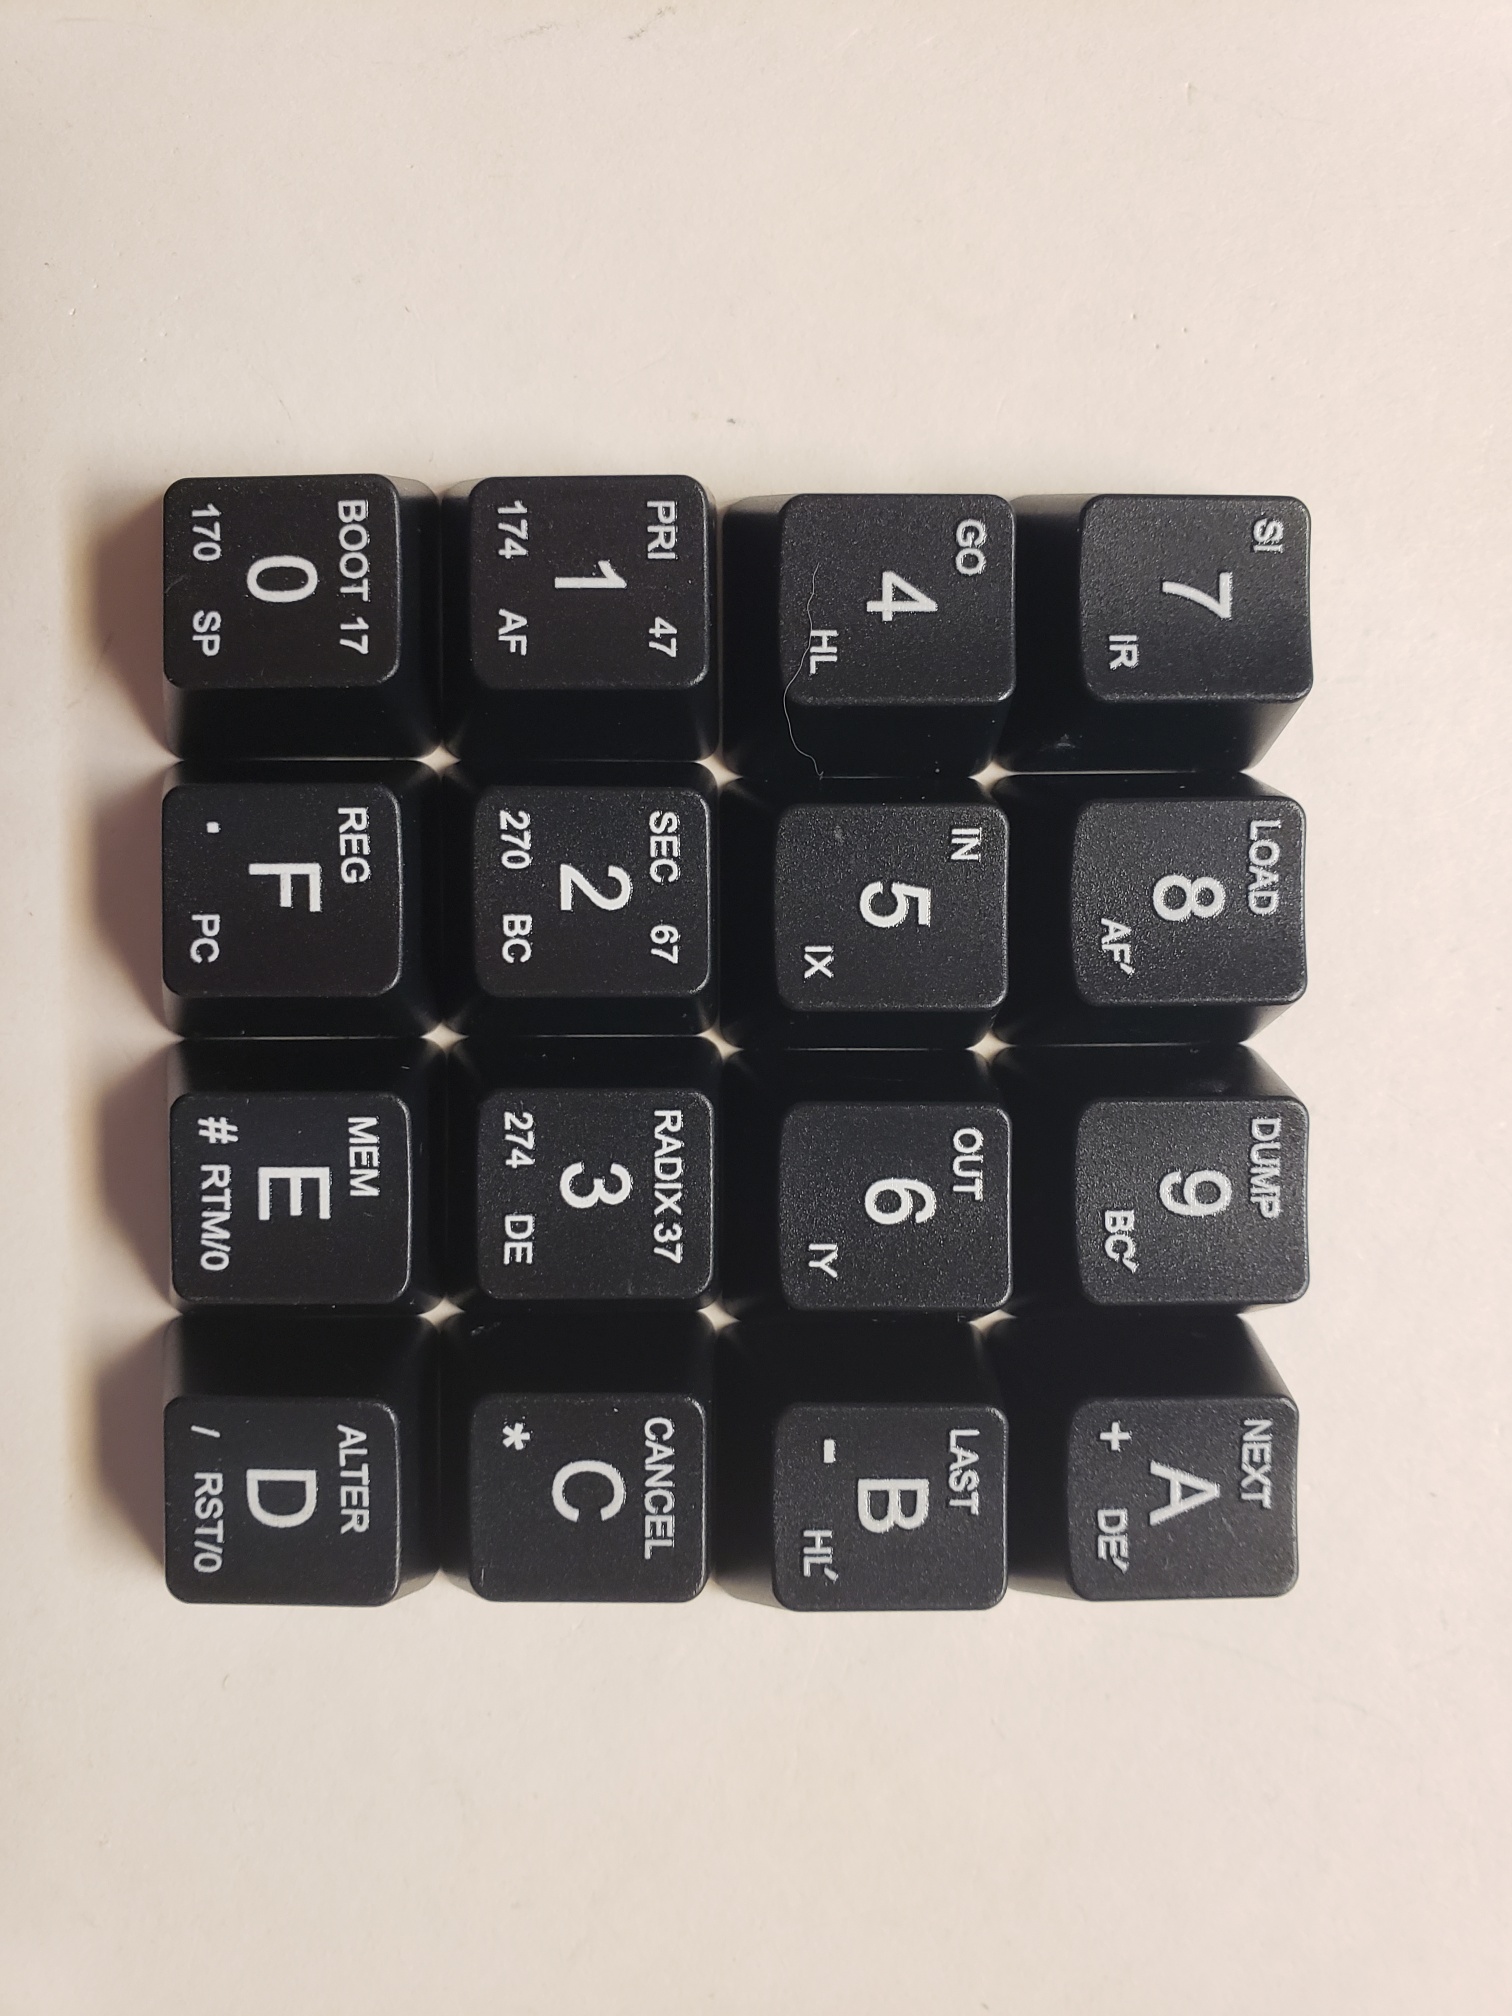
> I ordered custom keycaps from maxkeyboard.com using Norberto's instructions
> (http://koyado.com/heathkit/New-H8-Website/download/ordering-h8-custom-keycaps%20(1).pdf).
> The caps were received in about a week.
>
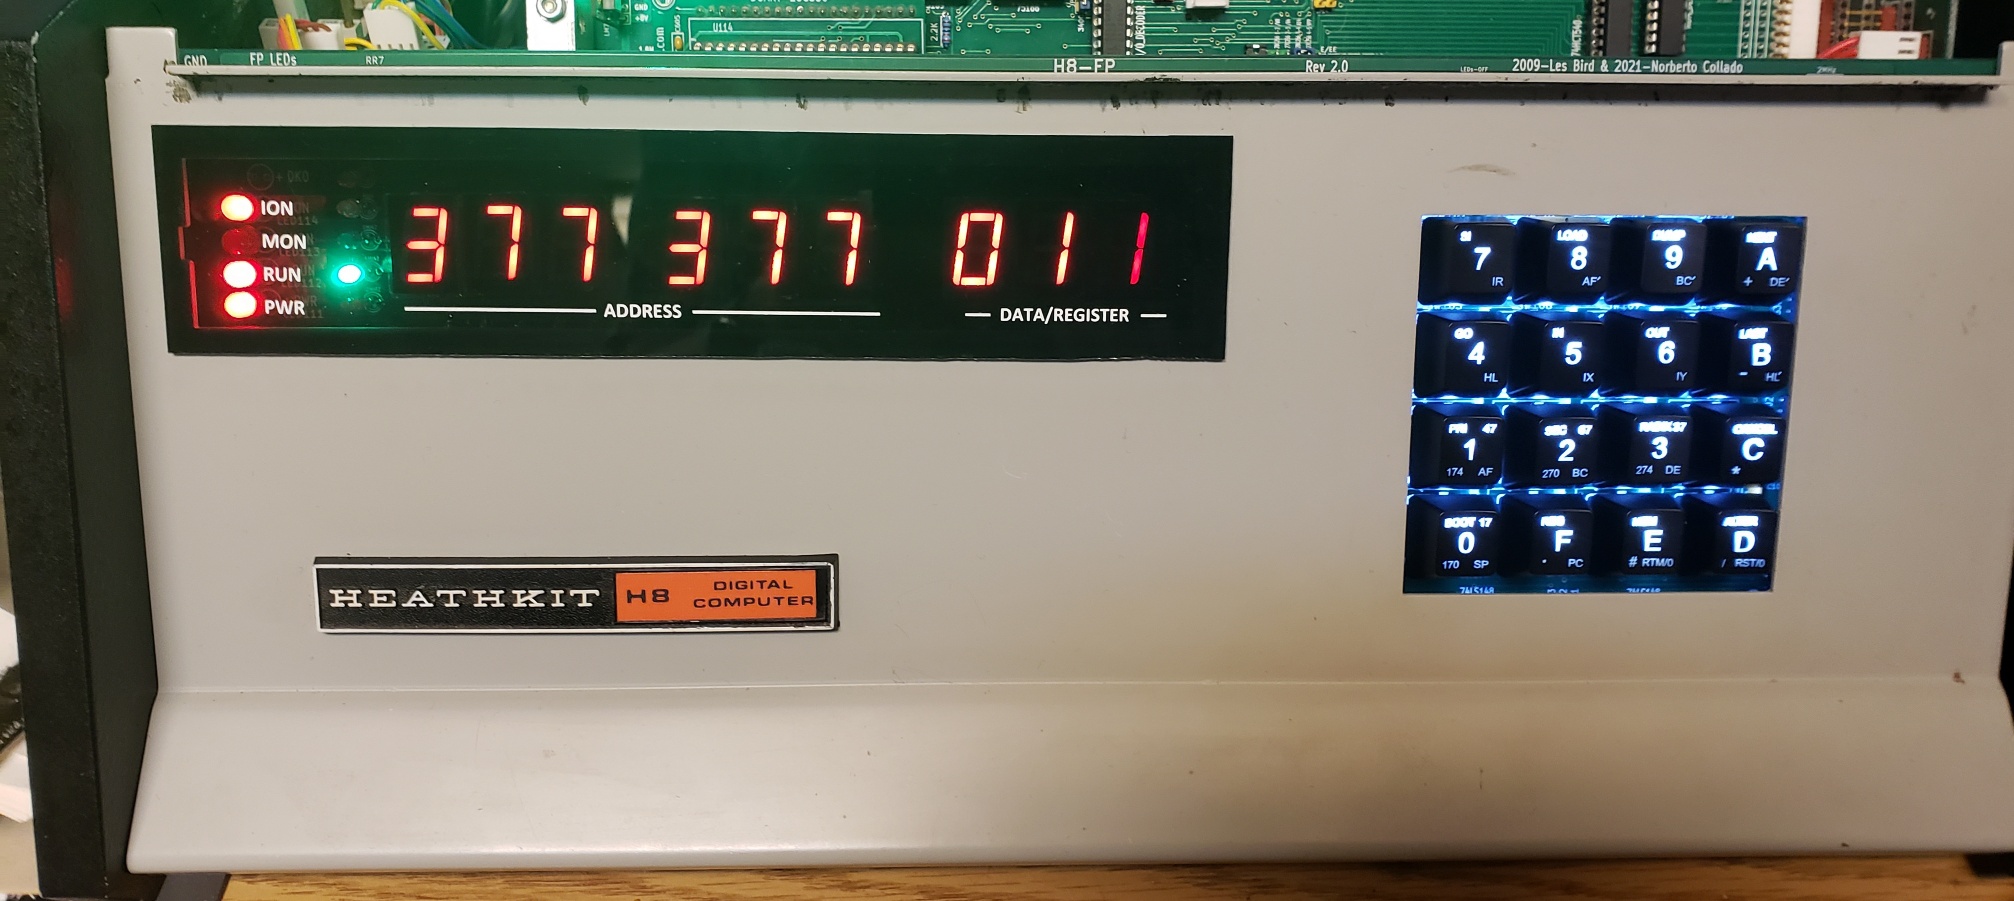
> Here are photographs of the backlit set installed with clear LED
> backlights. Also a photo of the complete opaque set (not installed). I
> think I will try to lay some black felt around the Cherry MXs bases to
> eliminate the "between the key" glow.
>
g.
--
Proud owner of F-15C 80-0007
http://www.f15sim.com - The only one of its kind.
http://www.diy-cockpits.org/coll - Go Collimated or Go Home.
Some people collect things for a hobby. Geeks collect hobbies.
ScarletDME - The red hot Data Management Environment
A Multi-Value database for the masses, not the classes.
http://scarlet.deltasoft.com - Get it _today_!
Terry Smedley
The transfers were mailed the day after I ordered them. The results look pretty true to the original. I like the smoked acrylic because it allows for LED indicator colors other than red, and it gives the LED 7-segment displays a "blackout" appearance.
norberto.collado koyado.com
Sent: Monday, July 12, 2021 8:28 AM
To: SEBHC <se...@googlegroups.com>
Subject: Re: [sebhc] New Front Panel Build
You received this message because you are subscribed to the Google Groups "SEBHC" group.
To unsubscribe from this group and stop receiving emails from it, send an email to sebhc+un...@googlegroups.com.
Terry Smedley
Glenn Roberts
Since the color indicates the speed I feel like it may not be necessary to label the 3mm ones. Could clutter the look.
I use the 5th LED position (5mm LEDs) on my system for the disk access LED. It would make sense to label that.
From: se...@googlegroups.com <se...@googlegroups.com> On Behalf Of Terry Smedley
To view this discussion on the web visit https://groups.google.com/d/msgid/sebhc/9654ec03-069f-4ce2-b67d-8a72bb39487bn%40googlegroups.com.
norberto.collado koyado.com
Sent: Monday, July 12, 2021 1:29 PM
To: se...@googlegroups.com <se...@googlegroups.com>
Subject: RE: [sebhc] New Front Panel Build
Glenn Roberts
Perhaps label the 5th position just “I/O” ? would be cool to aggregate all the board I/O signals to one LED but that sounds like a challenge. As it is I have the VDIP/USB I/O light, I/O lights for floppy drives, Z67 IDE, etc… currently I use it for the Z67 IDE
To view this discussion on the web visit https://groups.google.com/d/msgid/sebhc/BN7PR01MB3844B2D60B3B027BB3229D98F7159%40BN7PR01MB3844.prod.exchangelabs.com.
norberto.collado koyado.com
terry.smedley
To unsubscribe from this topic, visit https://groups.google.com/d/topic/sebhc/E-WTjW2oPjM/unsubscribe.
To unsubscribe from this group and all its topics, send an email to sebhc+un...@googlegroups.com.
To view this discussion on the web visit https://groups.google.com/d/msgid/sebhc/BN7PR01MB384458A6A831CB70E7FD4D97F7159%40BN7PR01MB3844.prod.exchangelabs.com.