Duet 2 Wifi board configuration for OpenPnP use

Hanski

ma...@makr.zone
Very cool! Very light looking! Fast?
Is it stable enough, with just this narrow center rail?
Video?
_Mark
--
You received this message because you are subscribed to the Google Groups "OpenPnP" group.
To unsubscribe from this group and stop receiving emails from it, send an email to openpnp+u...@googlegroups.com.
To view this discussion on the web visit https://groups.google.com/d/msgid/openpnp/7389ea88-1275-4428-8673-2bb12190842a%40googlegroups.com.

Mike M.
Mike M.
Hanski
--
You received this message because you are subscribed to a topic in the Google Groups "OpenPnP" group.
To unsubscribe from this topic, visit https://groups.google.com/d/topic/openpnp/M9VY-GcFP2o/unsubscribe.
To unsubscribe from this group and all its topics, send an email to openpnp+u...@googlegroups.com.
To view this discussion on the web visit https://groups.google.com/d/msgid/openpnp/6b2e1479-68d0-42e0-9bdf-88189388e212%40googlegroups.com.

dc42
Hanski
--
You received this message because you are subscribed to a topic in the Google Groups "OpenPnP" group.
To unsubscribe from this topic, visit https://groups.google.com/d/topic/openpnp/M9VY-GcFP2o/unsubscribe.
To unsubscribe from this group and all its topics, send an email to openpnp+u...@googlegroups.com.
To view this discussion on the web visit https://groups.google.com/d/msgid/openpnp/9f8b21c8-4095-49a7-9077-be934cbc4138%40googlegroups.com.
Hanski

Jarosław Karwik
ma...@makr.zone
Very nice! Thanks for that.
_Mark
--
You received this message because you are subscribed to the Google Groups "OpenPnP" group.
To unsubscribe from this group and stop receiving emails from it, send an email to openpnp+u...@googlegroups.com.
To view this discussion on the web visit https://groups.google.com/d/msgid/openpnp/527ccf25-b6e5-4ce7-9329-7b123dfbfc12%40googlegroups.com.
Hanski
--
You received this message because you are subscribed to a topic in the Google Groups "OpenPnP" group.
To unsubscribe from this topic, visit https://groups.google.com/d/topic/openpnp/M9VY-GcFP2o/unsubscribe.
To unsubscribe from this group and all its topics, send an email to openpnp+u...@googlegroups.com.
To view this discussion on the web visit https://groups.google.com/d/msgid/openpnp/d608b509-9468-44f9-a66e-badfd0da3f2e%40googlegroups.com.

Felix Schneider
On 20. Mar 2020, at 19:35, Hanski <hanski...@gmail.com> wrote:
Hi!
You received this message because you are subscribed to the Google Groups "OpenPnP" group.
To unsubscribe from this group and stop receiving emails from it, send an email to openpnp+u...@googlegroups.com.
To view this discussion on the web visit https://groups.google.com/d/msgid/openpnp/19D007B4-D713-41E6-A002-6ED08B5ABD7B%40gmail.com.
Hanski
To view this discussion on the web visit https://groups.google.com/d/msgid/openpnp/6A14F773-F65A-4F80-9EC4-178E59AEF813%40yasit.net.

Bill Ruckman
To view this discussion on the web visit https://groups.google.com/d/msgid/openpnp/6A14F773-F65A-4F80-9EC4-178E59AEF813%40yasit.net.
Felix Schneider
On 20. Mar 2020, at 21:02, Bill Ruckman <bil...@gmail.com> wrote:
To view this discussion on the web visit https://groups.google.com/d/msgid/openpnp/CALrF6L7M8-ykPsJfLewRn5g%2BLAPpxyHaS8x2m7vb1FxHRwm4qg%40mail.gmail.com.
Hanski
To view this discussion on the web visit https://groups.google.com/d/msgid/openpnp/1A92E85D-7C1E-4780-8F6F-9710E4AC7A05%40yasit.net.
Jarosław Karwik
To view this discussion on the web visit https://groups.google.com/d/msgid/openpnp/C65435F4-9C65-4118-BC30-0606F107090E%40gmail.com.
Bill Ruckman
Wont vibrations from picking up first part cause second part to jump?
To view this discussion on the web visit https://groups.google.com/d/msgid/openpnp/CAC%2BEaog4c2ZQYF0O5uqgVRX%2BDcuWax%2Btet4wkSKPQDwfq%2BLF4A%40mail.gmail.com.
Mike M.
-Hanski
To unsubscribe from this group and all its topics, send an email to ope...@googlegroups.com.
ma...@makr.zone
Hanski
out of curiosity,
- can the camera reach the feeder pick location?
- does it see two sprocket holes (or more)?
Something like this:
I'm asking because I'm in the process of developing a new feeder
class in OpenPNP that can do what the lever feeder can do and
more. But the condition for using it comfortably are the above two
points (it can be used without vision but that's no fun).
_Mark
To view this discussion on the web visit https://groups.google.com/d/msgid/openpnp/C65435F4-9C65-4118-BC30-0606F107090E%40gmail.com.
Jarosław Karwik
You received this message because you are subscribed to the Google Groups "OpenPnP" group.
To unsubscribe from this group and stop receiving emails from it, send an email to openpnp+u...@googlegroups.com.
To view this discussion on the web visit https://groups.google.com/d/msgid/openpnp/e5cb6e53-adaf-4b55-903d-5efc5c508bba%40googlegroups.com.
Hanski
On 21. Mar 2020, at 0.21, ma...@makr.zone wrote:
Hanski
out of curiosity,
- can the camera reach the feeder pick location?
- does it see two sprocket holes (or more)?
Something like this:
<jioomnpkpbnbcgdm.png>
Hanski
ma...@makr.zone
Hi Hanski
I think my new feeder will work with that. It will automatically
"understand" the tape direction based on the sprocket holes
relative to the pick location and the EIA-481 standard and
therefore it will correctly iterate through the two picks.
You can even add a "Multiplier", so you can actuate the levers
multiple times, to serve 4 x 0402 parts or 2 x 0603 for instance.
This can save some time for feeders where the machine motion
required to reach the levers is significant.
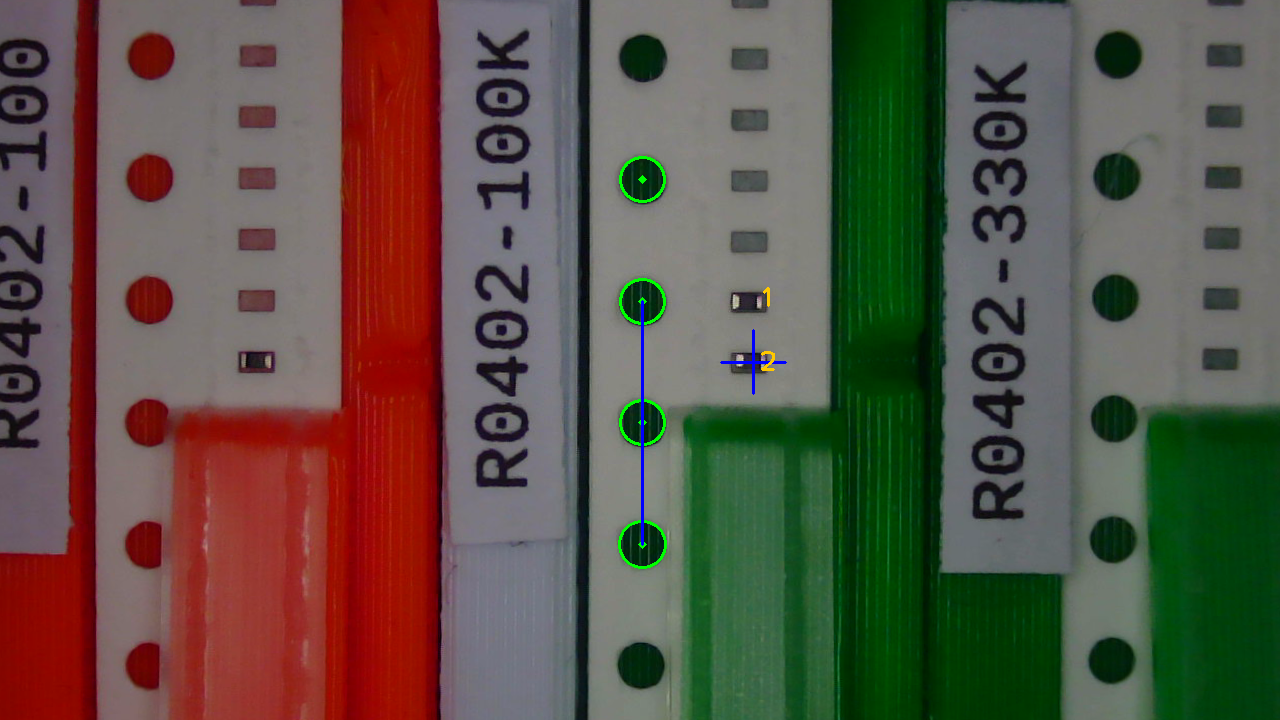
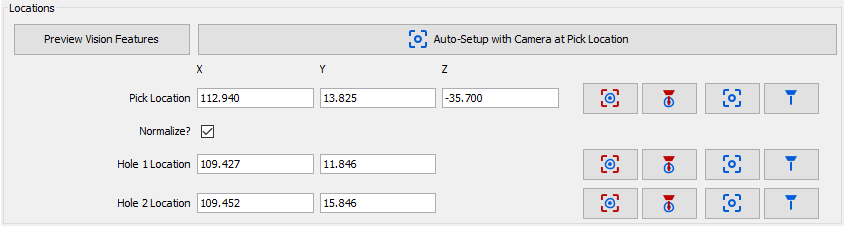
This is how vision numbers the picks in setup/calibration:


I have some problems yet to solve, then I will create a Pull
Request.
_Mark
Hanski
On 22. Mar 2020, at 12.53, ma...@makr.zone wrote:
Hi Hanski
I think my new feeder will work with that. It will automatically "understand" the tape direction based on the sprocket holes relative to the pick location and the EIA-481 standard and therefore it will correctly iterate through the two picks.
You can even add a "Multiplier", so you can actuate the levers multiple times, to serve 4 x 0402 parts or 2 x 0603 for instance. This can save some time for feeders where the machine motion required to reach the levers is significant.
This is how vision numbers the picks in setup/calibration:
<fgjdfbilkiolhmfc.png>
<gcadbfkbnpbkcblc.png>
I have some problems yet to solve, then I will create a Pull Request.
_Mark
Am 21.03.2020 um 10:12 schrieb Hanski:
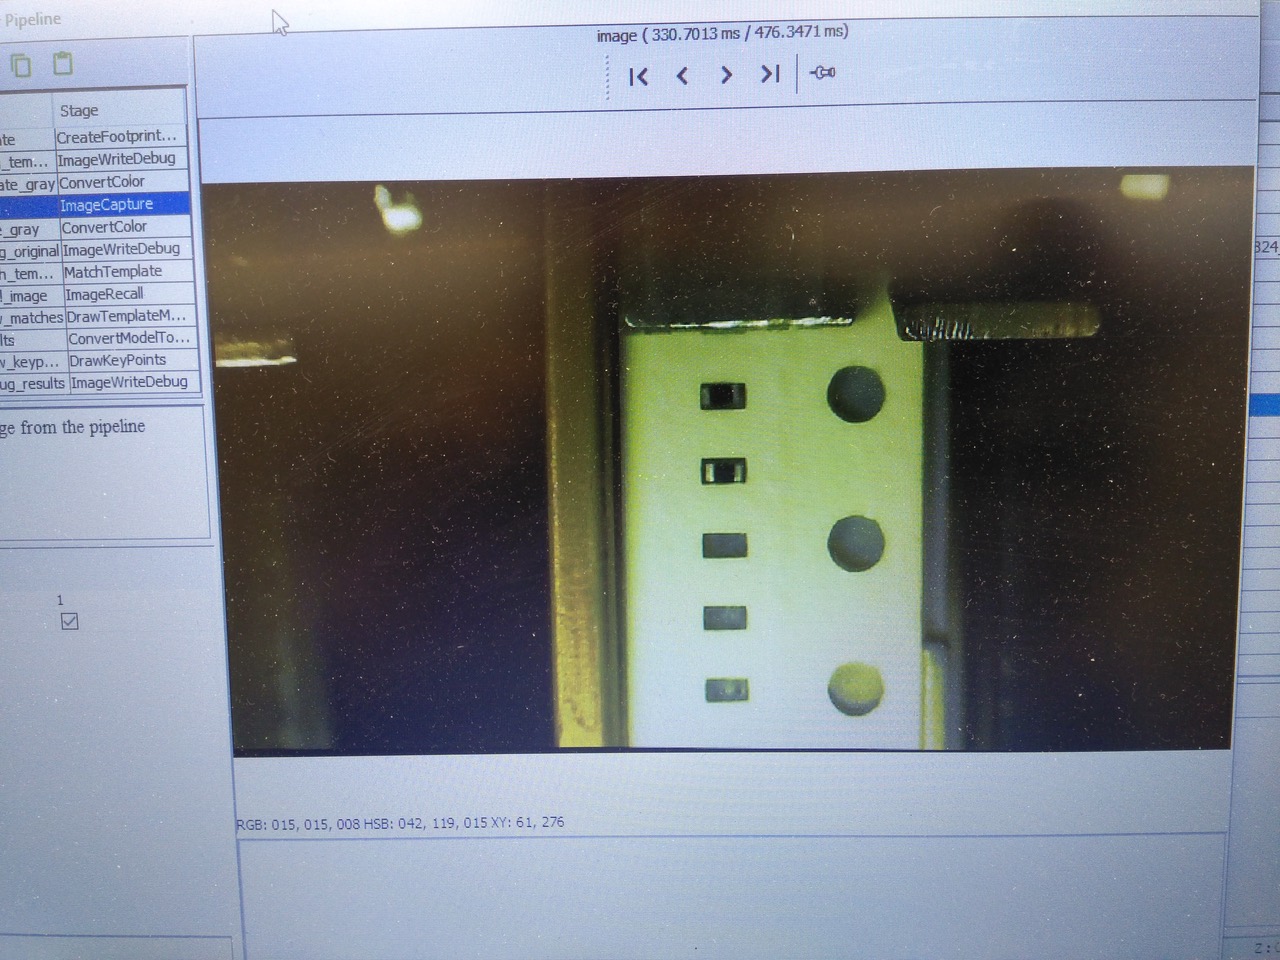
Hi Mark!In my case the two 0402 exposed parts in the feeder would look like this.
Sorry about the poor picture quality. I can’t post the original debug images. For some reason all pipeline stage image folder pictures are always 0KB in size and can’t be opened. I’ve set the log level to debug or trace but no difference. It does store all pics but all are 0KB size.
-Hanski
<IMG_20200321_110355.jpeg>
--
You received this message because you are subscribed to a topic in the Google Groups "OpenPnP" group.
To unsubscribe from this topic, visit https://groups.google.com/d/topic/openpnp/M9VY-GcFP2o/unsubscribe.
To unsubscribe from this group and all its topics, send an email to openpnp+u...@googlegroups.com.
To view this discussion on the web visit https://groups.google.com/d/msgid/openpnp/55ba3dda-a804-6b42-7758-d03d97cad6d0%40makr.zone.
ma...@makr.zone
You cannot set the direction manually, but you can set &
capture the two reference sprocket hole locations manually. This
is also useful if vision is not possible, i.e. when only the
nozzle tip can reach the feeder. You can then use the nozzle tip
to capture their locations. Or you can even calculate their
locations from theory (this is no fun but also not as difficult as
it sounds).
_Mark
You received this message because you are subscribed to the Google Groups "OpenPnP" group.
To unsubscribe from this group and stop receiving emails from it, send an email to openpnp+u...@googlegroups.com.
To view this discussion on the web visit https://groups.google.com/d/msgid/openpnp/F55465BF-C0FE-4A5D-BE88-C7FD9EF866BF%40gmail.com.
Hanski
On 22. Mar 2020, at 16.05, ma...@makr.zone wrote:
You cannot set the direction manually, but you can set & capture the two reference sprocket hole locations manually. This is also useful if vision is not possible, i.e. when only the nozzle tip can reach the feeder. You can then use the nozzle tip to capture their locations. Or you can even calculate their locations from theory (this is no fun but also not as difficult as it sounds).
<ehhdppnccaplebnk.png>
To view this discussion on the web visit https://groups.google.com/d/msgid/openpnp/95962ba8-49fb-9748-f50b-fc934a67dbb3%40makr.zone.
ma...@makr.zone
> As guys pointed out here before, the exposed parts may jump out of pocket when nozzle hits to the next open pocket..
For my flimsy 3D-printed prototype feeders, it reliably does not
do that when the nozzle tip hits, but it sometimes happens
when the tape is transported plus the cover tape pulled back. The
printed plastic or something is somehow transmitting vibrations
and the parts flip in their pockets. Really a tough nut to crack,
it seems, I tried so many things now and it is getting
frustrating. Guess, there's a reason why most (if not even all)
3D printed feeders out there only handle 0603 or even larger.
But for your sturdy, heavy feeders, if you can already
successfully feed your 0402 tapes without the parts toppling, then
I would be very surprised if the pick is a problem. Those feeders
are specifically made for very fast and hard picks and even if
0402 parts i.e. two parts uncovered at a time were not considered
back then, vibrations are never a good thing, so I'm confident
your tape is flush to the support and nothing is bouncing in
there.
_Mark
To view this discussion on the web visit https://groups.google.com/d/msgid/openpnp/821EAE54-8CCD-4701-8CF7-4BA29F977795%40gmail.com.
Hanski
Mike M.
Hanski
--
You received this message because you are subscribed to a topic in the Google Groups "OpenPnP" group.
To unsubscribe from this topic, visit https://groups.google.com/d/topic/openpnp/M9VY-GcFP2o/unsubscribe.
To unsubscribe from this group and all its topics, send an email to openpnp+u...@googlegroups.com.
To view this discussion on the web visit https://groups.google.com/d/msgid/openpnp/13699033-2f6f-4136-8d70-172ff777c824%40googlegroups.com.
Mike M.
Mike
ma...@makr.zone

Marek T.
Hanski
I’m not blaming Dima feeders here.
I just use them the wrong way. :)
But perhaps the feeders were designed in that point of history that 0402 components weren’t popular yet.
And they just did a quick fix to the 4mm feeder to enable 2mm pitch (e.g. 2mm feeder is missing the shutter part)
-Hanski
> On 24. Mar 2020, at 11.31, Marek T. <marek.tw...@gmail.com> wrote:
>
> Solution is called "shutter".
> --
> You received this message because you are subscribed to a topic in the Google Groups "OpenPnP" group.
> To unsubscribe from this topic, visit https://groups.google.com/d/topic/openpnp/M9VY-GcFP2o/unsubscribe.
> To unsubscribe from this group and all its topics, send an email to openpnp+u...@googlegroups.com.

Inf Asked
dc42
Inf Asked

--
You received this message because you are subscribed to a topic in the Google Groups "OpenPnP" group.
To unsubscribe from this topic, visit https://groups.google.com/d/topic/openpnp/M9VY-GcFP2o/unsubscribe.
To unsubscribe from this group and all its topics, send an email to openpnp+u...@googlegroups.com.
To view this discussion on the web visit https://groups.google.com/d/msgid/openpnp/c5e5916b-0c21-4abd-871f-c257139e2bb9%40googlegroups.com.
dc42
Inf Asked
The type of pump is A120 see http://www.qdahead.com/show.asp?Id=16
The valve is a Scoocom valve 24V looks like these http://www.skoocomtech.com/air-valve/3-way-valve/3-way-2set-solenoid-valvesc0726g-2.html
So at this moment it looks like the TinyG drives (with 3.3v logic) separate of board FETs. If I keep it like that I don't need the diode I guess? But can I remove the FET, drive directly and place a diode instead?
There are two 12V FANs in series directly connected to the 24V. But I like to modify it because it make very much noise all the time. See http://www.delta.com.tw/product/cp/dcfans/download/pdf/AUB/AUB70x70x20mm.pdf
dc42
Inf Asked
dc42
Inf Asked
Marek T.
ma...@makr.zone
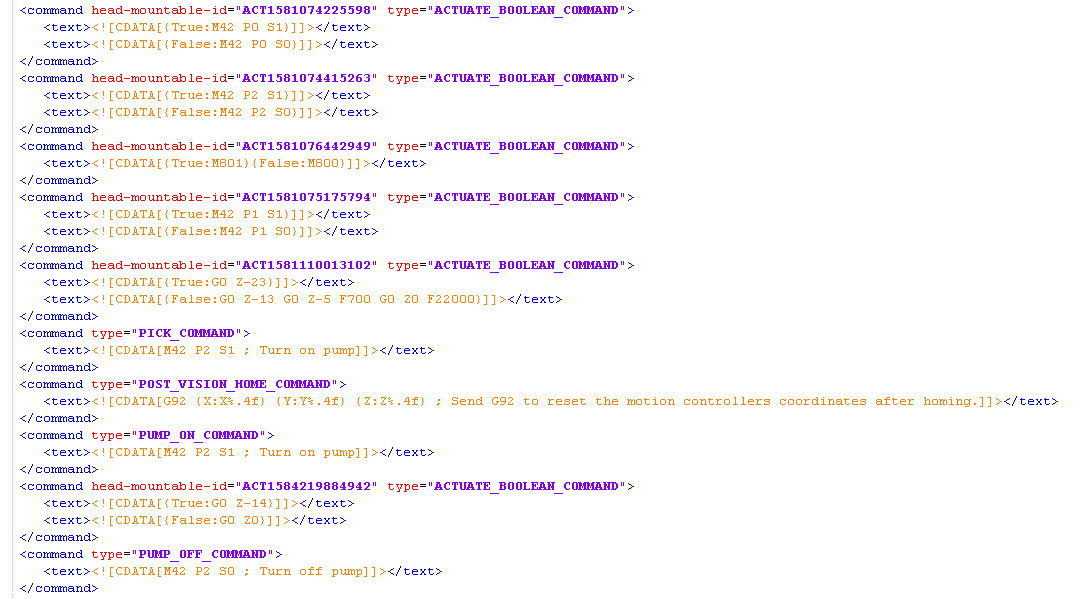
Hi
you don't need to work in the machine.xml, but you need to define the commands in the GUI.

Read this to understand the commands:
https://github.com/openpnp/openpnp/wiki/GcodeDriver%3A-Command-Reference
_Mark
--
You received this message because you are subscribed to the Google Groups "OpenPnP" group.
To unsubscribe from this group and stop receiving emails from it, send an email to openpnp+u...@googlegroups.com.
To view this discussion on the web visit https://groups.google.com/d/msgid/openpnp/42e7d21f-7f75-46c8-95f8-c61160fc9c30%40googlegroups.com.
dc42
Inf Asked
I start taking the config.g file of Hanski
1) Will it be suitable for the LitePlacer of do I have to modify it (assuming connecting the valve, pump ... to the right pins)?
In case I have to modify what is the best way to do? I see a configuration tool but that is mainly for 3D printers and it does not allow to import config.g files.
Then say my config.g file is correct.
I will take the machine.xml file of a working LitePlacer Smoothieboard setup. Starting OpenPNP with the machine.xml the OpenPNP should be configured with all the GCode commands for the smoothieboard. I can change them in the OpenPNP GUI as _Mark said (the GUI will then update the machine.xml).
2) All setting changed in GUI are stored in the machine.xml? So editing in GUI or machine.xml should not make any difference. But GUI is better.
Now comes the tricky part. E.g. the M950 .... in the config.g file is fixed. I cannot change to say something arbitrary like
M93746347 P2 C"bedheat" ; Vacuum pump output
But to control it I have to use M42 P2 S1
3) How should I know that M42 controls M950? I don't see any relation between the M950 and the M42 command.
4) Are the GCode command for the Smoothieboard and the Duet the same? So M42 is the same command on Smoothieboard as Duet.
Hanski
--
You received this message because you are subscribed to a topic in the Google Groups "OpenPnP" group.
To unsubscribe from this topic, visit https://groups.google.com/d/topic/openpnp/M9VY-GcFP2o/unsubscribe.
To unsubscribe from this group and all its topics, send an email to openpnp+u...@googlegroups.com.
To view this discussion on the web visit https://groups.google.com/d/msgid/openpnp/58880c8e-b8cf-415d-8cd6-4785fd33287d%40googlegroups.com.

Ondrej Janovsky
Dne pátek 22. května 2020 0:43:17 UTC+2 Inf Asked napsal(a):
Inf Asked
dc42

Mr. Cruz
On Thursday, March 19, 2020 at 11:15:34 AM UTC-5, Hanski wrote:
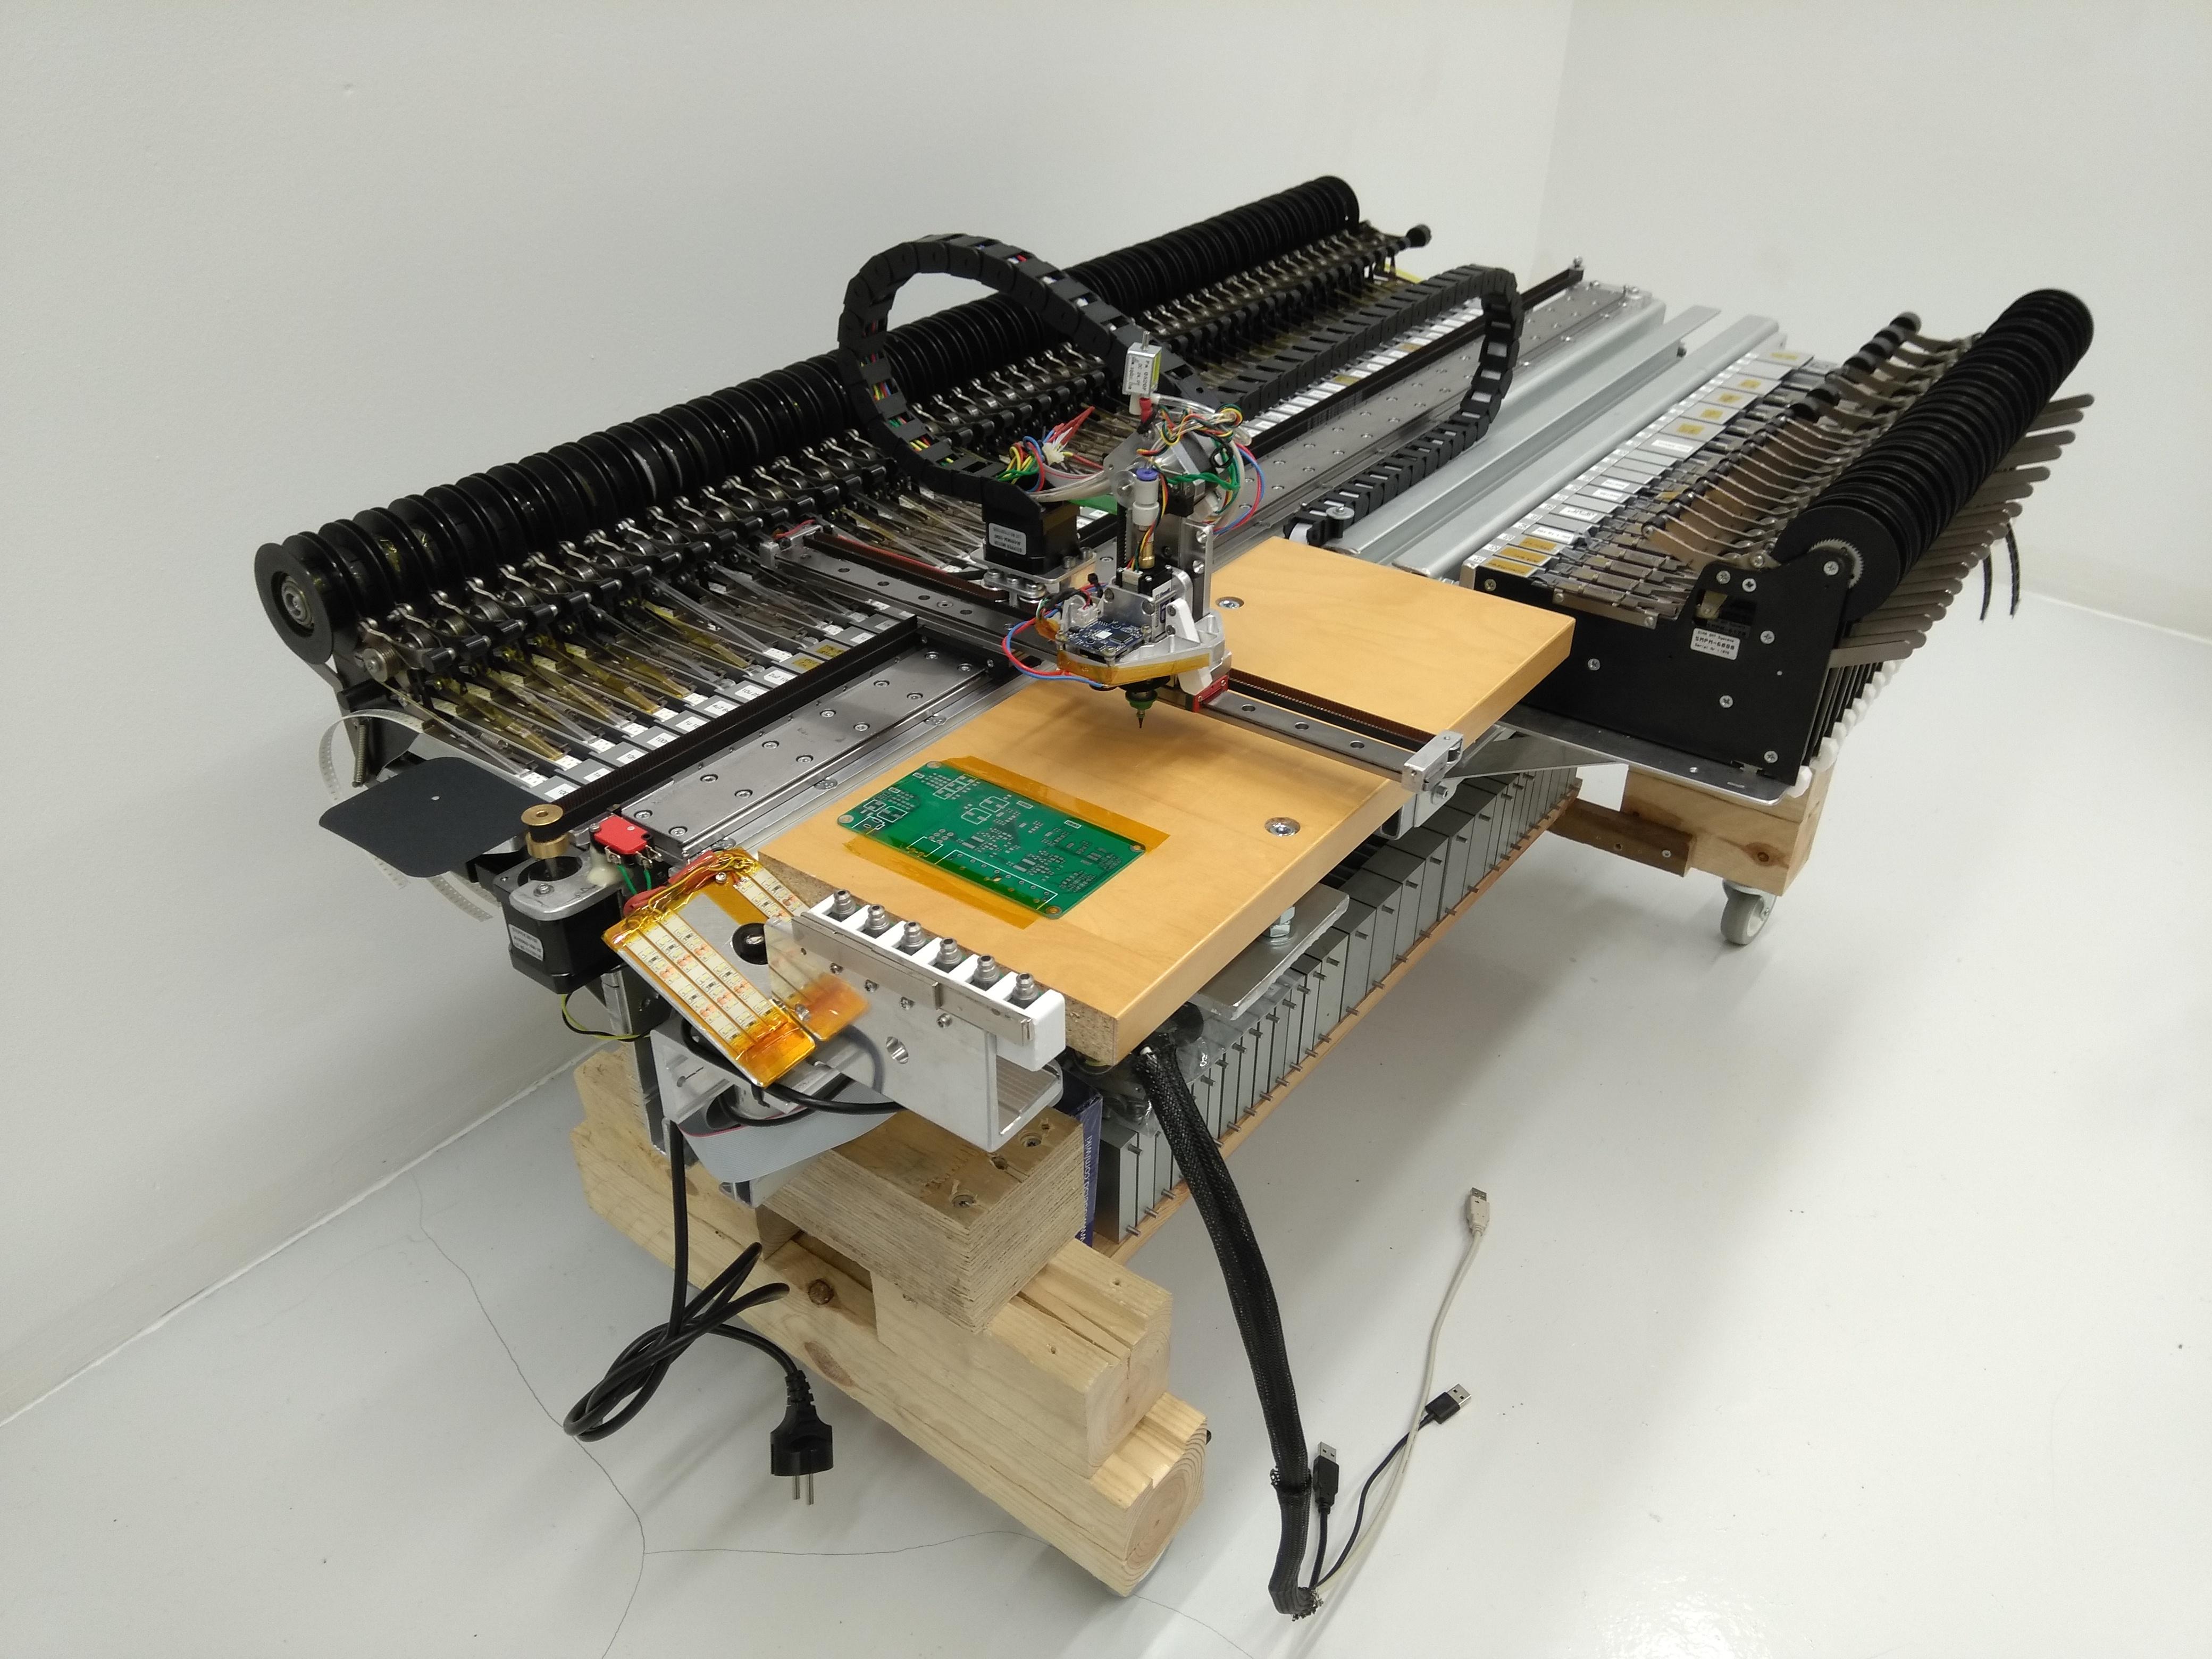
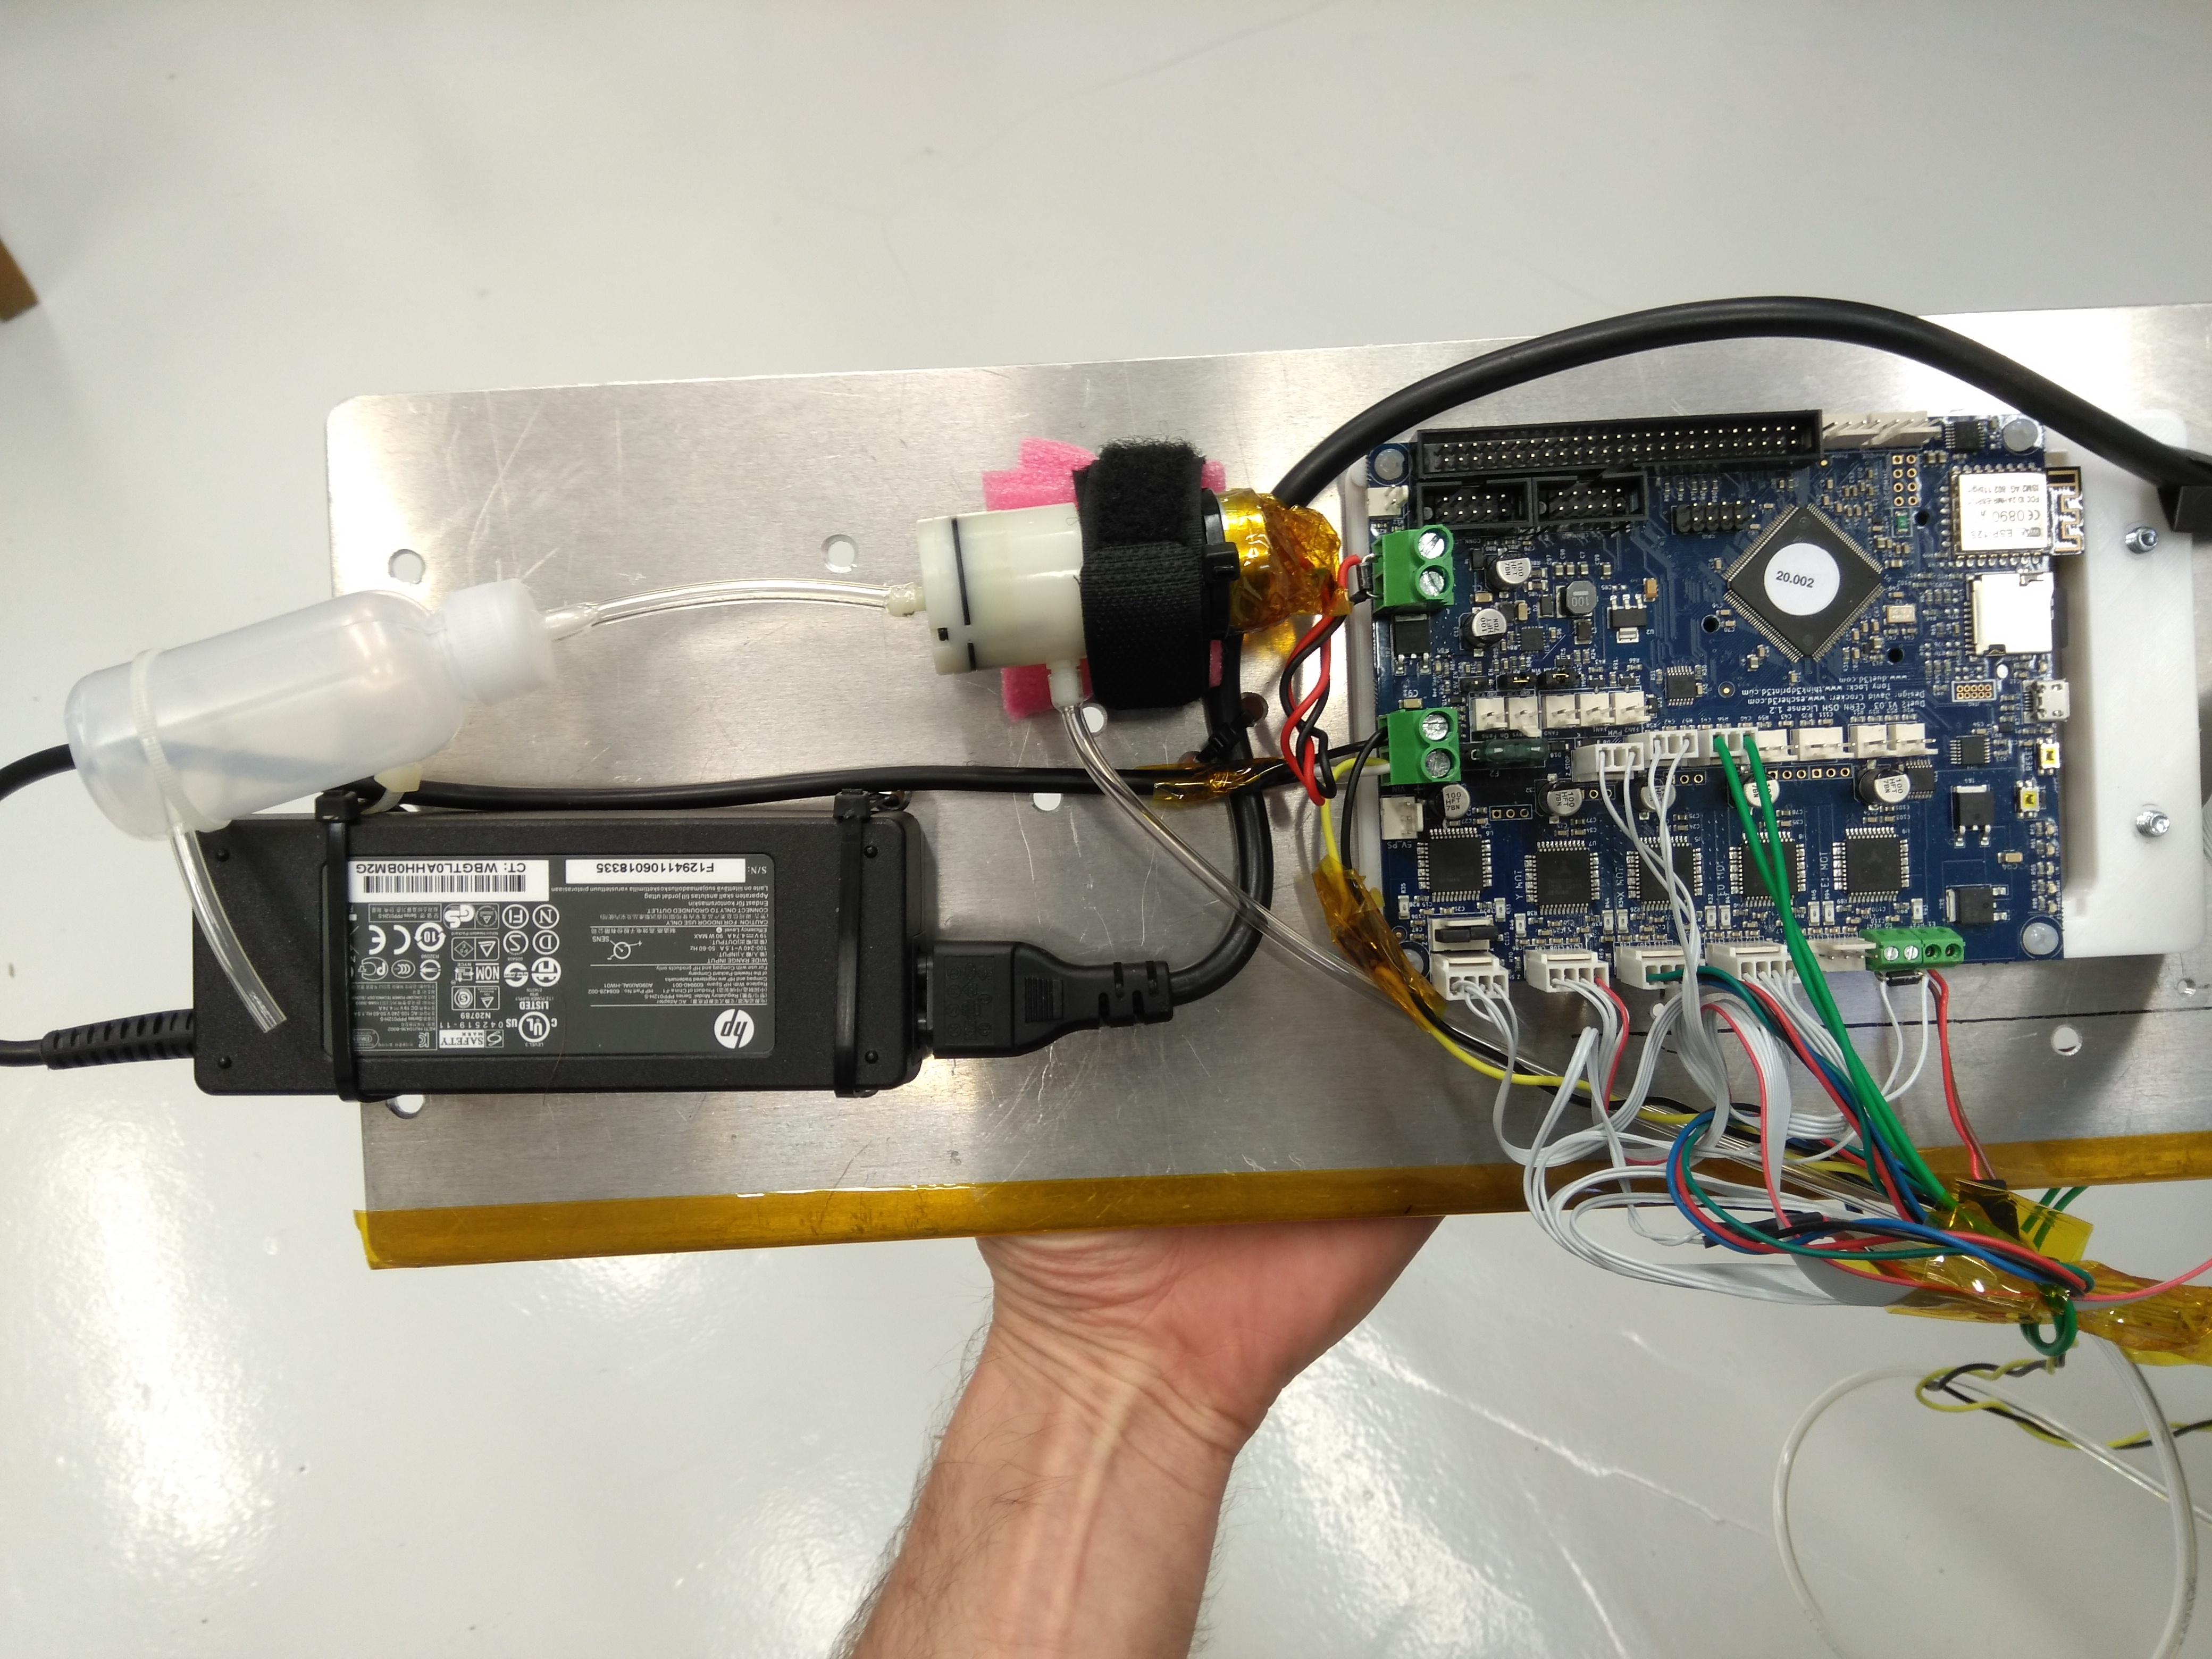
Hi all!Thanks for all the great minds behind OpenPnP software for making it possible for DIY guys to build home-brew PnP machines!The kind folks at Duet3D sent me a free Duet 2 Wifi board.I replaced the Smoothieboard in my machine with Duet 2 Wifi board to have more quiet stepper drivers (Duet 2 has Trinamic drivers).I've attached my machine.xml to show what commands are needed in OpenPnP GcodeDriver to control Duet 2 board.I also attached my config.g which is located in Duet 2 board SD card. It shows how to configure vacuum pump, vacuum valve, and top camera lights outputs.Pic of my machine:

Hanski
Sorry, I didn’t quite catch what you ment with the “cart”?
-Hanski
Mr. Cruz
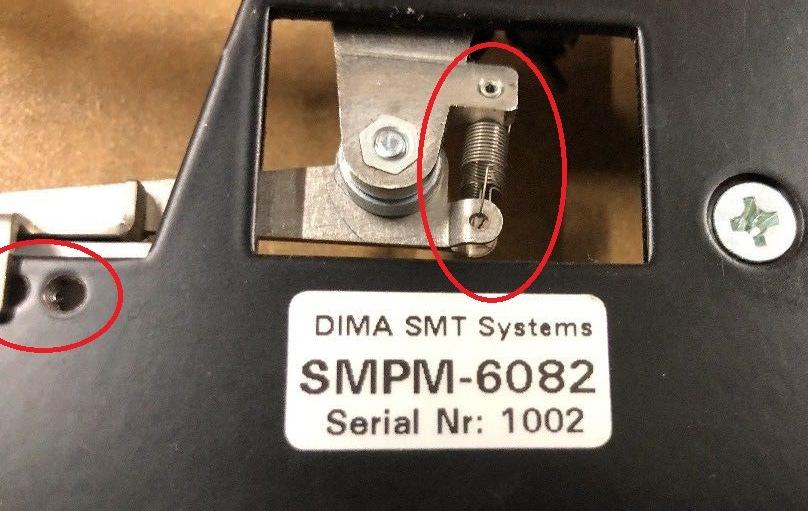
I was wondering what those metal blocks with the pegs were.
By "cart" I meant the entire structure that your PnP is mounted on. Is it not on casters?
Cruz M.
Inf Asked
dc42
1. Use the online configurator to create config and homing files for a simple 3D printer with one tool. Then manually add to config.g any configuration commands that you need to set up GPOut ports for vacuum and any other additional devices.
2. Start from Hanski's configuration, and adjust the bed size (M208), maximum speeds (M203) and accelerations (M201) to suit your machine.
Feel free to ask at forum.duet3d.com if you need any help with the configuration and homing files.
Inf Asked
dc42
Inf Asked
dc42
Inf Asked
GcodeDriver DEBUG: sendCommand(G0 X20.0100 F22000 ; Send standard Gcode move, 5000)...
GcodeDriver DEBUG: sendCommand(tcp://192.168.1.25:23 G0 X20.0100 F22000 ; Send standard Gcode move, 5000) => [ok]
GcodeDriver DEBUG: sendCommand(M400 ; Wait for moves to complete before returning, 5000)...
GcodeDriver DEBUG: sendCommand(tcp://192.168.1.25:23 M400 ; Wait for moves to complete before returning, 5000) => [ok]
dc42

Josh DeWitt
Inf Asked
Thanks, sorry for the late reaction but I was on holiday.
You both pointed to the parts of the solution which I didn't solve completely.
@dc42
Yes you are (almost) right. I home at the top. The range is set to 154:190. It turned out that the top is 190. Then going down the value decreases.
@Josh
Yes the mapping was wrong. Therefore no commands where send to the Duet. Now the commands are send the rotation is working. But only the Z movements not. But it seems to me a problem in the configuration of the Duet.
In the attachment my configuration files.

bert shivaan
--
You received this message because you are subscribed to the Google Groups "OpenPnP" group.
To unsubscribe from this group and stop receiving emails from it, send an email to openpnp+u...@googlegroups.com.
To view this discussion on the web visit https://groups.google.com/d/msgid/openpnp/04b129a8-4bb3-4475-a2e6-07070eb46525o%40googlegroups.com.