flozen stuffing box

Evan DeLucia

Chuck and Grayce
I've got an excessive drip rate from my stuffing box - not fatal but I'd like to dial it back. Problem, the nuts are completely frozen. Tried a couple of pipe wrenches but couldn't get them to budge. My mechanic wants me to upgrade to a dripless stuffing box. Nice idea but the project could be $$. Thoughts?
--
You received this message because you are subscribed to the Google Groups Catalina355 group. To post to this group, send email to catal...@googlegroups.com. To unsubscribe from this group, send email to catalina355...@googlegroups.com. For more options, visit this group at https://groups.google.com/d/forum/catalina355?hl=en
If changing the topic, please start a new message and send to catal...@googlegroups.com, rather than clicking "reply" to an existing message.
---
You received this message because you are subscribed to the Google Groups "Catalina355" group.
To unsubscribe from this group and stop receiving emails from it, send an email to catalina355...@googlegroups.com.
To view this discussion on the web visit https://groups.google.com/d/msgid/catalina355/6400ffe6-316b-405b-a886-34c93e3f36a1n%40googlegroups.com.

Mike Curtin
On Nov 20, 2021, at 1:38 PM, Evan DeLucia <deluc...@gmail.com> wrote:
I've got an excessive drip rate from my stuffing box - not fatal but I'd like to dial it back. Problem, the nuts are completely frozen. Tried a couple of pipe wrenches but couldn't get them to budge. My mechanic wants me to upgrade to a dripless stuffing box. Nice idea but the project could be $$. Thoughts?

bill pittore
On Nov 20, 2021, at 4:38 PM, Evan DeLucia <deluc...@gmail.com> wrote:
I've got an excessive drip rate from my stuffing box - not fatal but I'd like to dial it back. Problem, the nuts are completely frozen. Tried a couple of pipe wrenches but couldn't get them to budge. My mechanic wants me to upgrade to a dripless stuffing box. Nice idea but the project could be $$. Thoughts?

Jeff Hare

Bruce Toothaker
What is the price for the 355 stuffing box wrench set?
Bruce Toothaker – C355 #97 – DIRIGO
Thanks.
Sent from Mail for Windows
To view this discussion on the web visit https://groups.google.com/d/msgid/catalina355/1637461284281.4b3e4a0327ed31d0%40thehares.com.
Jeff Hare
Hi Bruce,
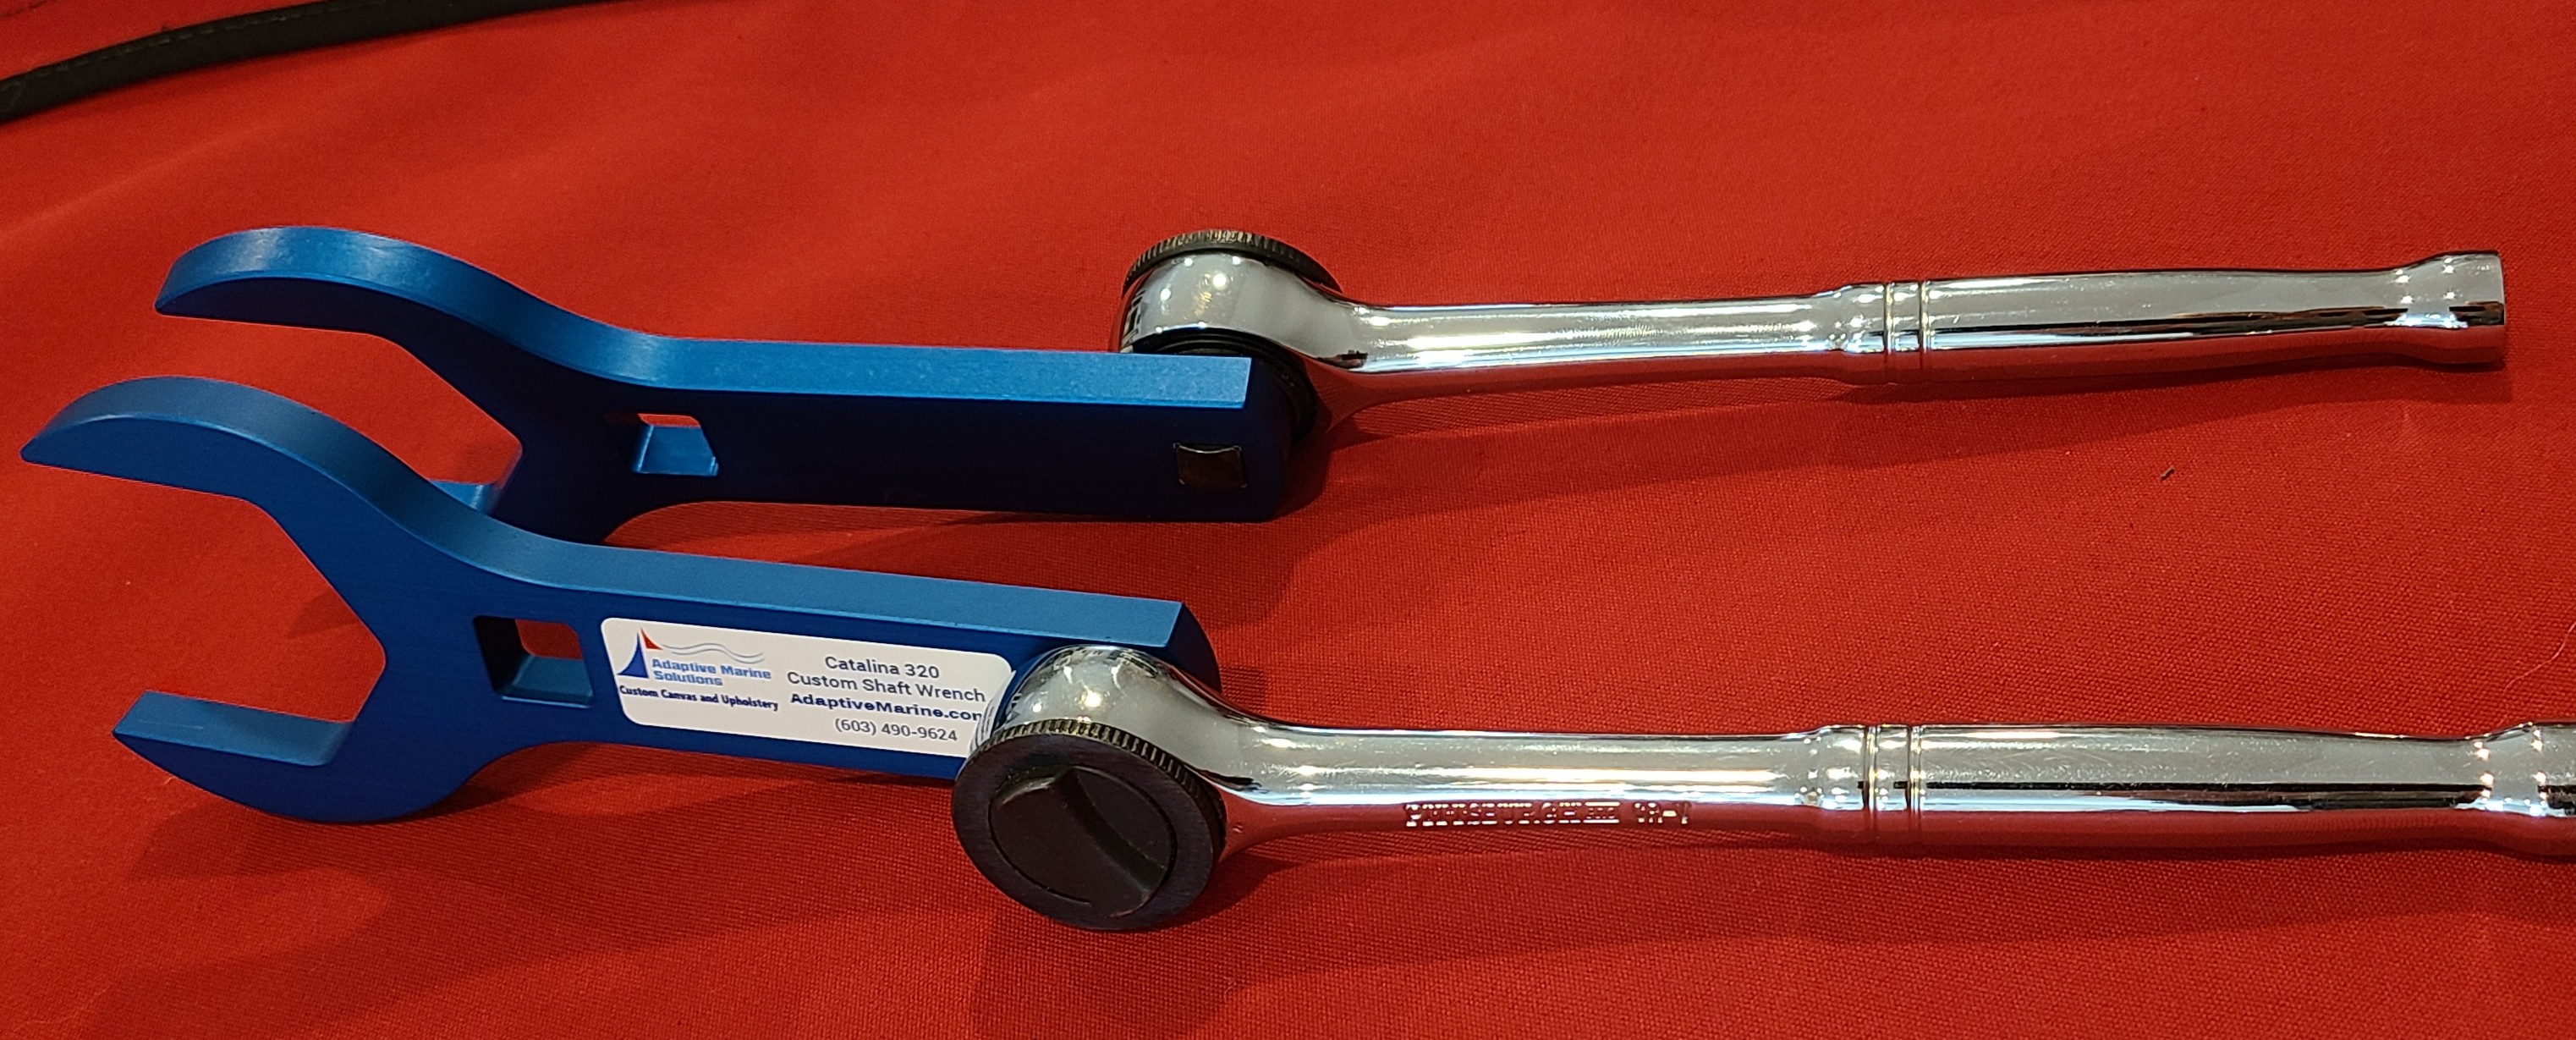
While we still have some left (not sure how many exactly, but we have at least 10 or 15 sets), we’re offering them with a custom made padded zippered storage pouch for $85 + $8 priority shipping.
We take Venmo to: @Jeffrey-Hare-320
Or a check to:
Jeff Hare
97 Lowell Road
Windham, NH 03087
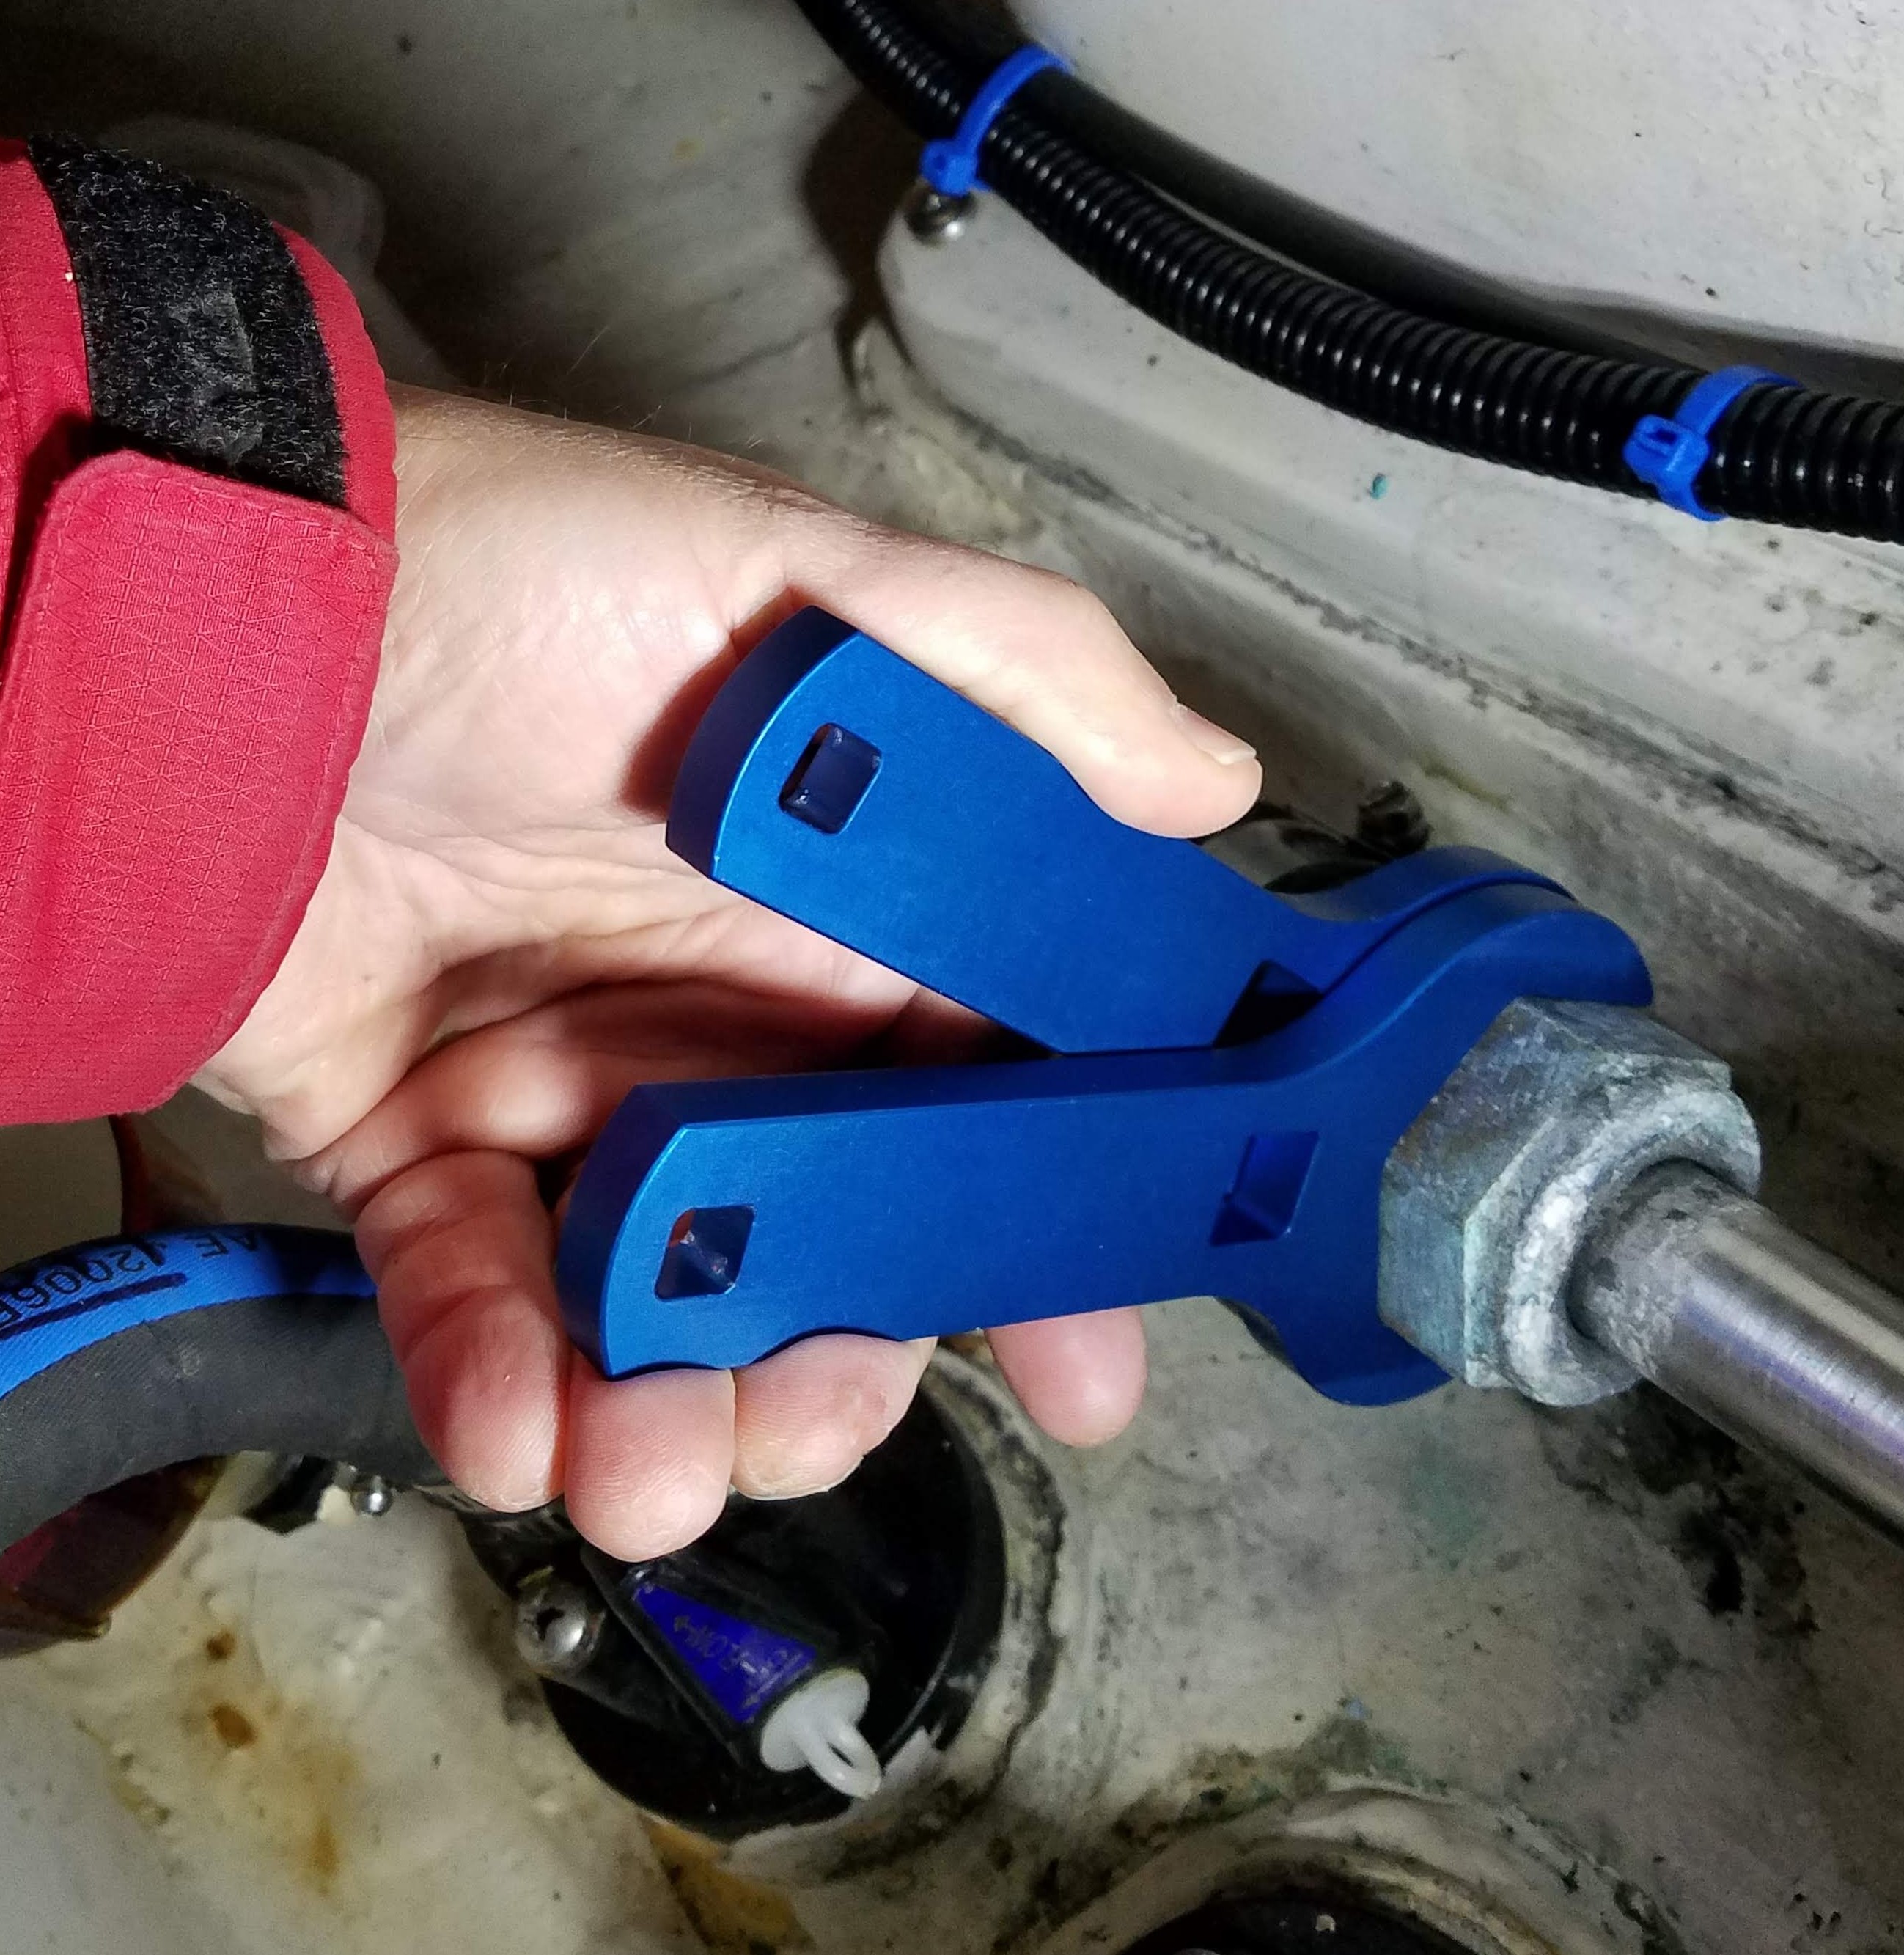
How these came about: We had a good machine shop mill custom wrenches from quality billet aluminum and then hard-coat anodize a batch for C320 International Association members that worked super well. Stock wrenches were a bit sloppy and didn’t allow attaching socket wrench handles for leverage and access when the nut and locking ring are in inconvenient positions.
Jon Vez wanted a set for the C355 so he worked with us a while back to hone in on the measurements needed for a good fit for the C355’s stuffing box for his (now our boat). We’ve been busy and just didn’t get around to letting other C355 owners know we still had more of that mfg batch available until this thread came up.
Jeff Hare
C355 #17 Solstice
To view this discussion on the web visit https://groups.google.com/d/msgid/catalina355/619ab78b.1c69fb81.580f0.2238SMTPIN_ADDED_MISSING%40gmr-mx.google.com.

David Mills
On Nov 21, 2021, at 7:22 PM, Jeff Hare <Cata...@thehares.com> wrote:
To view this discussion on the web visit https://groups.google.com/d/msgid/catalina355/00fb01d7df37%24074a63b0%2415df2b10%24%40thehares.com.

Jon Vez
On Nov 20, 2021, at 4:38 PM, Evan DeLucia <deluc...@gmail.com> wrote:
I've got an excessive drip rate from my stuffing box - not fatal but I'd like to dial it back. Problem, the nuts are completely frozen. Tried a couple of pipe wrenches but couldn't get them to budge. My mechanic wants me to upgrade to a dripless stuffing box. Nice idea but the project could be $$. Thoughts?

David Everett
bill pittore
To view this discussion on the web visit https://groups.google.com/d/msgid/catalina355/021cee43-5c23-4e03-b795-63cdcec000f1n%40googlegroups.com.
Jeff Hare
Hi,
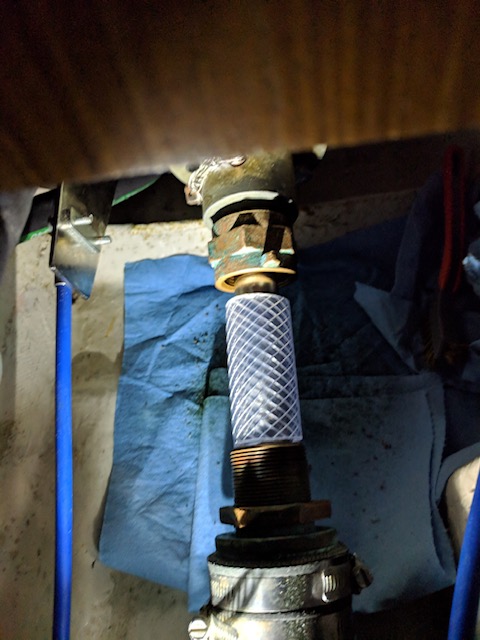
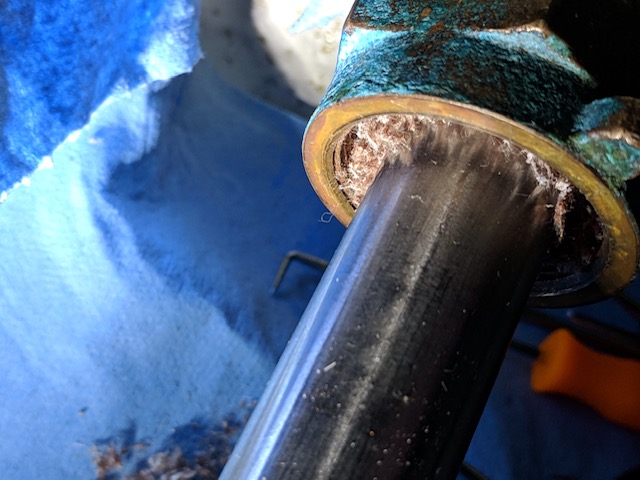
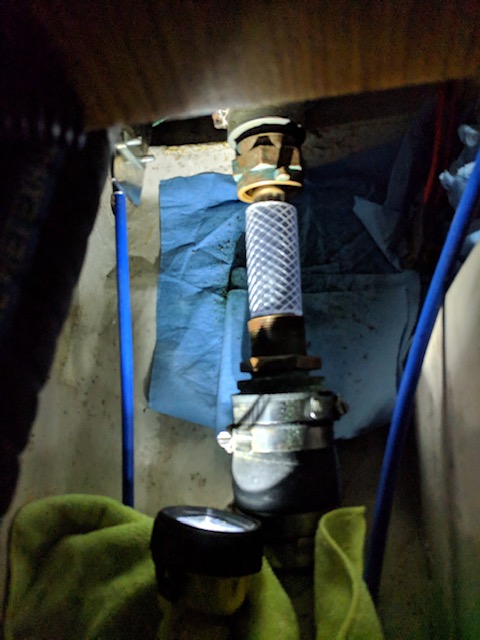
I agree, the stuffing box appears to be the Buck Algonquin one for 1” Shaft that Bill listed.
The Packing Hose that connects it to the shaft log on the boat is 2” ID & 2-3/4” OD ( https://www.deepblueyachtsupply.com/80ho20012-12-inch-sections-of-packing-box-hose)
I would assume they are sticking with the same version for all the hulls, given Catalina’s history of consistency. I don’t have good pictures of the disassembly of this particular stuffing box but maybe this helps?
(FYI: If anyone still wants a set of these shaft wrenches, we are down to about 12 sets left. We probably won’t be making any more unless enough people ask to justify the minimums on another milling/hard-coat anodizing run.)

We replaced the packing with 2 rings of 1/4" GFO while we had the shaft seal out. We remove the stuffing box, clean it up with a brass wire wheel and replace the hose whenever we replace the packing material. It’s a good time to do all that every 10yrs or so, all depending on how much motoring you do and what kind of packing you use. I would suggest that you apply a coat of Tef-Gel anticorrosion grease to both the threads and to the mating surface between the locking and packing nut. This will help keep them from freezing up with corrosion over time. TefGel is fairly thick and sticky so there’s no concern with it causing anything to loosen up on its own.
Don’t use GFO on a bronze shaft, but since the C355 has quality stainless shafts it won’t be a problem.
We’ve found GFO to be really easy on the prop shaft from a wear perspective and is essentially dripless and cool running after break-in. We ran this packing material our C320 with Aqualoy 22 stainless shaft for 14 seasons before it was getting to where it needed replacing. Probably could have tightened it up and gotten another year or two but that was long enough. We found almost no perceptible prop shaft wear where the rings were seated. Prior to that we used a PSS Shaft seal which, while dripless, seemed to be a messy solution with black graphite mist getting everywhere over time and the failure modes for those are not very pretty.
For what it’s worth, it was a pretty simple process for us to remove and replace the stuffing box. Here was the whole process. Took about 3-1/2 hrs overall over 2 days because I took the stuffing box home to clean up in the shop. I’ve done this 5 or 6 times to date on various boats, so that should be factored in. We did not need to remove the prop for this.
Steps:
1: Use a sharpie to make an alignment mark on the both the transmission side flange and shaft side flange. It’s a good idea for alignment reasons to put them back in the same orientation. Rotating them 90 or 180 on reassembly can introduce driveline vibration.
2: Remove the 4 flange bolts, the stainless wire and the 2 locking set bolts.
3: Remove the coupler from the prop shaft. There are several ways to do this. We used a Buck Algonquin flange puller (because I had access to one) but if you don’t have access to one, it’s a simple matter to take a 6” x 3” x 3/6” (rough dimensions) piece of bar stock or angle iron, drill and tap a hole in the center for a 3/8” or 7/16" diameter bolt that will be used to push the shaft out. Drill 2 holes that align with the coupler’s bolt holes. Then you have a nice little tool to separate the coupler from the prop shaft anytime you need one.
4: Loosen the hose clamps holding the packing hose to the hull and twist the stuffing box and it’ll loosen up and come off pretty easily. There’s no sealant there.
5: Clean up any prop shaft corrosion with some very fine strips of mesh sandpaper/scotch-brite and polish it up. Do this also for where the coupler sits and also lightly polish the inside of the coupler and the keyway.
6: Pick out all the old packing material from the packing nut. Clean up the stuffing box with brass wire wheel on a drill or something (if you want).
7: You’ll need the prop shaft or a piece of 1” OD tube or dowel handy to cut the new packing rings. I like to wrap the material around the tube so they bypass each other. Using a new razor blade, cut where they bypass each other at a 45 degree angle. The 45 degree angle is better than just making a square cut because they tend to seal better. Make two of them. The rings will go into the packing nut with the seams at 180 degrees of each other. Avoid threading this back onto the stuffing box body and tightening it until it’s on the prop shaft so that the rings don’t expand and make it hard to get on the shaft.
NOTE: if you prefer, you can wait to put these rings in until the packing nut is slid on the prop shaft already but you’ll have to use other tricks to get the packing material inserted. Not a big deal either way. Sometimes, it’s a little more difficult to get the packing nut started on the shaft on with the rings already in place, but it’s a little more difficult to put the rings in with it already on the shaft.
8: slide the stuffing box hose, 4 new hose clamps, slide the stuffing box body on (don’t forget to have the locking nut threaded on).
9: To replace the coupling, polish the key and keyway and tap the key back in place. Wipe on a little oil from the dipstick on the end of the prop shaft where the couple will sit and wipe most of it off.
A ziplock filled with ice cubes and some very salty water draped it over the prop shaft for a half hour or so will freeze the prop shaft end pretty well. (We usually do this in the winter, so that step isn’t necessary).
Put the coupler in a ziplock and set it in a pan of very hot water. Can also use a torch if you’re careful, but boiling water works well enough and more evenly heats the coupler.
Put on gloves, then quickly pop the coupler on the shaft. Have someone on the outside with a block of wood and a small hammer to tap it in place. You’ll just watch through the set screw holes until the dimples in the shaft line up with the holes. You shouldn’t need to tap very hard. Just little taps. You may not even need to do that, but I had to this time.
10: Line up the sharpie marks from step 1 and replace the coupling bolts. Put in the 2 set bolts and be sure they drop into the dimples, but don’t tighten them up fully, just trying to be sure the shaft doesn’t slide in or out. Use a thread locker, make sure the lock washers are present and tighten the 4 coupling bolts alternating side to side a little at a time until they’re finally all very tight. (Could check the torque specs if you’re that kind of person). Then tighten up the 2 Set bolts (again with thread locker) and finally add stainless locking wire for security, be sure to tuck in the ends so you don’t scratch yourself in the future.
Break in Process for GFO packing: Snug up the packing nut until the shaft doesn’t turn by hand, then back it off just a bit until you can turn the prop shaft again but with a fair amount of resistance. That just helps set the packing material in the nut. For GFO, we leave it a bit snug just so that it doesn’t drip at all at rest. Running the engine in gear for a while, it’ll get warm at first but shouldn’t burn you and shouldn’t drip. Then back it off till you just start to get an occasional little drip, then tighten just a hair until that stops completely, even when motoring. Watch it/adjust it slightly for the next few hours of motoring. It shouldn’t get hot or uncomfortably warm even when motoring for hours and really shouldn’t let in any water. If so, back it off just a tiny fraction.
-Jeff Hare
C355 #17 Solstice (Thanks Jon!)
To view this discussion on the web visit https://groups.google.com/d/msgid/catalina355/BB0B9F72-58B9-4155-85E2-E7C61B1C2467%40gmail.com.

Jon Vez
On Feb 25, 2022, at 6:13 PM, Jeff Hare <Cata...@thehares.com> wrote:
To view this discussion on the web visit https://groups.google.com/d/msgid/catalina355/03a501d82a9d%2455f68140%2401e383c0%24%40thehares.com.
bill pittore
On Feb 25, 2022, at 6:13 PM, Jeff Hare <Cata...@thehares.com> wrote:
Hi,I agree, the stuffing box appears to be the Buck Algonquin one for 1” Shaft that Bill listed.The Packing Hose that connects it to the shaft log on the boat is 2” ID & 2-3/4” OD ( https://www.deepblueyachtsupply.com/80ho20012-12-inch-sections-of-packing-box-hose)I would assume they are sticking with the same version for all the hulls, given Catalina’s history of consistency. I don’t have good pictures of the disassembly of this particular stuffing box but maybe this helps?(FYI: If anyone still wants a set of these shaft wrenches, we are down to about 12 sets left. We probably won’t be making any more unless enough people ask to justify the minimums on another milling/hard-coat anodizing run.)
<image002.jpg>
To view this discussion on the web visit https://groups.google.com/d/msgid/catalina355/03a501d82a9d%2455f68140%2401e383c0%24%40thehares.com.
Jon Vez
On Feb 25, 2022, at 7:28 PM, bill pittore <bill.p...@gmail.com> wrote:
Great write up Jeff. I did read in the marinehowto.com page that carbon infused packing is not recommended because of galvanic corrosion potential. However, you have obviously used it successfully for 14 yrs.! Is it likely that the 355 shaft is AQ22 as well and will also be fine with GFO type packing? I replaced my packing last year with a teflon infused synthetic that worked really well. Nearly dripless and ran cool as well.
To view this discussion on the web visit https://groups.google.com/d/msgid/catalina355/4771ADD5-7DBB-4808-9CF4-AC67AF1D2D02%40gmail.com.
Jeff Hare
Please understand that my site only suggests CAUTION using these packings and suggests to check it periodically. I won't personally use it on bronze shafts, to much of a voltage spread for me, but still do install it with AQ 22 shafts for customers who are good about keeping up with anodic protection."
Jon Vez
On Feb 26, 2022, at 10:44 AM, Jeff Hare <Cata...@thehares.com> wrote:
There's this quote later from the 'mainsail' guy about his article:
To view this discussion on the web visit https://groups.google.com/d/msgid/catalina355/1645890268511.464b79f67b449cac%40thehares.com.