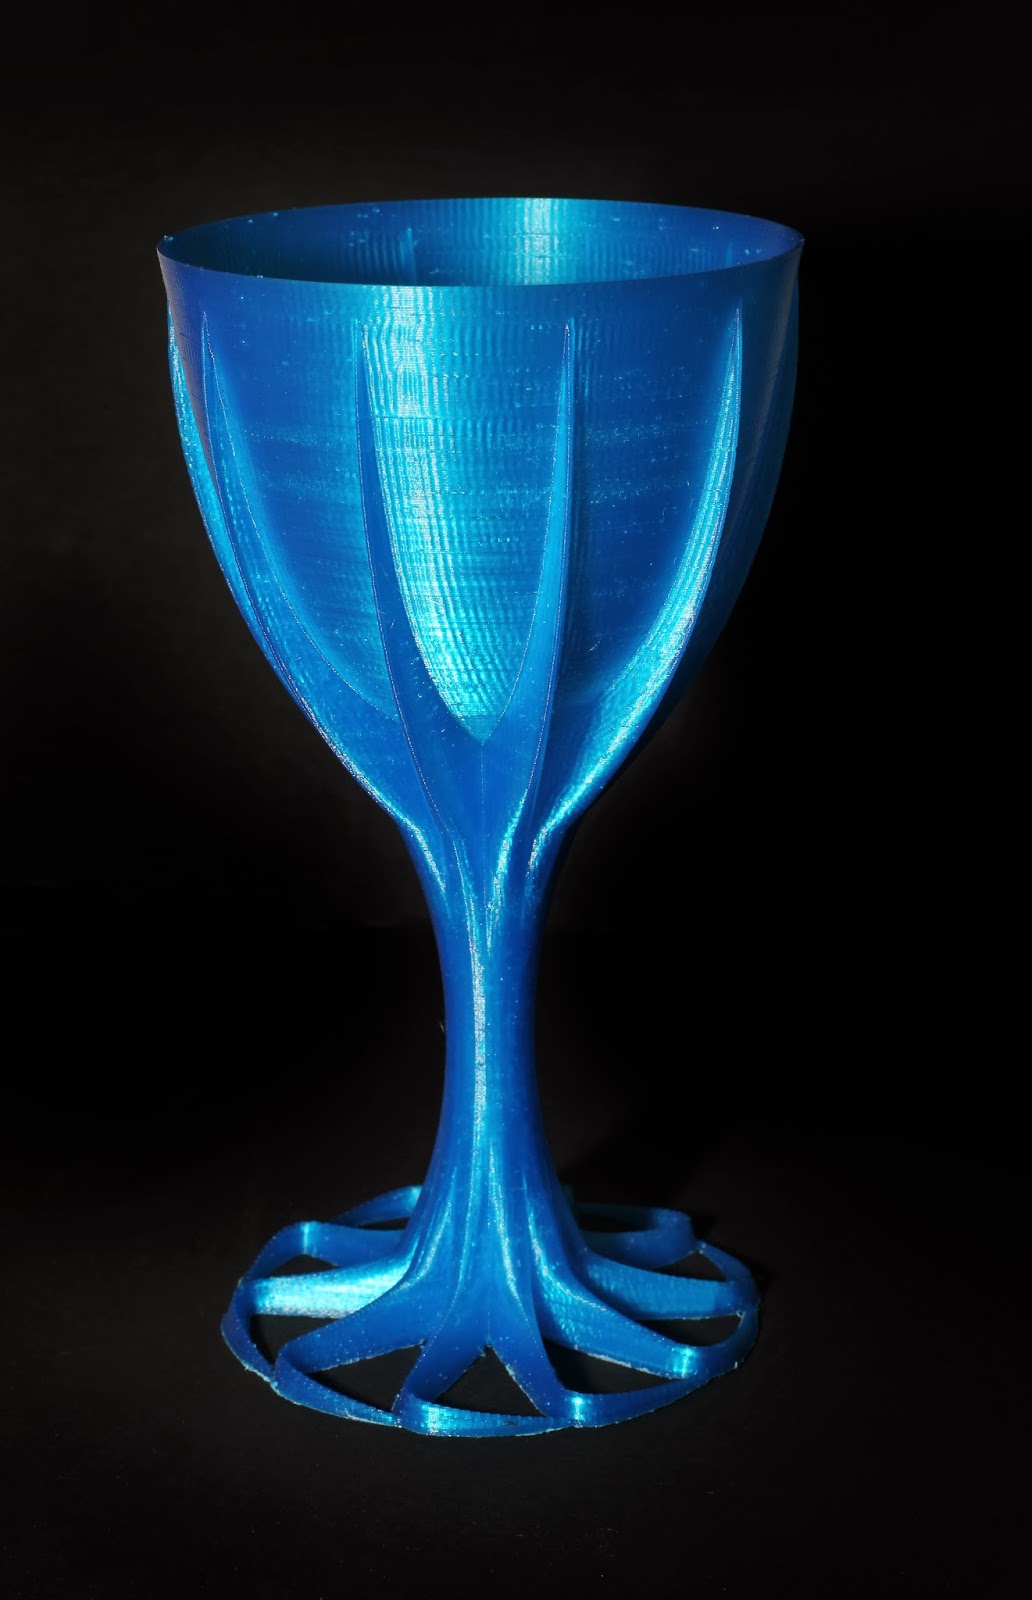
Using Temperature set points to combat ABS warp & corner lifting.

Steve Johnstone
Yesterday I tried printing clear ABS for the first time. My first try failed at about 20 minutes into the print. The cause was typical heat creep and air printing symptoms in the extruder.
It was lovely to hear the extruder motor skipping for a change thanks to Dave’s 3 in 1 extruder upgrade (one more variable I can take out of the equation when identifying problems).
I printed a couple of calibration cubes with the new filament prior and had probably some of the worst build plate corner lift and distortion to date. This also showed on the failed print.
At first I thought they must have sent me clear PLA. As there was no label on the spool I deducted that it was ABS by putting a piece in acetone and it did eventually get sticky.
To stop the corner lift / distortion issue I tried something I had been thinking about for a while. In Simplify 3D I added build plate temperature setpoints to help control the overall temperature, especially at the base, during the print. For a while I have thought that the corner lift problem may be due to the temperature of mid portion of the print dropping below that of the base. Remember that the base of an ABS print is normally held at constant 110c.
The effect of the cooler shrinking mid-section then pulls the hotter, softer base corner sections up. As Jetguy said in another post “you are fighting against nature”.
In an ideal world you would want to have the part all cool at the same rate. We are unable to do this on the 2X but I thought that if I could bring the differential temperatures in the part closer together it should help.
The first successful print started with the build plate at 115c. This decreased every 5 layers to 90c and remained at this temperature until the end of the print.
30 minutes into the print I was concerned that the aluminium extruder block was getting to hot so thought “too hell with it” remove the lid, opened the door and setup the office fan to blow into. It worked a treat :)
Other things that to add to the mix is that I have upgraded the extruder fans and I’m using thermal past on the heat sink to aluminium block contact areas. I also used it on where the thermal tubes clamp / contact the block (thanks for the recommendations and links TaErog).
These’s a video with some other detail and time-lapse on YouTube.
You can download the Goblet STL on Thingiverse


Kobus du Toit

Michael Nichol

Jetguy

Enginwiz
Steve Johnstone
- Upgraded extruder - 3 in 1 by Dave,
- Upgraded Fans, and use of thermal paste - recommended by TaErog
- Upgrade Aluminium Carage by Carl (kindly donated by Eighty)
- DIY glass build plate - recomendation by Jetguy
- 0.2mm PLA Slicing profile by Enginwiz.
- Everyone else who contributes in these groups

Jimc
Enginwiz


Steve Johnstone

Dan Newman
during a print, you're better off changing it by no more than 10C at a time from the
current target temp. If you change it by 11C or more from the current target temp,
then the firmware resets the entire PID state and you're subject to larger over or
undershoots. This is true of both MBI's firmware and Sailfish.
Dan
On 16 Nov 2013 , at 12:52 AM, Enginwiz wrote:
> With one layer of Garnier Fructis #5 on the heated build plate is possible
> to reduce the HBP temperature
> step by step from 90°C to 70°C during the print and still have the ABS part
> firmly sticking to the build plate.
>
>
>
>
>
>
>
>
>
>
>
>
>
>
>
>
> This increases convective selfcooling of the ABS part and the recently
> printed upper surfaces
> are less gooey. Still there were no cracks and no corner lifting during the
> print.
>
>
>
>
>
>
>
>
>
>
>
>
>
>
>
>
>
>
>
> To get better bridging at the top of the hole I decreased the nozzle
> temperature
> step by step from 215°C to 205°C during the print.
>
>
>
>
>
>
>
>
>
>
>
>
>
>
>
>
> After removing the glass plate I took pictures of the bottom of the print
> through the glass plate.
>
> 2 minutes after the print the outer edges of the part start to lift from
> the hairspray.
>
>
>
>
>
>
>
>
>
>
>
>
>
>
> 5 minutes later the build plate has cooled down to around 40°C and the part
> separates itself from the hairspray layer.
>
>
>
>
>
>
>
>
>
>
>
>
>
>
>
>
>
> The bottom of the printed part is flat and the part has no cracks and a
> nice surface finish.
>
> On the glass plate the layer of Garnier Fructis #5 stays intact and it is
> possible to print
> the same part on the same spot again.
>
> You received this message because you are subscribed to the Google Groups "MakerBot Operators" group.
> To unsubscribe from this group and stop receiving emails from it, send an email to makerbot+u...@googlegroups.com.
> For more options, visit https://groups.google.com/groups/opt_out.
Dan Newman
On 16 Nov 2013 , at 7:23 AM, Dan Newman wrote:
> And for folks who don't know, if you want to play with changing the extruder temp
> during a print, you're better off changing it by no more than 10C at a time from the
> current target temp. If you change it by 11C or more from the current target temp,
> then the firmware resets the entire PID state and you're subject to larger over or
> undershoots. This is true of both MBI's firmware and Sailfish.
1. I'm mentioning this just to remind folks. I doubt that Engiwiz was making changes
larger than 10C at a time.
2. The same applies to the HBP -- the state reset. However, it's immaterial as the
"PID" control in the firmware for the HBP doesn't do actual PID. It's just "bang-bang"
style. I.e., PWM techniques to get power levels other than 0% and 100% to the HBP are
not used. The HBP power is either completely on or completely off. The extruders have
intermediate power levels between on and off (1/255 all the way to 254/255). As such,
resetting the PID state on the HBP doesn't have nearly as significant of a consequence.
Dan

Rick L.
Steve Johnstone
Enginwiz

Clinton Hoines
Dan Newman
On 16 Nov 2013 , at 1:24 PM, Enginwiz wrote:
> Hello Dan,
>
> thank you for explaining the PID reset after a temperature change of more
> than 10°C.
>
> Reducing the nozzle temperature even slightly during the print results in
> an undershoot and a recovery phase.
is tuned, it undershoots more significantly. You can always tune it yourself
and then set the PID parameters you wish to use for the extruders. (Or at
least RepG lets you set them.) I've not seen an interface to let you
set the PID parameters for the HBP but those are also saved and recalled
from EEPROM so changing them is possible as well given a UI to do so.
(or using s3g.py you could do it.)
That said, I've been pretty pleased myself with the PID tuning MBI uses: it's
worked reasonably well for me all these years. That in contrast to some of the
tunings I've had on other bots.
Dan
Dan Newman
On 16 Nov 2013 , at 8:19 AM, Rick L. wrote:
> So... am I understanding that one way to accomplish the change in temps
> during the build is to simply edit the gcode at appropriate places with
> these lines?
>
> Hypothetical beginning of print...
> M109 S110 T0
> M104 S230 T0
> M104 S230 T1
>
> Hypothetical middle of print...
> M109 S120 T0
> M104 S220 T0
> M104 S220 T1
>
> Hypothetical last third of print...
> M109 S100 T0
> M104 S220 T0
> M104 S220 T1
process those Tn commands can trigger a tool change. So, if you're
doing dualstrusion and the gcode is expecting T0 (right) to be being used,
that M104 S220 T1 command at the end of the triplet will likely cause
a switch to T1 (left extruder) as the extruder.
Dan
Steve Johnstone
The dual material goblet is as challenge, still working it all out, but as soon as I have a solution will let you know.

Wingcommander
> Hypothetical last third of print...
> M109 S100 T0
> M104 S220 T0
> M104 S220 T1
So GPX has a temperature control macro that already does this for the primary extruder, so I am going to investigate how I can adapt it to Dow what you are proposing. In theory you would just add something like the following to your GPX.ini and it would insert the temperature change commands at the appropriate layer height.
[macro]
temperature: 3.0mm 220c 90hbp
temperature: 5.0mm 210c 80hbp
But I will have to look at the parser to decide on the exact syntax
> Mostly correct. Just realize that in the gcode to s3g/x3g conversion
> process those Tn commands can trigger a tool change. So, if you're
> doing dualstrusion and the gcode is expecting T0 (right) to be being used,
> that M104 S220 T1 command at the end of the triplet will likely cause
> a switch to T1 (left extruder) as the extruder.
GPX treats these differently. Only an M6 or a naked T0 or T1 causes a tool change. All other G and M codes that contain a T reference, are only supposed to advance that tool in the tool carousel (according to the NIST standard anyway) so GPX does the same in a virtual sense i.e. You can change the temperature of a tool without changing the current tool - unless this triggers a tool change in sailfish? I have never actually checked.
Wingcommander

Jamesarm97

Wingcommander
Rick L.
Wingcommander
[macro]start: 230c 100ctemperature: 3.0mm 220c 90ctemperature: 5.0mm 210c 80ctemperature: 7.0mm 70c
Dan Newman
1. An explicit change tool command, or
2. An explicit wait for tool command.
So as long as GPX doesn't issue either of those two commands willy-nilly, things
are okay. RepG definitely will change the tool when it sees a Tnnn in any command
starting with M. The comment below notwithstanding, if there's a "Tnnn" in that
"M" line, it addes to the stream a change tool command.
private void buildMCodes(GCodeCommand gcode, Queue< DriverCommand > commands) throws GCodeException {
// If this machine handles multiple active toolheads, we always honor a T code
// as being a annotation to send the given command to the given toolheads. Be
// aware that appending a T code to an M code will not necessarily generate a
// change tool request! Use M6 for that.
if (gcode.hasCode('T') && driver instanceof MultiTool && ((MultiTool)driver).supportsSimultaneousTools())
{
commands.add(new replicatorg.drivers.commands.SelectTool((int) gcode.getCodeValue('T')));
tool = (int) gcode.getCodeValue('T');
}
I've seen similar behavior from MakerWare but as MBI has been polishing their dualstrusion
support that may well have changed recently.
Dan
Wingcommander
Tool changes at the firmware level require either
1. An explicit change tool command, or
2. An explicit wait for tool command.
Wingcommander
Tool changes at the firmware level require either
1. An explicit change tool command, or
2. An explicit wait for tool command.
Do commands like M190 - Wait for build platform to reach (or exceed) temperature - which also require a tool id also cause a tool change?
Dan Newman
they translate gcode to x3g.
Dan
Dan Newman
gone closed source, it's hard to know the complete picture since just
because it does or does not happen in one test case doesn't mean in
general it won't: there may have been some conditionals involved.
Dan
Wingcommander
Without looking at the x3g they generate, I have no idea. It's all in how
they translate gcode to x3g.
135 - Wait for extruder ready
141 - Wait for build platform ready
Dan Newman
I'd need to install MakerWare in order to tell. (MakerWare is a fine slicer; however,
I do not keep it installed as it leaves "stuff" around such as code off in
system directories intended for background services and whatnot. I dislike that
practice and so I do not keep it installed for long on my systems.)
Dan
Wingcommander
Sorry I didn't make myself clear - these are the x3g commands I was asking about - do they change the tool offset like 134 or is the the combination of x3g commands that does this?// These are our bufferable commands from the host#define HOST_CMD_FIND_AXES_MINIMUM 131#define HOST_CMD_FIND_AXES_MAXIMUM 132#define HOST_CMD_DELAY 133#define HOST_CMD_CHANGE_TOOL 134#define HOST_CMD_WAIT_FOR_TOOL 135#define HOST_CMD_TOOL_COMMAND 136#define HOST_CMD_ENABLE_AXES 137#define HOST_CMD_WAIT_FOR_PLATFORM 141
Wingcommander
Enginwiz

Dan Newman
On 17 Nov 2013 , at 9:40 AM, Wingcommander wrote:
>
>
> // These are our bufferable commands from the host
>
> #define HOST_CMD_FIND_AXES_MINIMUM 131
> #define HOST_CMD_FIND_AXES_MAXIMUM 132
> #define HOST_CMD_DELAY 133
> #define HOST_CMD_CHANGE_TOOL 134
> #define HOST_CMD_WAIT_FOR_TOOL 135
> #define HOST_CMD_TOOL_COMMAND 136
> #define HOST_CMD_ENABLE_AXES 137
> #define HOST_CMD_WAIT_FOR_PLATFORM 141
>
> Sorry I didn't make myself clear - these are the x3g commands I was asking
> about - do they change the tool offset like 134 or is the the combination
> of x3g commands that does this?
No, only 134 and 135. Command 141 will not. If you actually poke in the
firmware sources, you look for an assignment to currentToolIndex. And those
assignments only happen in three places
1. Initialization (0; T0)
2. HOST_CMD_CHANGE_TOOL (134)
3. HOST_CMD_WAIT_FOR_TOOL (135)
It's actually ignored for HOST_CMD_WAIT_FOR_PLATFORM even though the command
carries a tool index. The tool index is treated as superfluous. Likewise
for the 16 bit "tool ping delay" if it's MightyBoard electronics.
Dan
Dan Newman
On 17 Nov 2013 , at 9:55 AM, Wingcommander wrote:
> OK, so 134 HOST_CMD_CHANGE_TOOL seems to change the current tool index for
> the steppers and tool head.
>
> * if (command_buffer.getLength() >= 2) {*
> * pop8(); // remove the command code*
> * currentToolIndex = pop8();*
> * line_number++;*
> * steppers::changeToolIndex(currentToolIndex);*
> * tool::setCurrentToolheadIndex(currentToolIndex);*
> * }*
> But 135 HOST_CMD_WAIT_FOR_TOOL and 141 HOST_CMD_WAIT_FOR_PLATFORM do not,
> which would suggest that these two commands do not explicitly change the
> (Command.cc). I assume from this that only 134 causes a tool change and the
> wait commands to not - or am I missing something?
down deeper into the code for the tool wait. However, that's just because
it presently doesn't need to be pushed down deeper. But at the s3g parsing
stage -- Command.cc -- a tool change has occurred and will impact the operations
at that level which need to know the current tool index. And, at some point
in the future, it may be necessary to push it down to the other layers. (And
over on the Gen 4 electronics side there may be some considerations owing to the
extruder controller being a separate processor.)
So, presently you're safe with the wait command. But it could change in
the future or otherwise have subtle consequences as it is changing state
in the firmware's s3g interpreter.
Dan
Steve Johnstone
The dual goblet is proving challenging as I can't keep the PLA side of the extruder block cool enough to prevent heat cheap.
I wonder if Jetguy has been able to print dual materials in the same part, ABS & PLA, on his custom bot. The reason I ask is I think he is using Carl's threaded block with threaded thermal tubes.
So my game plan at the moment is to get a nice std 0.2mm Dual ABS setup and then add clear ABS to the mix.
Clinton Hoines
Jetguy
Wingcommander
So, presently you're safe with the wait command. But it could change in
the future or otherwise have subtle consequences as it is changing state
in the firmware's s3g interpreter.
Steve Johnstone

This is basically what I'm shooting for - Blue PLA, Clear ABS.
Some time-laps video of the blue PLA print - 0.2mm Layer Height & 230C (based on Enginewiz's 0.2mm PLA profile) - http://youtu.be/Kk_cphgQCG0
Steve Johnstone
Dan Newman
the gcode.
2. This is largely a non-issue as there's no practical reason to be using a "wait for tool"
outside of the start.gcode section. Why on earth would gcode be tossing in a "wait for tool"
mid-print anyway? (Makerbot gcode that is; we're ignoring the fact that this whole tool
change gcode in Makerbot gcode is somewhat at odds with the larger CNC worlds usage of gcode.)
Makerbot gcode with a "wait for tool" midprint would just damage the print as the extruder
stops in place and waits some period of time (measured in 10's of seconds) for a temp
change to occur. For folks doing these gradual temp changes, waits are not needed and,
I'd argue, counterproductive. I suppose someone could put a pause into their gcode, then
expect manually for someone to change the filament to another which needs a
radically different temp at which point then having a "wait for temp" might make sense.
But that's a hypothetical situation and personally I prefer to not spend time solving
presently non-existent hypothetical cases. Personally, it's always seemed best to wait
for a real, existing case and then address it. And in this situation, there's already
a manual solution to such a hypothetical case: while the filament is manually changed,
the user can also manually change the temp from the LCD display and the bot will automatically
wait for the new target temp before un-pausing itself.
Dan
Steve Johnstone
Today I was dual printing, abs on both extruder and could have done with reducing the temp on the left extruder during the print. With sailfish, is it only the right extruder temp you can change on the fly fron the LCD?
Thanks
Dan Newman
On 18 Nov 2013 , at 12:55 PM, Steve Johnstone wrote:
> Hi Dan,
>
> Today I was dual printing, abs on both extruder and could have done with reducing the temp on the left extruder during the print. With sailfish, is it only the right extruder temp you can change on the fly fron the LCD?
used briefly, it can be tricky to change its temp from the LCD display. I don't
know offhand if there's enough program space left in the 1280's to be able to
have a UI element to allow picking which extruder to change the temp for during
printing.
Dan
Steve Johnstone
Steve Johnstone


On Saturday, 16 November 2013 23:36:07 UTC, Steve Johnstone wrote:
Enginwiz, I had the exact same glass chip experience when I first started using hairspray on the glass. It was almost like the glass had delaminates on the surface directly under the print. It's good to know what caused it.The dual material goblet is as challenge, still working it all out, but as soon as I have a solution will let you know.
Dan Newman
On 19 Nov 2013 , at 4:40 AM, Steve Johnstone wrote:
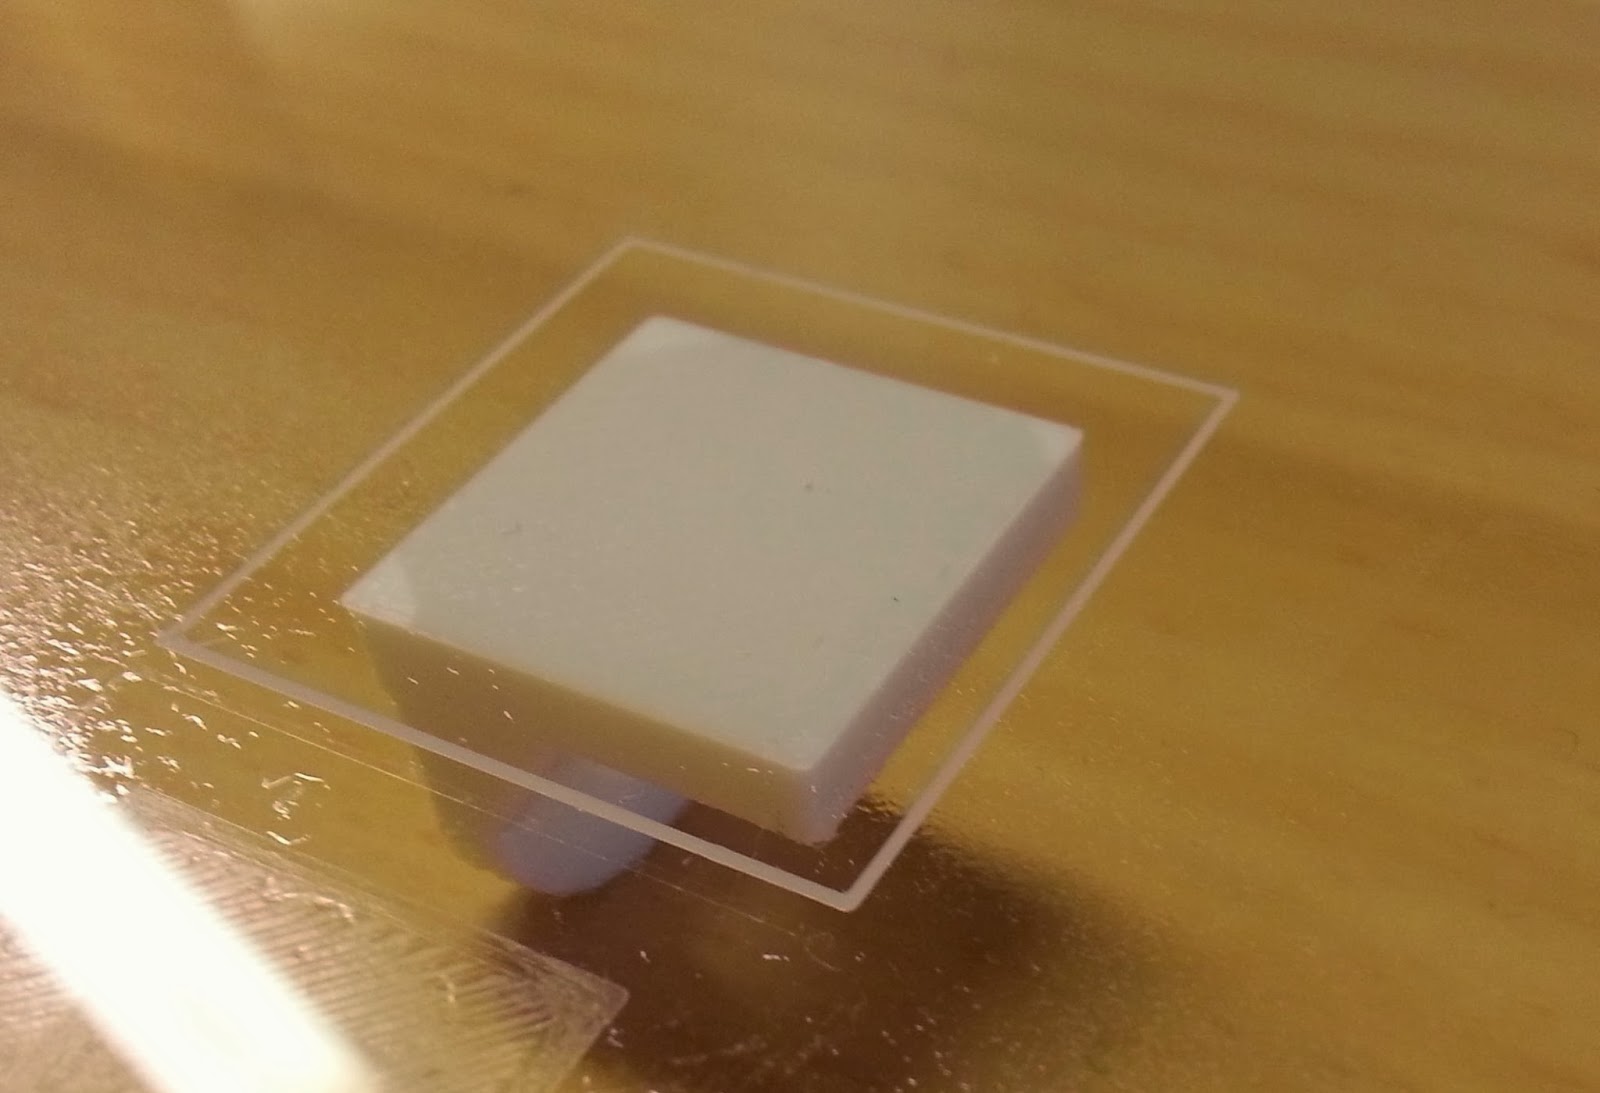
> My wife took some abstract photos of the chipped glass build table ...
But if you digitize them and put them on Thingiverse as 3d prints of
some ancient water flow feature found on Mars, they might get featured ;)
Dan
Steve Johnstone
Wingcommander
(@temperature 3.0mm 220c 90c)(@temperature 5.0mm 210c 80c)(@temperature 7.0mm 70c)
Wingcommander
1. I'd stick to whatever is working today which is basically leaving this to
the gcode.