DroidScript plugins
2,618 views
Skip to first unread message

Steve Garman
Jul 4, 2016, 3:14:47 AM7/4/16
to androi...@googlegroups.com
There have been a couple of requests recently for more information on what is available in
the UIExtras plugin.
This is a bit of an update of the post Chris Hopkin made previously showing some screenshots.
Here is the code of a couple of the examples that are included in the plugin docs.
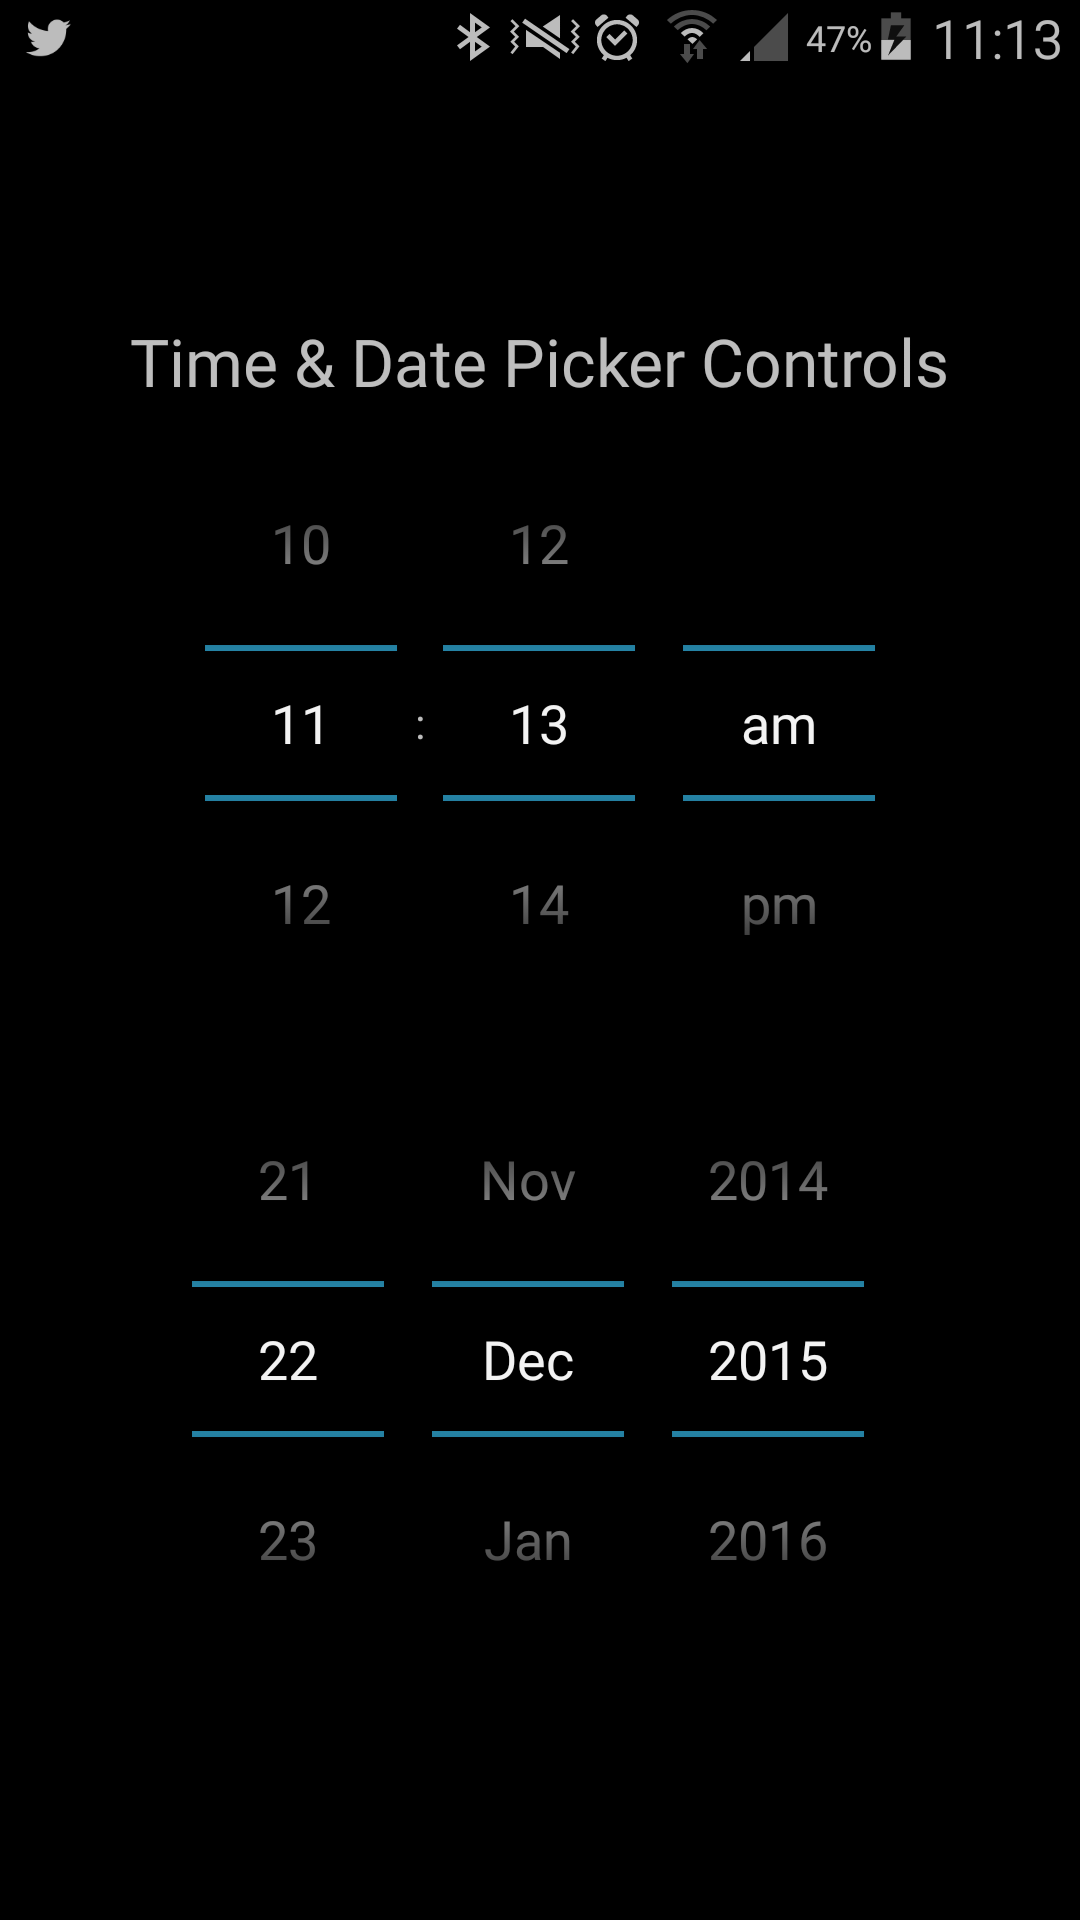
An app with a Time Picker can be as simple as this
app.LoadPlugin( "UIExtras" );

function OnStart()
{
 lay = app.CreateLayout( "Linear", "VCenter,FillXY" );

 uix = app.CreateUIExtras();

 picker = uix.CreateTimePicker();
 picker.SetOnTimeChanged( OnTimeChanged );
 lay.AddChild (picker );

 app.AddLayout( lay );
}

function OnTimeChanged( hour, minute )
{
 app.ShowPopup( hour + ":" + minute);
}
This is how to call a Date Picker Dialog
app.LoadPlugin( "UIExtras" );

function OnStart()
{
 lay = app.CreateLayout( "Linear", "VCenter,FillXY" );

 btn = app.CreateButton( "Pick Date", 0.3, 0.1 );
 btn.SetOnTouch( btn_OnTouch );
 lay.AddChild( btn );

 app.AddLayout( lay );

 uix = app.CreateUIExtras();
}

function btn_OnTouch()
{
 picker = uix.CreateDatePickerDialog( "Pick a Date" );
 picker.SetOnOk( picker_OnOk );
 picker.Show();
}

function picker_OnOk( year, month, day )
{
 var date = new Date();
 date.setFullYear( year, month, day);

 app.ShowPopup( date.toDateString() );
}
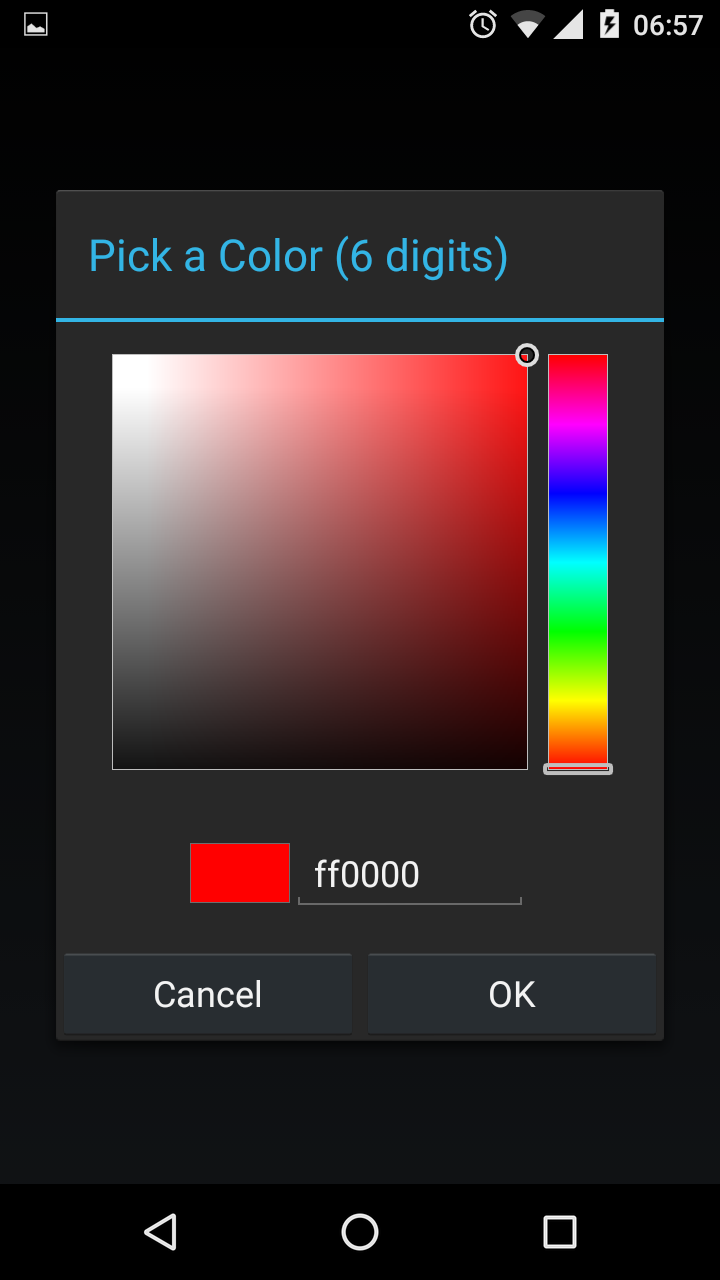
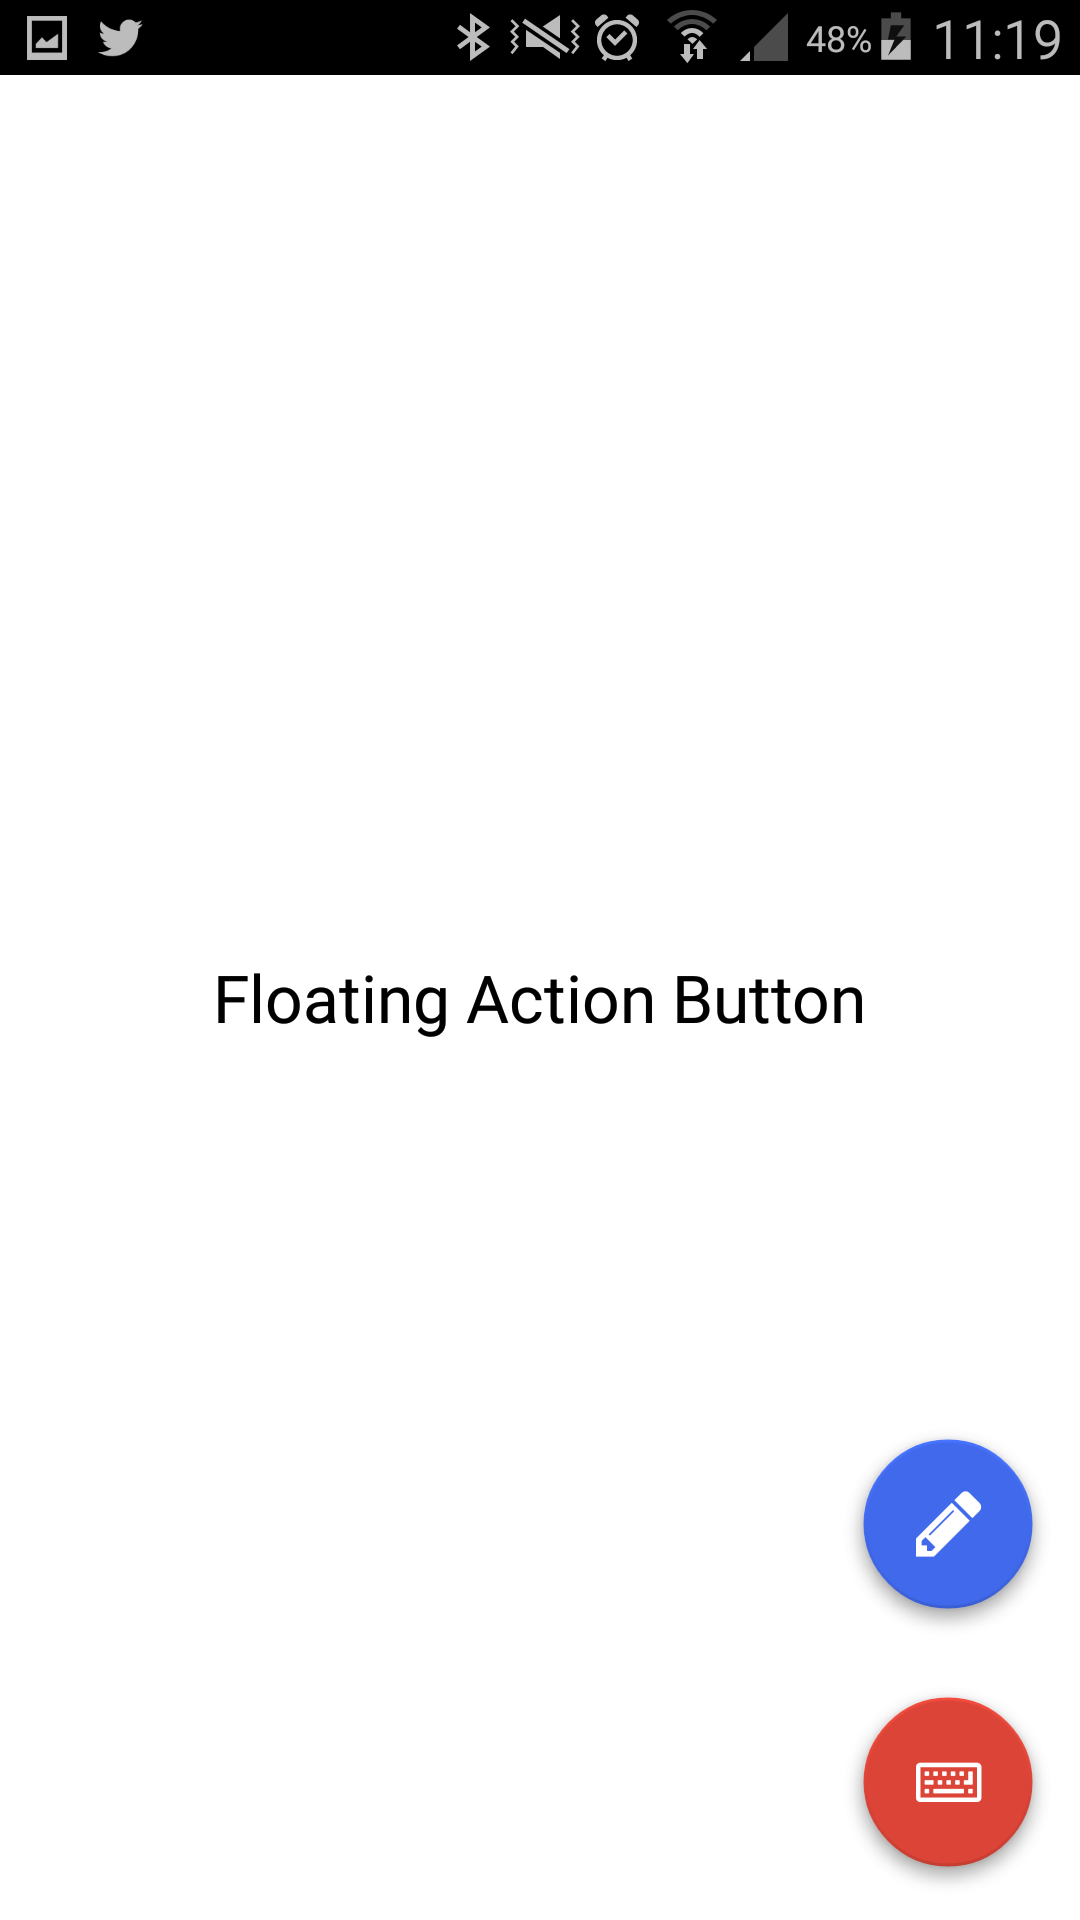
And this builds a whole floating action menu.
app.LoadPlugin( "UIExtras" );

function OnStart()
{
 lay = app.CreateLayout( "Linear", "FillXY" );
 lay.SetBackground( "/Sys/Img/GreenBack.png" );
 app.AddLayout( lay );

 uix = app.CreateUIExtras();

 layFam = app.CreateLayout( "Linear", "FillXY, Bottom, Right, TouchThrough" );
 fam = uix.CreateFAMenu( "[fa-envelope-o]", "Up,LabelsLeft" );
 fam.SetMargins( 0.02, 0.01, 0.02, 0.01 );
 fam.SetLabelBackColor( "#FFFFFF" );
 fam.SetLabelTextColor( "#646464" );
 fam.SetOnOpened( fam_OnOpened );
 fam.SetOnClosed( fam_OnClosed );
 layFam.AddChild( fam );

 fabReply = uix.CreateFAButton( "[fa-reply]", "Mini" );
 fabReply.SetButtonColors( "#db4437", "#c33d32" );
 fabReply.SetOnTouch( fab_OnMailReply );
 fabReply.SetLabel( "Reply" );
 fam.AddFAButton( fabReply );

 fabReplyAll = uix.CreateFAButton( "[fa-reply-all]", "Mini" );
 fabReplyAll.SetButtonColors( "#db4437", "#c33d32" );
 fabReplyAll.SetOnTouch( fab_OnMailReplyAll );
 fabReplyAll.SetLabel( "Reply All" );
 fam.AddFAButton( fabReplyAll );

 fabForward = uix.CreateFAButton( "[fa-share]", "Mini" );
 fabForward.SetButtonColors( "#fbbc05", "#efb306" );
 fabForward.SetOnTouch( fab_OnMailForward );
 fabForward.SetLabel( "Forward" );
 fam.AddFAButton( fabForward );

 app.AddLayout( layFam );
}
function fam_OnOpened()
{
 layFam.SetBackColor( "#99FFFFFF" );
}

function fam_OnClosed()
{
 layFam.SetBackColor( "#00FFFFFF" );
}

function fab_OnMailReply()
{
 app.ShowPopup( "Reply" );
}

function fab_OnMailReplyAll()
{
 app.ShowPopup( "Reply All" );
}

function fab_OnMailForward()
{
 app.ShowPopup( "Forward" );
}
Steve Garman
Jul 5, 2016, 5:03:02 AM7/5/16
to androi...@googlegroups.com
The QR and barcode reader plugin is a great way of reading and analyzing QR codes.
It is also useful for reading old-fashioned barcodes.
Most of the information below is extracted from the docs that come with the plugin.
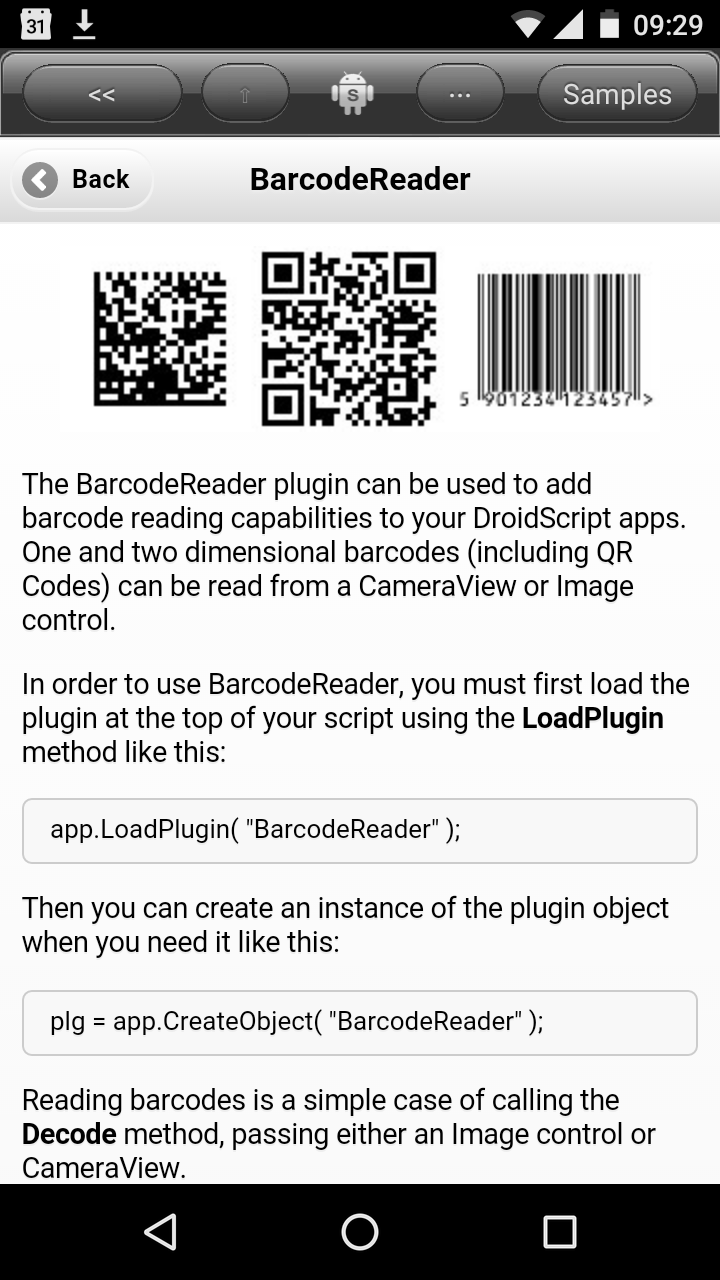
The BarcodeReader plugin can be used to add barcode reading capabilities to your DroidScript apps. One and two dimensional barcodes (including QR Codes) can be read from a CameraView or Image control.
In order to use BarcodeReader, you must first load the plugin at the top of your script using the LoadPlugin method like this:
app.LoadPlugin( "BarcodeReader" );
Then you can create an instance of the plugin object when you need it like this:
plg = app.CreateObject( "BarcodeReader" );
Reading barcodes is a simple case of calling the Decode method, passing either an Image control or CameraView.
reader.Decode( cam );
Note that when decoding from a CameraView, the "UseYUV" option is required when creating the CameraView.
The following example periodically attempts to decode a barcode from the camera and displays the decoded content when it finds one:
Example - Reading from a CameraView can be done lick this:
app.LoadPlugin( "BarcodeReader" );


function OnStart()
{
  app.SetOrientation( "Landscape" );
lay = app.CreateLayout( "Linear", "FillXY" );
  reader = app.CreateObject( "BarcodeReader" );


  cam = app.CreateCameraView( 0.8, 1, "VGA, UseYUV" );
  cam.SetOnReady( cam_OnReady );
  lay.AddChild( cam );


  app.AddLayout( lay );
}


function cam_OnReady()
{
  cam.StartPreview();
  cam.SetFocusMode( "macro" );
  DecodeFromCamera();
}


function DecodeFromCamera()
{
  var result = reader.Decode( cam );


  if( result != null )
  {
    app.ShowPopup( result.barcodeType + ": " + result.content );
  }


  setTimeout( DecodeFromCamera, 200 );
}
If a barcode is successfully decoded, the Decode method will return a result object. The result object contains the following properties:
Property Description
barcodeType The type of the barcode, e.g. QR Code, Data Matrix, EAN 13, etc. See Supported Barcodes for the complete list.
contentType The type of the barcode contents. The content can represent product codes, address book contacts, telephone numbers, etc. See Content Types for the complete list.
content The human readable representation of the barcode contents.
raw Contains the barcode content in it's original form. In some cases this will be the same as the content property, but if the contentType is ADDRESSBOOK for example, the raw property will contain the vCard or meCard contact data.
By default, when Decode is called, the plugin will attempt to detect all types of barcodes defined in the Suppoted Barcodes section. The SetBarcodeTypes method allows you to specify which barcode types you are interested in. The required barcode types can be passed to SetBarcodeTypes as a comma separated string. For example, to decode only QR Code and Data Matrix types:
reader.SetBarcodeTypes( "QR CODE,DATA MATRIX" );
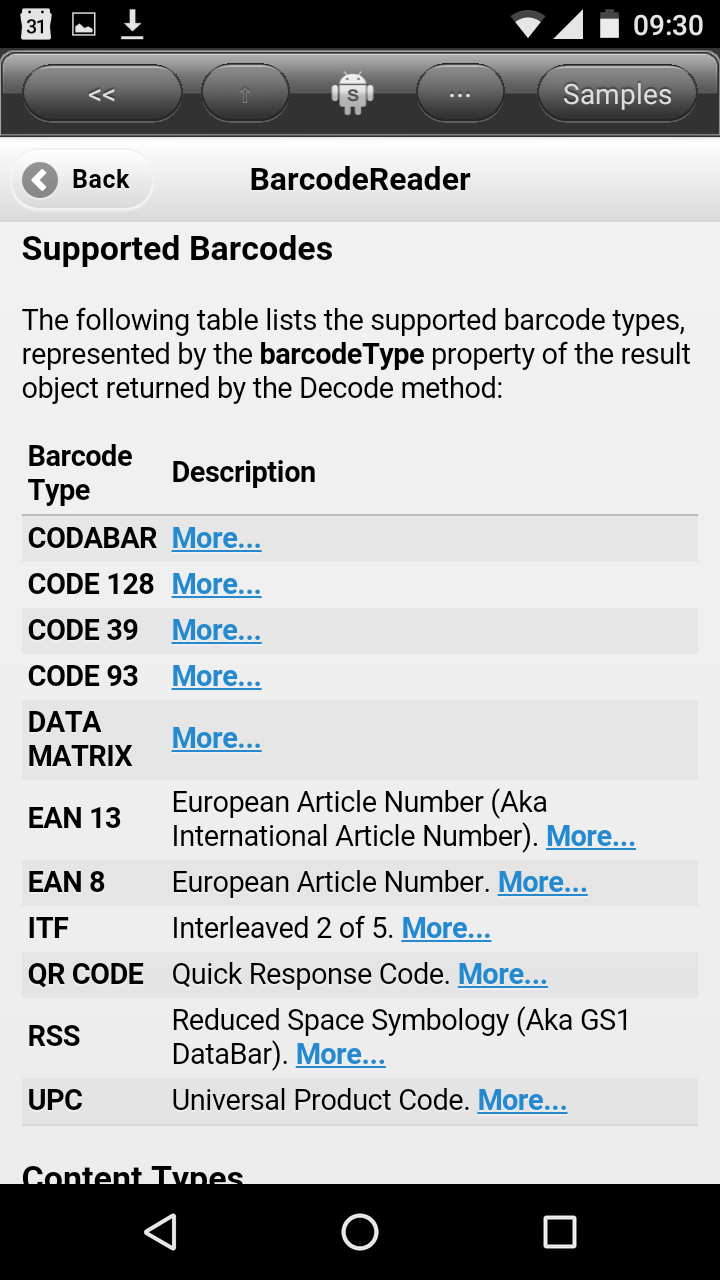
Supported Barcodes
The following table lists the supported barcode types, represented by the barcodeType property of the result object returned by the Decode method:
Barcode Type Description
CODABAR
CODE 128
CODE 39 Code 3 of 9
CODE 93
DATA MATRIX
EAN 13 European Article Number (Aka International Article Number). More...
EAN 8 European Article Number.
ITF Interleaved 2 of 5.
QR CODE Quick Response Code.
RSS Reduced Space Symbology (Aka GS1 DataBar).
UPC Universal Product Code.
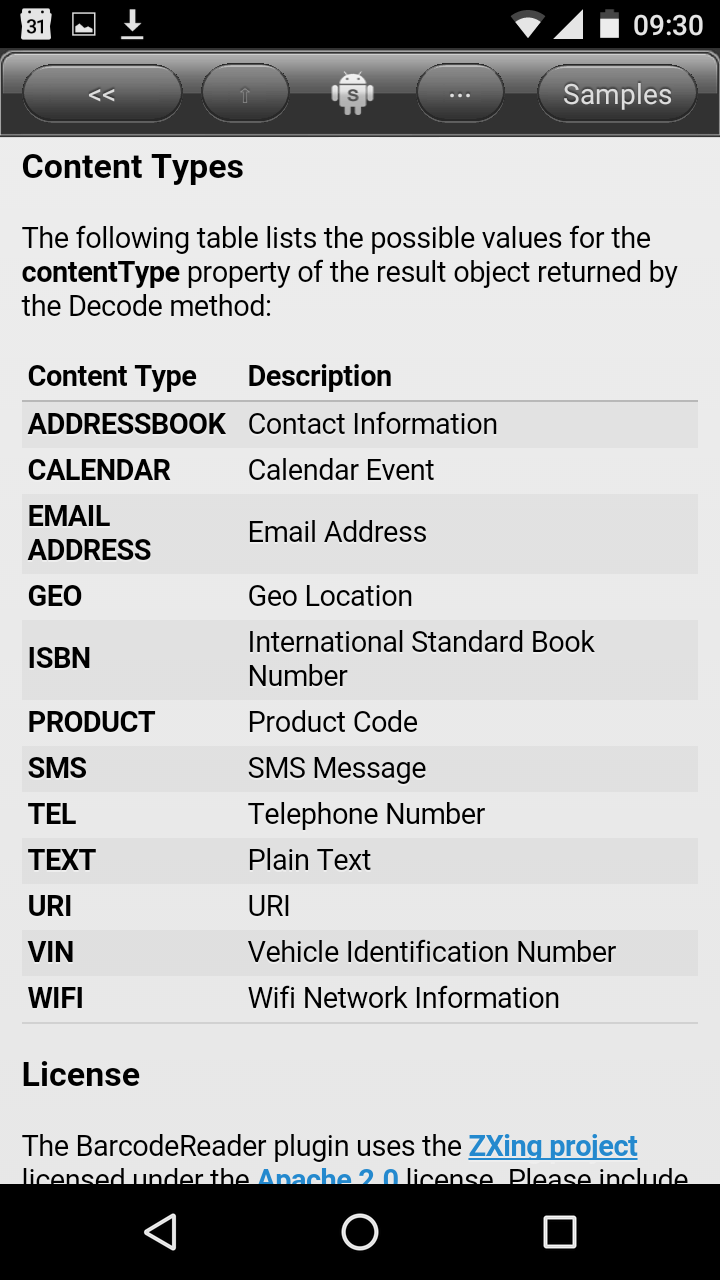
Content Types
The following table lists the possible values for the contentType property of the result object returned by the Decode method:
Content Type Description
ADDRESSBOOK Contact Information
CALENDAR Calendar Event
EMAIL ADDRESS Email Address
GEO Geo Location
ISBN International Standard Book Number
PRODUCT Product Code
SMS SMS Message
TEL Telephone Number
TEXT Plain Text
URI URI
VIN Vehicle Identification Number
WIFI Wifi Network Information
License
The BarcodeReader plugin uses the ZXing project licensed under the Apache 2.0 license. Please include the link to the project in any DroidScript apps built using this plugin - this could be placed in your apps About box for example.
Sample App
Below is an extended sample BarcodeReader App, which includes the option to use the flash while scanning for barcodes:
app.LoadPlugin( "BarcodeReader" );


//Called when application is started.
function OnStart()
{
  //Fix orientation to landscape.
  app.SetOrientation( "Landscape" );

  //Stop screen turning off.
  app.PreventScreenLock( true );


  //Create a layout to fill the screen.
  lay = app.CreateLayout( "Absolute", "FillXY" );


  //Create the barcode reader.
  reader = app.CreateObject( "BarcodeReader" );


  //Create camera view control
  //(UseYUV is required for use with BarcodeReader)
  cam = app.CreateCameraView( 0.8, 1.0, "VGA, UseYUV" );
  cam.SetPosition( 0.1, 0 );
  cam.SetOnReady( cam_OnReady );
  lay.AddChild( cam );


  //Add main layout to app.
  app.AddLayout( lay );
}


//Called when camera is ready.
function cam_OnReady()
{
  //Create an image control over the top of the
  //camera view with transparency (alpha) so
  //we can show a framed area.
  img = app.CreateImage( null, 1.0, 1.0 );
  img.SetAlpha( 0.5 );
  lay.AddChild( img );
  img.SetPaintColor( "#ff0000" );
  img.SetPaintStyle( "Line" );
  img.SetLineWidth( 2.5 );
  img.DrawRectangle( 0.2, 0.2, 0.8, 0.8 );


  //Create a layout for instruction text
  //and flash checkbox.
  overlay = app.CreateLayout( "Linear", "FillXY" );
  lay.AddChild(overlay);


  //Create the instruction text.
  txt = app.CreateText( "Position a barcode in the frame to read it" );
  txt.SetMargins( 0,0.05,0,0 );
  txt.SetPadding( 0.01,0,0.01,0 );
  txt.SetTextColor( "#ffffff" );
  txt.SetBackColor( "#44000000" );
  txt.SetTextSize( 18 );
  overlay.AddChild( txt );


  //Create Use Flash check box.
  chkFlash = app.CreateCheckBox( "Use Flash" );
  chkFlash.SetMargins( 0,0.75,0,0 );
  chkFlash.SetPadding( 0.01,0,0.01,0 );
  chkFlash.SetTextColor( "#ffffff" );
  chkFlash.SetBackColor( "#44000000" );
  chkFlash.SetTextSize( 18 );
  chkFlash.SetOnTouch( chkFlash_OnTouch );
  overlay.AddChild( chkFlash );


  //Start preview.
  cam.StartPreview();


  //Macro focus mode works best for
  //reading barcodes.
  cam.SetFocusMode( "macro" );


  //Start decoding the camera preview.
  DecodeFromCamera();
}


//Handle Use Flash checkbox touch
function chkFlash_OnTouch( value )
{
cam.SetFlash( value );
}


function DecodeFromCamera()
{
  //Attempt to detect a barcode in the
  //camera preview.
  var result = reader.Decode( cam );


  //If result is not null, a barcode
  //was detected.
  if( result != null )
  {
    //Vibrate and show result dialog.
    app.Vibrate( "0,100,30,100,50,300" );
    ShowResult( result );
  }
  else
  {
    //Decode again in 200 milliseconds.
    setTimeout( DecodeFromCamera, 200 );
  }
}


function ShowResult( result )
{
  //Create dialog window.
  resultDlg = app.CreateDialog( result.barcodeType, "NoCancel" );


  //Create a layout for dialog.
  layDlg = app.CreateLayout( "Linear", "Vertical, FillXY" );
  layDlg.SetPadding( 0.02, 0, 0.02, 0.02 );
  resultDlg.AddLayout( layDlg );


  //Create text for the content type name.
  txtDlg = app.CreateText( result.contentType );
  txtDlg.SetTextSize( 22 );
  txtDlg.SetTextColor( "#0099CC" );
  layDlg.AddChild( txtDlg );


  //Create a scroller for the content.
  scrDlg = app.CreateScroller( 0.4, 0.45 );
  scrDlg.SetMargins( 0, 0.01, 0, 0 );
  layDlg.AddChild( scrDlg );


  //Create text for the content.
  txtDlg = app.CreateText( result.content, 0.4, -1, "Multiline" );
  txtDlg.SetTextSize( 18 );
  scrDlg.AddChild( txtDlg );


  //Create an Ok button to dismiss the dialog.
  btnDlg = app.CreateButton( "Ok" );
  btnDlg.SetOnTouch( resultDlg_OnOk );
  layDlg.AddChild( btnDlg );


  //Show dialog.
  resultDlg.Show();
}


//Called when the result dialog Ok button is pressed
function resultDlg_OnOk()
{
  resultDlg.Dismiss();


  //Start decoding again.
  DecodeFromCamera();
}
Steve Garman
Jul 7, 2016, 4:39:44 AM7/7/16
to androi...@googlegroups.com
The OCR Scanner plugin allows you to extract text from pictures in an image control or directly from your device's camera.
Once you have text instead of a picture, you can treat it in the same way as if it had been typed into your app. It can be available for editing. cutting, pasting etc.
The details below are taken from the docs that come from the plugin.
OCR scanner is a tool to let you extract text from a picture in an image control or directly from the camera.
In order to use OCR Scanner, you must first load the plugin at the top of your script using the LoadPlugin method like this:
app.LoadPlugin( "OcrScanner" );
Then you can create an instance of the OCR object when you need it using the CreateOCR method:
ocr = app.CreateOCR();
The OCR object can scan directly from a CameraView object, which must be created with the UseYUV option:
cam = app.CreateCameraView( 1.0, 1.0, "UseYUV" );
To perform an OCR scan from the camera, use the Scan method:
ocr.Scan( cam );
Scanning from image files is also possible, BMP, PNG and JPG images files are supported. Simply call Scan with the filename of the image file:
ocr.Scan( "/sdcard/Pictures/scan.jpg" );
The scans are performed asynchronously, so to receive results from a scan, you must set a result callback function using the SetOnResult method. The callback function should have the following signature:
function OnOcrResult( ocrResult )
The ocrResult parameter is an object containing the results of the scan. The properties of the ocrResult object are as follows:
text The detected text
confidence A rating (0 to 100) indicating the overall certainty of the detected text
You can use the SetOnProgress method to set a callback that will receive progress updates during the scan. This can be used to update a progress bar during scanning (see the sample below).
The SetScanRect method can be used to set a sub-section of the camera image to use for scanning, which will improve scanning times. By default the entire camera image will be used.
ocr.SetScanRect( left, top, right, bottom )
The OCR Scanner comes ready to scan English text, but additional languages are supported through language packs. See Languages for more details.
Sample code:
app.LoadPlugin( "OcrScanner" );


var scanRect = {
  left: 0.25,
  top: 0.35,
  right: 0.75,
  bottom: 0.65
};


var ocr = null;
var cam = null;
var overlayImg = null;
var lightOn = false;
function OnStart()
{
  app.SetOrientation( "Landscape" );
  var lay = app.CreateLayout( "linear", "VCenter,FillXY" );


  cam = app.CreateCameraView( 1.0, 1.0, "UseYUV,XGA" );
  cam.SetOnReady( cam_OnReady );
  lay.AddChild( cam );


  app.AddLayout( lay );
  var overlay = app.CreateLayout( "Absolute", "FillXY" );


  overlayImg = app.CreateImage(null, 1, 1);
  overlay.AddChild(overlayImg);


  var msg = "Position text in the frame and press [fa-camera] to scan";
  var txt = app.CreateText( msg, 1.0, -1, "FontAwesome");
  txt.SetTextSize( 18 );
  txt.SetPosition( 0, 0.2 );
  overlay.AddChild(txt);


  var lightBtn = app.CreateButton( "[fa-bolt]", 0.1, -1, "FontAwesome" );
  lightBtn.SetTextSize(28);
  lightBtn.SetOnTouch( lightBtn_OnTouch );
  overlay.AddChild( lightBtn );


  var scanBtn = app.CreateButton( "[fa-camera]", 0.1, -1, "FontAwesome" );
  scanBtn.SetTextSize(28);
  scanBtn.SetOnTouch( scanBtn_OnTouch );
  scanBtn.SetPosition(0.9, 0);
  overlay.AddChild( scanBtn );


  app.AddLayout( overlay );


  ocr = app.CreateOCR();
  ocr.SetOnResult(ocr_OnResult);
  ocr.SetOnProgress(ocr_OnProgress);
  ocr.SetScanRect(scanRect.left, scanRect.top,
      scanRect.right, scanRect.bottom);


  DrawScanRect();
}


function cam_OnReady()
{
  cam.StartPreview();
}


function DrawScanRect()
{
  overlayImg.SetPaintColor( "#FFFF0000" );
  overlayImg.SetLineWidth( 2.0 );
  overlayImg.SetPaintStyle( "Line" );


  overlayImg.DrawRectangle(scanRect.left, scanRect.top,
      scanRect.right, scanRect.bottom);
}


function ocr_OnResult( ocrResult )
{
  app.HideProgressBar();


  if( ocrResult.text != "" )
  {
    app.ShowPopup( ocrResult.text );
  }
  else
  {
    app.ShowPopup( "OCR Failed" );
  }
}


function ocr_OnProgress( progress )
{
  app.UpdateProgressBar( progress );
}


function scanBtn_OnTouch()
{
  app.ShowProgressBar( "Scanning...", 0 );
  ocr.Scan( cam );
}


function lightBtn_OnTouch()
{
  lightOn = !lightOn;
  cam.SetFlash( lightOn );
}
The OCR Scanner plugin uses the android-ocr library, licensed under the Apache 2.0 License.
Steve Garman
Jul 7, 2016, 8:19:41 AM7/7/16
to androi...@googlegroups.com
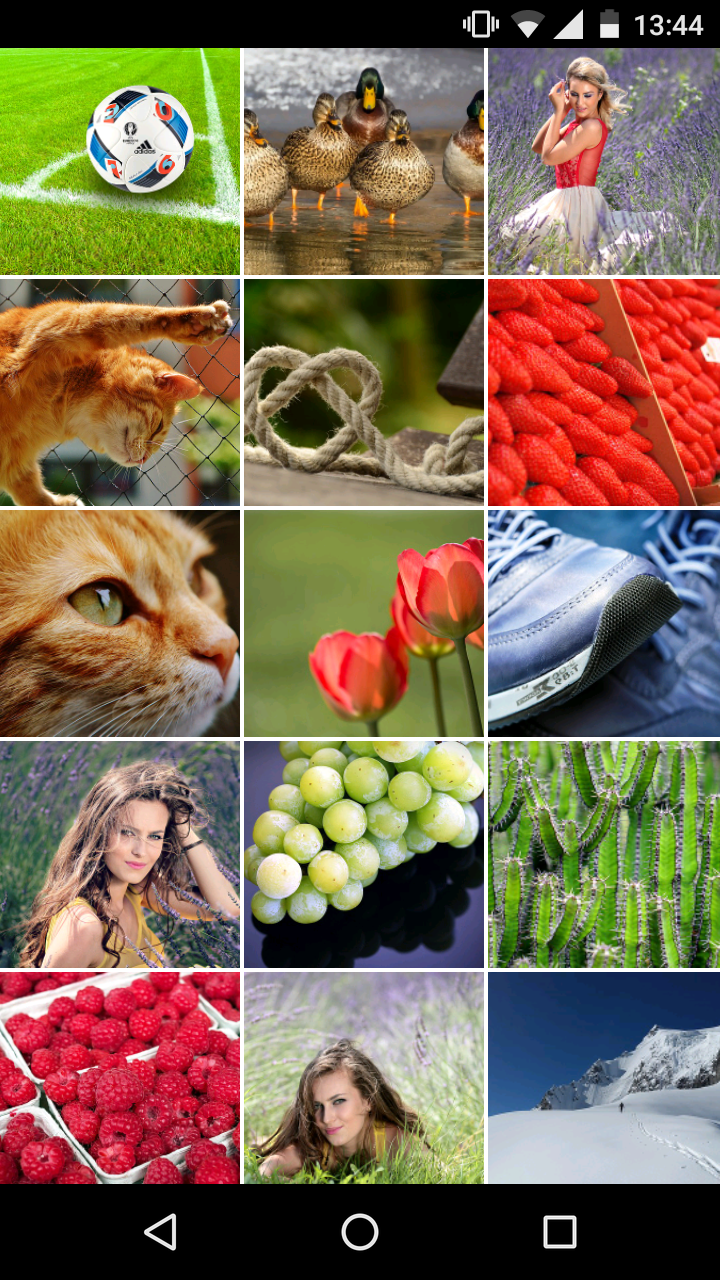
Need to display a choice of images for the user to select from?
The ImageGrid plugin provides a high performance, multi-threaded thumbnail viewing grid, with in-built memory and disk caching.
This control is suitable for providing 'gallery style' image browsing experiences to the user. It can display images from both local and remote sources.
To use the ImageGrid, you must first load the plugin at the top of your script using the LoadPlugin method like this:
app.LoadPlugin( "ImageGrid" );
Then you can create an instance of the image grid when you need it using the CreateImageGrid method:
grid = app.CreateImageGrid( list, width, height, cols, rows, cacheSize, options );
The list parameter should be an array or comma separated list of image file names. The width and height parameters set the size of the grid as a fraction of the screen width and height.
The cols parameter sets the number of grid columns required and the rows parameter sets the number of grid rows shown per screen.
The optional cacheSize parameter sets the number of megabytes reserved on disk to cache images, which vastly improves performance when re-displaying the same images (it defaults to 50).
The options parameter may contain the following values that determine the way that the images are scaled within each grid cell: crop, fit, fill, shrink.
Examples:
Example - Display and select
app.LoadPlugin( "ImageGrid";


function OnStart()
{
  lay = app.CreateLayout( "Linear", "VCenter,FillXY" );


  var files = app.ListFolder( "/sdcard/DCIM/Camera", ".jpg", 1000, "FullPath" );


  grid = app.CreateImageGrid( files, 1,1, 3,5 );
  grid.SetOnTouch( grid_OnTouch );
  grid.SetOnLongTouch( grid_OnLongTouch );
  lay.AddChild( grid );


  app.AddLayout( lay );
}


function grid_OnTouch( fileName )
{
  alert( fileName );
}


function grid_OnLongTouch( fileName )
{
  alert( fileName );
}
Example - Remove image
app.LoadPlugin( "ImageGrid" );


function OnStart()
{
  lay = app.CreateLayout( "Linear", "VCenter,FillXY" );


  var files = app.ListFolder( "/sdcard/DCIM/Camera", ".jpg", 1000, "FullPath" );


  grid = app.CreateImageGrid( files, 1,0.7, 3,5 );
  lay.AddChild( grid );


  btn = app.CreateButton( "Remove", 0.3 );
  btn.SetOnTouch( btnRemove_OnTouch );
  lay.AddChild( btn );
  app.AddLayout( lay );
}


function btnRemove_OnTouch()
{
  grid.RemoveItemByIndex( 0 );
}
Example - Album art
app.LoadPlugin( "ImageGrid" );


function OnStart()
{
  lay = app.CreateLayout( "Linear", "VCenter,FillXY" );
  grid = app.CreateImageGrid( "", 0.9,0.9, 1,2 );
  lay.AddChild( grid );
  app.AddLayout( lay );


  media = app.CreateMediaStore();
  media.SetOnAlbumsResult( media_OnAlbumsResult );
  media.QueryAlbums( "", "", "external" );
}


function media_OnAlbumsResult( result )
{
  s = "";
  for( var i=0; i<result.length; i++ )
  {
    if( result[i].albumArt!="null" )
      s += (i>0?",":"") + result[i].albumArt;
  }
  grid.SetList( s, "," );
}
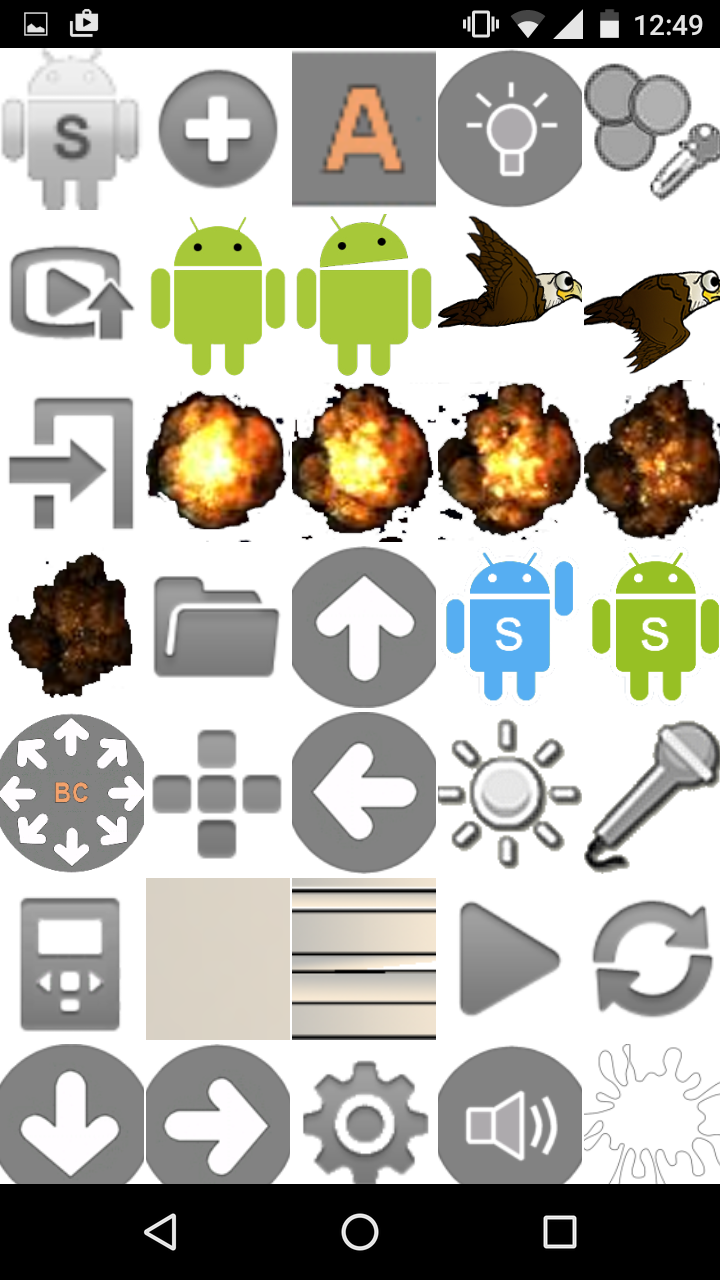
Example - Assets
app.LoadPlugin( "ImageGrid" );


function OnStart()
{
  lay = app.CreateLayout( "Linear", "VCenter,FillXY" );


  var files = app.ListFolder( "/Assets/Img", ".png", 0, "FullPath" );


  grid = app.CreateImageGrid( files, 1,1, 5,7 );
  lay.AddChild( grid );


  app.AddLayout( lay );
}
Example - Remote
//////////////////// Remote
app.LoadPlugin( "ImageGrid" );


function OnStart()
{
  lay = app.CreateLayout( "Linear", "VCenter,FillXY" );


  var files =
  [
  "http://androidscript.org/Plugins/img/BarcodeReader.png",
  "http://androidscript.org/Plugins/img/GoProController.png",
  "http://androidscript.org/Plugins/img/Moga.png",
  "http://androidscript.org/Plugins/img/NXT.png",
  "http://androidscript.org/Plugins/img/PluginApk.png",
  "http://androidscript.org/Plugins/img/SpheroBall.png",
  ];


  grid = app.CreateImageGrid( files, 1,1, 3,6, -1, "fit" );
  lay.AddChild( grid );


  app.AddLayout( lay );
}
You may want use the SetSpacing method to set the size of the border between each image and the SetBackColor method to change the background color (for example to black rather than the default white).
The following methods are provided by the ImageGrid object:
SetOnTouch( callback )
SetOnLongTouch( callback )
SetList( list, delim )
InsertItem( index, name )
AddItem( name )
RemoveItemByIndex( index )
RemoveAll()
GetLength()
SetSpacing( width, height )
The following general methods are also avaiable:
Focus()
GetAbsWidth()
GetAbsHeight()
GetWidth()
GetHeight()
GetPosition()
GetType()
GetVisibility()
SetVisibility( visibility )
SetPadding( left, top, right, bottom )
SetMargins( left, top, right, bottom )
SetBackground( imageFile, options )
SetBackColor( colorCode )
SetBackGradient( color1, color2, color3 )
SetBackGradientRadial( x, y, r, color1, color2, color3 )
SetPosition( left, top, width, height )
SetSize( width, height )
SetScale( width, height )
Reply all
Reply to author
Forward
This conversation is locked
You cannot reply and perform actions on locked conversations.
0 new messages