Some thoughts on working with mosaic mode

Tduell
I have spent a bit of time lately trying to get a good understanding
of how to work with mosaic mode, all aimed at putting together a
tutorial for the 2010.2 release.
I think there are problems with the code, and some projects seem to be
impossible, whilst others work like like a charm.
Bruno's project (http://bugbear.postle.net/~bruno/misc/1-mosaic.zip)
seems to be one that is particularly good causing the problems to
appear, and as a result of my attempts to wrestle it into submission I
have arrived at a set of steps that will work with all my other mosaic
projects. Bruno's project still fails, but more on that a bit later.
The process is a bit painful, and may not be necessary with some
simple projects, but appears to me to be required for others. Here are
the steps that I go through...
(1) Set the default control point detector to "pre-aligned panorama",
and ensure that the advanced selection "only work on image pairs
without control points" is selected.
(2) Load 2 overlapping images.
(3) In the Fast preview window, set projection "rectilinear", select
"layout", and "mosaic" mode. Drag the images roughly into alignment.
(4) Images tab, "create control points".
(5) Optimiser tab, select "the custom parameters below", and set p,y
for the anchor and p,y,x,y,z for the other image, then optimise.
(6) Add another overlapping image.
(7) Fast Preview window, layout, mosaic. Drag the new image roughly
into position.
(8) Image tab, create control points.
(9) Control points tab, check the control points created for the
latest image, ensure they are OK, with no points set for unconnected
images.
(10) Optimiser tab, select p,y,x,y,z for the new image, optimise. If
the optimisation result is OK, accept it, else reject it and go back
to control points tab and edit/change control points for this latest
image.
(11) repeat the cycle of adding one new image at a time until done.
The above process is clearly tedious, particularly when a project has
a lot of images, and not a desirable solution, but at this stage it
seems to to needed to get a result with some projects.
I would welcome comments on the above, and suggest trying Bruno's
project with your 'favourite' process and see what result you get.
Bruno's project has been interesting. There have been situations where
it has all been going quite good until adding in the last image, then
it goes completely awry, and no amount of recovery tricks seem to
work.
I have tried starting with different images and working through them
in a different order, but it always goes belly up, for me.
What I have found is that images #178 and #180 appear to be the a
major part of the problem. If I only load them in, the control point
detectors always fail and control points have to be manually created.
When optimised the Z value for both images is set to -1, which is
hopeless. I have spent a lot of time trying different control points
but these two images always go wrong.
If anyone would like to try to track down the problems in the code
that are causing these issues, images #178 and #180 in Bruno's project
might be good test case.
Cheers,
Terry

Yuval Levy
On September 8, 2010 02:02:40 am Tduell wrote:
> I have spent a bit of time lately trying to get a good understanding
> of how to work with mosaic mode, all aimed at putting together a
> tutorial for the 2010.2 release.
thanks for sharing your experience. I built on it [0].
> (1) Set the default control point detector to "pre-aligned panorama",
> and ensure that the advanced selection "only work on image pairs
> without control points" is selected.
Done away with it. Use manual CPs instead, is faster.
> (7) Fast Preview window, layout, mosaic. Drag the new image roughly
> into position.
Use the numeric input in the Images tab instead, and you won't be limited by
the drag/move functionality.
> The above process is clearly tedious, particularly when a project has
> a lot of images, and not a desirable solution, but at this stage it
> seems to to needed to get a result with some projects.
The problem is that dragging will move all images connected by CPs, so you
must do the dragging before adding CPs or find an alternate way to get the
image into position before optimizing.
Because optimization is heavily dependent from the initial position of the
image, dragging it (or setting it there by entering a reasonable numerical
value in the Images tab) is not an option. What Hugin needs is an extra
switch to the dragging functionality in the Fast Preview window: drag group
of connected images (as exist now) and drag individual image (new).
> Bruno's project has been interesting. There have been situations where
> it has all been going quite good until adding in the last image, then
> it goes completely awry, and no amount of recovery tricks seem to
> work.
once things go awry it is very difficult to recover. I found that the
starting positions are much more important in determining the outcome than in
traditional panoramas on the sphere.
> If anyone would like to try to track down the problems in the code
> that are causing these issues, images #178 and #180 in Bruno's project
> might be good test case.
I have not played with Bruno's project and have arrived at similar conclusions
as you. There is room for improvement.
Yuv
[0] http://panospace.wordpress.com/2010/09/19/linear-panoramas-mosaic-
tutorial/
Tduell
On Sep 20, 6:35 am, Yuval Levy <goo...@levy.ch> wrote:
> Hi Terry,
>
> On September 8, 2010 02:02:40 am Tduell wrote:
>
> > I have spent a bit of time lately trying to get a good understanding
> > of how to work with mosaic mode, all aimed at putting together a
> > tutorial for the 2010.2 release.
>
> thanks for sharing your experience. I built on it [0].
I have found that most projects I have tackled since have worked OK
without any of the complexity...pretty much as per a normal pano, just
load images, add control points, optimise positions and translations
and all done.
The approach I previously described seemed to be the only way to make
any progress with Bruno's project, but I haven't had another like it.
You should put a link to your tutorial on the Hugin web page.
Cheers,
Terry

Dale Beams
Dale
> Date: Sun, 19 Sep 2010 16:11:08 -0700
> Subject: [hugin-ptx] Re: Some thoughts on working with mosaic mode
> From: tdu...@iinet.net.au
> To: hugi...@googlegroups.com
> You received this message because you are subscribed to the Google Groups "Hugin and other free panoramic software" group.
> A list of frequently asked questions is available at: http://wiki.panotools.org/Hugin_FAQ
> To post to this group, send email to hugi...@googlegroups.com
> To unsubscribe from this group, send email to hugin-ptx+...@googlegroups.com
> For more options, visit this group at http://groups.google.com/group/hugin-ptx
Tduell
On Sep 20, 11:05 am, Dale Beams <drbe...@hotmail.com> wrote:
> Speaking of translations, what is the new translations options on the optimizer menu? For this sort of thing, not for standard panos?
thereafter any that include 'Translation'.
Cheers,
Terry
Dale Beams
Dale
> Date: Sun, 19 Sep 2010 18:29:36 -0700
> Subject: [hugin-ptx] Re: Some thoughts on working with mosaic mode
> From: tdu...@iinet.net.au
> To: hugi...@googlegroups.com
>
Tduell
On Sep 20, 1:57 pm, Dale Beams <drbe...@hotmail.com> wrote:
> Let me re-phrase. What is the translation option mean?
I'll give my simple (?) explanation. Others may be able to elaborate
and/or correct me.
When one shoots a normal pano, all photos are shot from the same (or
as close as possible) camera position.
The photos are assumed to be on the surface of a sphere, and when a
photo is moved the assumption is one or more of the camera angles
(pitch, yaw, roll) are changed. Basic optimisation is done on the
camera angles to arrive at an alignment which represents the original
scene.
When one shoots a mural or mosaic, the subject is on a plane (flat, or
nearly so) surface and each photo can be taken from a different camera
position and using different camera angles.
The assumption is that the photos are all on a plane surface and the
projection is rectilinear, so when a photo is moved left-right or up-
down it is translated in the X, and/or Y directions on the flat
surface. Basic optimisation is done on the X,Y and Z parameters to
arrive at an alignment that represents the subject on the flat
surface.
Hope this helps better.
Cheers,
Terry

Oskar Sander
Nice walk though! I picked up a couple of nice features that I didn't used before, like "use only control point from images visible... " that was a good one i think i will use a lot going forward!
A few assorted questions come to my mind:
* Is there something inherent in CP detection that is thrown of by linear mosaics? My experience is too that it doesn't work well, but i tho thought it was my low-contrast low-light and monochrome application (very dark underwater scenes) that was throwing the search off.
- One experience that I have form manual CP detection is that IF your mosaic subject is not a flat plane, you need to analyze the images and make sure that the CP are selected in the image plane you want, and not on features that are significantly in front or behind your thought image plane.
* I agree that independent dragging is something useful to get a good starting position. When you are laying the images out manually, are you just picking a number? The X,Y,Z parameters are a scaling factor of the radius to the unit panosphere I understand. Maybe a simple calculator button next to the X, Y X fields to place the image a whole number of image lengths away from the anchor could be useful. This could bi just a little gui-calculation next to the X,Y,Z input fields. This is just a hunch, let's discuss it.
* I like your in-line lens calibration in the work-flow, I have to try that to se if I get better results!
Another question that I think I asked before but can't find the answer to is: When you have generated a mosaic project, is it possible to generate an output where all image seams are highlighted? Like a sort of mosaic debug mode. Or as I would use it, as the scientific explanation on how the mosaic (or panorama) was assembled from source images.
Cheers
/O
--
/O

Bruno Postle
>
> Another question that I think I asked before but can't find the answer to
> is: When you have generated a mosaic project, is it possible to generate
> an output where all image seams are highlighted? Like a sort of mosaic
> debug mode. Or as I would use it, as the scientific explanation on how the
> mosaic (or panorama) was assembled from source images.
If you select Identify in the Preview window and hover your mouse over
either the row of image number buttons or the preview image itself you
can see the individual photos.
Hugin can't show you where the seams will be because enblend will do
it's own thing and this can't be accurately predicted. A long time ago
before we had enblend, the Hugin preview did actually draw simple seam
lines, this code is still there but disabled, there is probably
something useful that can be done with it.
--
Bruno

kfj
On Sep 20, 3:38 pm, Oskar Sander <oskar.san...@gmail.com> wrote:
> * Is there something inherent in CP detection that is thrown of by linear
> mosaics?
parallactic errors. Since subsequent images are not taken from the
same point (the NPP), as panoramas would (or should) be, parallactic
errors will occur if the object isn't flat. I made a series of
something like a dozen handheld shots of a map lying on the floor, and
the resulting mosaic I got (using only automatically generated CPs)
was very good indeed with virtually no visible flaws! But if the
object isn't flat, you have a problem, which leads to your next
question:
> - One experience that I have form manual CP detection is that IF your
> mosaic subject is not a flat plane, you need to analyze the images and make
> sure that the CP are selected in the image plane you want, and not on
> features that are significantly in front or behind your thought image plane.
to use as your reference plane, but the CPGs will have difficulties
with the parallactic errors You even have the same problems setting
the CPs manually, if there isn't some feature you can use which is
unaffected by parallax. And the XYZ correction will not make these
errors go away. When finally stitching the mosaic, the objects outside
your reference plane and also parallax-sensitive parts of objects near
the reference plane (like surfaces that aren't parallel to the object
plane) will often come out wrong. You can possibly avoid some of the
worse-looking problems by using smartblend in preference to enblend,
but there's only so much you can do.
with regards
KFJ
Yuval Levy
On September 20, 2010 09:38:48 am Oskar Sander wrote:
> Nice walk though!
thanks,
> * Is there something inherent in CP detection that is thrown of by linear
> mosaics? My experience is too that it doesn't work well, but i tho
> thought it was my low-contrast low-light and monochrome application (very
> dark underwater scenes) that was throwing the search off.
depth (pun intended). The CP detectors will detect features that look the
same, but they still can't tell if all of those features are on one plane.
> - One experience that I have form manual CP detection is that IF your
> mosaic subject is not a flat plane, you need to analyze the images and make
> sure that the CP are selected in the image plane you want
exactly that. My experience with building fronts is that even small relief
makes a big difference.
> When you are laying the images out manually, are you
> just picking a number?
I help myself visually with the feedback of the fast preview.
> The X,Y,Z parameters are a scaling factor of the
> radius to the unit panosphere I understand.
the unit is relative. The way I understand it is that with X you shift the
center of the panosphere left and right. With Y you shift it up and down.
with Z you shift it forth and back ("zoom"). Each image is on its own
panosphere that gets projected on the mosaic surface. Knowing this, playing
with the numerical values in the Images tab becomes a "fly by wire" exercise
where you zero in on an approximate position, before optimizing it with the
optimizer.
> Maybe a simple calculator
> button next to the X, Y X fields to place the image a whole number of image
> lengths away from the anchor could be useful.
The image length is constant on the mosaic only if you shoot from the same
distance and angle - a special case. I don't see it as being helpful to me.
I rather have some sort of 3D joystick/trackball. one joystick would do X/Y
the other would do Z/roll and the trackball would do pitch/yaw.
> * I like your in-line lens calibration in the work-flow, I have to try
> that to se if I get better results!
It's a fortunate coincidence that I have the necessary features in the
picture. It's really much better to work with calibrated lens profiles in the
first place, but it has been so long since I've been serious about pano
stitching that I have not bothered to calibrate this lens I bought about a
year ago (Sigma 15mm fisheye).
> Another question that I think I asked before but can't find the answer to
> is: When you have generated a mosaic project, is it possible to generate
> an output where all image seams are highlighted?
If my memory does not betray me, there was a debugging version of enblend that
would do just that, but I can't find any references to it right now.
Given the extreme sensitivity to depth/perspective, it is anyway better to
place the seams manually, using masks. That's the most time consuming part of
the work. Fiddle, fiddle, until it looks acceptable.
Yuv (still fiddling)
Dale Beams
understand the difficulty and complexity in doing so.
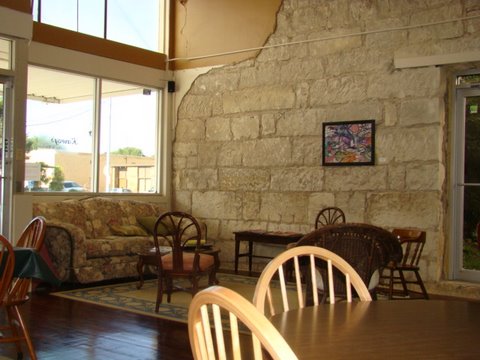
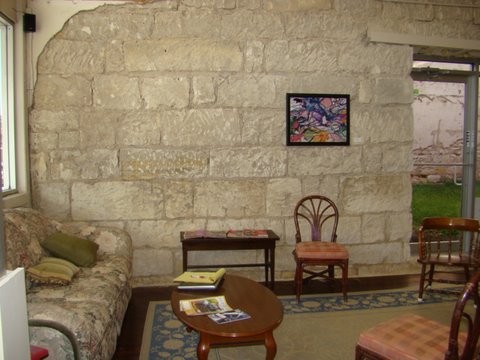
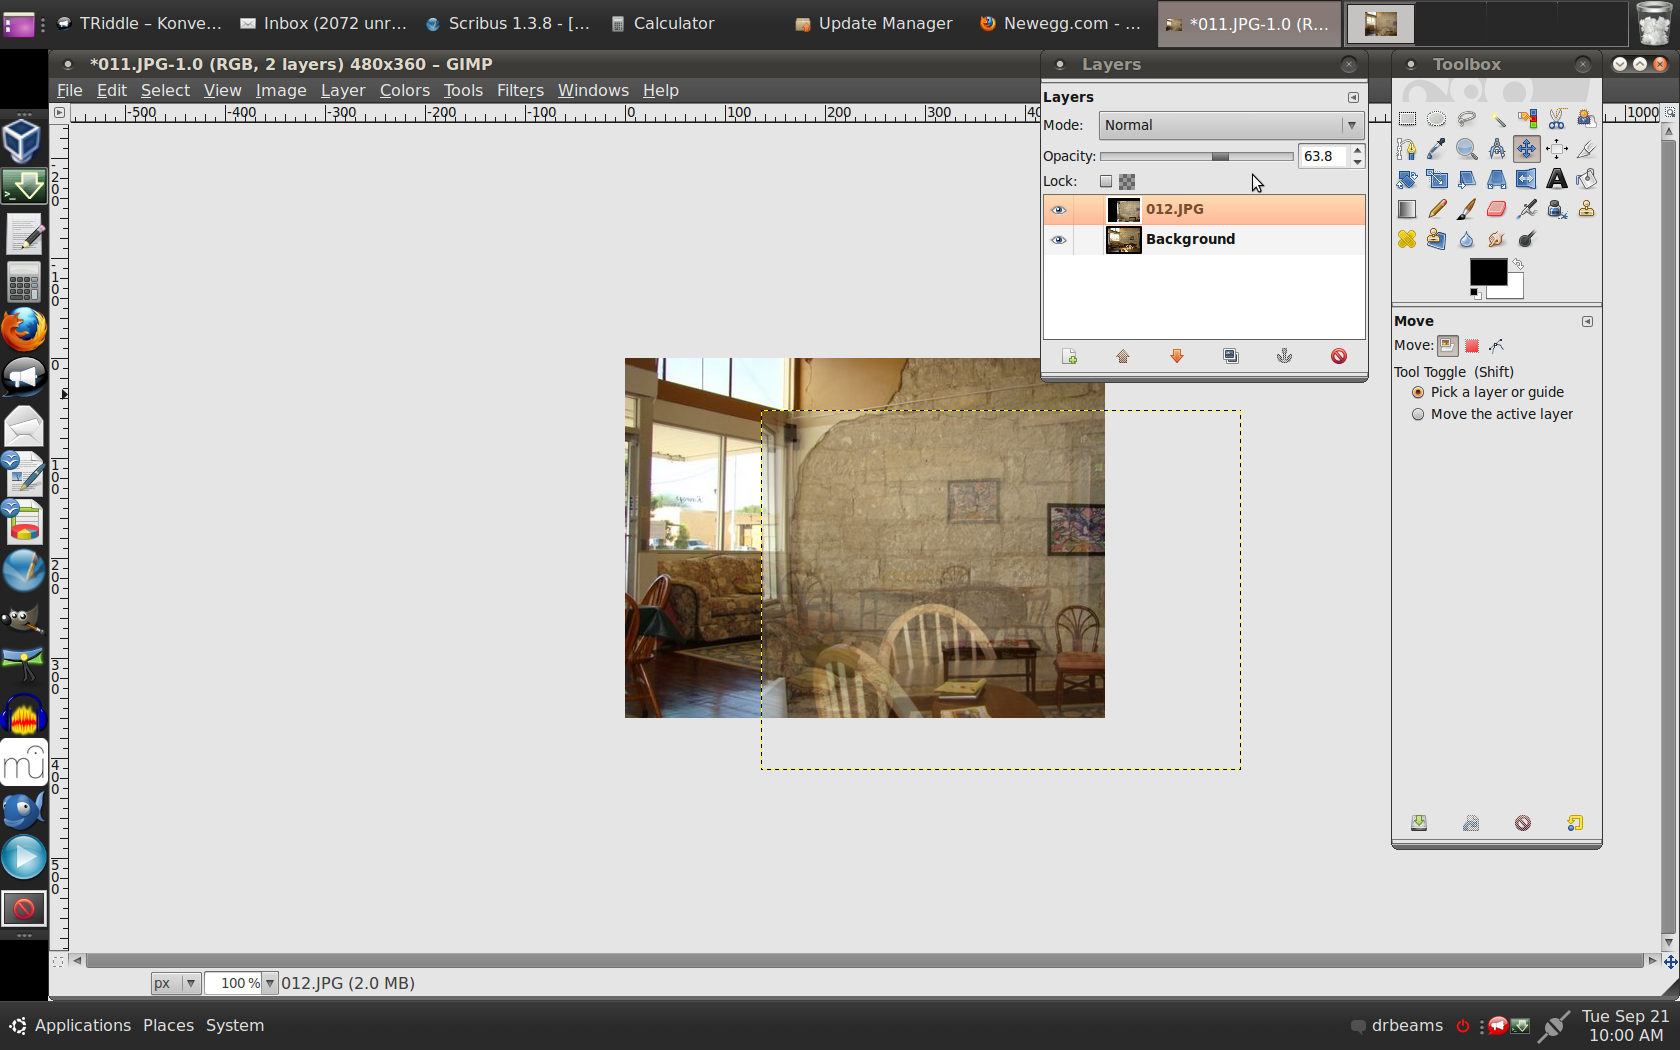
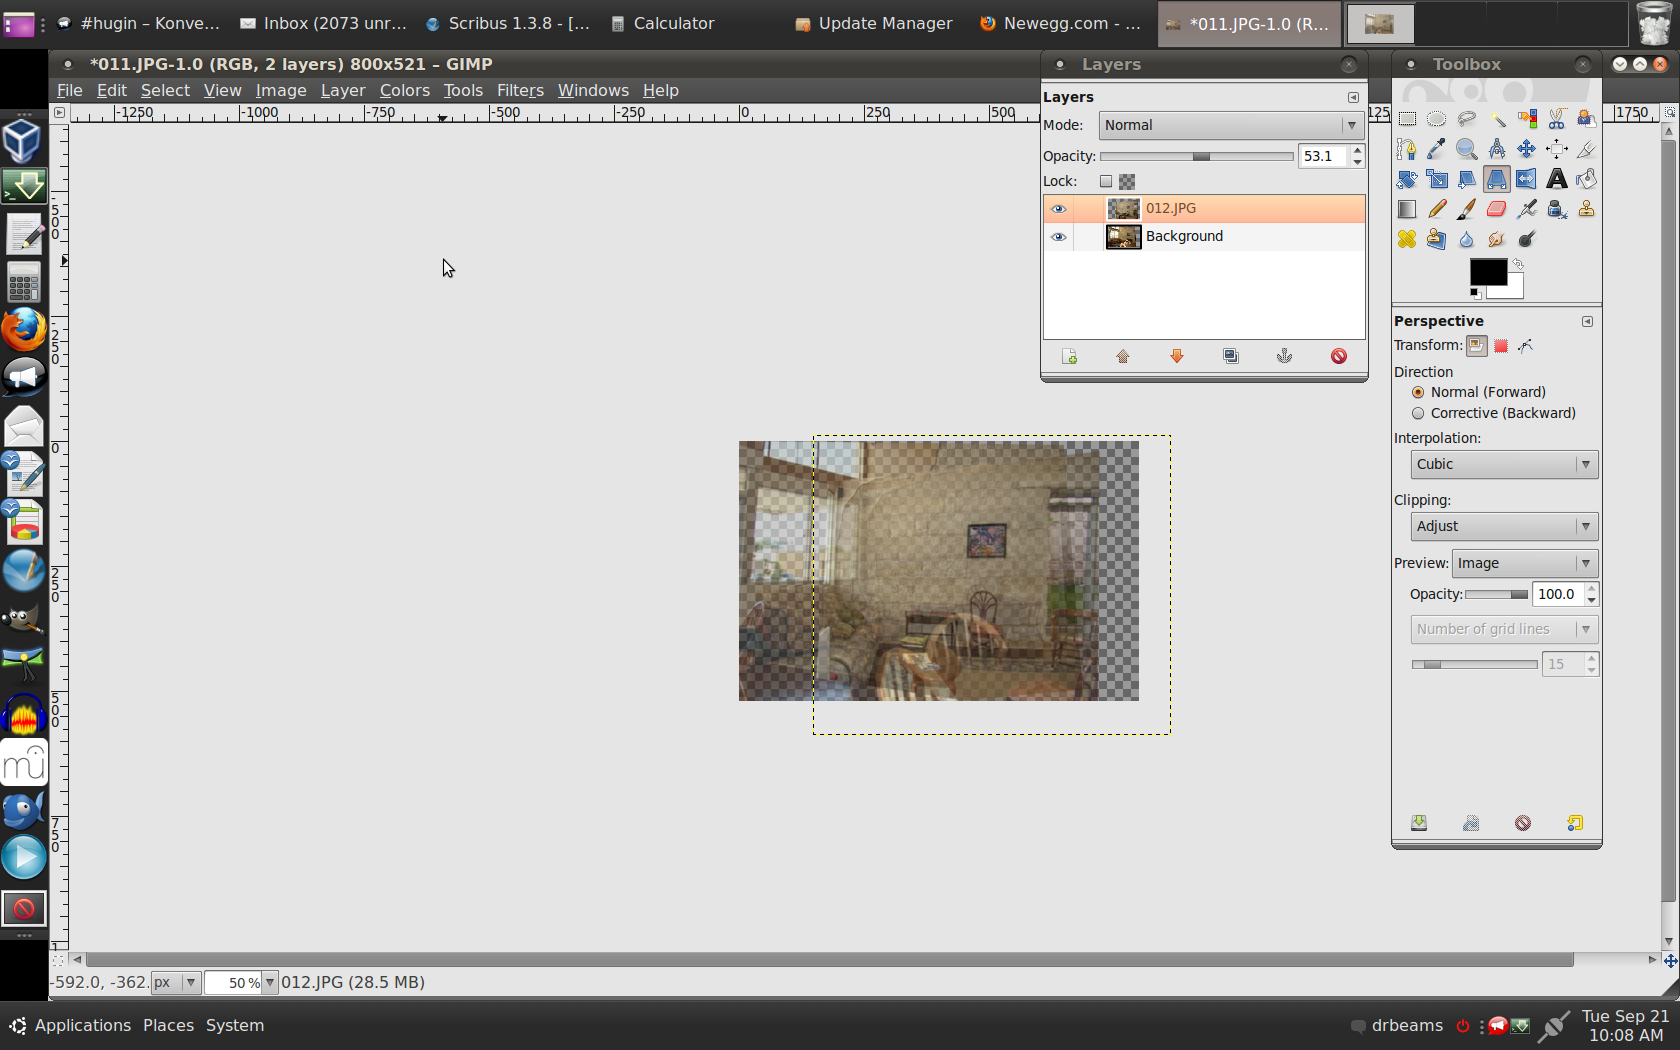
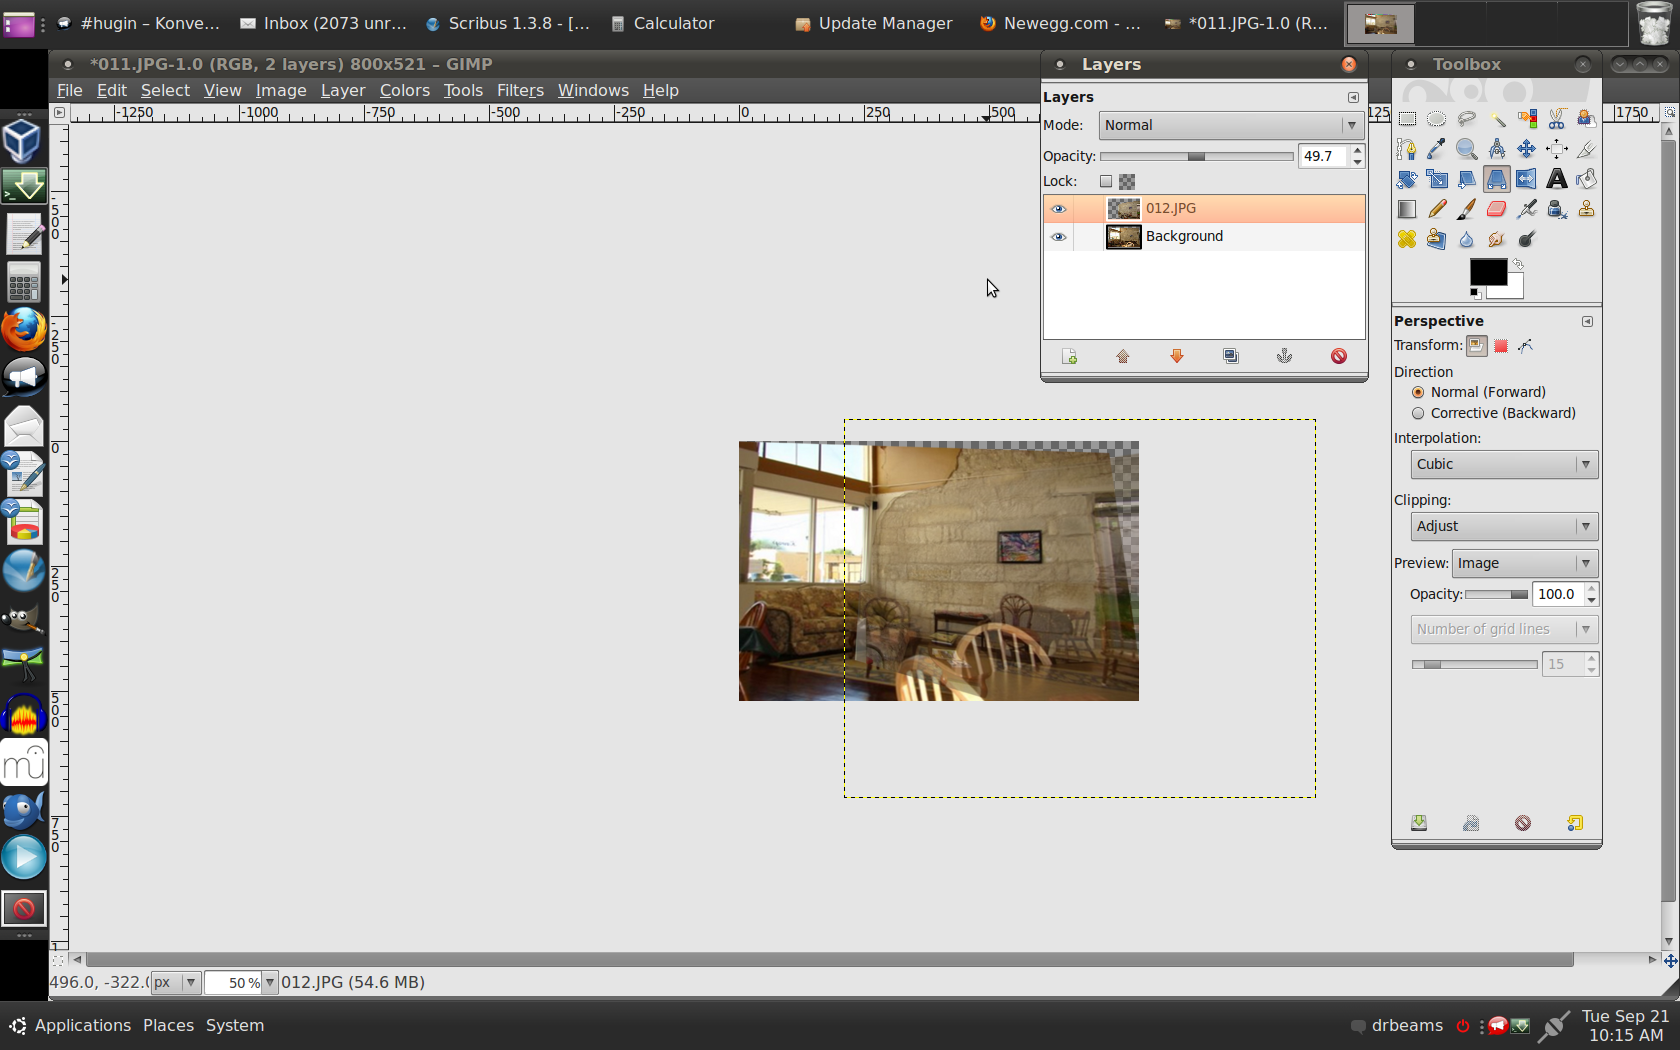
The example I'm providing is an extreme view. I did some "rough"
optimization/layout in Gimp. I suppose this is what I was expecting.
Using Shift, Perspective, & Scaling in Gimp, I was able to get close. I
think some type of curve warping of the photo would get one closer. Add
either manual masking or aggressive enblend masking, and one might be
able to combine the two photos. They are from different angles,
different distance, different tilt, etc. Everything that could be wrong
is here.
I would expect to be able to add manual CP or use a different kind of
mosaic mode CP detector (some modified form of geodaisy) to find common
control points. There are some "constants" or common control point
possibilities in the photos, such as the picture frame, stone corners,
window corners, wall chair, and to some degree, door frame. If one was
able to connect the dots with these constants and then warp each photo
to fit, mosaic mode work work well. The constants are "flat" objects
not subject to change from perspective, shift, tilt, etc.
Attached are the files. Interested in feedback and possibilities.
Tduell
On Sep 22, 3:11 am, Dale Beams <drbe...@hotmail.com> wrote:
> First let me express thanks for those working on mosaic mode. I
> understand the difficulty and complexity in doing so.
>
> The example I'm providing is an extreme view. I did some "rough"
> optimization/layout in Gimp. I suppose this is what I was expecting.
> Attached are the files. Interested in feedback and possibilities.
(the plane wall) but your other photo isn't from a viewpoint that
would allow you to see parts of the wall that aren't seen in 012.jpg.
In my view, having a number of shots from different angles, viewpoints
etc, that provide a full view of the subject plane surface, is where
mosiac mode can do its magic. When they are stitched together and some
masking done, you will have a full unobstructed view of the
subject...see this example [0].
[0] http://hugin-ptx.googlegroups.com/web/Sunbury-mosaic.jpg?gsc=TVeqcQsAAABXrvTsq81vadU69a-KIzo9
Hope this helps.
Cheers,
Terry